 返回首页
返回首页
 回到顶部
回到顶部
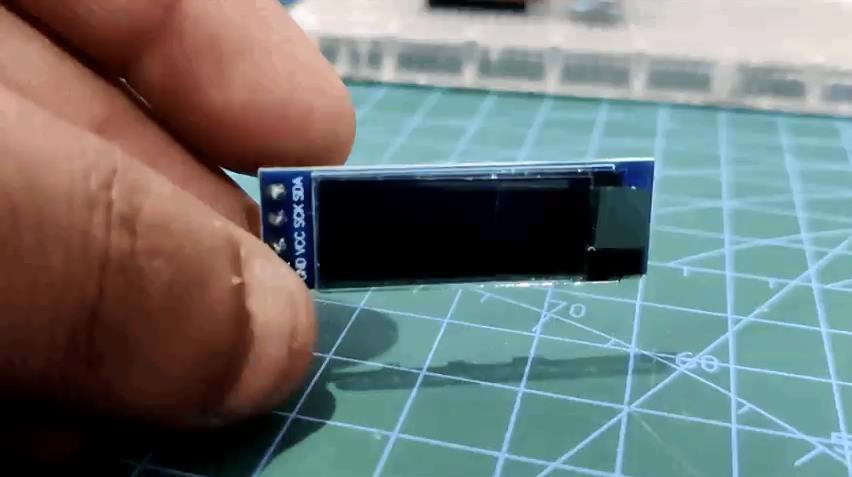
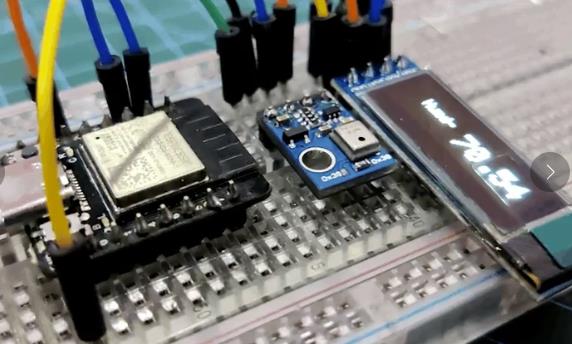
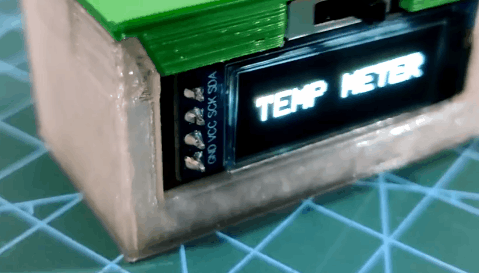
AHT10 是一款由ESP32C3驱动的 MCU 制成的小型便携袖珍温度计,搭配SSD1306 128x32 像素屏幕,用于测量温度。
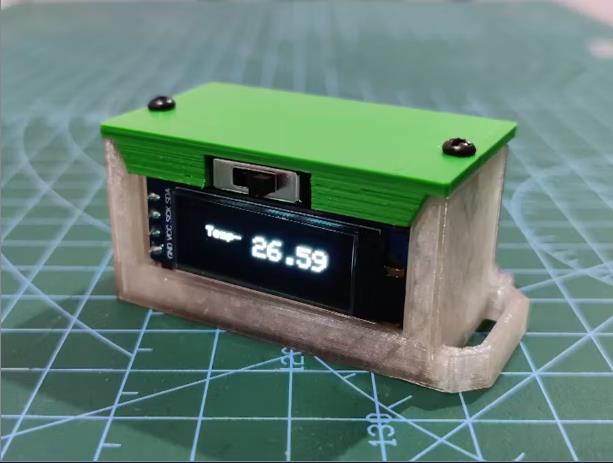
顾名思义,这是一款紧凑、实用的温湿度计,由基于ESP32C3的开发板、SSD1306 OLED 显示屏、AHT10 传感器、LiPo 电池和 3D 打印部件制成。
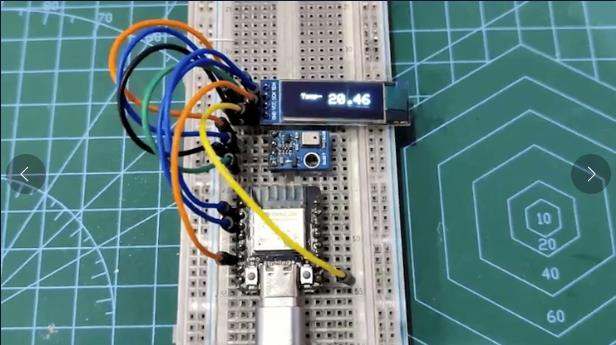
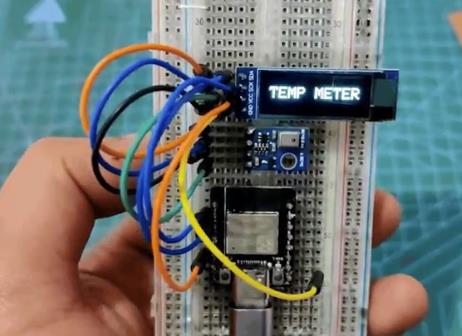
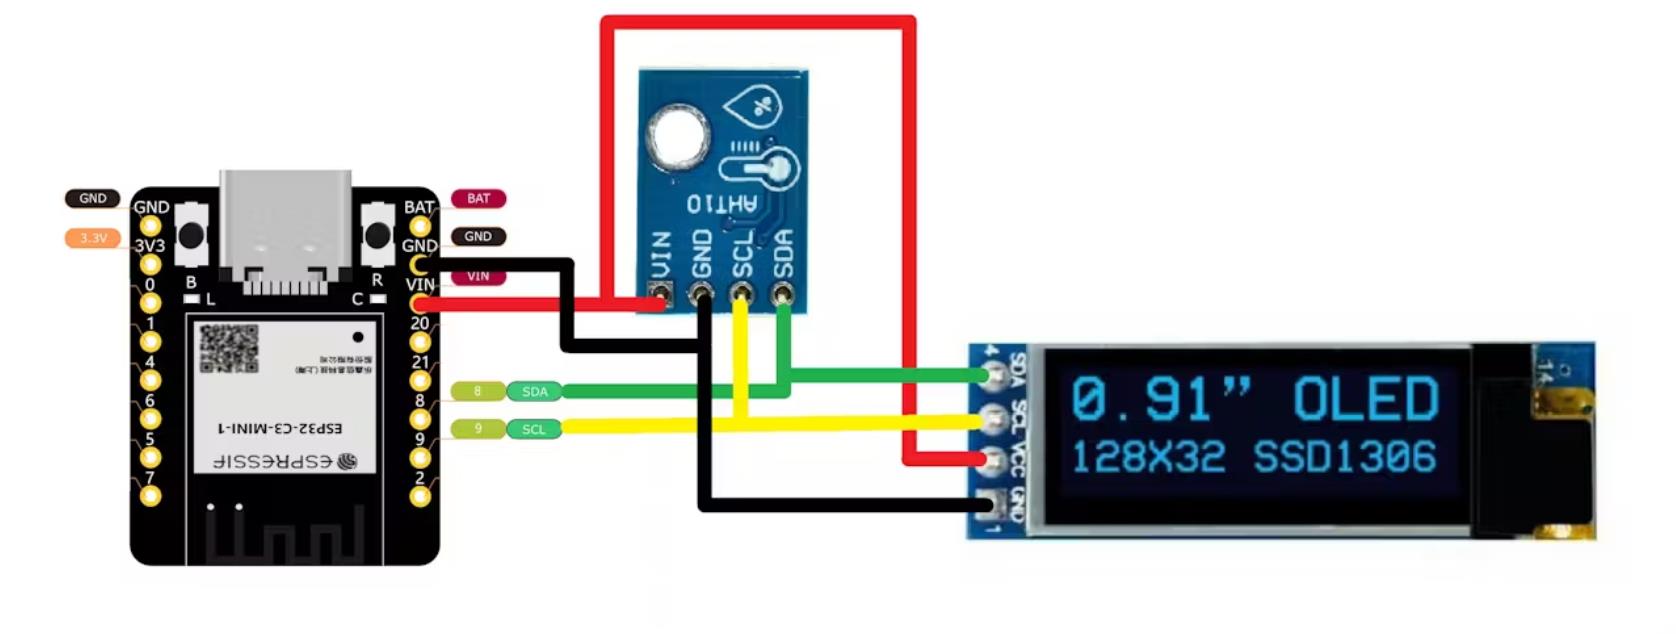
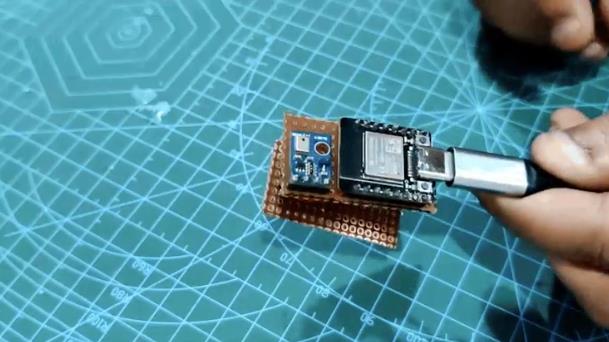
在这里,使用 AHT10 温度和湿度传感器获取 TEMP 值,该传感器在 OLED 屏幕上显示数据。我们能够将设备的尺寸缩小到 25x25x48 毫米的微小外形尺寸,这使得它非常适合放在口袋里随身携带,让我们随时随地收集温度读数。
这是通过构建中使用的小型电池和相对紧凑的组件实现的。
整篇文章都是关于这个设备的构建过程,所以让我们开始构建吧。
所需材料
这些是此版本中使用的组件:
SSD1306展示(从 PCBWAY 的礼品店获得)
ESP32C3 DEV 板甲虫
3D打印零件
AHT10 温度传感器
原型板
锂聚合物电池,3.7V-100mAh电池
M2 螺丝
电线
因此,这是这个简单构建的结果:使用定制电路和 3D 打印部件从头开始制作的小型紧凑型温度和湿度计。
如果您想连续收集不同点的温度读数,AHT10 的准确温度读数非常有用。目标是利用这个易于携带且便携的小仪表来测试我工作地点两个不同房间的湿度和温度。
至于这个项目的第 3 级,我将在这个项目的下一次迭代中使用定制 PCB,敬请期待。
我已经包含了所有文件,因此您可以尝试自己制作一个。
如果您需要有关此项目的任何帮助,请发表评论。 伙计们,今天就到这里了。
感谢PCBWAY对这个项目的支持。
如果您需要以更低的成本和优质的优质 PCB 和模板服务,你们可以查看它们。
我很快就会带着一个新项目回来!
项目代码
#include <Wire.h>
#include <AHTxx.h>


#include <Adafruit_SSD1306.h>
#include <Adafruit_GFX.h>

#define OLED_WIDTH 128
#define OLED_HEIGHT 32

#define OLED_ADDR   0x3C
Adafruit_SSD1306 display(OLED_WIDTH, OLED_HEIGHT);


float ahtValue;                               //to store T/RH result

AHTxx aht10(AHTXX_ADDRESS_X38, AHT1x_SENSOR); //sensor address, sensor type


void setup()
{
  #if defined(ESP8266)
  WiFi.persistent(false);  //disable saving wifi config into SDK flash area
  WiFi.forceSleepBegin();  //disable AP & station by calling "WiFi.mode(WIFI_OFF)" & put modem to sleep
  #endif

  display.begin(SSD1306_SWITCHCAPVCC, OLED_ADDR);
  display.clearDisplay();

  Serial.begin(115200);
  Serial.println();

  while (aht10.begin() != true) //for ESP-01 use aht10.begin(0, 2);
  {
    Serial.println(F("AHT1x not connected or fail to load calibration coefficient")); //(F()) save string to flash & keeps dynamic memory free

    delay(5000);
  }

  Serial.println(F("AHT10 OK"));

  //Wire.setClock(400000); //experimental I2C speed! 400KHz, default 100KHz
}


void loop()
{
  /* DEMO - 1, every temperature or humidity call will read 6-bytes over I2C, total 12-bytes */
  Serial.println();
  Serial.println(F("DEMO 1: read 12-bytes"));

  ahtValue = aht10.readTemperature(); //read 6-bytes via I2C, takes 80 milliseconds

  display.clearDisplay();
  display.setTextSize(2);
  display.setTextColor(WHITE);
  display.setCursor(30, 0);
  display.println(F("Temp-"));

//  Serial.print(F("Temperature...: "));

  if (ahtValue != AHTXX_ERROR) //AHTXX_ERROR = 255, library returns 255 if error occurs
  {

  display.setTextSize(2);
  display.setTextColor(WHITE);
  display.setCursor(35, 25);
  display.println(ahtValue);
  display.display();
//    Serial.print(ahtValue);

  }
  else
  {
    printStatus(); //print temperature command status

    if   (aht10.softReset() == true) Serial.println(F("reset success")); //as the last chance to make it alive
    else                             Serial.println(F("reset failed"));
  }

  delay(2000); //measurement with high frequency leads to heating of the sensor, see NOTE

  ahtValue = aht10.readHumidity(); //read another 6-bytes via I2C, takes 80 milliseconds

  display.clearDisplay();
  display.setTextSize(2);
  display.setTextColor(WHITE);
  display.setCursor(30, 0);
  display.println(F("Humd-"));


//  Serial.print(F("Humd-"));

  if (ahtValue != AHTXX_ERROR) //AHTXX_ERROR = 255, library returns 255 if error occurs
  {

  display.setTextSize(2);
  display.setTextColor(WHITE);
  display.setCursor(35, 25);
  display.println(ahtValue);
  display.display();


 //   Serial.println(F(" +-2%"));
  }
  else
  {
    printStatus(); //print humidity command status
  }

  delay(2000); //measurement with high frequency leads to heating of the sensor, see NOTE

  /* DEMO - 2, temperature call will read 6-bytes via I2C, humidity will use same 6-bytes */
  Serial.println();
  Serial.println(F("DEMO 2: read 6-byte"));

  ahtValue = aht10.readTemperature(); //read 6-bytes via I2C, takes 80 milliseconds

  Serial.print(F("Temperature: "));

  if (ahtValue != AHTXX_ERROR) //AHTXX_ERROR = 255, library returns 255 if error occurs
  {
    Serial.print(ahtValue);
    Serial.println(F(" +-0.3C"));
  }
  else
  {
    printStatus(); //print temperature command status
  }

  ahtValue = aht10.readHumidity(AHTXX_USE_READ_DATA); //use 6-bytes from temperature reading, takes zero milliseconds!!!

  Serial.print(F("Humidity...: "));

  if (ahtValue != AHTXX_ERROR) //AHTXX_ERROR = 255, library returns 255 if error occurs
  {
    Serial.print(ahtValue);
    Serial.println(F(" +-2%"));
  }
  else
  {
    printStatus(); //print temperature command status not humidity!!! RH measurement use same 6-bytes from T measurement
  }

  delay(10000); //recomended polling frequency 8sec..30sec
}

void printStatus()
{
  switch (aht10.getStatus())
  {
    case AHTXX_NO_ERROR:
      Serial.println(F("no error"));
      break;

    case AHTXX_BUSY_ERROR:
      Serial.println(F("sensor busy, increase polling time"));
      break;

    case AHTXX_ACK_ERROR:
      Serial.println(F("sensor didn't return ACK, not connected, broken, long wires (reduce speed), bus locked by slave (increase stretch limit)"));
      break;

    case AHTXX_DATA_ERROR:
      Serial.println(F("received data smaller than expected, not connected, broken, long wires (reduce speed), bus locked by slave (increase stretch limit)"));
      break;

    case AHTXX_CRC8_ERROR:
      Serial.println(F("computed CRC8 not match received CRC8, this feature supported only by AHT2x sensors"));
      break;

    default:
      Serial.println(F("unknown status"));
      break;
  }
}
【Arduino 动手做】由ESP32C3驱动的 MCU 制成的小型便携袖珍温度计
项目链接:https://www.hackster.io/Arnov_Sharma_makes/pocket-temp-meter-4b0119
项目作者:阿诺夫·夏尔马
项目视频:https://www.youtube.com/watch?v=7zadFE9VqTA
项目代码:https://www.hackster.io/code_files/651932/download
3D打印文件:https://hacksterio.s3.amazonaws.com/uploads/attachments/1692465/temp_meter_v1_6KzV1nyzg3.f3d


 他的勋章
他的勋章

评论