 返回首页
返回首页
 回到顶部
回到顶部
37款传感器与执行器的提法,在网络上广泛流传,其实Arduino能够兼容的传感器模块肯定是不止这37种的。鉴于本人手头积累了一些传感器和执行器模块,依照实践出真知(一定要动手做)的理念,以学习和交流为目的,这里准备逐一动手尝试系列实验,不管成功(程序走通)与否,都会记录下来—小小的进步或是搞不掂的问题,希望能够抛砖引玉。
【Arduino】168种传感器模块系列实验(资料代码+仿真编程+图形编程)
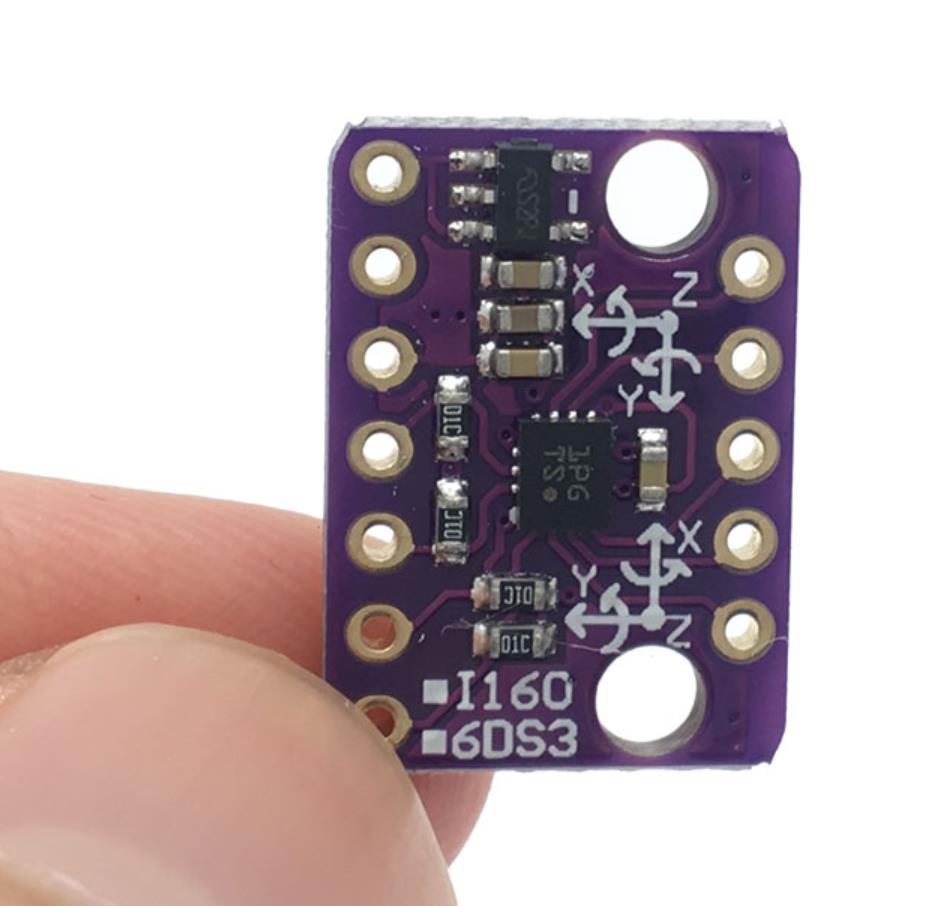
实验一百五十二:BMI160模块 6DOF 6轴 角速度 陀螺仪+重力加速度传感器IICSPI
【Arduino】168种传感器模块系列实验(资料代码+仿真编程+图形编程)
项目之三:读取陀螺仪数据
Arduino实验开源代码
/*
【Arduino】168种传感器模块系列实验(资料代码+仿真编程+图形编程)
BMI160 6轴惯性运动传感器 16位3轴加速度+超低功耗3轴陀螺仪 I2C/SPI 14LGA
项目之三:读取陀螺仪数据
实验接线:
BMI160 UNO
VIN 5V
GND GND
SCL A5
SDA A4
SAO GND
INT1 D2
*/
#include <BMI160Gen.h>
void setup() {
Serial.begin(9600); // initialize Serial communication
while (!Serial); // wait for the serial port to open
// initialize device
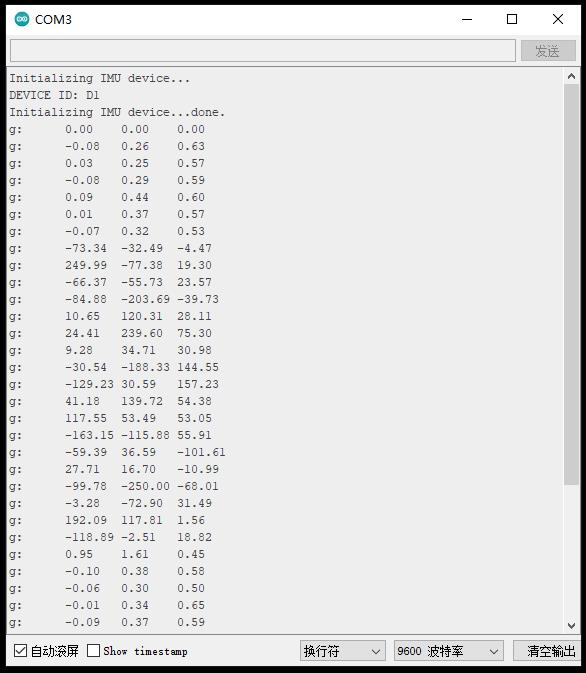
Serial.println("Initializing IMU device...");
//BMI160.begin(BMI160GenClass::SPI_MODE, /* SS pin# = */10);
BMI160.begin(BMI160GenClass::I2C_MODE);
uint8_t dev_id = BMI160.getDeviceID();
Serial.print("DEVICE ID: ");
Serial.println(dev_id, HEX);
// Set the accelerometer range to 250 degrees/second
BMI160.setGyroRange(250);
Serial.println("Initializing IMU device...done.");
}
void loop() {
int gxRaw, gyRaw, gzRaw; // raw gyro values
float gx, gy, gz;
// read raw gyro measurements from device
BMI160.readGyro(gxRaw, gyRaw, gzRaw);
// convert the raw gyro data to degrees/second
gx = convertRawGyro(gxRaw);
gy = convertRawGyro(gyRaw);
gz = convertRawGyro(gzRaw);
// display tab-separated gyro x/y/z values
Serial.print("g:\t");
Serial.print(gx);
Serial.print("\t");
Serial.print(gy);
Serial.print("\t");
Serial.print(gz);
Serial.println();
delay(50);
}
float convertRawGyro(int gRaw) {
// since we are using 250 degrees/seconds range
// -250 maps to a raw value of -32768
// +250 maps to a raw value of 32767
float g = (gRaw * 250.0) / 32768.0;
return g;
}实验串口返回情况
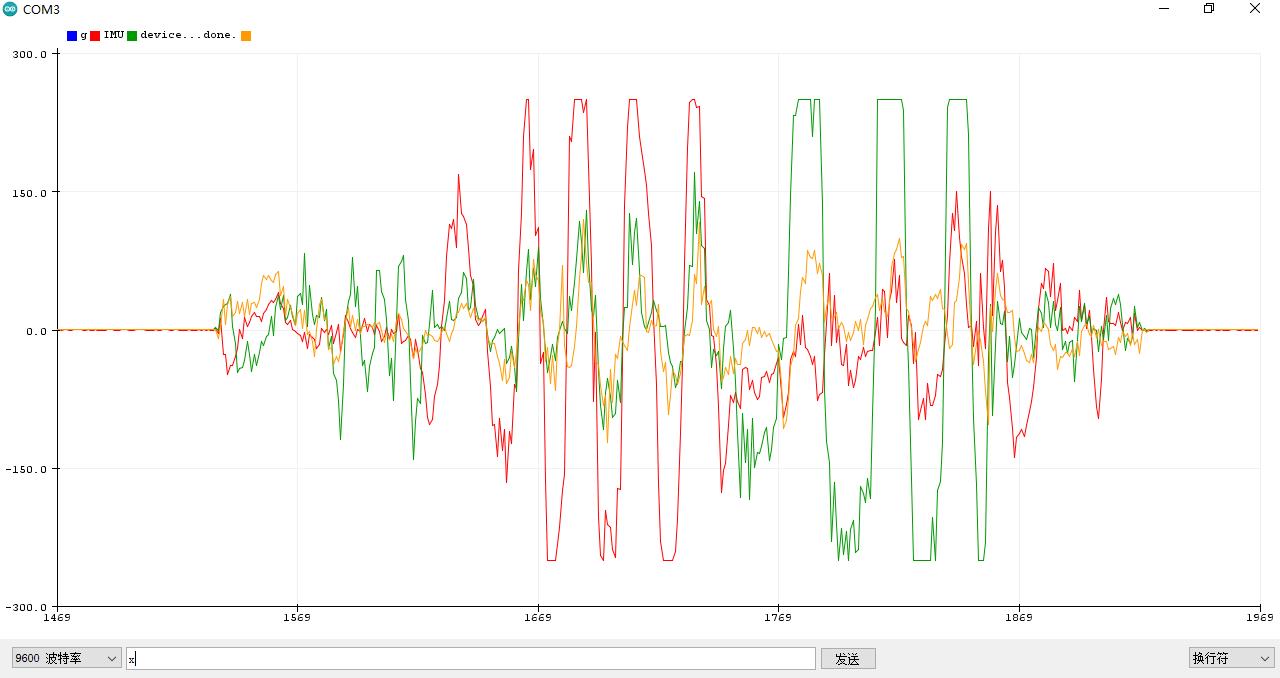
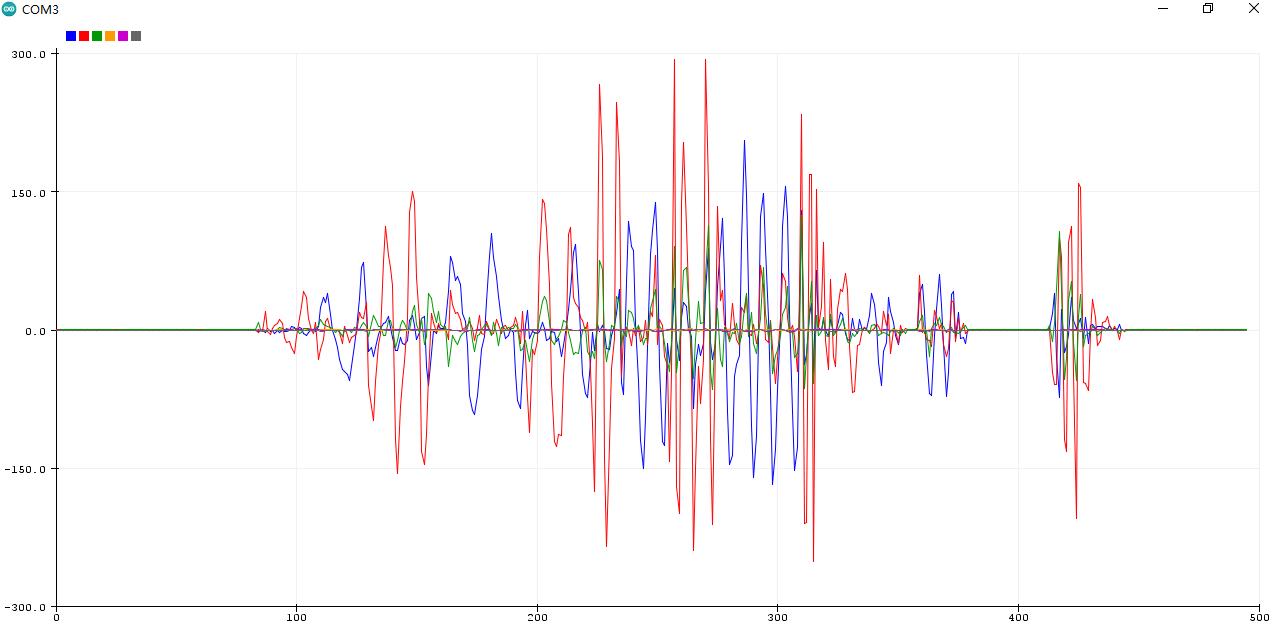
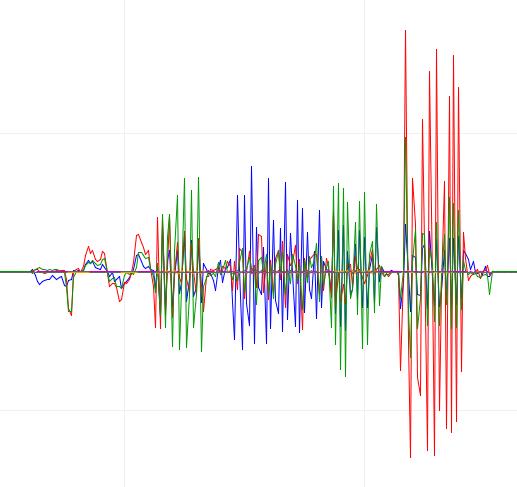
实验串口绘图器返回情况
【Arduino】168种传感器模块系列实验(资料代码+仿真编程+图形编程)
项目之四:从硬件 bmi160 读取计步器
I2C地址:
0x68:将 BMI160 的 SDIO 引脚连接到 GND,即默认 I2C 地址
实验接线:
BMI160 UNO
VIN 5V
GND GND
SCL A5
SDA A4
SAO GND
INT1 D2
Arduino实验开源代码
/*
【Arduino】168种传感器模块系列实验(资料代码+仿真编程+图形编程)
BMI160 6轴惯性运动传感器 16位3轴加速度+超低功耗3轴陀螺仪 I2C/SPI 14LGA
项目之四:从硬件 bmi160 读取计步器
I2C地址:
0x68:将 BMI160 的 SDIO 引脚连接到 GND,即默认 I2C 地址
实验接线:
BMI160 UNO
VIN 5V
GND GND
SCL A5
SDA A5
SAO GND
INT1 D2
*/
#include <DFRobot_BMI160.h>
DFRobot_BMI160 bmi160;
const int8_t i2c_addr = 0x68;
bool readStep = false;
#if defined ARDUINO_AVR_UNO || defined ARDUINO_AVR_MEGA2560 || defined ARDUINO_AVR_PRO
//uno和mega2560的中断号为0
int pbIn = 2;
#elif ARDUINO_AVR_LEONARDO
//uno和leonardo的中断号为0
int pbIn = 3;
#else
int pbIn = 13;
#endif
//bmi160 有两个中断接口
int int1 = 1;
int int2 = 2;
void stepChange() {
//一旦改变了步进控制器,就可以读取该值
readStep = true;
}
void setup() {
Serial.begin(115200);
delay(100);
//设置并初始化 bmi160 i2c 地址
while (bmi160.I2cInit(i2c_addr) != BMI160_OK) {
Serial.println("i2c init fail");
delay(1000);
}
//将中断号设置为 int1 或 int2
if (bmi160.setInt(int1) != BMI160_OK) {
Serial.println("set interrput fail");
while (1);
}
//将 bmi160 模式设置为计步器
if (bmi160.setStepCounter() != BMI160_OK) {
Serial.println("set step fail");
while (1);
}
//设置 bmi160 电源模型(正常电源模式)
if (bmi160.setStepPowerMode(bmi160.stepNormalPowerMode) != BMI160_OK){
Serial.println("set setStepPowerMode fail");
while (1);
}
#if defined ARDUINO_AVR_UNO || defined ARDUINO_AVR_MEGA2560 || defined ARDUINO_AVR_LEONARDO || defined ARDUINO_AVR_PRO
//将板上的引脚设置为连接到 bmi160 的 int1 或 int2
attachInterrupt(digitalPinToInterrupt(pbIn), stepChange, FALLING);
#else
attachInterrupt(pbIn, stepChange, FALLING);
#endif
Serial.println(pbIn);
}
void loop() {
if (readStep) {
uint16_t stepCounter = 0;
//从硬件 bmi160 读取计步器
if (bmi160.readStepCounter(&stepCounter) == BMI160_OK) {
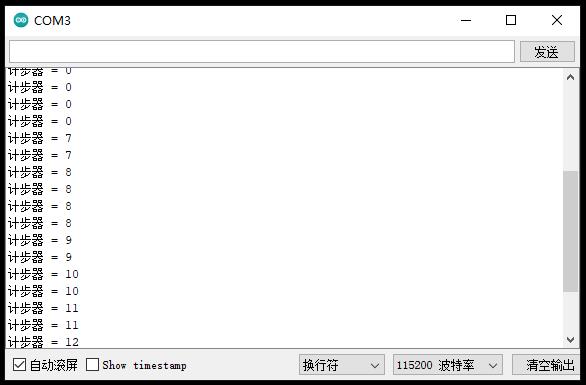
Serial.print("计步器 = "); Serial.println(stepCounter);
}
readStep = false;
}
}实验串口返回情况
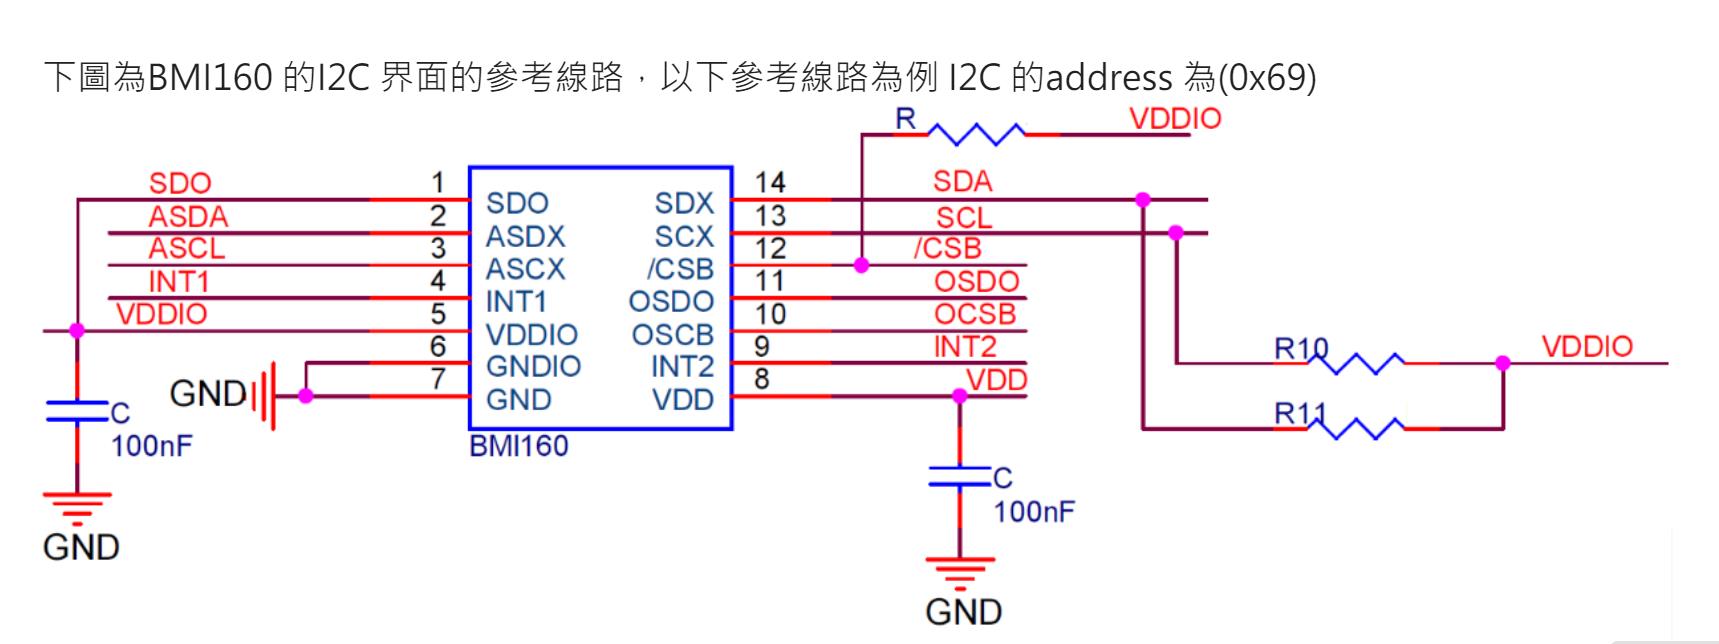
模块参考电原理图之二
【Arduino】168种传感器模块系列实验(资料代码+仿真编程+图形编程)
项目之五:获取陀螺仪传感器的数据
Arduino实验开源代码
/*

 【Arduino】168种传感器模块系列实验(资料代码+仿真编程+图形编程)

 BMI160 6轴惯性运动传感器 16位3轴加速度+超低功耗3轴陀螺仪 I2C/SPI 14LGA

 项目之五:获取陀螺仪传感器的数据

 I2C地址:

 0x68:将 BMI160 的 SDIO 引脚连接到 GND,即默认 I2C 地址

 实验接线:

 BMI160   UNO

 VIN    5V

 GND    GND

 SCL    A5

 SDA    A5

 SAO    GND

 INT1    D2

*/

#include <DFRobot_BMI160.h>

DFRobot_BMI160 bmi160;

const int8_t i2c_addr = 0x68;

void setup(){

 Serial.begin(115200);

 delay(100);


 //init the hardware bmin160

 if (bmi160.softReset() != BMI160_OK){

  Serial.println("reset false");

  while(1);

 }


 //set and init the bmi160 i2c address

 if (bmi160.I2cInit(i2c_addr) != BMI160_OK){

  Serial.println("init false");

  while(1);

 }

}

void loop(){

 int i = 0;

 int rslt;

 int16_t accelGyro[6]={0};


 //get both accel and gyro data from bmi160

 //parameter accelGyro is the pointer to store the data

 rslt = bmi160.getAccelGyroData(accelGyro);

 if(rslt == 0){

  for(i=0;i<6;i++){

   if (i<3){

    //the first three are gyro datas

    Serial.print(accelGyro[i]*3.14/180.0);Serial.print("\t");

   }else{

    //the following three data are accel datas

    Serial.print(accelGyro[i]/16384.0);Serial.print("\t");

   }

  }

  Serial.println();

 }else{

  Serial.println("err");

 }

 delay(100);

 /*

  * //only read accel data from bmi160

  * int16_t onlyAccel[3]={0};

  * bmi160.getAccelData(onlyAccel);

  */

 /*

  * ////only read gyro data from bmi160

  * int16_t onlyGyro[3]={0};

  * bmi160.getGyroData(onlyGyro);

  */

}
实验串口返回情况

实验串口绘图器返回情况
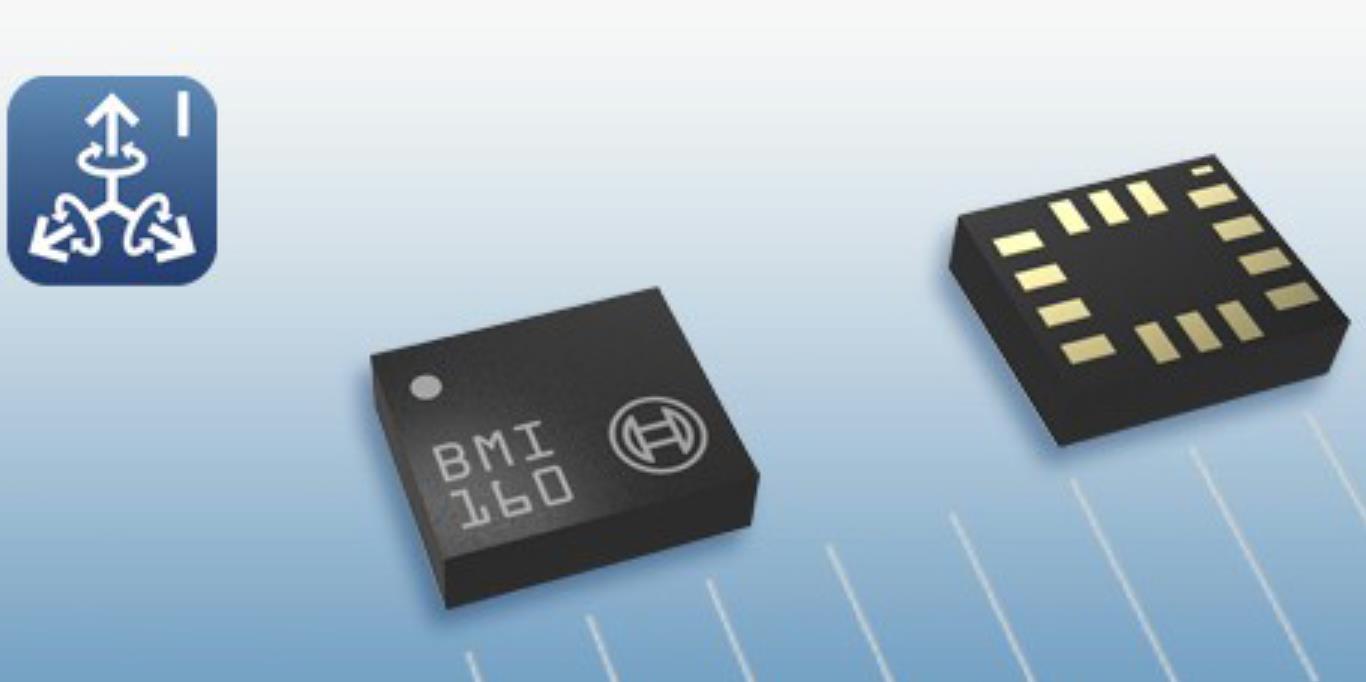
BMI160 传感器 API概述
体积小、功耗低的 BMI160 是一款低噪声 16 位 IMU,专为 AR 或室内导航等移动应用而设计,可提供高度准确的传感器数据和实时传感器数据。BMI160 的低电流消耗使电池驱动设备中的应用成为可能。该传感器具有可配置的片上中断引擎,可提供基于运动的手势识别和上下文感知作为始终开启的后台功能。
主要特征
任意运动检测(加速度计)
显着运动检测(加速度计)
步进检测器(加速度计)
敲击感应(加速度计)
方向识别(加速度计)
平面检测(加速度计)
低重力/自由落体检测(加速度计)
高 G 检测(加速度计)
慢动作警报/无动作中断(加速度计)
数据就绪检测(加速度计、陀螺仪和外部传感器)
PMU触发器(陀螺仪)
FIFO 中断((加速度计、陀螺仪和外部传感器)
目标应用
增强现实和沉浸式游戏
室内导航
3D 扫描/室内测绘
高级手势识别
沉浸式游戏
9轴运动检测
空中鼠标应用程序和指针
计步器/计步
移动应用的高级系统电源管理
相机模组的光学防抖
自由落体检测和保修记录
【Arduino】168种传感器模块系列实验(资料代码+仿真编程+图形编程)
项目之九:低功耗模式计步器
通过 setStepPowerMode 设置计步器功耗模式(stepNormalPowerMode 表示正常模式,stepLowPowerMode 表示低功耗模式)
Arduino实验开源代码
/*
【Arduino】168种传感器模块系列实验(资料代码+仿真编程+图形编程)
实验一百六十三:BMI160 6轴惯性运动传感器 16位3轴加速度+超低功耗3轴陀螺仪 I2C/SPI 14LGA
项目之九:低功耗模式计步器
I2C地址:
0x68:将 BMI160 的 SDIO 引脚连接到 GND,即默认 I2C 地址
实验接线:
BMI160 UNO
VIN 5V
GND GND
SCL A5
SDA A5
SAO GND
INT1 D2
*/
#include <DFRobot_BMI160.h>
DFRobot_BMI160 bmi160;
const int8_t i2c_addr = 0x68;
bool readStep = false;
#if defined ARDUINO_AVR_UNO || defined ARDUINO_AVR_MEGA2560 || defined ARDUINO_AVR_PRO
//uno和mega2560的中断号为0
int pbIn = 2;
#elif ARDUINO_AVR_LEONARDO
//uno和leonardo的中断号为0
int pbIn = 3;
#else
int pbIn = 13;
#endif
//bmi160 有两个中断接口
int int1 = 1;
int int2 = 2;
void stepChange() {
//一旦改变了步进控制器,就可以读取该值
readStep = true;
}
void setup() {
Serial.begin(115200);
delay(100);
//设置并初始化 bmi160 i2c 地址
while (bmi160.I2cInit(i2c_addr) != BMI160_OK) {
Serial.println("i2c init fail");
delay(1000);
}
//将中断号设置为 int1 或 int2
if (bmi160.setInt(int1) != BMI160_OK) {
Serial.println("set interrput fail");
while (1);
}
//将 bmi160 模式设置为计步器
if (bmi160.setStepCounter() != BMI160_OK) {
Serial.println("set step fail");
while (1);
}
//设置 bmi160 电源模型(微功耗电源模式)
if (bmi160.setStepPowerMode(bmi160.stepLowPowerMode) != BMI160_OK) {
Serial.println("set setStepPowerMode fail");
while (1);
}
#if defined ARDUINO_AVR_UNO || defined ARDUINO_AVR_MEGA2560 || defined ARDUINO_AVR_LEONARDO || defined ARDUINO_AVR_PRO
//将板上的引脚设置为连接到 bmi160 的 int1 或 int2
attachInterrupt(digitalPinToInterrupt(pbIn), stepChange, FALLING);
#else
attachInterrupt(pbIn, stepChange, FALLING);
#endif
Serial.println(pbIn);
}
void loop() {
if (readStep) {
uint16_t stepCounter = 0;
//从硬件 bmi160 读取计步器
if (bmi160.readStepCounter(&stepCounter) == BMI160_OK) {
Serial.print("计步器 = "); Serial.println(stepCounter);
}
readStep = false;
}
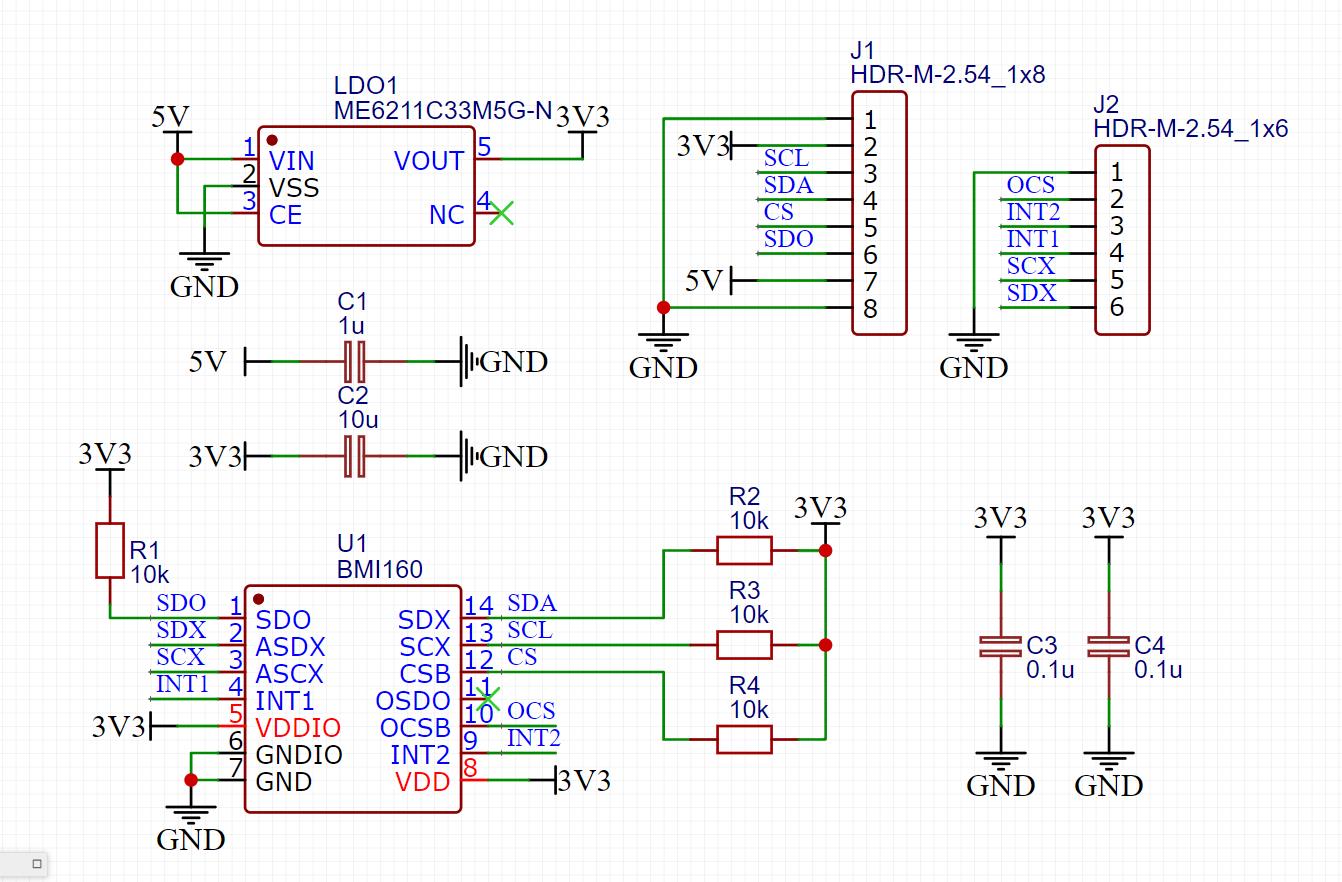
}BMI160 6轴惯性运动传感器电原理图
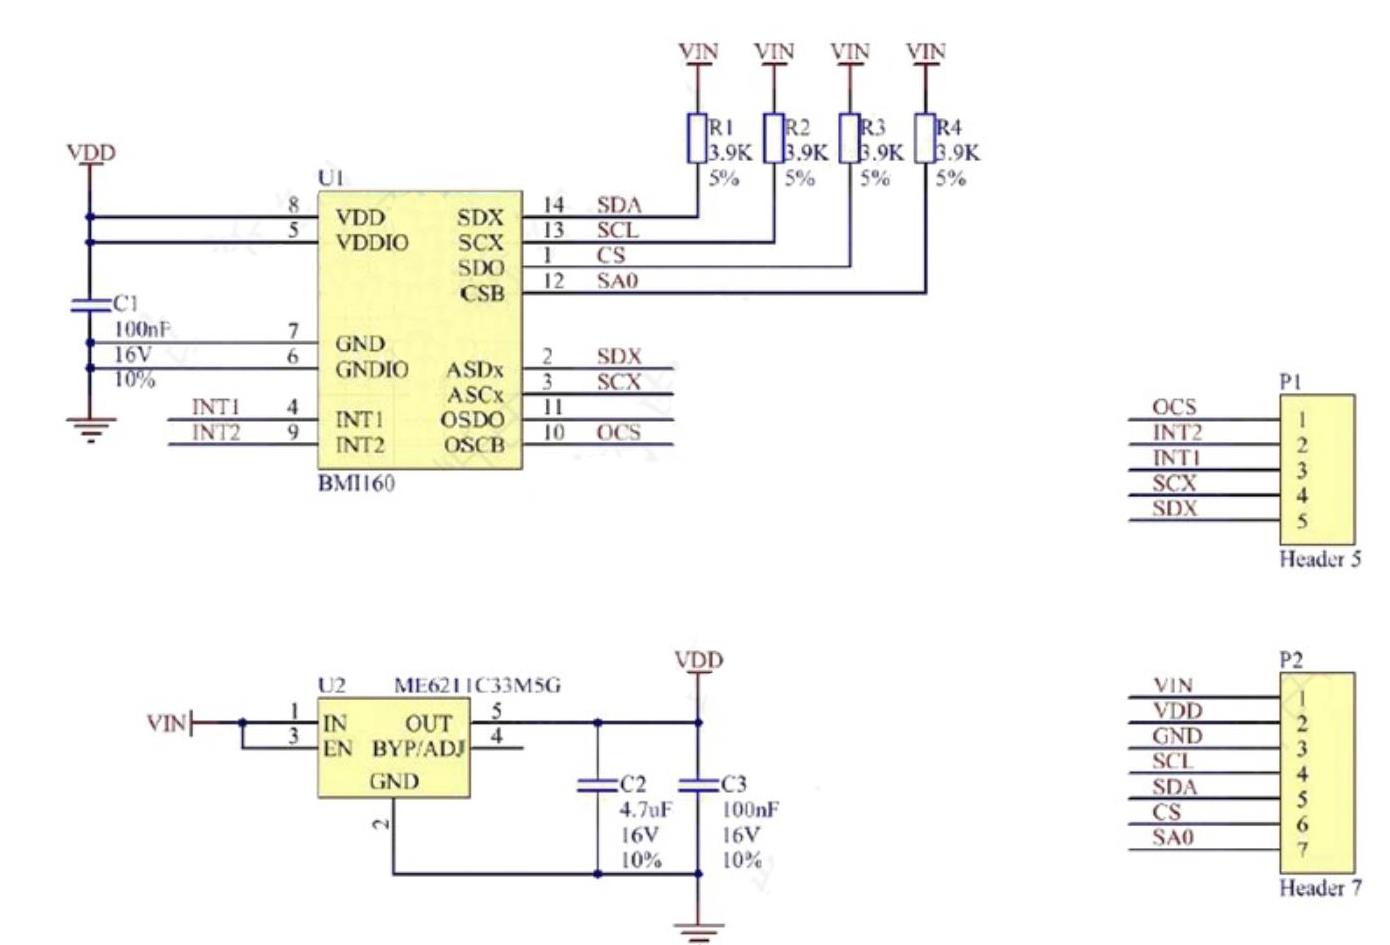
BMI160 6轴惯性运动传感器电原理图


 他的勋章
他的勋章

9mm2023.08.14
666