 返回首页
返回首页
 回到顶部
回到顶部
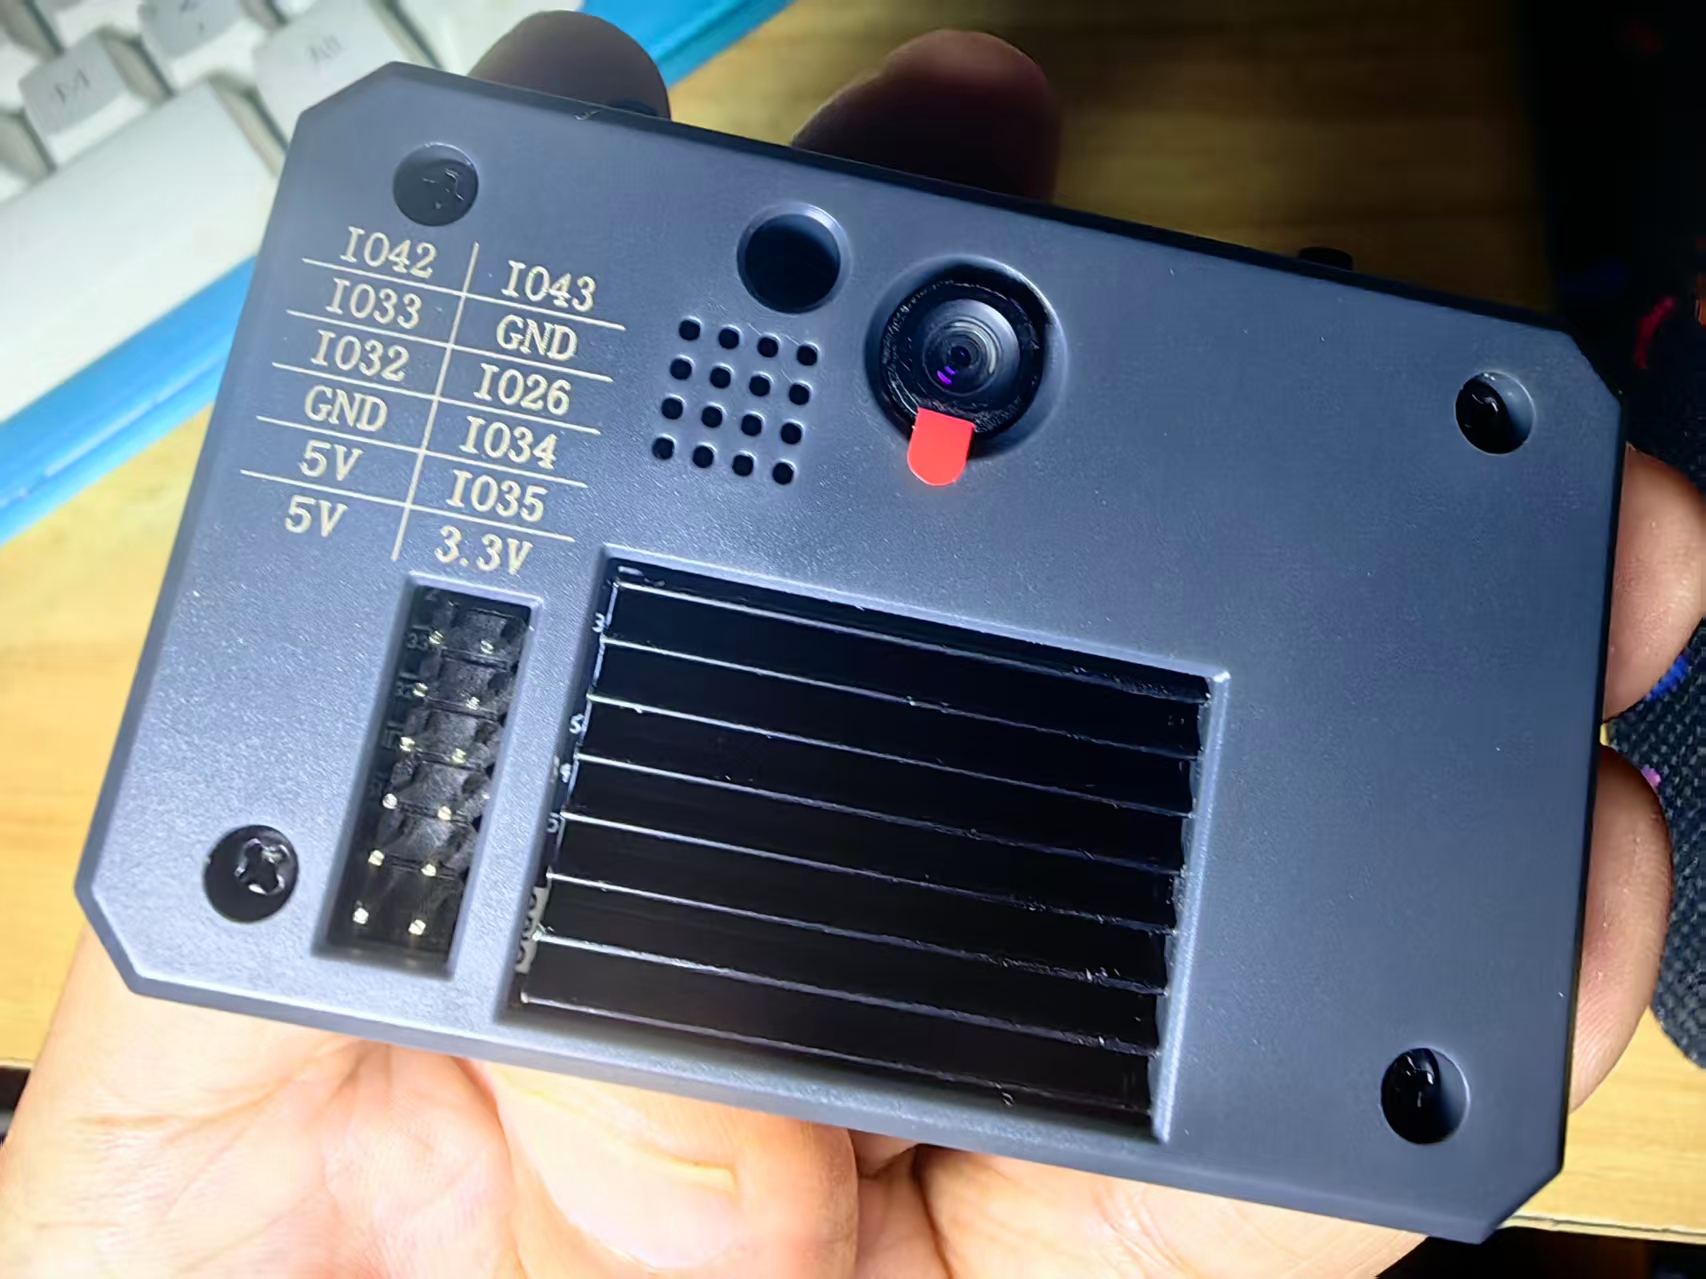
什么是 CanMV K230?
CanMV K230是一款高性价比的RISC-V边缘AI平台,凭借低功耗、强视觉处理能力和开放的开发生态,成为嵌入式AI开发的理想选择,尤其适合需要快速部署视觉与AI功能的创客、中小企业及教育场景。CanMV 是一套 AI 视觉开发平台,K230 是其核心芯片。该模块结合了图像采集、AI推理、边缘计算等能力,适合嵌入式视觉应用开发。
CanMV:类似 OpenMV 的图像处理框架,支持 Python 编程,简化视觉识别开发流程。
K230 芯片:嘉楠科技推出的 AIoT SoC,采用 RISC-V 架构,内置第三代 KPU(AI加速单元),算力高达 6 TOPS,性能是 K210 的 13.7 倍。
绘制关键点的draw_keypoints方法
1、什么是关键点?
这里的关键点(keypoints)是指图像中的特征点,通常是图像中比较显著或者独特的点,具体来说:
2、特征点的特性:
这些点通常是图像中的角点、边缘交叉点等具有显著特征的位置
它们在图像的不同视角下都容易被识别
这些点的周围像素值变化较大,使其具有独特性
实际应用中的关键点可能是:
3、物体的角点
纹理丰富区域的特征点
图案中的显著交叉点
物体轮廓上的重要点
4、用途:
目标跟踪
物体识别
图像匹配
运动检测
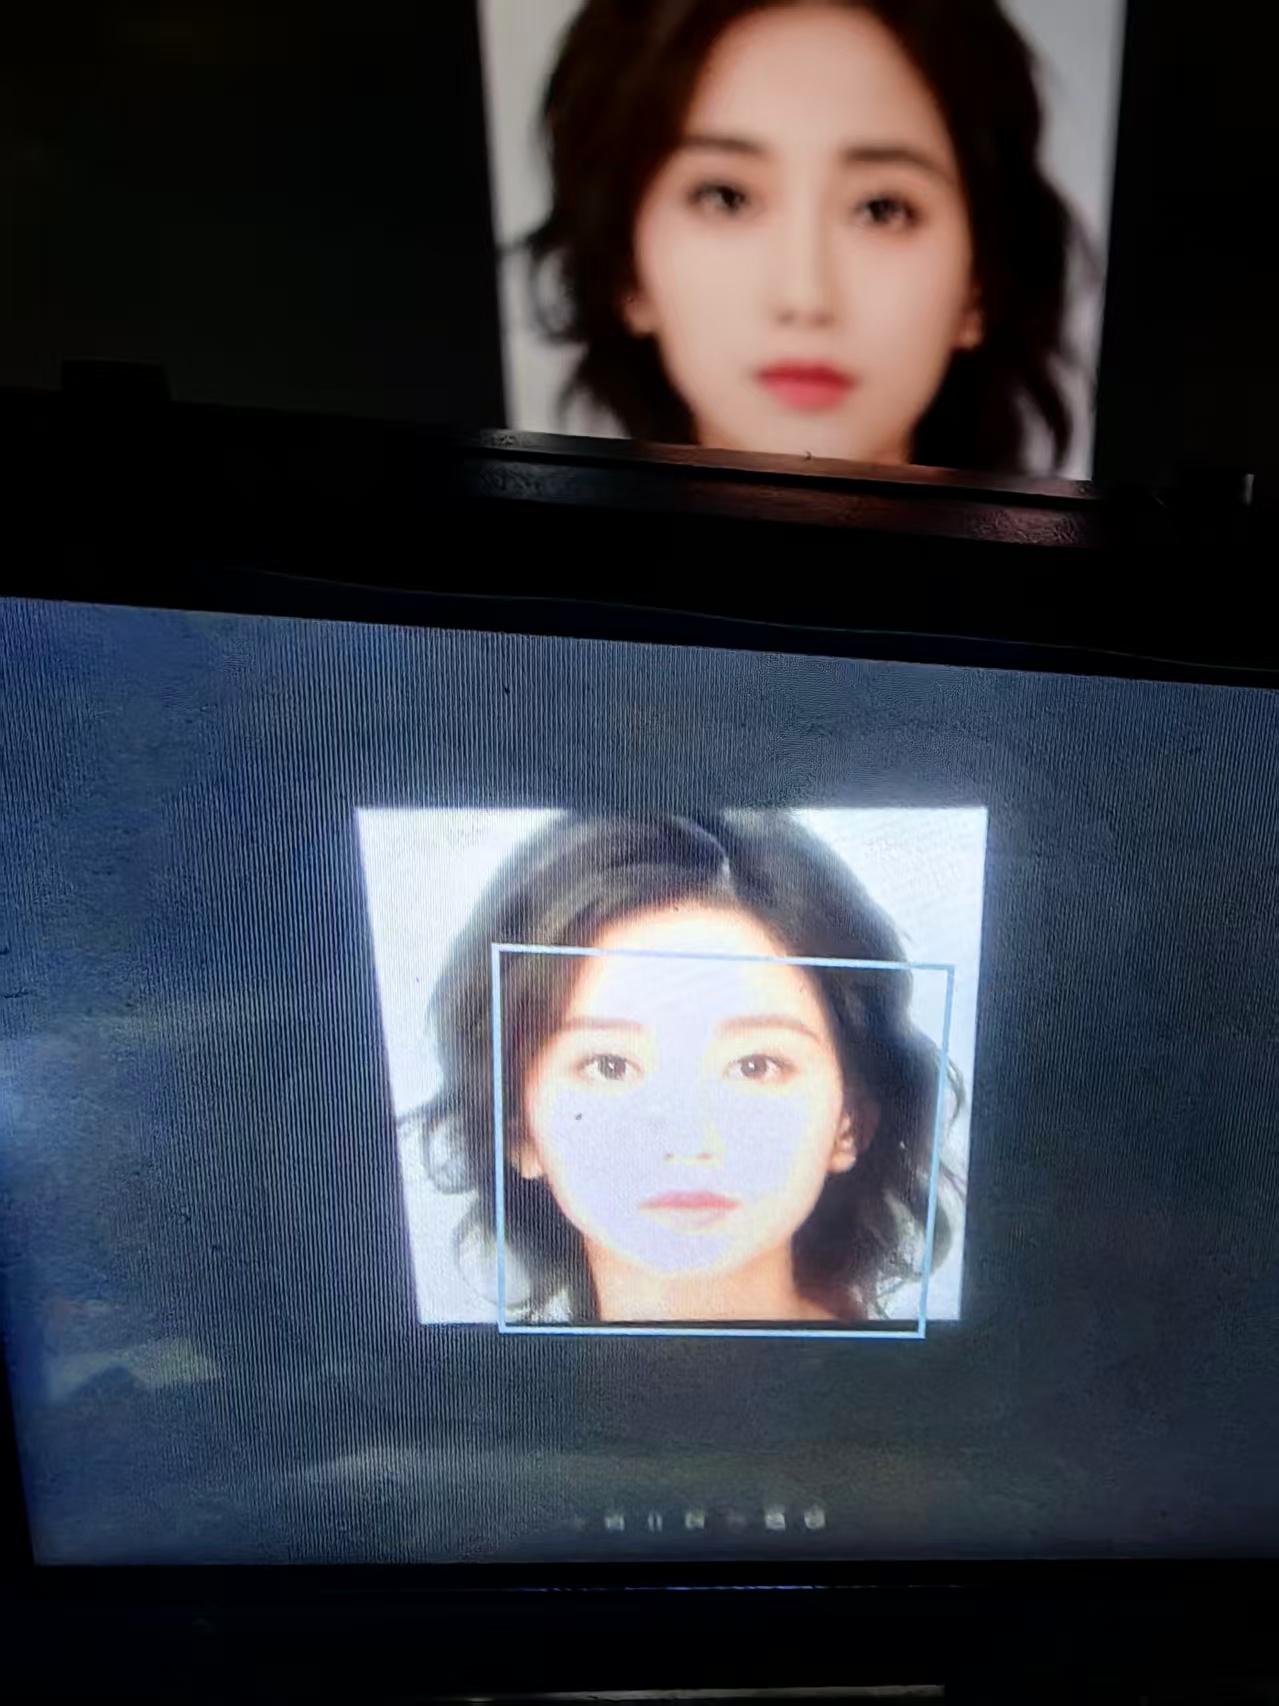
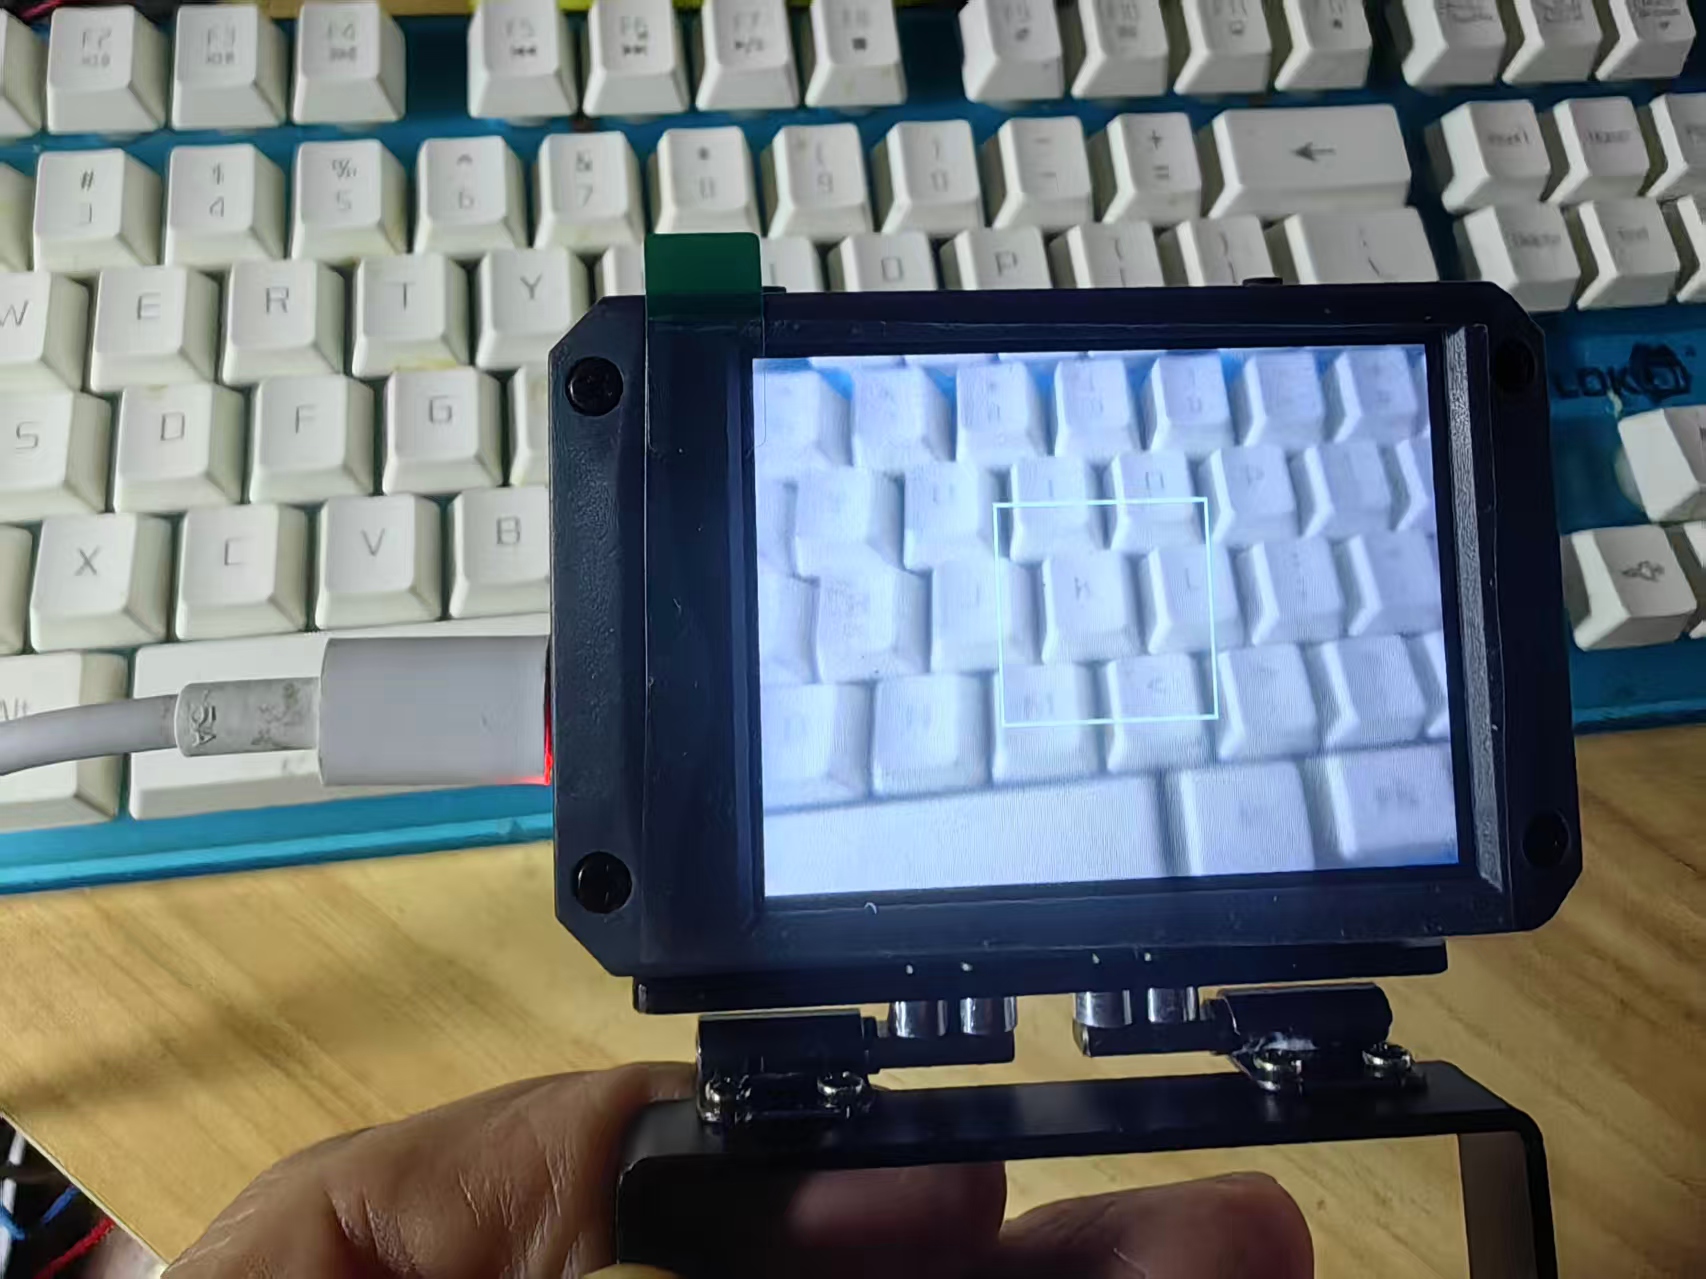
由于寻找关键点对性能消耗较大,所以我们减少了识别的区域,只识别屏幕最中心的部分的关键点
5、寻找关键点
image.find_keypoints([roi[, threshold=20[, normalized=False[, scale_factor=1.5[, max_keypoints=100[, corner_detector=image.CORNER_AGAST]]]]]])
该函数从指定的 ROI 元组 (x, y, w, h) 中提取 ORB 关键点。您可以使用 image.match_descriptor 函数比较两组关键点以获取匹配区域。若未发现关键点,则返回 None。
roi 是感兴趣区域的矩形元组 (x, y, w, h)。若未指定,默认 ROI 为整个图像。操作范围仅限于该区域内的像素。
threshold 控制提取关键点的数量(取值范围为 0-255)。对于默认的 AGAST 角点检测器,该值应设为约 20;对于 FAST 角点检测器,该值应设为约 60 至 80。阈值越低,提取的角点越多。
normalized 是布尔值。若为 True,则在多分辨率下关闭关键点提取。若您不关心处理扩展问题,且希望算法运行更快,则将其设置为 True。
scale_factor 是一个大于 1.0 的浮点数。较高的比例因子运行速度较快,但图像匹配效果相对较差。理想值介于 1.35 和 1.5 之间。
max_keypoints 是关键点对象能够容纳的最大关键点数量。若关键点对象过大导致内存问题,请适当降低该值。
corner_detector 是提取关键点所使用的角点检测器算法。可选值为 image.CORNER_FAST 或 image.CORNER_AGAST。FAST 角点检测器速度较快,但准确度较低。
注意: 此方法仅支持灰度图像。
6、绘制关键点
image.draw_keypoints(keypoints[, color[, size=10[, thickness=1[, fill=False]]]])
在图像上绘制特征点。
color:指定颜色,适用于灰度或 RGB565 图像。默认为白色。对于灰度图像,可以传递灰度值(0-255);对于 RGB565 图像,可以传递反向字节序的 RGB565 值。
size:控制特征点的大小。
thickness:控制线条的粗细(以像素为单位)。
fill:如果为 True,则填充特征点。
返回图像对象,以便后续方法可以链式调用。
该方法不支持压缩图像和 Bayer 格式图像
7、项目测试实验代码
#【花雕动手做】CanMV K230 AI视觉识别模块之使用draw_keypoints()方法绘制关键点

"""
Camera preview demo
摄像头预览演示

This script initializes camera sensor, displays preview and handles cleanup
本脚本初始化摄像头传感器、显示预览并处理清理工作
"""

import sys
import uos as os
import time
from media.sensor import *
from media.display import *
from media.media import *

def init_sensor():
    """
    Initialize camera sensor with specified configuration
    使用指定配置初始化摄像头传感器

    返回:
        Sensor: 初始化好的传感器对象
    """
    # Create sensor instance with resolution 1280x960
    # 创建分辨率为1280x960的传感器实例
    sensor = Sensor()

    # Reset sensor to default state
    # 将传感器重置为默认状态(恢复默认参数)
    sensor.reset()

    # Configure channel 1 output format to 640x480 RGB565
    # 配置通道1输出格式为640x480 RGB565(彩色图像)
    # RGB565格式:每个像素16位(5位红色,6位绿色,5位蓝色)
    sensor.set_framesize(width=640, height=480, chn=CAM_CHN_ID_1)
    sensor.set_pixformat(Sensor.RGB565, chn=CAM_CHN_ID_1)

    # Configure channel 0 output format to 640x480 GRAYSCALE
    # 配置通道0输出格式为640x480 GRAYSCALE(灰度图像)
    # 灰度图像更适合特征点检测算法
    sensor.set_framesize(width=640, height=480, chn=CAM_CHN_ID_0)
    sensor.set_pixformat(Sensor.GRAYSCALE, chn=CAM_CHN_ID_0)

    return sensor

def main():
    """
    Main function to run camera preview
    运行摄像头预览的主函数
    """
    sensor = None  # 传感器对象初始化为None

    # 定义感兴趣区域(ROI) - Region of Interest
    # 格式: (x, y, width, height)
    # 从(220,140)开始,宽200像素,高200像素的正方形区域
    roi = (220, 140, 200, 200)

    try:
        # Initialize camera sensor
        # 初始化摄像头传感器
        sensor = init_sensor()

        # Initialize display with ST7701 driver
        # 使用ST7701驱动初始化显示器
        # 分辨率640x480,to_ide=True表示同时输出到IDE和硬件屏幕
        Display.init(Display.ST7701, width=640, height=480, to_ide=True)

        # Initialize media management
        # 初始化媒体管理(管理摄像头、显示等硬件资源)
        MediaManager.init()

        # Start sensor operation
        # 启动传感器运行(开始捕获图像)
        sensor.run()

        # Main loop to capture and display frames
        # 捕获和显示帧的主循环
        while True:
            # Capture color frame from channel 1 for display
            # 从通道1捕获彩色帧用于显示
            # RGB565格式,适合人眼观看
            img = sensor.snapshot(chn=CAM_CHN_ID_1)

            # Capture grayscale frame from channel 0 for keypoint detection
            # 从通道0捕获灰度帧用于关键点检测
            # 灰度图像计算量小,更适合计算机视觉算法
            img_g = sensor.snapshot(chn=CAM_CHN_ID_0)

            # Draw ROI rectangle on the color image
            # 在彩色图像上绘制ROI矩形框
            # color=(173, 216, 230): 浅蓝色
            # fill=False: 不填充,只绘制边框
            # thickness=3: 线宽3像素
            img.draw_rectangle(roi, color=(173, 216, 230), fill=False, thickness=3)

            # Find keypoints in the grayscale image within ROI
            # 在灰度图像的ROI区域内查找关键点
            keypoints = img_g.find_keypoints(
                threshold=30,        # 特征点检测阈值,值越小检测越敏感
                scale_factor=1.2,    # 尺度因子,用于构建图像金字塔
                max_keypoints=30,    # 最大特征点数量,限制计算复杂度
                roi=roi              # 指定感兴趣区域,只在该区域内检测
            )

            # If keypoints are detected
            # 如果检测到特征点
            if keypoints:
                # Print keypoints information for debugging
                # 打印特征点信息用于调试
                print(keypoints)

                # Draw keypoints on the color image
                # 在彩色图像上绘制特征点
                img.draw_keypoints(
                    keypoints,        # 特征点列表,包含每个特征点的坐标和分数
                    color=(255, 0, 0), # 红色 (RGB格式)
                    size=8,           # 特征点显示大小(像素)
                    thickness=4,      # 绘制线条的粗细
                    fill=True         # 填充特征点(实心圆点)
                )

            # Display captured frame with keypoints
            # 显示带有关键点的捕获帧
            Display.show_image(img)

    except KeyboardInterrupt:
        # Handle user interruption (Ctrl+C)
        # 处理用户中断(Ctrl+C)
        print("User interrupted the program")
        print("用户中断了程序")

    except Exception as e:
        # Handle other exceptions
        # 处理其他异常
        print(f"An error occurred: {str(e)}")
        print(f"发生错误: {str(e)}")

    finally:
        # Cleanup section - always executed
        # 清理部分 - 始终执行

        # Stop sensor if initialized
        # 如果传感器已初始化则停止
        if isinstance(sensor, Sensor):
            sensor.stop()

        # Deinitialize display
        # 反初始化显示(释放显示资源)
        Display.deinit()

        # Enable sleep mode
        # 启用睡眠模式(节能)
        os.exitpoint(os.EXITPOINT_ENABLE_SLEEP)
        time.sleep_ms(100)  # 等待100毫秒确保资源释放完成

        # Release media resources
        # 释放媒体资源
        MediaManager.deinit()

if __name__ == "__main__":
    # Program entry point
    # 程序入口点
    main()
解读这段CanMV K230关键点检测代码的技术细节和实现原理:
整体架构分析
1. 双通道并行处理架构
python
# 关键的双通道配置
sensor.set_pixformat(Sensor.RGB565, chn=CAM_CHN_ID_1) # 显示通道
sensor.set_pixformat(Sensor.GRAYSCALE, chn=CAM_CHN_ID_0) # 处理通道
技术优势:
性能优化:灰度图像处理计算量仅为彩色图像的1/3
实时性保证:算法处理和显示渲染并行进行
资源利用:充分利用硬件多通道能力
核心技术深度解析
1. 关键点检测算法原理
find_keypoints() 方法底层可能使用的算法:
python
# 基于FAST角点检测算法的实现原理
def fast_corner_detector(image, threshold):
"""
FAST (Features from Accelerated Segment Test) 算法
"""
keypoints = []
for y in range(3, image.height-3):
for x in range(3, image.width-3):
# 获取中心像素强度
center = image[y][x]
# 检查16个周边像素
circle_pixels = get_bresenham_circle(x, y)
# 快速测试:检查连续N个像素是否都大于或小于中心像素
if fast_test(circle_pixels, center, threshold):
# 计算角点得分
score = compute_corner_score(circle_pixels, center)
keypoints.append(Keypoint(x, y, score))
return non_maximum_suppression(keypoints)
ORB特征点检测流程:
text
1. oFast角点检测
└── 构建图像金字塔
└── 多尺度角点检测
└── Harris角点响应计算
2. rBRIEF描述符计算
└── 方向归一化
└── 二进制描述符生成
└── 特征点排序和筛选
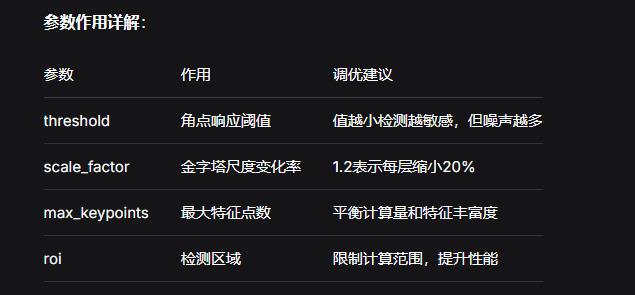
2. 参数调优分析
python
keypoints = img_g.find_keypoints(
threshold=30, # 角点检测阈值
scale_factor=1.2, # 图像金字塔尺度因子
max_keypoints=30, # 最大特征点数量
roi=roi # 感兴趣区域
)
3. ROI技术实现原理
python
roi = (220, 140, 200, 200) # (x, y, width, height)
ROI内存访问优化:
c
// 底层C实现可能类似这样
for(int y = roi_y; y < roi_y + roi_height; y++) {
for(int x = roi_x; x < roi_x + roi_width; x++) {
// 只处理ROI区域内的像素
process_pixel(image[y][x]);
}
}
计算量对比:
全图检测:640×480 = 307,200 像素
ROI检测:200×200 = 40,000 像素
性能提升:约87%的计算量减少
图像处理流水线分析
1. 数据流架构
text
摄像头传感器
↓
双通道输出
├── 通道0 (GRAYSCALE) → 特征检测 → 关键点坐标
└── 通道1 (RGB565) → 显示渲染 ← 绘制关键点
↓
显示输出
2. 内存管理策略
python
# 图像缓冲区内存占用分析
gray_buffer = 640 * 480 * 1 # 307,200 字节 (300KB)
rgb_buffer = 640 * 480 * 2 # 614,400 字节 (600KB)
total_memory = gray_buffer + rgb_buffer # 约900KB
# 关键点数据结构
class Keypoint:
x: int16 # 2字节
y: int16 # 2字节
score: float32 # 4字节
angle: float32 # 4字节
size: float32 # 4字节
# 总计: 16字节/关键点 × 30 = 480字节
算法性能优化技术
1. 图像金字塔优化
python
# 多尺度检测的实现
def build_image_pyramid(image, scale_factor, levels):
pyramid = [image]
for i in range(1, levels):
# 高斯模糊 + 下采样
blurred = gaussian_blur(pyramid[i-1])
downsampled = resize(blurred, scale_factor)
pyramid.append(downsampled)
return pyramid
2. 非极大值抑制(NMS)
python
def non_maximum_suppression(keypoints, radius=3):
"""
移除相邻区域内响应较低的特征点
"""
suppressed = []
keypoints.sort(key=lambda kp: kp.score, reverse=True)
for kp in keypoints:
is_local_max = True
for existing in suppressed:
if distance(kp, existing) < radius and kp.score <= existing.score:
is_local_max = False
break
if is_local_max:
suppressed.append(kp)
return suppressed
实际应用场景扩展
1. 实时目标跟踪
python
class FeatureTracker:
def __init__(self):
self.prev_keypoints = None
self.prev_descriptors = None
def track(self, current_frame):
current_keypoints = current_frame.find_keypoints(roi=tracking_roi)
if self.prev_keypoints:
# 特征点匹配
matches = self.match_features(self.prev_descriptors,
current_keypoints.descriptors)
# 计算运动向量
motion = self.calculate_motion(matches)
return motion
self.prev_keypoints = current_keypoints
return None
2. 视觉里程计
python
def visual_odometry(prev_frame, curr_frame):
prev_kps = prev_frame.find_keypoints()
curr_kps = curr_frame.find_keypoints()
# 特征匹配
matches = feature_matcher.match(prev_kps, curr_kps)
# 本质矩阵估计
E, mask = cv.findEssentialMat(prev_pts, curr_pts, camera_matrix)
# 姿态恢复
_, R, t, mask = cv.recoverPose(E, prev_pts, curr_pts, camera_matrix)
return R, t # 旋转和平移矩阵
错误处理和鲁棒性分析
1. 异常处理机制
python
try:
# 主要处理逻辑
sensor.run()
while True:
img = sensor.snapshot(chn=CAM_CHN_ID_1)
# ... 处理代码
except KeyboardInterrupt:
# 用户主动中断 - 友好退出
except Exception as e:
# 其他异常 - 防止系统崩溃
finally:
# 资源清理 - 确保资源释放
2. 算法鲁棒性考虑
python
def robust_keypoint_detection(image):
# 1. 图像质量检查
if image.is_too_dark() or image.is_too_bright():
adjust_exposure()
# 2. 特征点数量验证
keypoints = image.find_keypoints()
if len(keypoints) < 5: # 特征点太少
# 调整检测参数或返回错误
return adjust_and_retry(image)
# 3. 特征点分布检查
if not is_uniformly_distributed(keypoints):
# 特征点聚集在某些区域
return redistribute_keypoints(keypoints)
return keypoints
性能基准测试
根据代码参数估算性能:
处理分辨率:200×200 ROI
特征点数量:最多30个
预计帧率:15-30 FPS(取决于硬件)
内存占用:约900KB图像缓冲区 + 算法临时内存
技术总结
这段关键点检测代码展示了:
嵌入式视觉系统设计:双通道并行处理架构
实时算法优化:ROI限制、参数调优、内存管理
计算机视觉基础:特征点检测算法原理
系统集成能力:摄像头、显示、算法的协同工作
工程实践:异常处理、资源管理、性能考量
这是一个典型的嵌入式计算机视觉应用,为更复杂的目标识别、SLAM、AR等应用提供了基础技术支撑。代码在性能、功能和可维护性之间取得了很好的平衡。
实验场景图


 他的勋章
他的勋章

罗罗罗2025.11.12
666
驴友花雕2025.11.17
感谢罗罗罗老师的许多支持和鼓励!