 返回首页
返回首页
 回到顶部
回到顶部
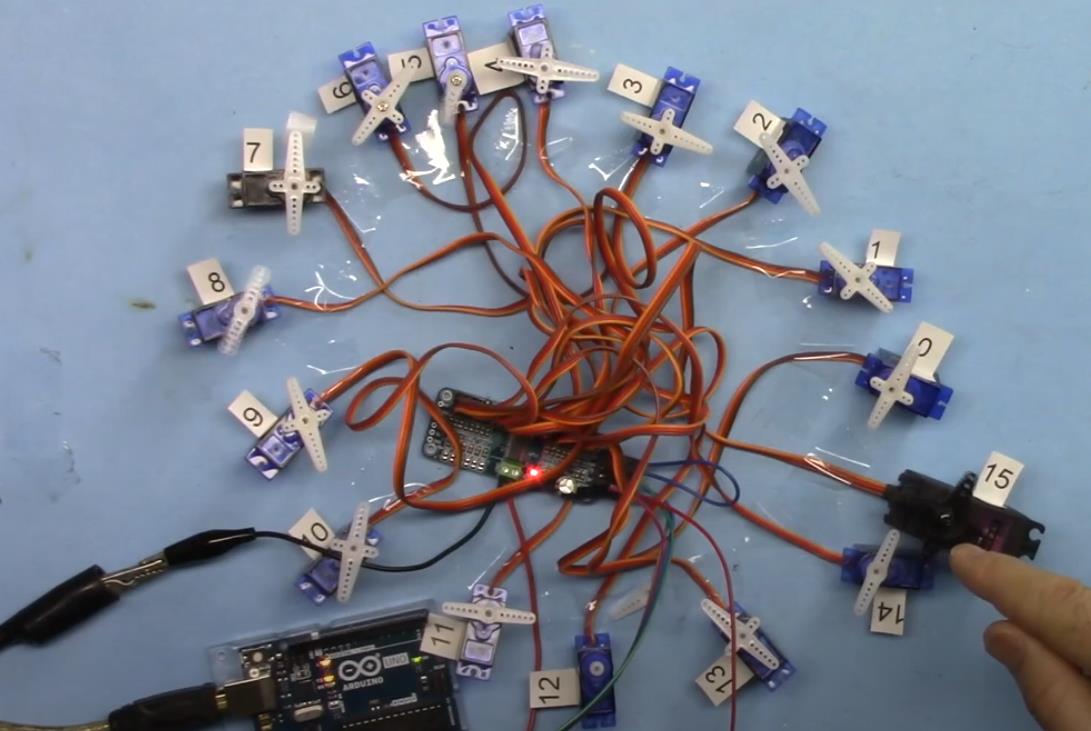
使用PCA9685模块与Arduino Uno R4(V2)控制16台伺服电机的简明方案
1. 核心硬件配置
PCA9685模块:
16通道PWM输出,支持I²C通信(地址可配置,默认0x40)。
每通道输出频率20Hz-1.5kHz可调,分辨率12位(4096级),适合伺服电机控制。
Arduino Uno R4(V2):
主控板,通过I²C接口与PCA9685通信,释放主控PWM资源。
伺服电机:
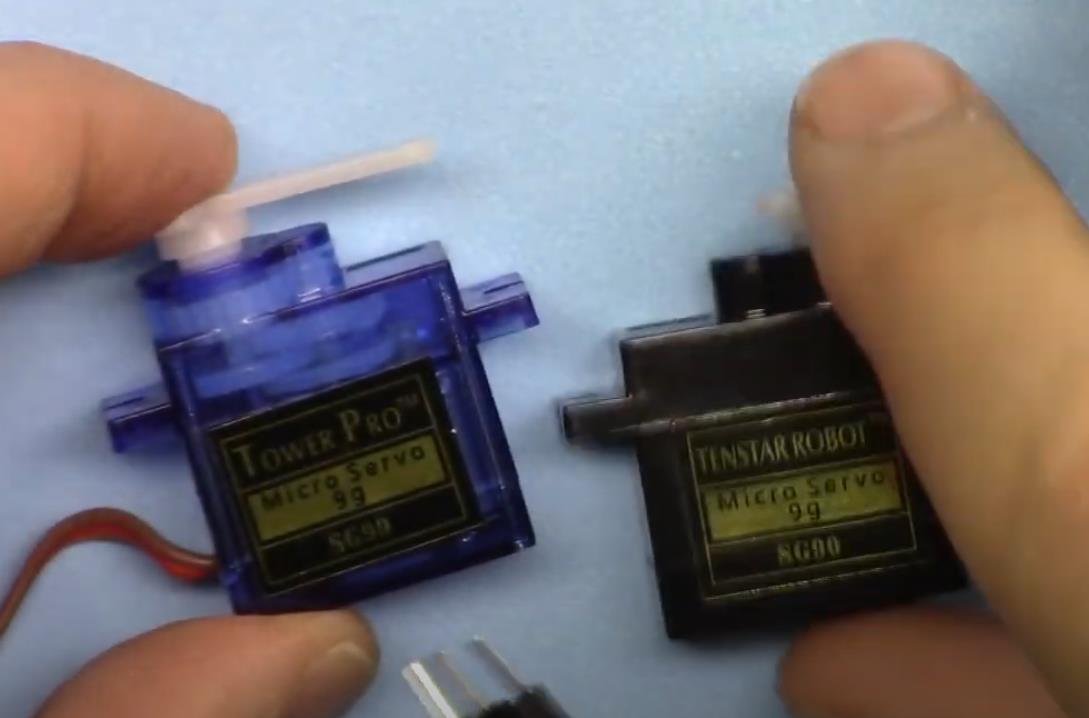
16台标准舵机(如SG90、MG996R),需5V电源供电,信号线接PCA9685通道。
2. 硬件连接
PCA9685与Arduino:
SDA → Arduino A4(或板载SDA引脚)
SCL → Arduino A5(或板载SCL引脚)
VCC → 5V(若电机功率低)或外部电源(推荐)
GND → 共地
伺服电机连接:
每台伺服电机的信号线接PCA9685的PWM0-PWM15通道。
电机电源线(红/棕)接独立5V电源(避免Arduino供电不足)。
3. 软件实现
库依赖:
安装Adafruit_PWMServoDriver库(支持PCA9685高级控制)。
关键代码逻辑:
#include
#include
Adafruit_PWMServoDriver pca = Adafruit_PWMServoDriver(); // 默认I²C地址0x40
void setup() {
pca.begin(); // 初始化PCA9685
pca.setPWMFreq(50); // 设置PWM频率为50Hz(标准舵机频率)
}
void loop() {
// 控制第0通道伺服电机转至90度(脉冲宽度1500μs)
pca.setPWM(0, 0, angleToPulse(90));
// 类似控制其他通道(1-15)
delay(1000);
}
// 将角度转换为PCA9685的脉冲值(0-4095对应0.5ms-2.5ms)
int angleToPulse(int angle) {
int pulse = map(angle, 0, 180, 150, 600); // 150=0.5ms, 600=2.5ms(50Hz下)
return pulse * (4096 / 20000); // 转换为12位分辨率值
}
4. 关键注意事项
电源管理:
伺服电机总电流可能超过Arduino的5V输出能力,必须使用独立电源(如4节AA电池或开关电源)。
电源负极需与Arduino共地。
I²C地址冲突:
若需连接多个PCA9685,通过A0-A5引脚配置不同地址(如0x40-0x4F)。
频率匹配:
伺服电机通常需要50Hz PWM信号,PCA9685需通过setPWMFreq(50)设置。
实时性优化:
避免在loop()中执行耗时操作,建议使用非阻塞控制(如定时器中断)。
5. 扩展功能
多板级联:
通过I²C扩展多个PCA9685,最多可控制16×N台伺服电机(N为模块数量)。
动态控制:
结合传感器输入(如电位器、蓝牙模块)实现交互式控制。
6. 典型应用场景
六足机器人关节控制
机械臂多自由度运动
动态灯光秀(需兼容LED控制)
此方案通过PCA9685的I²C扩展能力,高效解放了Arduino的PWM资源,适合需要同时控制多台伺服电机的低成本项目。


项目代码
/*
 * Original sourse: https://github.com/adafruit/Adafruit-PWM-Servo-Driver-Library
 *
 * This is the Arduino code PAC6985 16 channel servo controller
 * watch the video for details (V1) and demo http://youtu.be/y8X9X10Tn1k
 *  This code is #1 for V2 Video Watch the video :https://youtu.be/bal2STaoQ1M
 *  I have got 3 codes as follow:
   #1-Arduino Code to run one by one all servos from 0 to 180�
   #2-Arduino Code to control specific servos with specific angle
   #3-Arduino Code to run 2 or all servos at together

 * Written/updated by Ahmad Shamshiri for Robojax Video channel www.Robojax.com
 * Date: Dec 16, 2017, in Ajax, Ontario, Canada

 * Watch video for this code:
 *
 * Related Videos
V5 video of PCA9685 32 Servo with ESP32 with WiFi https://youtu.be/bvqfv-FrrLM
V4 video of PCA9685 32 Servo with ESP32 (no WiFi): https://youtu.be/JFdXB8Za5Os
V3 video of PCA9685 how to control 32 Servo motors https://youtu.be/6P21wG7N6t4
V2 Video of PCA9685 3 different ways to control Servo motors: https://youtu.be/bal2STaoQ1M
V1 Video introduction to PCA9685 to control 16 Servo  https://youtu.be/y8X9X10Tn1k

 * Disclaimer: this code is "AS IS" and for educational purpose only.
 * this code has been downloaded from http://robojax.com/learn/arduino/

 * Get this code and other Arduino codes from Robojax.com
Learn Arduino step by step in structured course with all material, wiring diagram and library
all in once place. Purchase My course on Udemy.com http://robojax.com/L/?id=62

****************************
Get early access to my videos via Patreon and have  your name mentioned at end of very
videos I publish on YouTube here: http://robojax.com/L/?id=63 (watch until end of this video to list of my Patrons)
****************************

or make donation using PayPal http://robojax.com/L/?id=64

 *  * This code is "AS IS" without warranty or liability. Free to be used as long as you keep this note intact.*
 * This code has been download from Robojax.com
    This program is free software: you can redistribute it and/or modify
    it under the terms of the GNU General Public License as published by
    the Free Software Foundation, either version 3 of the License, or
    (at your option) any later version.

    This program is distributed in the hope that it will be useful,
    but WITHOUT ANY WARRANTY; without even the implied warranty of
    MERCHANTABILITY or FITNESS FOR A PARTICULAR PURPOSE.  See the
    GNU General Public License for more details.

    You should have received a copy of the GNU General Public License
    along with this program.  If not, see <https://www.gnu.org/licenses/>.
 */

/***************************************************
  This is an example for our Adafruit 16-channel PWM & Servo driver
  Servo test - this will drive 16 servos, one after the other

  Pick one up today in the adafruit shop!
  ------> http://www.adafruit.com/products/815

  These displays use I2C to communicate, 2 pins are required to
  interface. For Arduino UNOs, thats SCL -> Analog 5, SDA -> Analog 4

  Adafruit invests time and resources providing this open source code,
  please support Adafruit and open-source hardware by purchasing
  products from Adafruit!

  Written by Limor Fried/Ladyada for Adafruit Industries.
  BSD license, all text above must be included in any redistribution
 ****************************************************/

#include <Wire.h>
#include <Adafruit_PWMServoDriver.h>

// called this way, it uses the default address 0x40
Adafruit_PWMServoDriver pwm = Adafruit_PWMServoDriver();
// you can also call it with a different address you want
//Adafruit_PWMServoDriver pwm = Adafruit_PWMServoDriver(0x41);

// Depending on your servo make, the pulse width min and max may vary, you
// want these to be as small/large as possible without hitting the hard stop
// for max range. You'll have to tweak them as necessary to match the servos you
// have!
// Watch video V1 to understand the two lines below: http://youtu.be/y8X9X10Tn1k
#define SERVOMIN  125 // this is the 'minimum' pulse length count (out of 4096)
#define SERVOMAX  575 // this is the 'maximum' pulse length count (out of 4096)

// our servo # counter
uint8_t servonum = 0;

void setup() {
  Serial.begin(9600);
  Serial.println("16 channel Servo test!");

  pwm.begin();

  pwm.setPWMFreq(60);  // Analog servos run at ~60 Hz updates

  //yield();
}

// the code inside loop() has been updated by Robojax
void loop() {

//watch video for details: https://youtu.be/bal2STaoQ1M
for(int i=0; i<16; i++)
  {
    for( int angle =0; angle<181; angle +=10){
      delay(50);
        pwm.setPWM(i, 0, angleToPulse(angle) );
        // see YouTube video for details (robojax)

    }

  }

  // robojax PCA9865 16 channel Servo control
  delay(1000);// wait for 1 second

}

/*
/* angleToPulse(int ang)
 * @brief gets angle in degree and returns the pulse width
 * @param "ang" is integer represending angle from 0 to 180
 * @return returns integer pulse width
 * Usage to use 65 degree: angleToPulse(65);
 * Written by Ahmad Shamshiri on Sep 17, 2019.
 * in Ajax, Ontario, Canada
 * www.Robojax.com
 */

int angleToPulse(int ang){
   int pulse = map(ang,0, 180, SERVOMIN,SERVOMAX);// map angle of 0 to 180 to Servo min and Servo max
   Serial.print("Angle: ");Serial.print(ang);
   Serial.print(" pulse: ");Serial.println(pulse);
   return pulse;
}
项目代码之二
++
/*
 * Original library source: https://github.com/adafruit/Adafruit-PWM-Servo-Driver-Library
 *
 * This is the Arduino code for the PCA6985 16-channel servo controller
 * to control 32 servo motors with an ESP32 board
 *
 * This is V3 Video on PCA9685: https://youtu.be/JFdXB8Za5Os
 *
 * Watch video for this code:
 *
 * Related Videos:
V5 video of PCA9685 32 Servo with ESP32 with WiFi: https://youtu.be/bvqfv-FrrLM
V4 video of PCA9685 32 Servo with ESP32 (no WiFi): https://youtu.be/JFdXB8Za5Os
V3 video of PCA9685 how to control 32 servo motors: https://youtu.be/6P21wG7N6t4
V2 Video of PCA9685 3 different ways to control servo motors: https://youtu.be/bal2STaoQ1M
V1 Video introduction to PCA9685 to control 16 servos: https://youtu.be/y8X9X10Tn1k
 *

 * Written/updated by Ahmad Shamshiri for Robojax Video channel, www.Robojax.com
 * Date: Dec 15, 2019, in Ajax, Ontario, Canada

 * Disclaimer: this code is "AS IS" and for educational purposes only.
 * this code has been downloaded from http://robojax.com/learn/arduino/

 * Get this code and other Arduino codes from Robojax.com.
Learn Arduino step by step in a structured course with all material, wiring diagrams, and libraries
all in one place. Purchase my course on Udemy.com: http://robojax.com/L/?id=62

****************************
Get early access to my videos via Patreon and have your name mentioned at the end of every
video I publish on YouTube here: http://robojax.com/L/?id=63 (watch until the end of this video for a list of my Patrons)
****************************

or make a donation using PayPal: http://robojax.com/L/?id=64

 *  * This code is "AS IS" without warranty or liability. Free to be used as long as you keep this note intact.*
 * This code has been downloaded from Robojax.com
    This program is free software: you can redistribute it and/or modify
    it under the terms of the GNU General Public License as published by
    the Free Software Foundation, either version 3 of the License, or
    (at your option) any later version.

    This program is distributed in the hope that it will be useful,
    but WITHOUT ANY WARRANTY; without even the implied warranty of
    MERCHANTABILITY or FITNESS FOR A PARTICULAR PURPOSE.  See the
    GNU General Public License for more details.

    You should have received a copy of the GNU General Public License
    along with this program.  If not, see <https://www.gnu.org/licenses/>.
 */
#include <Wire.h>

#include <Adafruit_PWMServoDriver.h>

// called this way, it uses the default address 0x40
Adafruit_PWMServoDriver board1 = Adafruit_PWMServoDriver(0x40);
Adafruit_PWMServoDriver board2 = Adafruit_PWMServoDriver(0x41);

// Depending on your servo make, the pulse width min and max may vary, you
// want these to be as small/large as possible without hitting the hard stop
// for max range. You'll have to tweak them as necessary to match the servos you
// have!
// Watch video V1 to understand the two lines below: http://youtu.be/y8X9X10Tn1k
#define SERVOMIN  125 // this is the 'minimum' pulse length count (out of 4096)
#define SERVOMAX  575 // this is the 'maximum' pulse length count (out of 4096)


int servoNumber = 0;

void setup() {
  Serial.begin(9600);
  Serial.println("32 channel Servo test!");

  board1.begin();
  board2.begin();
  board1.setPWMFreq(60);  // Analog servos run at ~60 Hz updates
  board2.setPWMFreq(60);
  //yield();
}

// the code inside loop() has been updated by Robojax
void loop() {


    for( int angle =0; angle<181; angle +=10){
      for(int i=0; i<16; i++)
        {
            board2.setPWM(i, 0, angleToPulse(angle) );
            board1.setPWM(i, 0, angleToPulse(angle) );
        }
    }

// robojax PCA9865 16 channel Servo control
  delay(100);

}

/*
 * angleToPulse(int ang)
 * gets angle in degree and returns the pulse width
 * also prints the value on serial monitor
 * written by Ahmad Nejrabi for Robojax, Robojax.com
 */
int angleToPulse(int ang){
   int pulse = map(ang,0, 180, SERVOMIN,SERVOMAX);// map angle of 0 to 180 to Servo min and Servo max
   Serial.print("Angle: ");Serial.print(ang);
   Serial.print(" pulse: ");Serial.println(pulse);
   return pulse;
}
【Arduino 动手做】使用PCA9685模块和Arduino控制16台伺服电机
项目链接:https://robojax.com/tutorial_view.php?id=243
项目作者:Robojax
项目视频 :https://www.youtube.com/watch?v=bal2STaoQ1M
项目代码:
https://robojax.com/tutorial_view.php?id=243
https://robojax.com/tutorial_view.php?id=244
https://robojax.com/tutorial_view.php?id=268
https://robojax.com/tutorial_view.php?id=243


 他的勋章
他的勋章

评论