 返回首页
返回首页
 回到顶部
回到顶部
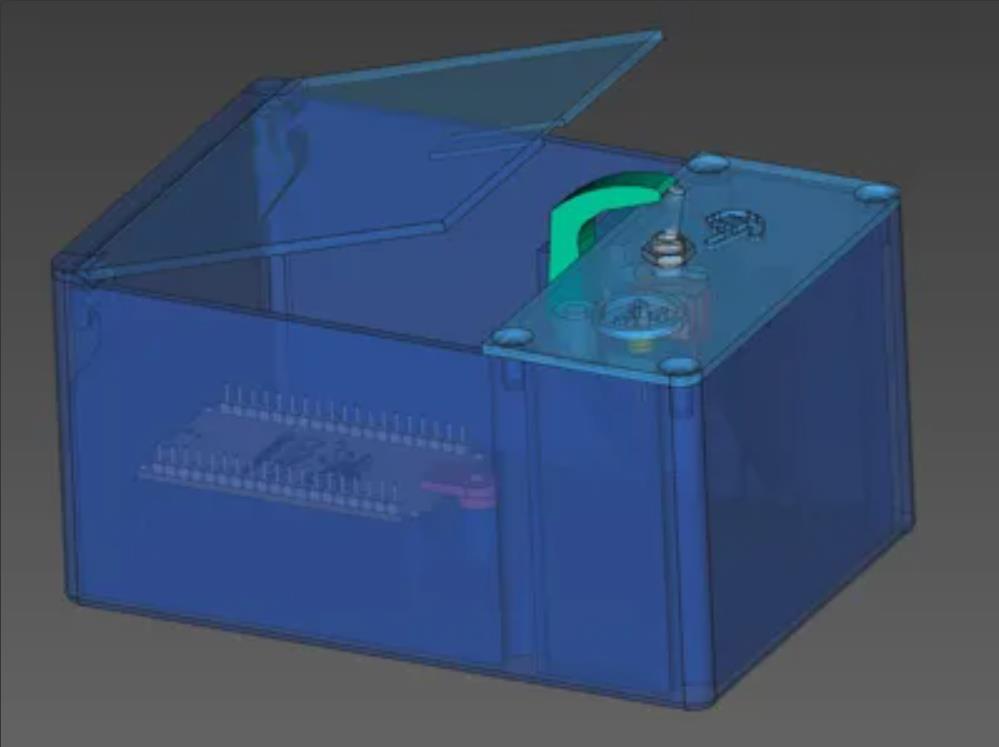
谁不想创建一个完全认证的无用箱呢?自从我在法戈看到一个之后,我当然想要一个 🙂
另外,我把它作为 ESP32 的一种“Hello world”练习。
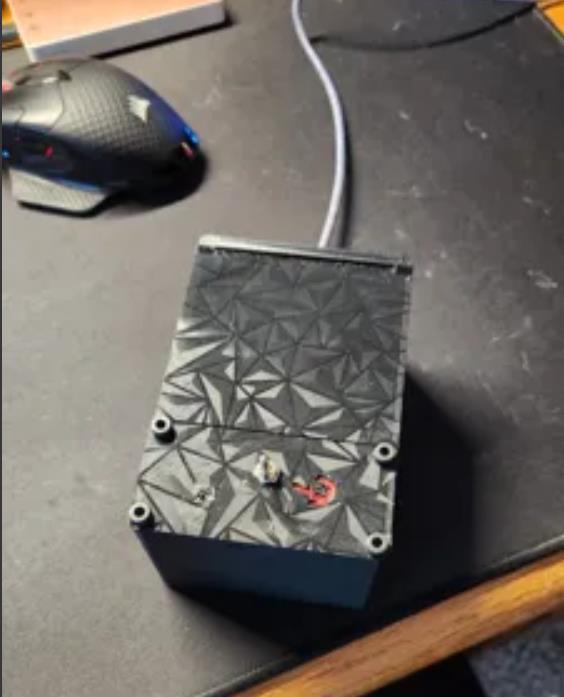
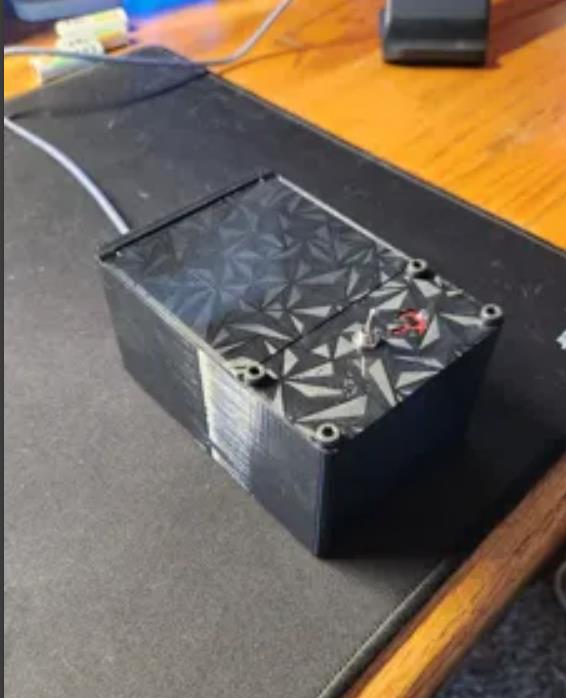
看看它的实际效果:
你需要:
• 一个 ESP32
• 托管在 https://github.com/wiz78/UselessBox 的代码
• 一个 5mm LED
• 一个 220 欧姆电阻
• 一个小型 SPDT 杠杆开关
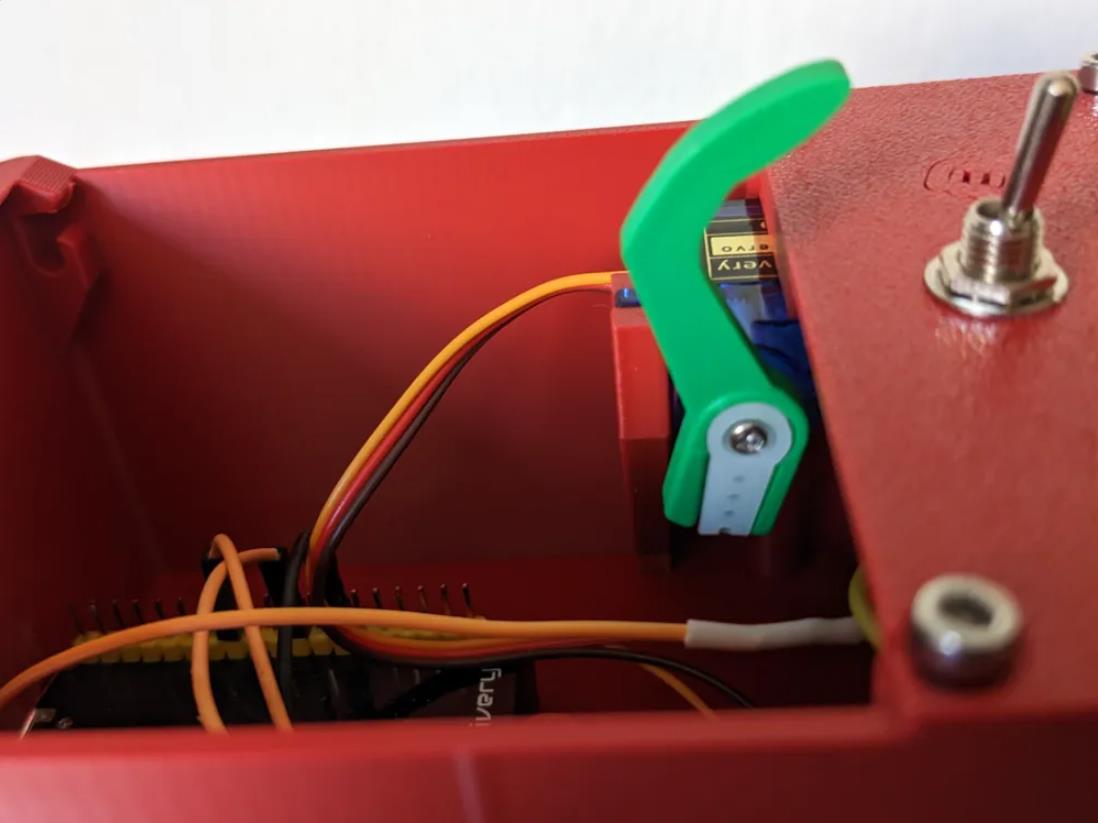
• 一个微型伺服电机(我使用的是 Miuzei MS18)
• 一些电线
• 4 个用于顶部滑盖的小型 M3 螺丝
• 2 个用于 ESP 阻挡器和 LED 支撑的长 M3 螺丝
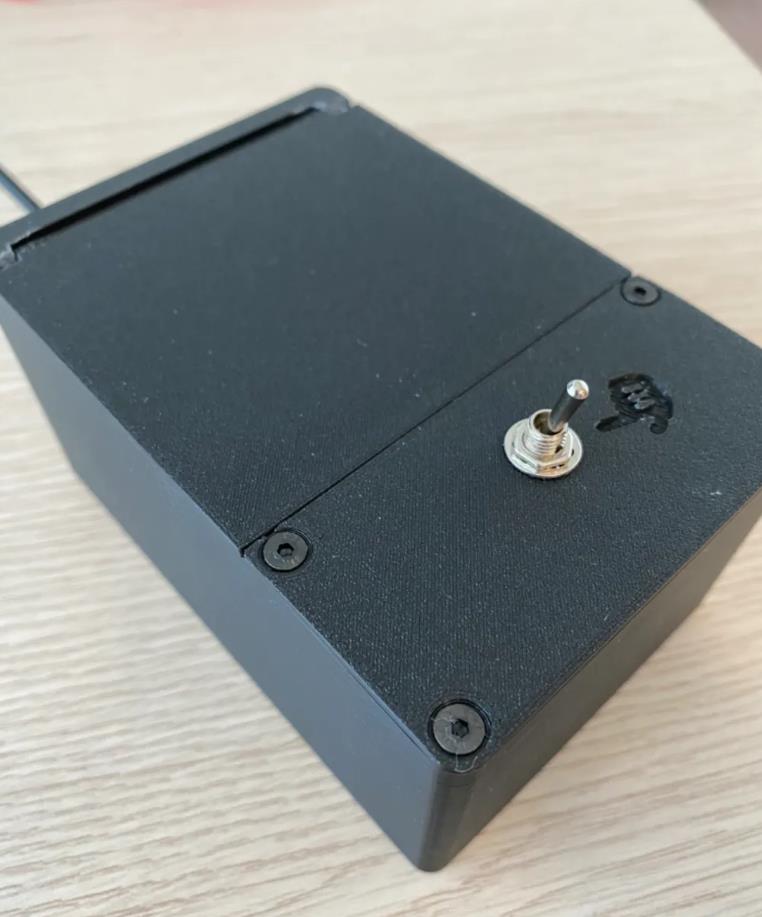
• 一个 2A USB 电源 + 微型 USB 线
一些组装提示:
• 使用电阻连接 LED 到 GND 和 GPIO 引脚(例如 16)之间。
• 连接电机到另一个 GND 和不同的 GPIO(例如 18)。
• 连接开关到 GND 和 GPIO 引脚(例如 12)之间。
• 这些是代码中已定义的引脚,当然你可以更改它们。
• 该代码可以进行调整,以启用一个 HTTP 服务器来替换固件,还可以启用其他测试端点。其中一个特别有用,可以用来校准伺服电机组装后的位置:即 curl -o- -X POST http://uselessbox.local/servo?pos=80 - 你需要找到将代码中用于静止位置(臂在盖子下面)、偷看位置(臂部分抬高,打开盖子)和推压位置(足以将开关移到关闭位置)的值输入。
刷写 ESP32:
• 从 Github 下载代码。
• 将 wifi_config-dist.h 重命名为 wifi_config.h。
• 编辑 wifi_config.h 并插入你的 Wi-Fi 设置。
• 安装 Arduino IDE (https://www.arduino.cc/en/software)
• 为 ESP32 设置它(例如 https://medium.com/@pauljoegeorge/setup-arduino-ide-to-flash-a-project-to-esp32-34db014a7e65)
• 编译代码并将其上传到 ESP32。
• 在使用电机之前,将 ESP32 与电脑断开连接。
• 按照最后一个“组装提示”中的说明校准伺服电机。一旦你有了正确的要在 UselessBox.ino 的第 13-16 行中输入的值,重新编译并刷写 ESP32。

项目代码
#include <ezButton.h>
#include <ESP32Servo.h>

#define OTA_ENABLED 0

const int switchPin = 12;
const int ledPin = 16;
const int motorPin = 18;

ezButton topSwitch(switchPin);

Servo servo;
const int restingPos = 160;
const int peekingPos = 80;
const int intermediatePos = 60;
const int pushingPos = 41;

unsigned int lastActionMillis = 0;
bool firstAction = true;
bool ledOn = false;

void simple();
void slow();
void verySlow();
void slowPeek();
void angry();
void peeking();
typedef void (*actionHandler)();

const actionHandler actions[] = {
  simple,
  slow,
  verySlow,
  slowPeek,
  angry,
  peeking,

  simple,
  simple,
  simple,
  simple,
  slowPeek,
  peeking,
  peeking,
  angry,
  angry,
  angry,
};

constexpr int actionsCount = sizeof( actions ) / sizeof( actions[0] );

#if OTA_ENABLED
// based on https://randomnerdtutorials.com/esp32-over-the-air-ota-programming/

#include <WiFi.h>
#include <WiFiClient.h>
#include <WebServer.h>
#include <ESPmDNS.h>
#include <Update.h>

#include "wifi_config.h"

const char *host = "uselessBox";
const char *otaPage =
"<html>"
"<head>"
"<title>useless box OTA</title>"
"<script src='https://ajax.googleapis.com/ajax/libs/jquery/3.2.1/jquery.min.js'></script>"
"</head>"
"<body>"
"<form method='POST' action='#' enctype='multipart/form-data' id='upload_form'>"
   "<input type='file' name='update'>"
        "<input type='submit' value='Update'>"
    "</form>"
 "<div id='prg'>progress: 0%</div>"
 "<script>"
  "$('form').submit(function(e){"
  "e.preventDefault();"
  "var form = $('#upload_form')[0];"
  "var data = new FormData(form);"
  " $.ajax({"
  "url: '/update',"
  "type: 'POST',"
  "data: data,"
  "contentType: false,"
  "processData:false,"
  "xhr: function() {"
  "var xhr = new window.XMLHttpRequest();"
  "xhr.upload.addEventListener('progress', function(evt) {"
  "if (evt.lengthComputable) {"
  "var per = evt.loaded / evt.total;"
  "$('#prg').html('progress: ' + Math.round(per*100) + '%');"
  "}"
  "}, false);"
  "return xhr;"
  "},"
  "success:function(d, s) {"
  "console.log('success!')"
 "},"
 "error: function (a, b, c) {"
 "}"
 "});"
 "});"
 "</script>"
 "</body>"
 "</html>";

WebServer server(80);
#endif

void setup()
{
#if OTA_ENABLED
  Serial.begin(115200);

  WiFi.begin(ssid, password);

  for(int i = 0; ( i < 20 ) && ( WiFi.status() != WL_CONNECTED ); i++) {
    delay(500);
    Serial.print(".");
  }

  Serial.println("");
  Serial.print("Connected to ");
  Serial.println(ssid);
  Serial.print("IP address: ");
  Serial.println(WiFi.localIP());

  /*use mdns for host name resolution*/
  if (!MDNS.begin(host)) {
    Serial.println("Error setting up MDNS responder!");
  }

  server.on("/", HTTP_GET, []() {
    server.sendHeader("Connection", "close");
    server.send(200, "text/html", otaPage);
  });

  /*handling uploading firmware file */
  server.on("/update", HTTP_POST, []() {
    server.sendHeader("Connection", "close");
    server.send(200, "text/plain", (Update.hasError()) ? "FAIL" : "OK");
    ESP.restart();
  }, []() {
    HTTPUpload& upload = server.upload();
    if (upload.status == UPLOAD_FILE_START) {
      Serial.printf("Update: %s\n", upload.filename.c_str());
      if (!Update.begin(UPDATE_SIZE_UNKNOWN)) { //start with max available size
        Update.printError(Serial);
      }
    } else if (upload.status == UPLOAD_FILE_WRITE) {
      /* flashing firmware to ESP*/
      if (Update.write(upload.buf, upload.currentSize) != upload.currentSize) {
        Update.printError(Serial);
      }
    } else if (upload.status == UPLOAD_FILE_END) {
      if (Update.end(true)) { //true to set the size to the current progress
        Serial.printf("Update Success: %u\nRebooting...\n", upload.totalSize);
      } else {
        Update.printError(Serial);
      }
    }
  });

  /* set servo position, useful to calibrate the motor */
  server.on("/servo", HTTP_POST, []() {
    server.sendHeader("Connection", "close");
    server.send(200, "text/plain", "OK\n");

    if(server.hasArg("pos")) {
      servo.write(server.arg("pos").toInt());
      delay(300);
    }
  });

  server.on("/action", HTTP_POST, []() {
    server.sendHeader("Connection", "close");
    server.send(200, "text/plain", "OK\n");

    if(server.hasArg("num")) {
      int requestedAction = server.arg("num").toInt();

      actions[ requestedAction % ( actionsCount + 1 ) ]();
    } else if(server.hasArg("peek"))
      peekAfterwards();
  });

  server.begin();
#endif

  topSwitch.setDebounceTime(100);

  pinMode(ledPin, OUTPUT);
  setLed(false);

  servo.setPeriodHertz(50);
  servo.attach(motorPin);
  servo.write(restingPos);
}

void loop()
{
#if OTA_ENABLED
  server.handleClient();
#endif

  topSwitch.loop();

  if(topSwitch.getState() == LOW) {
    int action, maxAction;
    unsigned long sinceLastAction = millis() - lastActionMillis;

    if(!lastActionMillis)
      srandom(millis());

    if(sinceLastAction > 60 * 5 * 1000)
      firstAction = true;

    if(firstAction)
      action = 0;
    else
      action = random(0, actionsCount - 1);

    actions[ action ]();

    if(!firstAction && (sinceLastAction < 5000) && (random(1, 10) > 6))
      peekAfterwards();

    lastActionMillis = millis();
    firstAction = false;
  }

  if(ledOn)
    setLed(false);

  delay(20);
}

int stepFromTo(int from, int to)
{
  return (to > from) ? 1 : -1;
}

void simple()
{
  servo.write(pushingPos);
  delay(250);
  servo.write(restingPos);
}

void slow()
{
  for(int i = restingPos; i != pushingPos; i += stepFromTo(restingPos, pushingPos)) {
    servo.write(i);
    delay(10);
  }

  servo.write(intermediatePos);
  delay(100);

  servo.write(pushingPos);

  delay(100);

  servo.write(restingPos);
}

void verySlow()
{
  for(int i = restingPos; i != pushingPos; i += stepFromTo(restingPos, pushingPos)) {
    servo.write(i);
    delay(30);
  }

  servo.write(intermediatePos);
  delay(100);

  servo.write(pushingPos);

  delay(150);

  servo.write(restingPos);
}

void slowPeek()
{
  for(int i = restingPos; i != peekingPos; i += stepFromTo(restingPos, peekingPos)) {
    servo.write(i);
    delay(10);
  }

  servo.write(peekingPos);

  delay(500);
  servo.write(pushingPos);
  delay(250);

  servo.write(restingPos);
}

void angry()
{
  setLed(true);

  for(int i = 0; i < 3; i++) {
    servo.write(pushingPos);
    delay(250);
    servo.write(peekingPos);
    delay(200);
  }

  servo.write(restingPos);
  delay(200);
}

void peeking()
{
  servo.write(peekingPos);
  setLed(true);
  delay(250);
  servo.write(pushingPos);
  delay(250);
  servo.write(restingPos);
  delay(200);
}

void peekAfterwards()
{
  setLed(true);
  delay(100);
  servo.write(peekingPos);
  delay(1500);
  servo.write(restingPos);
}

void setLed(bool on)
{
  digitalWrite(ledPin, on ? HIGH : LOW);

  ledOn = on;
}
【Arduino 动手做】ESP32 的“Hello world”练习:无聊盒子
【Arduino 动手做】ESP32 的一种“Hello world”练习:无聊盒子
项目链接:https://makerworld.com/zh/models/76853
项目作者:Wiz_78
项目代码:https://github.com/wiz78/UselessBox
3D 文件:https://makerworld.com/zh/models/76853-useless-box#profileId-81310
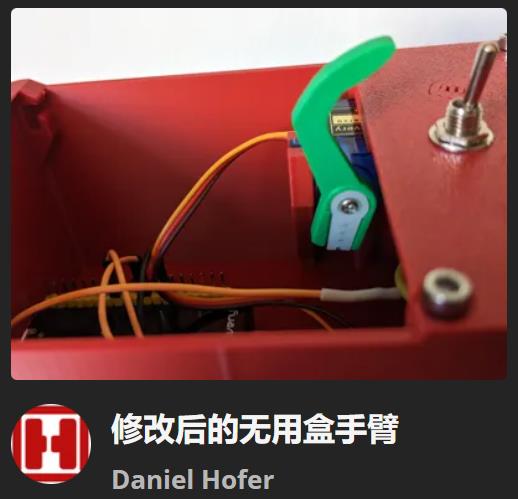
升级手臂:https://makerworld.com/zh/models/737831-modified-arm-for-useless-box#profileId-669999
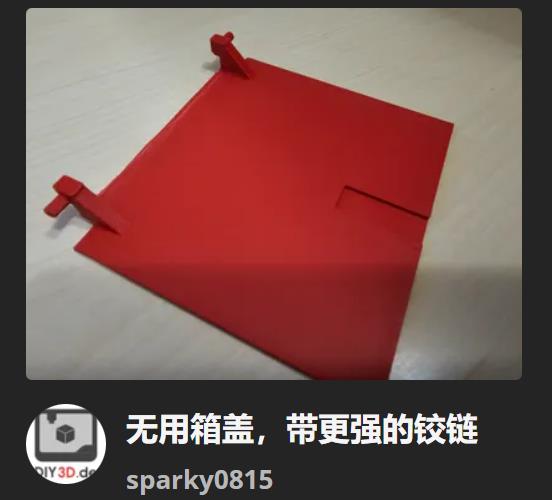
带更强的铰链: https://makerworld.com/zh/models/525764-useless-box-flap-with-stronger-hinge#profileId-442597


 他的勋章
他的勋章

评论