 返回首页
返回首页
 回到顶部
回到顶部

1、打开Arduino,选择了“文件/首选项”,http://arduino.esp8266.com/stable/package_esp8266com_index.json
这个json地址键入下图所示开发板网址管理器的位置,点击“确定”。
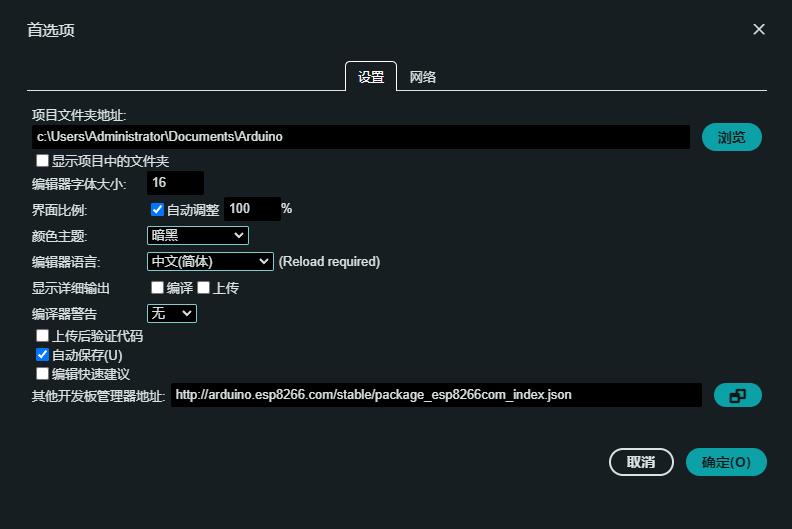
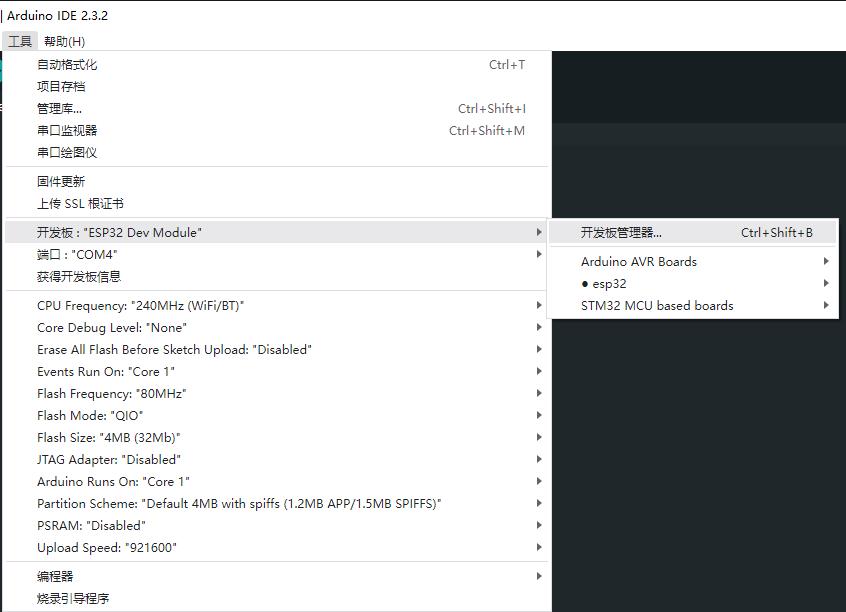
2、到开发板管理器安装
在开发板管理器搜索8266就能找到要的支持文件了,开始下载......
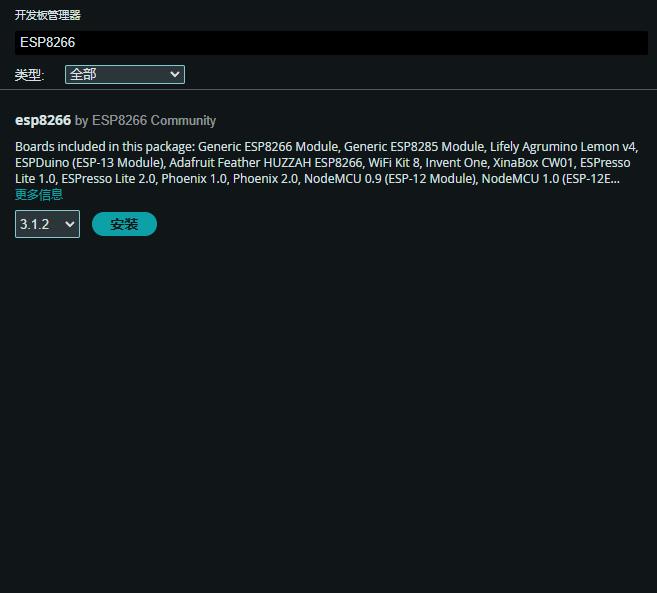
下载不到一分钟,出错卡住了
出错信息:
Downloading packages
esp8266:xtensa-lx106-elf-gcc@3.1.0-gcc10.3-e5f9fec
Failed to install platform: 'esp8266:esp8266:3.1.2'.
Error: 2 UNKNOWN: Get "https://github.com/earlephilhower/esp-quick-toolchain/releases/download/3.1.0-gcc10.3/x86_64-w64-mingw32.xtensa-lx106-elf-e5f9fec.220621.zip": dial tcp 20.205.243.166:443: connectex: A connection attempt failed because the connected party did not properly respond after a period of time, or established connection failed because connected host has failed to respond.
意思是:连接尝试失败,因为连接方在一段时间后没有正确响应,或者由于连接的主机没有响应而建立的连接失败。

3、尝试离线安装
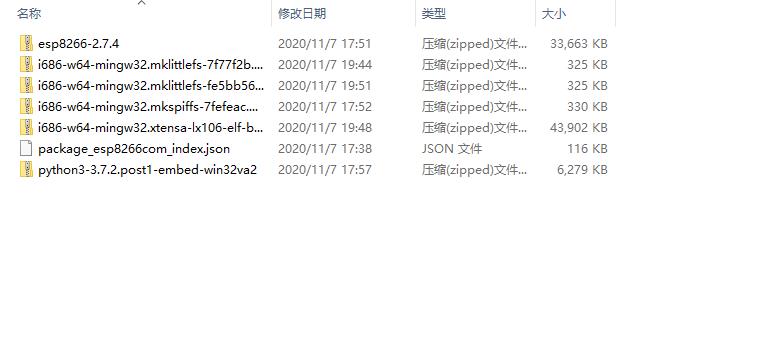
找到一个四年前的安装包(里面有七个文件),先做过渡
链接:https://pan.baidu.com/s/1hX45SsujWOyPKyntA6fDkQ
提取码:8266
然后解压到arduino的缓存文件下
4、还有一个办法,就是使用8266安装器,下载
https://pan.baidu.com/s/1BGT9Vw31mz5CdlPKyKYXUQ
(提取码:49c1),并运行该文件(8266_package_2.6.3)即可完成Arduino IDE配置。
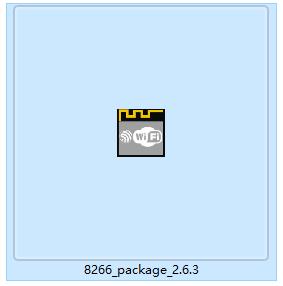
运行程序后,打开开发板管理器,可以看到已安装2.6.3版本(老版本,先过渡)
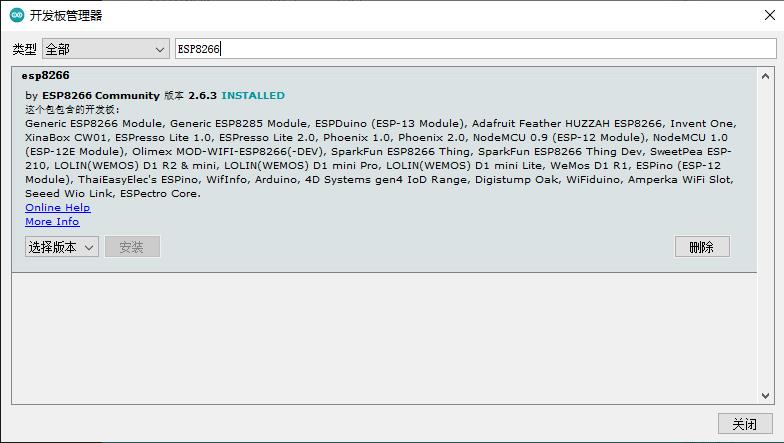
5、这里的配置如下
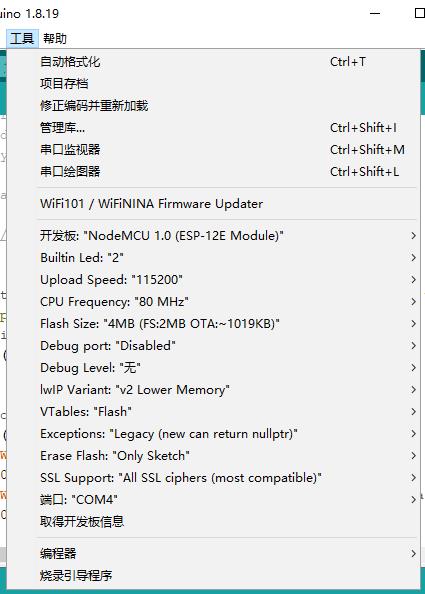
6、测试8266开发板
【花雕学编程】239种传感器执行器系列实验(资料代码+仿真编程+图形编程)
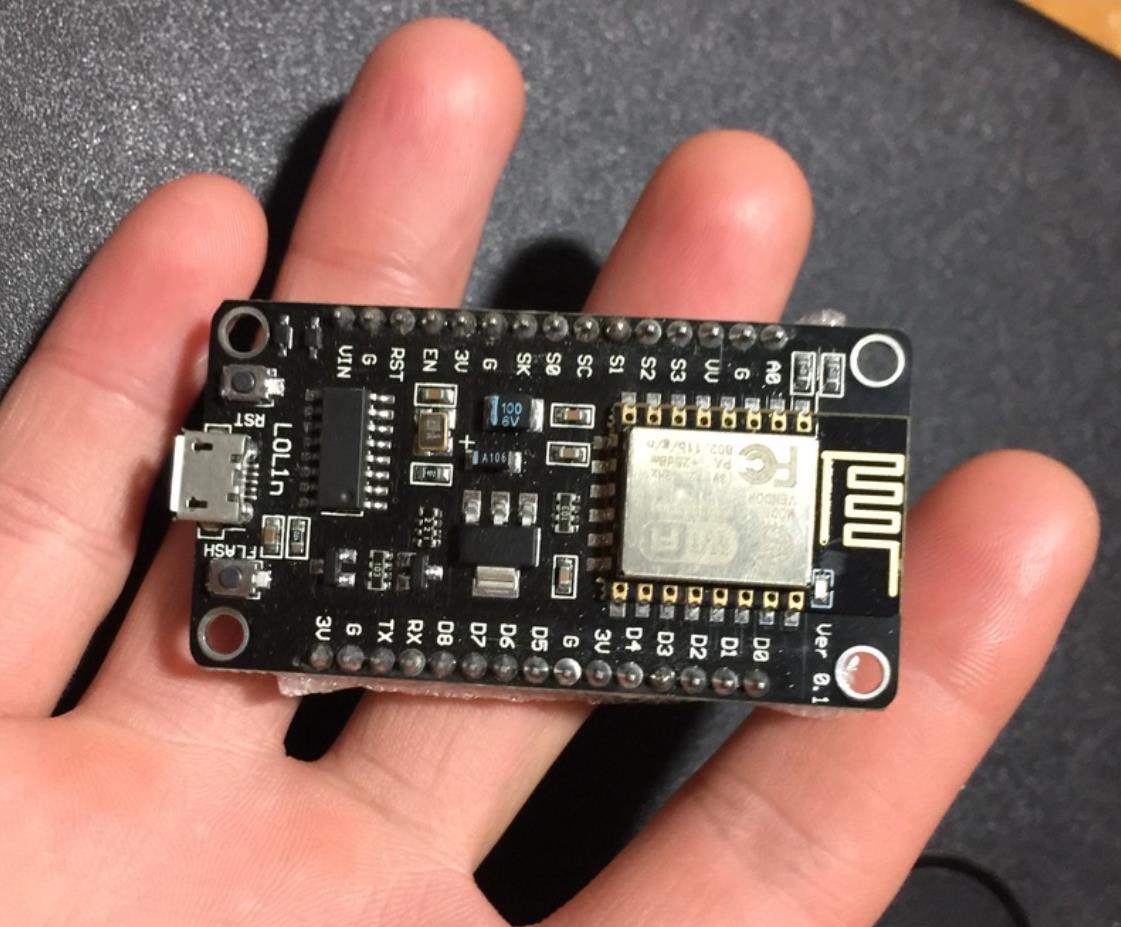
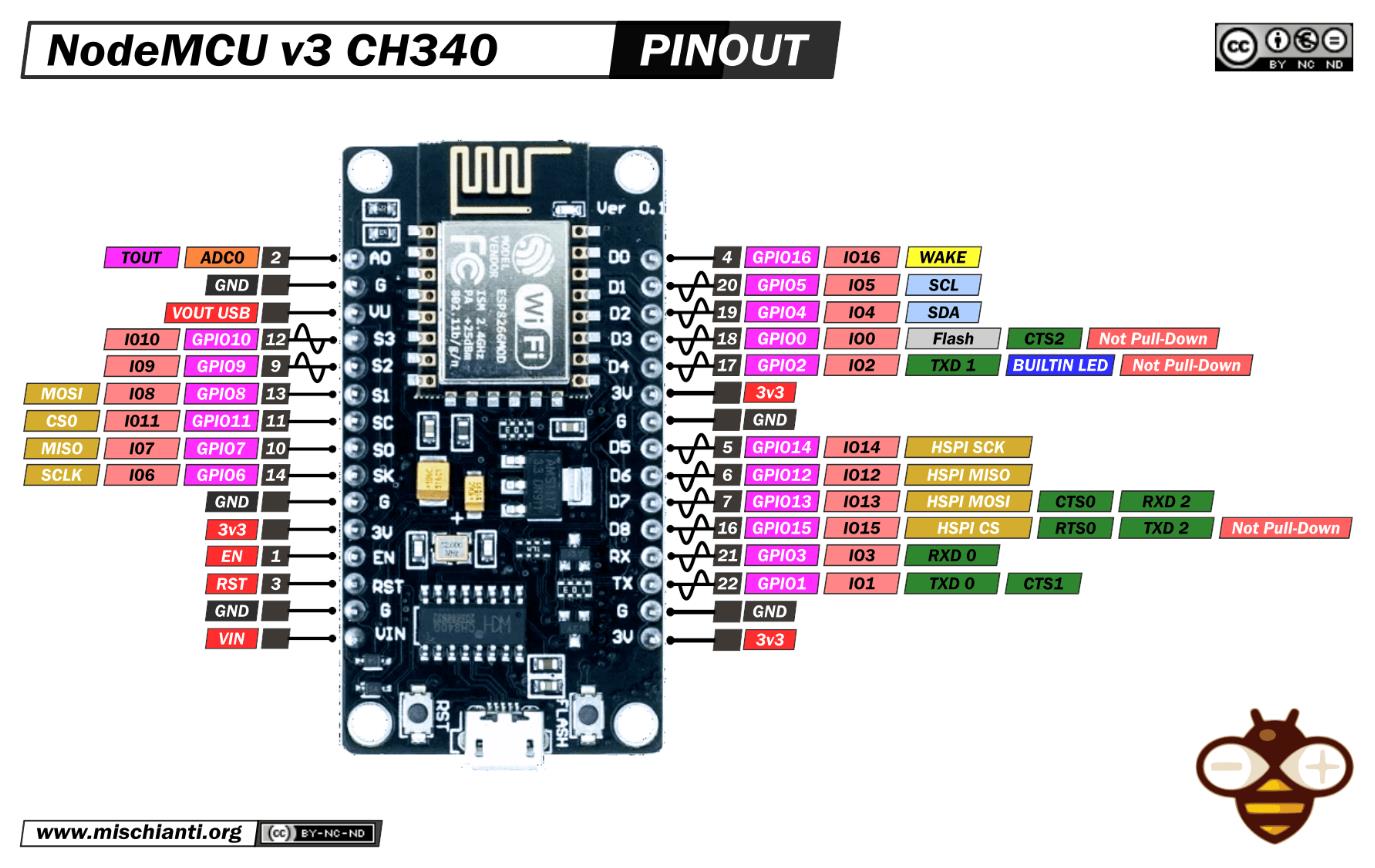
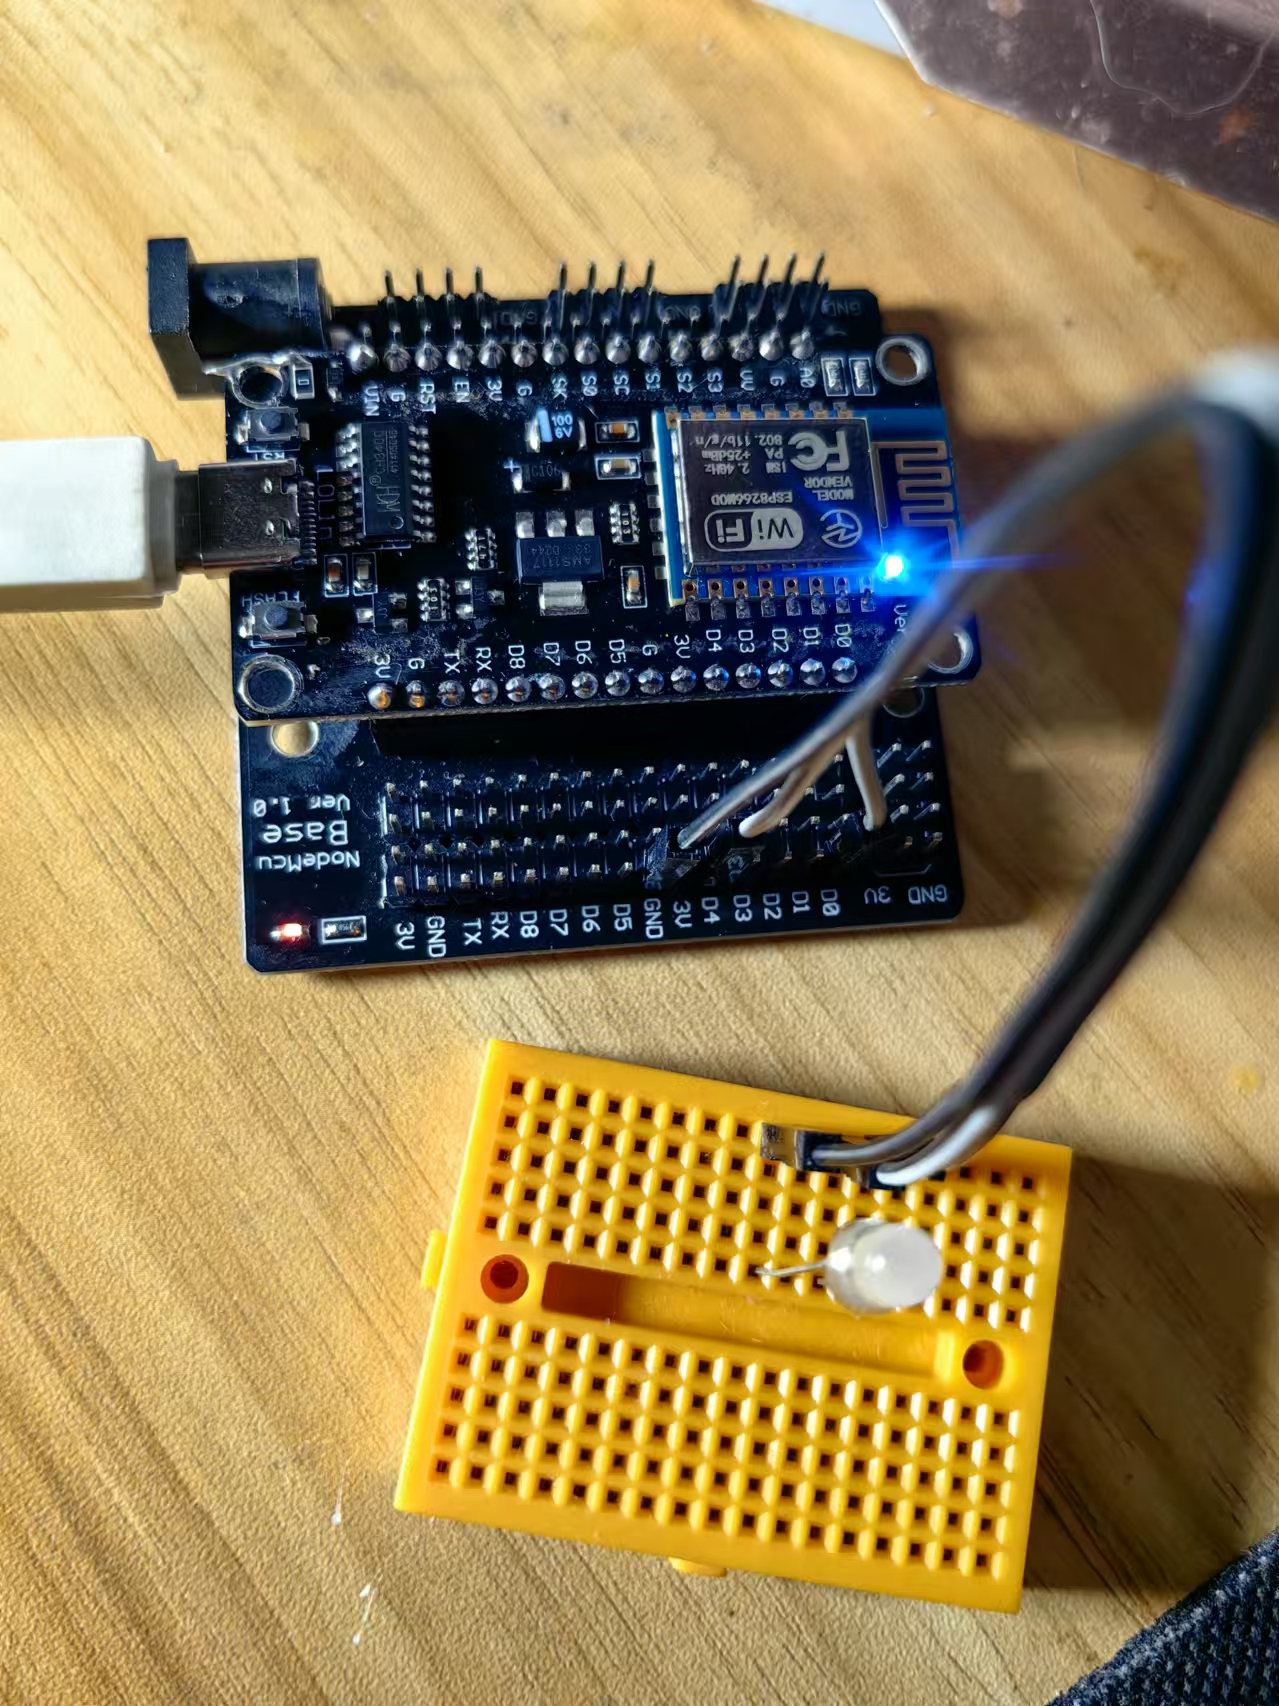
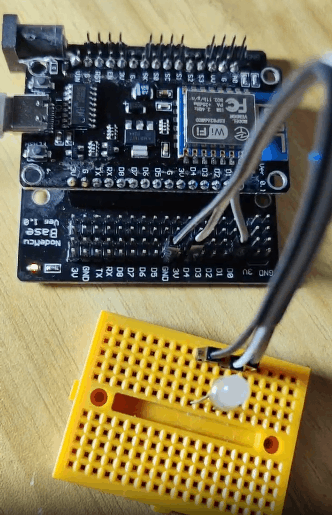
实验二百四十六:ESP8266串口wifi模块 NodeMCU Lua V3物联网开发板 CH340
实验项目之一:点亮板载 LED 灯
实验开源代码
/*
  【花雕学编程】239种传感器执行器系列实验(资料代码+仿真编程+图形编程)
   实验二百四十六:ESP8266串口wifi模块 NodeMCU Lua V3物联网开发板 CH340
   实验项目之一:点亮板载 LED 灯
*/

// setup函数在按下复位按钮或给电路板供电时运行一次
void setup() {
  // 将数字引脚LED_BUILTIN初始化为输出模式
  pinMode(LED_BUILTIN, OUTPUT);
}

// loop函数会一直重复运行
void loop() {
  digitalWrite(LED_BUILTIN, HIGH);   // 将LED设置为高电平(点亮LED)
  delay(1000);                       // 等待一秒
  digitalWrite(LED_BUILTIN, LOW);    // 通过将电压设置为低电平关闭LED
  delay(1000);                       // 再等待一秒
}
实验场景图 动态图


 他的勋章
他的勋章


评论