 返回首页
返回首页
 回到顶部
回到顶部

昨天应柚子相机项目组之约做了一节案例分享,分享的内容是基于柚子相机的“流浪小猫智能救助站”。这次分享很成功,不仅使我熟练了一个优秀项目作品的全过程,还学会了使用腾讯会议。腾讯会议设置权限、安排时间、设置主持人等等。
柚子相机也叫掌控相机,相当于柚子爱相机和掌控板的结合。柚子爱相机既可以自主训练模型,也可以导入模型。下面我将案例“流浪小猫智能救助站”做详细的分享。
一、模型训练
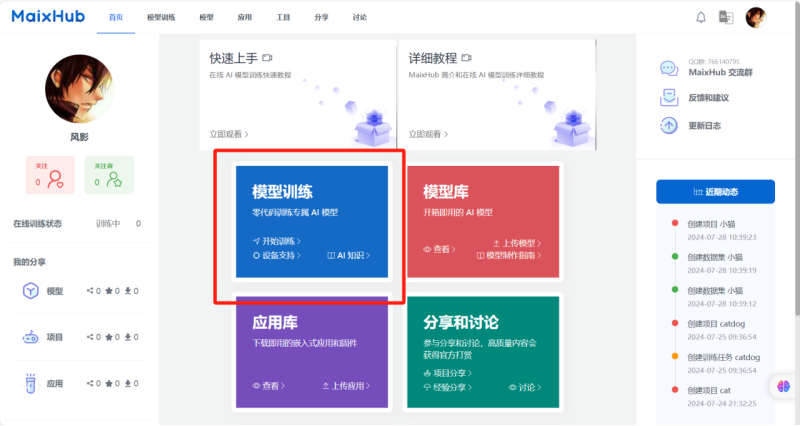
柚子相机的模型训练在深圳矽速科技平台(https://maixhub.com/),点击页面中的模型训练开始建立模型。
模型的建立过程参看这两篇文章(柚子相机MaixHub平台训练一- Makelog(造物记) (dfrobot.com.cn))(柚子相机MaixHub平台训练二- Makelog(造物记) (dfrobot.com.cn)),这里模型建立方法与前两篇略有不同。
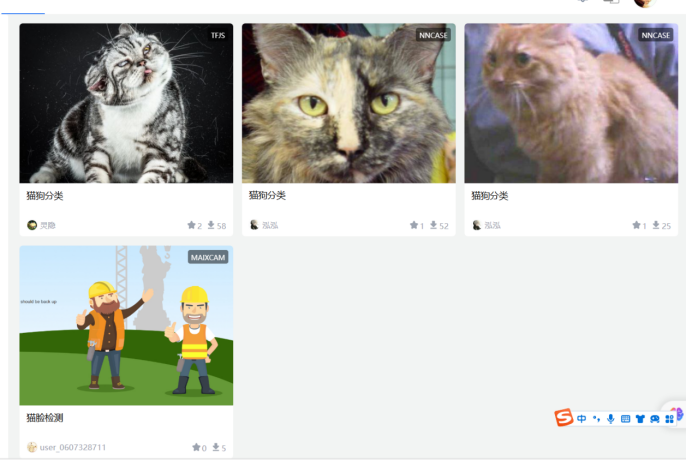
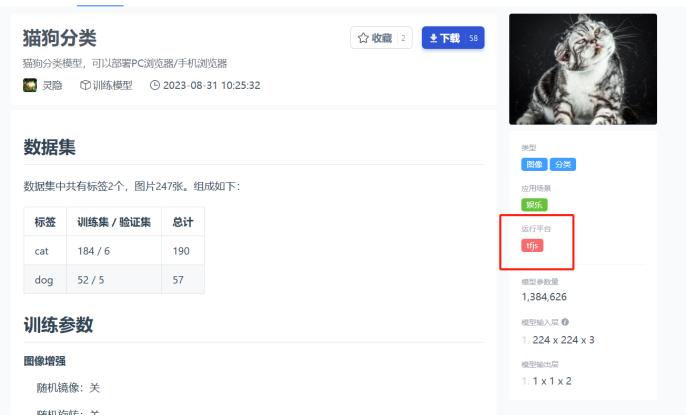
本案例与猫有关,要准备小猫的数据集。手头没有小猫的数据集我想到两种办法,办法一是直接使用矽速科技平台的模型。矽速平台首页选择模型库,弹出的页面填写搜索词“猫”,搜索到猫狗分类的模型有3个,猫眼检测模型1个。点开1个模型查看详情介绍,模型运行的平台是tfjs,tfjs是在手机上运行,柚子相机上不能运行。另外3个模型都是在其他平台运行的,柚子相机运行的是awnn平台。模型库行行不通,只能用方法二。方法二是上传关于各种小猫的图片,没有图片就得下载图片。

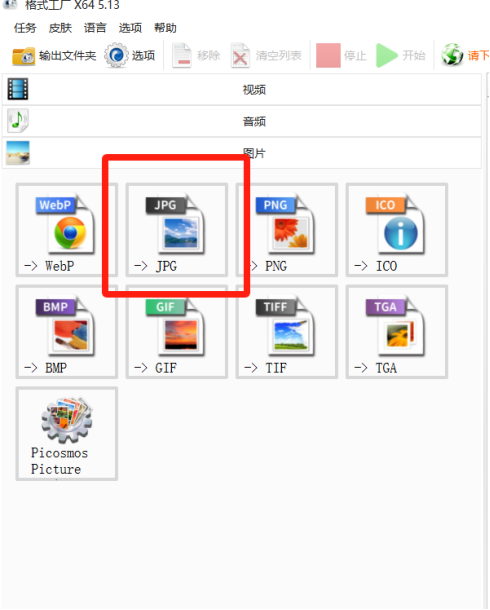
我家里养了两只小猫,如果给小猫拍照传照片,每只小猫照片量至少100张,小猫乱动控制不住。而且要识别流浪猫,流浪猫的品种和家猫不是一个品种识别时置信度不会太高。流浪小猫品种大多数是三种,橘猫、狸花猫、三花猫。三种猫用浏览器从网上下载各超过100张的图片。我家猫是银渐层和蓝猫,我也各下载了100多张。网上下载的图片页掺杂了其他品种的猫,以及一些幼猫。下载的小猫图片格式比较乱,模型训练要求图片是JPG格式,使用格式工厂,选择JPG格式导入图片,开始转换图片,不到1分钟就转换完成。专门建立一个小猫文件夹,把格式工厂转换好的图片移动进去。如果这一步不做,猫和狗的图片会混在一起,还得再次分类。人工智能在识别狗时,可能会当成猫,所以要下载一些狗的图片,也做模型训练。下载狗的图片,修个格式,建立狗文件夹,移动狗图片方法和小猫一样的。
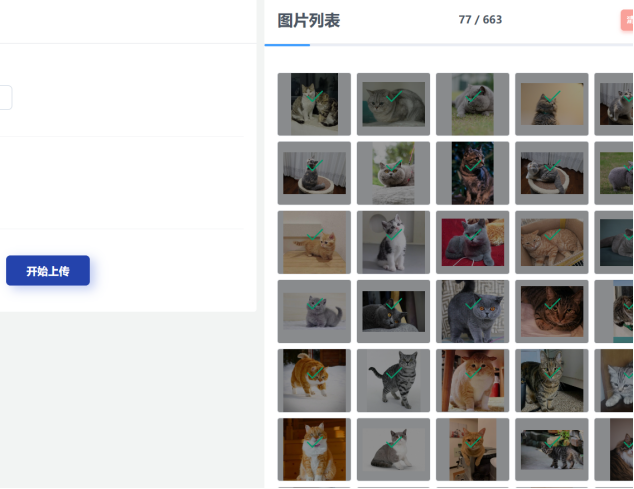
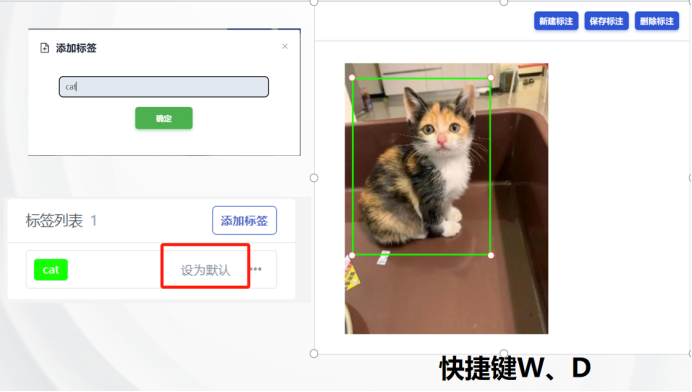
回到矽速平台,上传小猫图片,标注小猫数据。标注完小猫,上传小狗图片,对所有小狗标注。小猫和小狗分开标注的好处是猫和狗分的很清楚,标签不会出错。标注数据的快捷键是W和D键。模型训练选择选择awnn平台,同时选择最后一项“允许负样本”,负样本的意思就是防止把狗识别成猫。
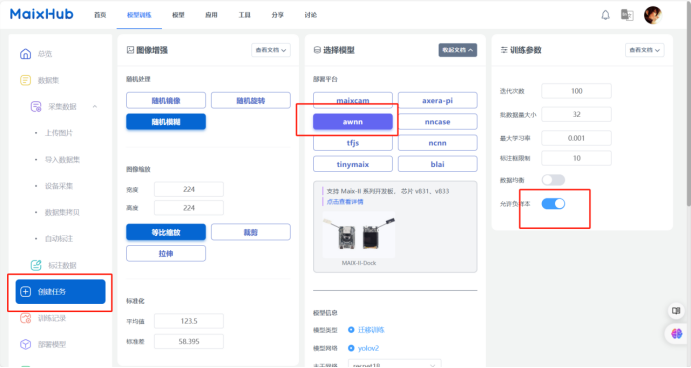
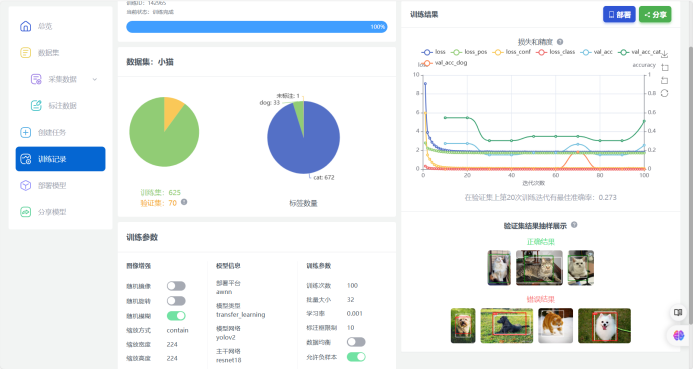
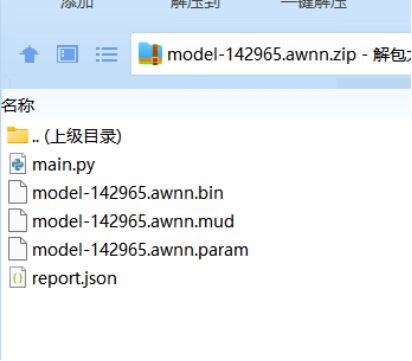
耐性等待7、8分钟,模型训练结束。进入模型部署页面,点击部署,选择手动部署,浏览器自动下载文件。
二、main.py文件修改写
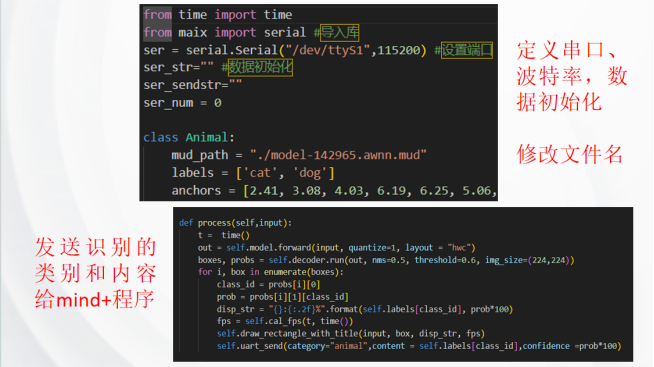
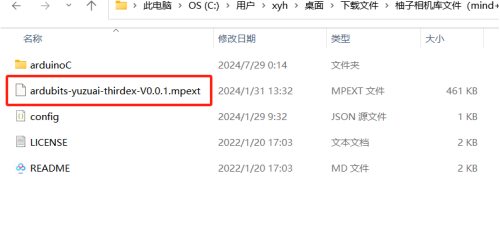
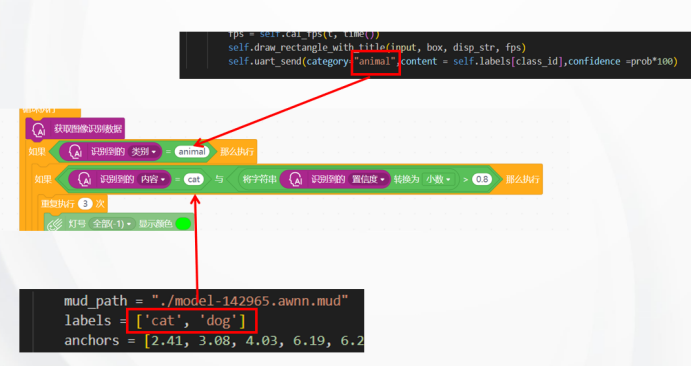
打开下载的模型文件,打开main.py文件。main文件用Studio Code软件打开。修改文件里这几部分,定义串口、波特率,数据初始化,修改文件名,发送识别的类别和内容给mind+程序。修改好文件保存了,柚子相机连接电脑,出现一个U盘。打开U盘,将修改后的main文件和压缩包里其他文件全部拷贝到U盘app文件夹里。删除app里全部文件再拷进去,弹出U盘。
三、Mind+程序编写
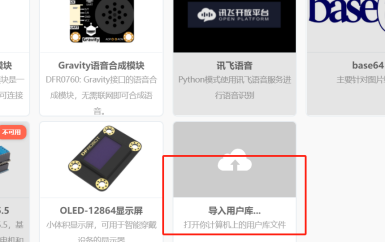
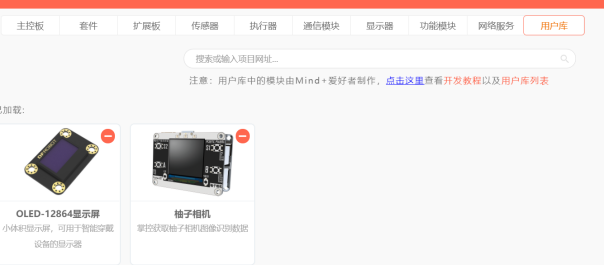
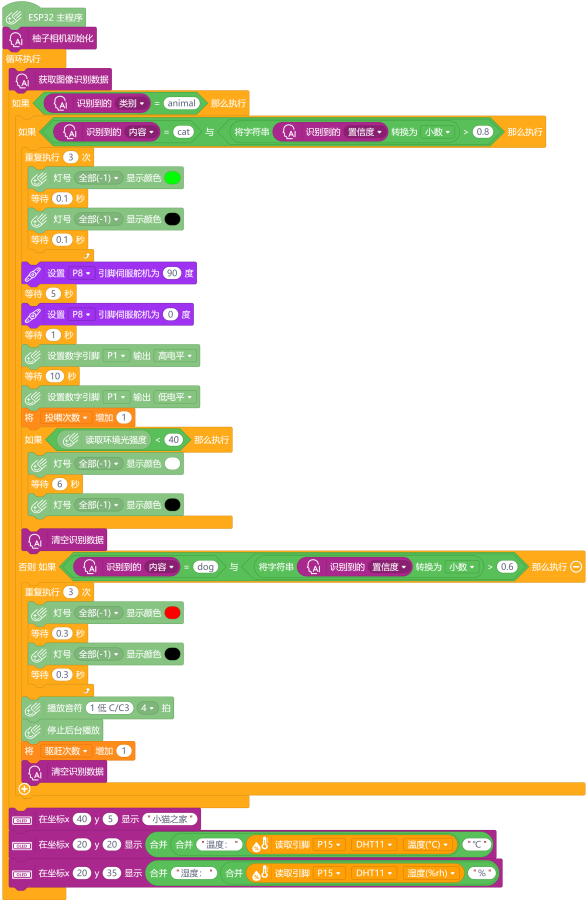
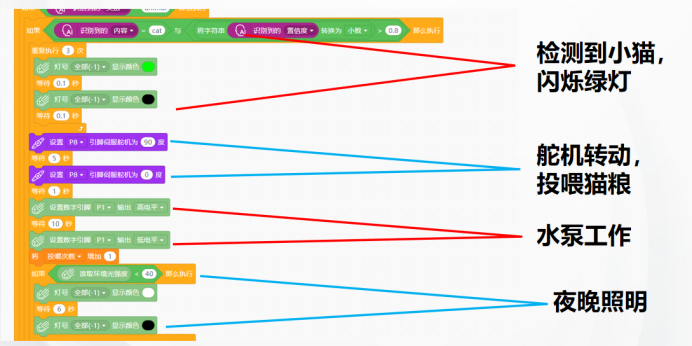
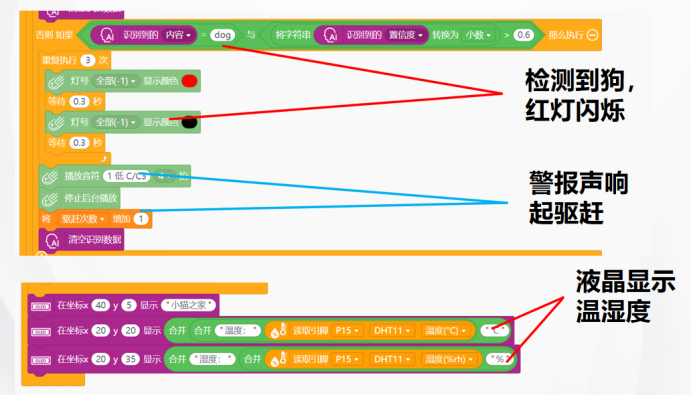
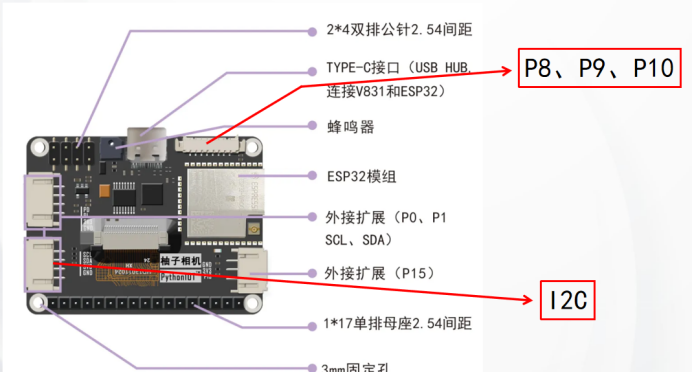
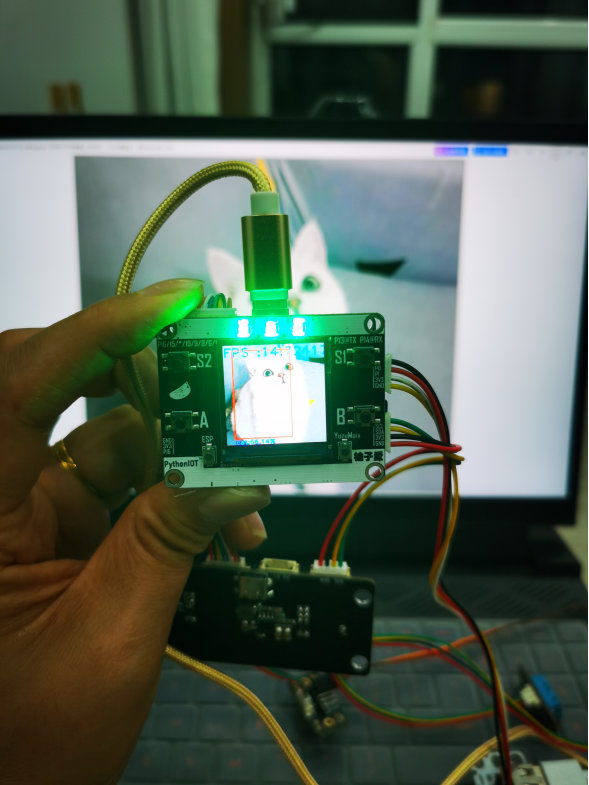
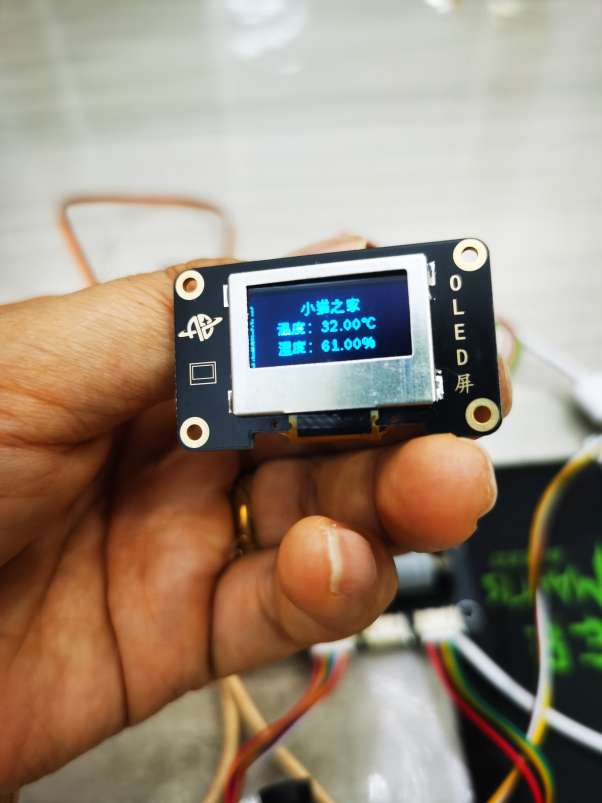
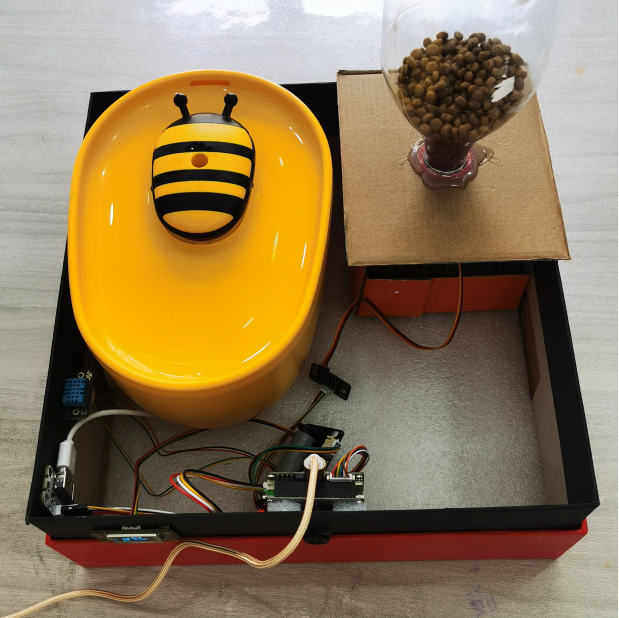
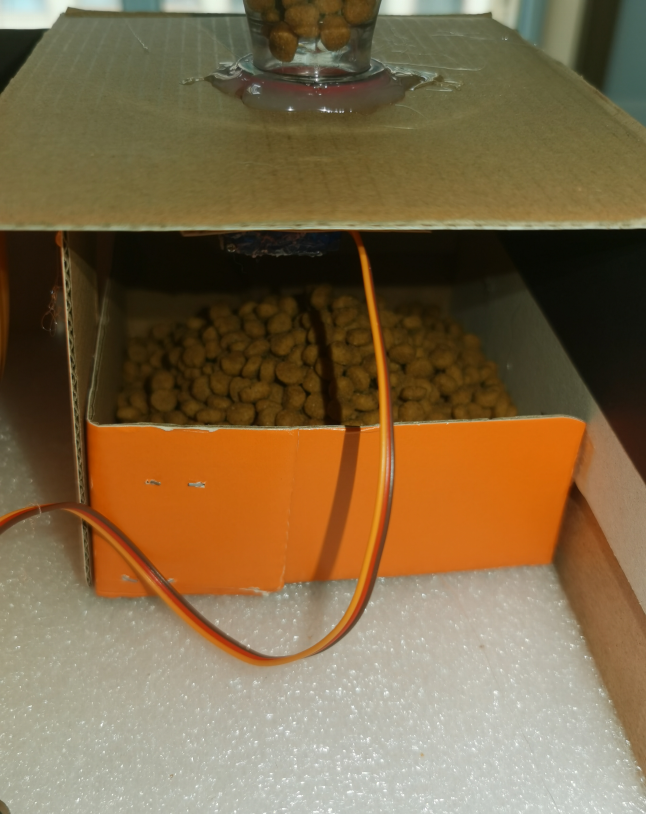
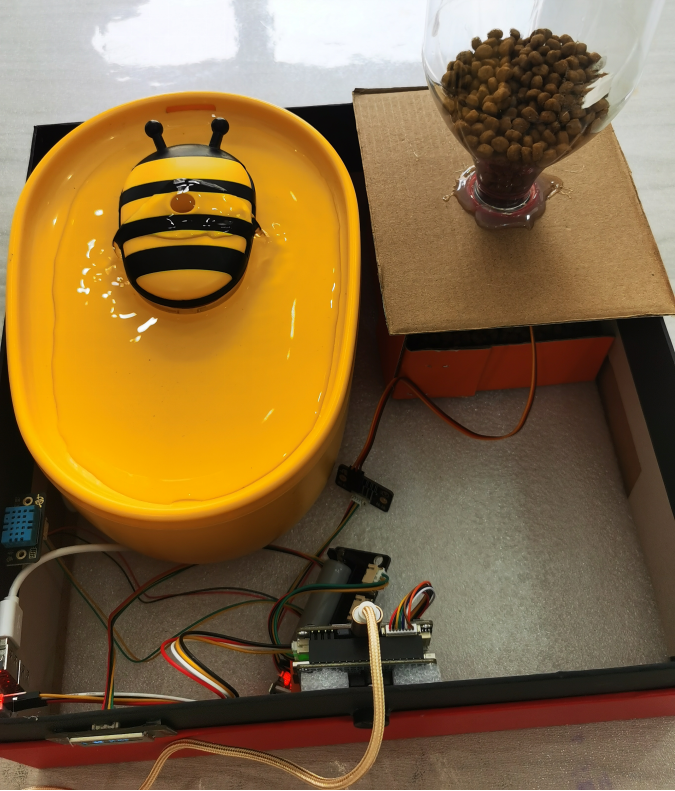
第三部分,打开mind+软件主控板选择掌控板,用户库选择导入用户库。打开库文件选择ardubits-yuzuai-thirdex-V0.0.1.mpext文件。出现柚子相机图片,另外我添加了12864液晶屏,直接搜索OLDE就可以出现。Mind+编程时用掌控板来编程调用相机中的数据。这张图片是我编写的mind+程序,识别类别对应main文件“animal”,识别内容对应标签cat和dog。识别到小猫功能有闪烁绿灯,舵机转动、投喂猫粮,水泵工作,夜晚照明四个功能。这个案例我想的可以是救助流浪小猫,也可以是家猫主人外出旅行用。家猫习惯了夜晚明亮的灯光,检测到有猫时照明开启。检测到狗,红灯闪烁,警报声响起驱赶小狗。这样做的目的是想,小区里小狗都是有主人的,不要来给小猫添乱。最后是12864液晶显示温湿度功能。

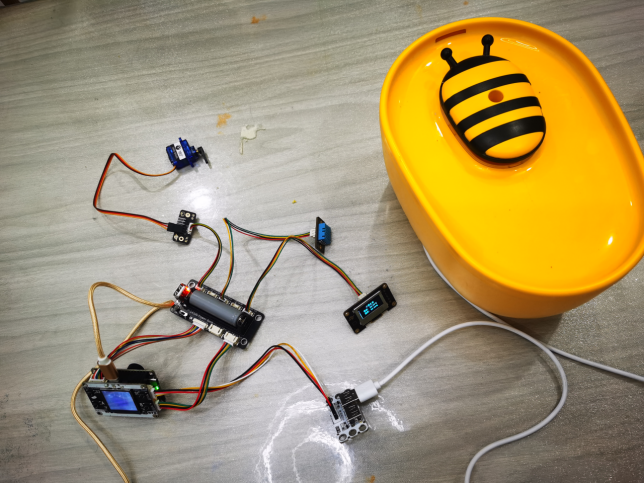
四、硬件调试
接上硬件后,效果还是蛮好的。用小猫照片检测,绿灯闪烁。舵机转动投喂猫粮,水泵工作。夜间是检测到小猫,LED灯会发出白色的光用于照明。用我家的银渐层,硬件相应非常迅速,比照片要快。蓝猫看到设备有吃的,主动凑过来吃,让我给赶走了。这个案例还是很成功的!

from time import time
from maix import serial #导入库
ser = serial.Serial("/dev/ttyS1",115200) #设置端口
ser_str="" #数据初始化
ser_sendstr=""
ser_num = 0

class Animal:
    mud_path = "./model-142965.awnn.mud"
    labels = ['cat', 'dog']
    anchors = [2.41, 3.08, 4.03, 6.19, 6.25, 5.06, 3.13, 4.56, 4.56, 3.66]

    def __init__(self) -> None:
        from maix import nn
        self.model = nn.load(self.mud_path)
        from maix.nn import decoder
        self.decoder = decoder.Yolo2(len(self.labels) , self.anchors , net_in_size = (224, 224) ,net_out_size = (7,7))

    def __del__(self):
        del self.model
        del self.decoder

    def cal_fps(self ,start , end):
        one_second = 1
        one_flash = end - start
        fps = one_second / one_flash
        return  fps

    def draw_rectangle_with_title(self ,img, box, disp_str , fps ):
        img.draw_rectangle(box[0], box[1], box[0] + box[2], box[1] + box[3],color=(255, 0, 0), thickness=2)
        img.draw_string(box[0], box[1]+ box[3] ,disp_str, scale=1,color=(0, 0, 255), thickness=2)
        img.draw_string(0, 0 ,'FPS :'+str(fps), scale=2 ,color=(0, 0, 255), thickness=2)

    def uart_send(self,category,content,x="0",y= "0",size ="0",confidence ="0"):
        global ser_str,ser_sendstr,ser_num,ser
        ser_num +=1
        if ser_num >=10:
            ser_str = str(category)+"*"+"x:"+str(x)+"*"+"y:"+str(y)+"*"+str(size)+"*"+str(content)+"*"+str(confidence)+"*#"
            ser_sendstr = "YZ*"+str(len(ser_str))+"*"+ser_str
            ser.write(ser_sendstr.encode("utf-8"))
            ser_num = 0


    def process(self,input):
        t =  time()
        out = self.model.forward(input, quantize=1, layout = "hwc")
        boxes, probs = self.decoder.run(out, nms=0.5, threshold=0.6, img_size=(224,224))
        for i, box in enumerate(boxes):
            class_id = probs[i][0]
            prob = probs[i][1][class_id]
            disp_str = "{}:{:.2f}%".format(self.labels[class_id], prob*100)
            fps = self.cal_fps(t, time())
            self.draw_rectangle_with_title(input, box, disp_str, fps)
            self.uart_send(category="animal",content = self.labels[class_id],confidence =prob*100)


def main():
    from maix import display, camera
    global Animal
    app =  Animal()
    while True:
        img = camera.capture().resize(size=(224,224))
        app.process(img)
        display.show(img)

main()


 他的勋章
他的勋章


罗罗罗2024.10.13
太厉害了