 返回首页
返回首页
 回到顶部
回到顶部

1、使用浦育的在线可视化工具训练模型得到onnx格式的通用模型文件;
2、在Mind+中使用xedu-hub图形化扩展进行推理得到手势结果;
3、当摄像头识别到石头、剪子、布等手势图形控制Yeelight 智能灯的开关和颜色
一、训练ONNX模型
1、采集数据
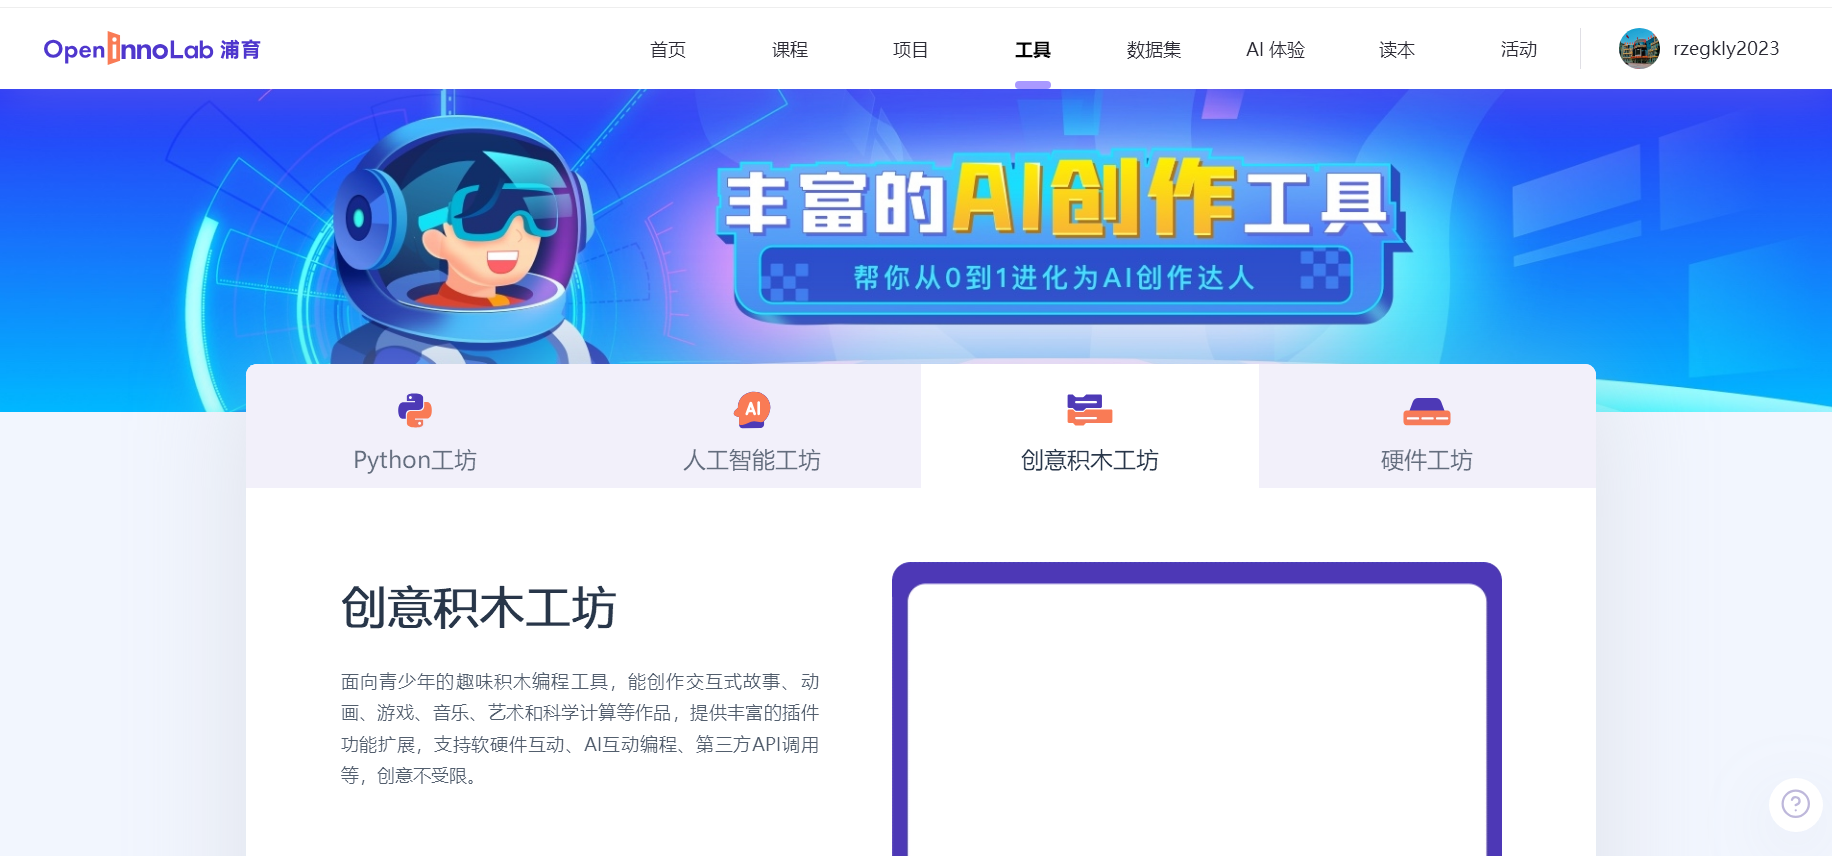
(1).登录上海人工智能浦育平台,进入在线工具,创意积木工坊。
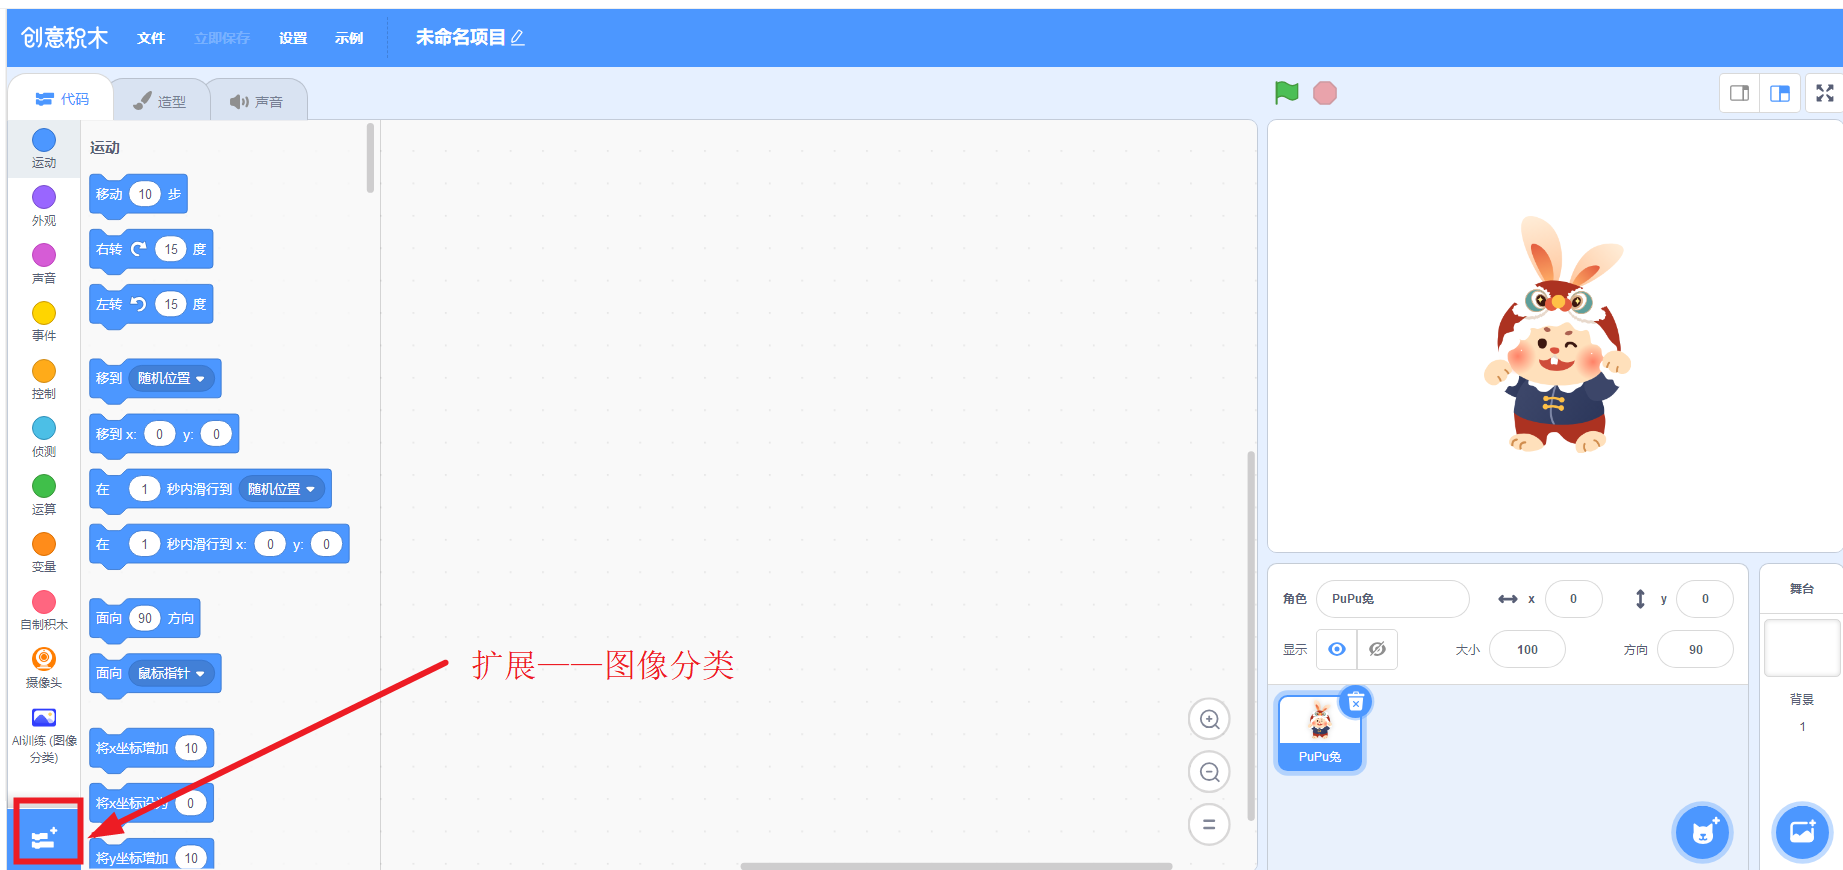
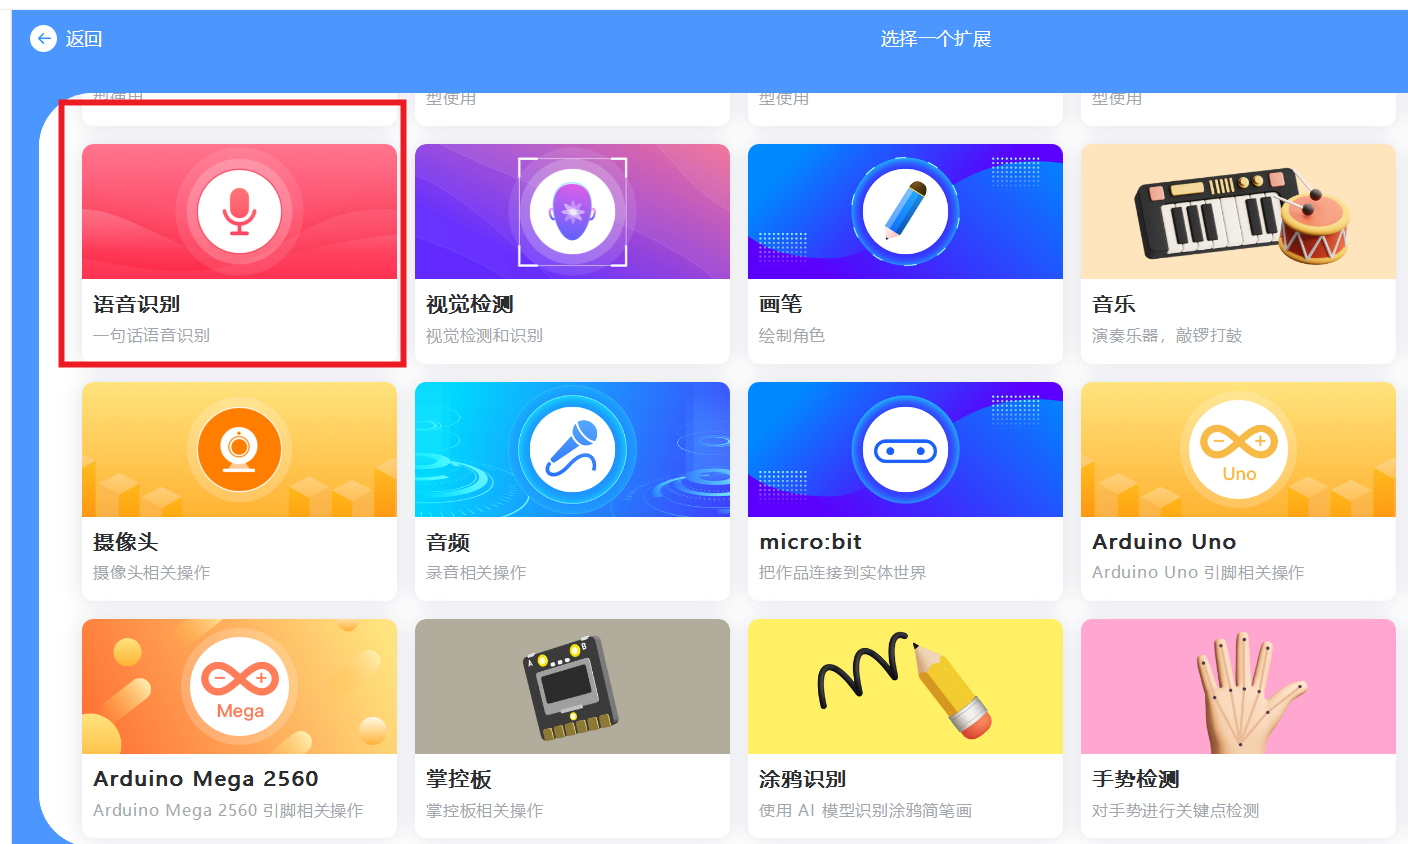
(2).在创意积木工坊左下角——扩展模块——图像分类——添加AI训练工具。
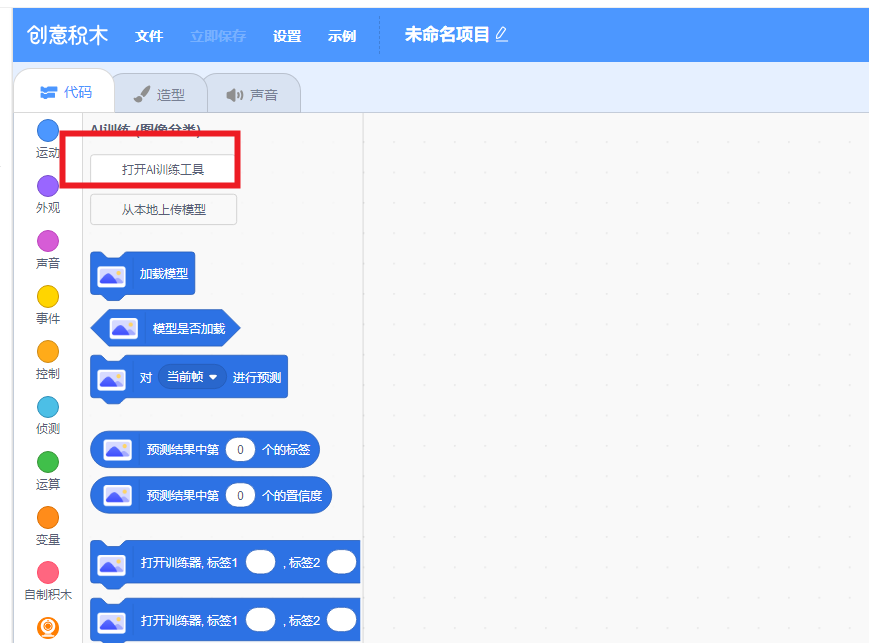
(3)打开AI训练工具,打开摄像头采集图像,准备采集手势图片
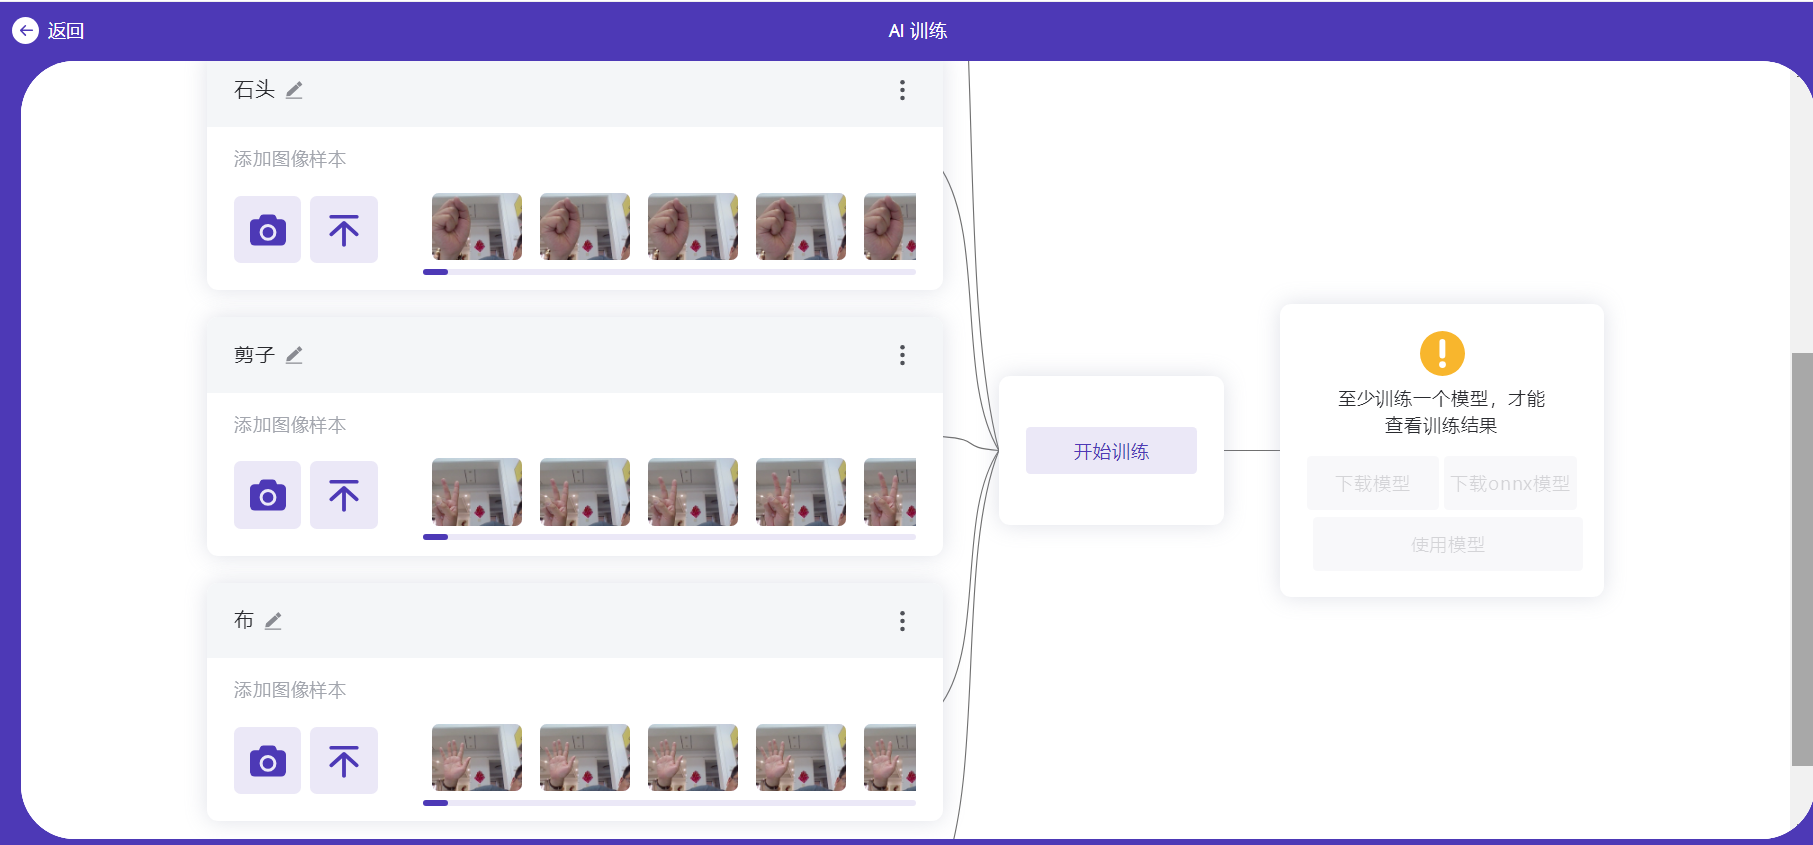
2.添加模型训练数据标签
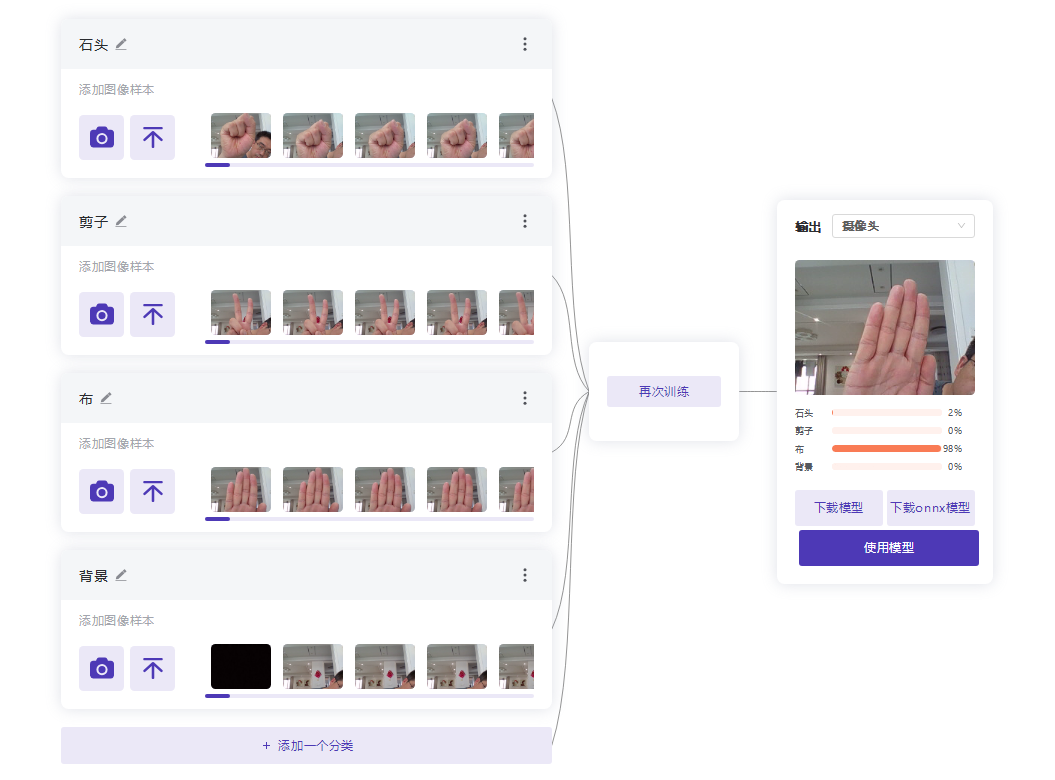
(1)设置四个标签,分别是:标签1-背景,标签2-石头,标签3-剪子;标签4-布,
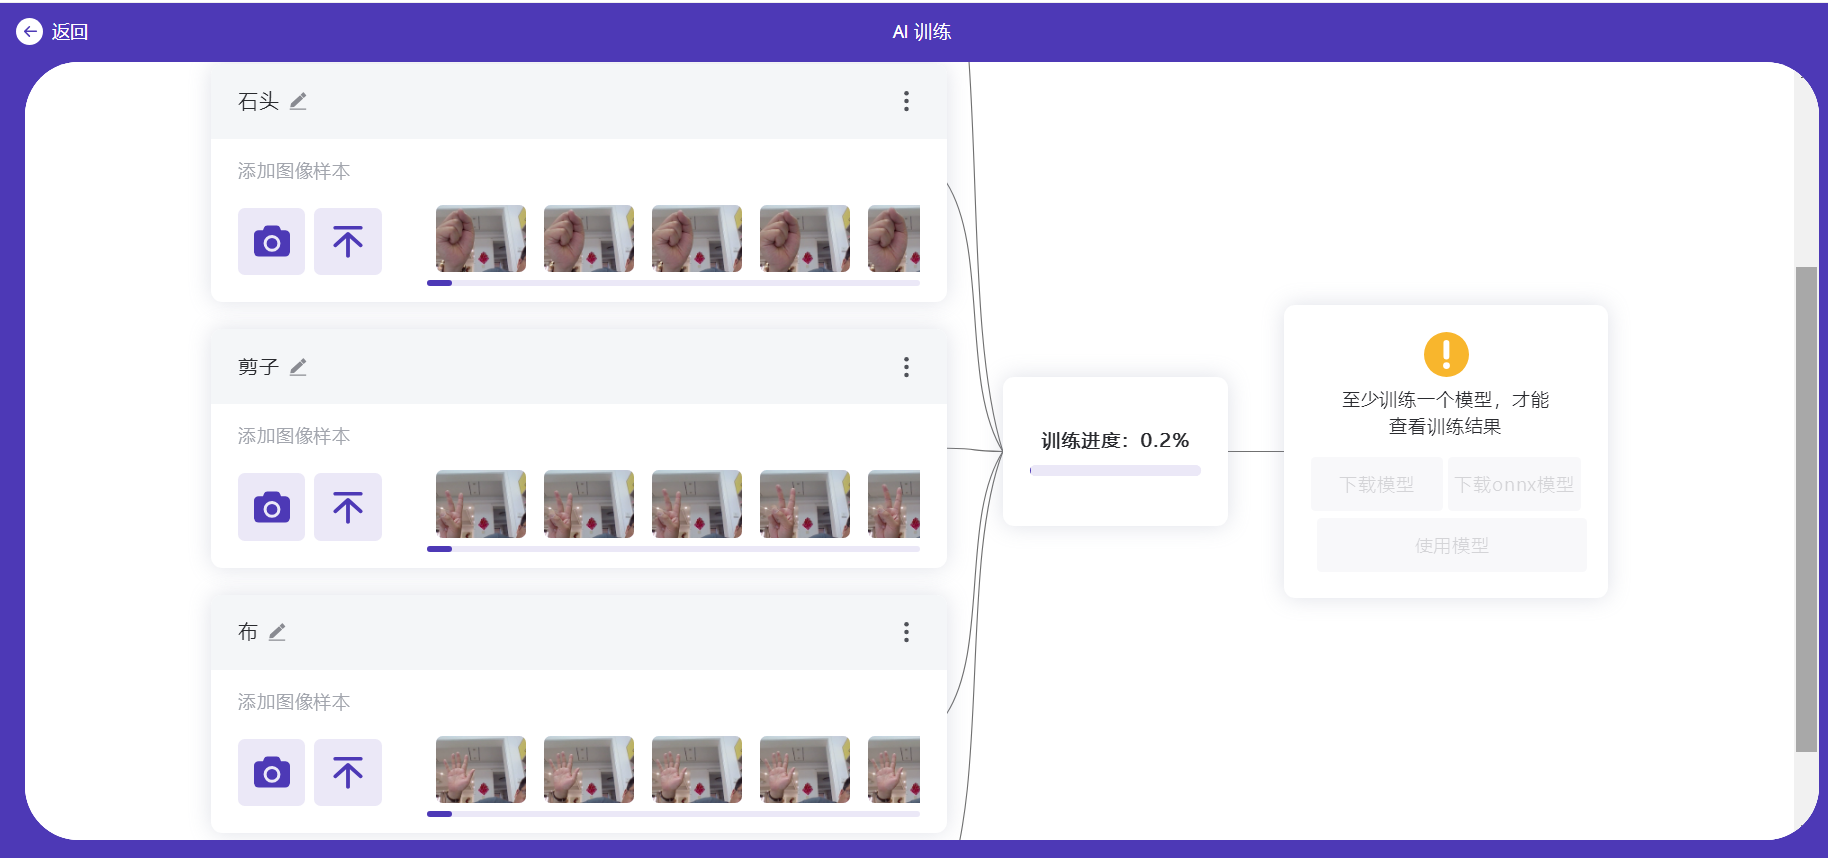
(2)训练模型

(3)在线实时测试识别手势效果
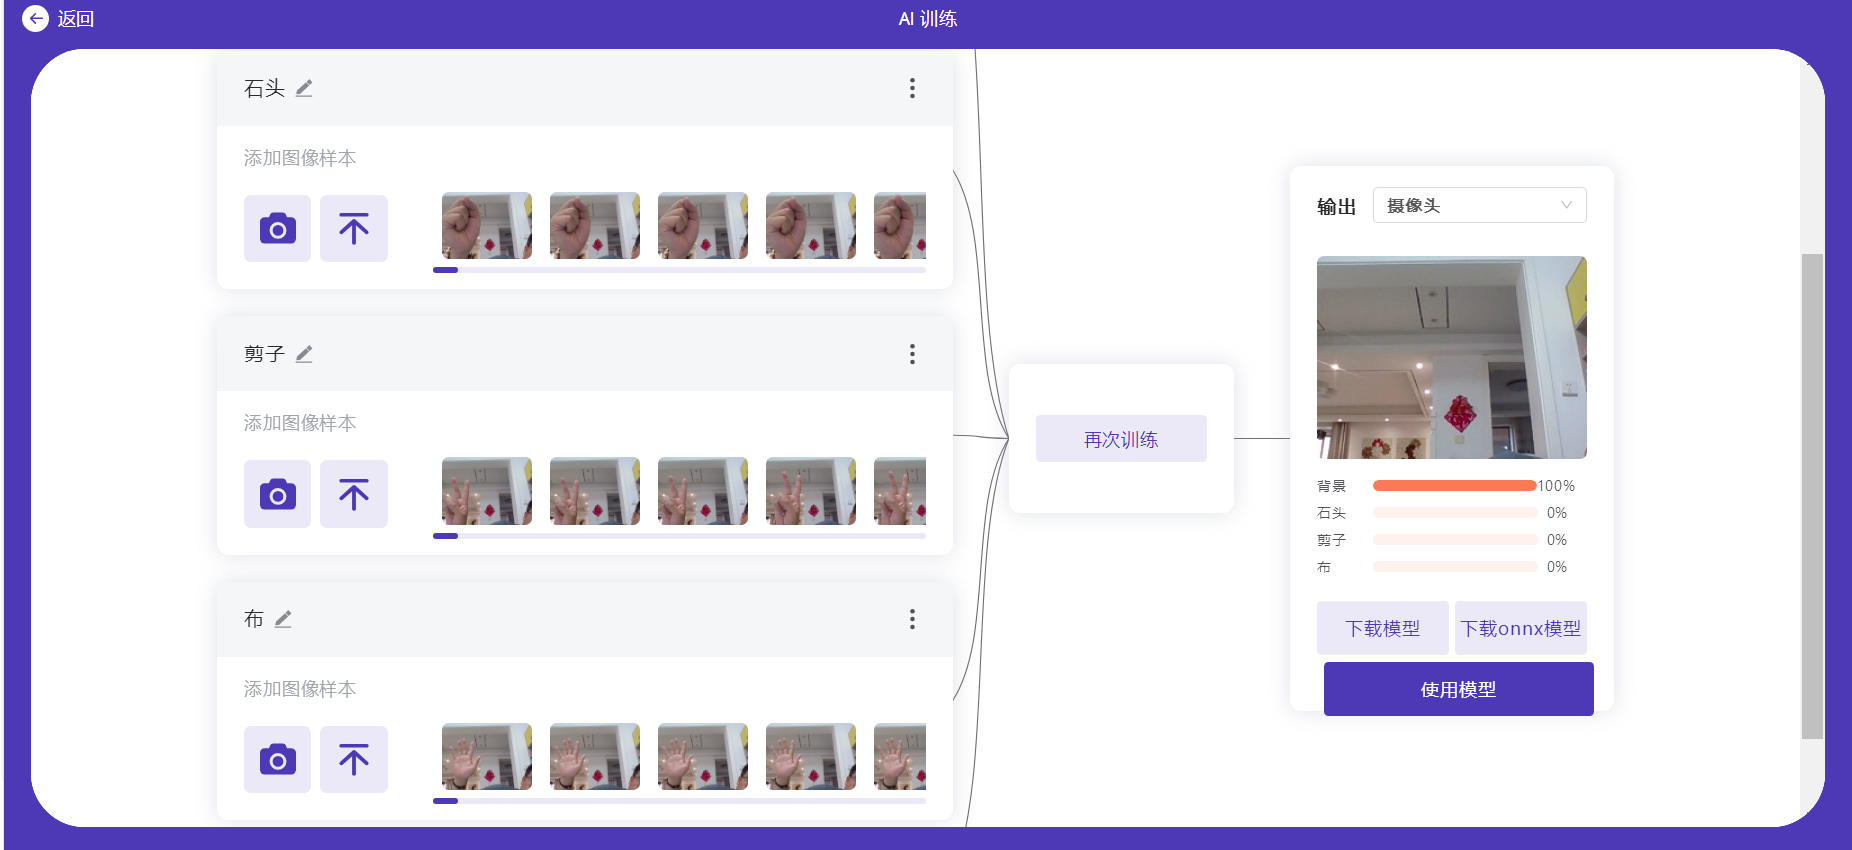
(4)在线测试效果正常后,下载ONNX模型
二、在Mind+ 行空板上进行手势推理
1.准备推理手势
(1)行空板通过USB线连接电脑,点击菜单中的“连接远程设备”,直到连接成功,
在Mind+右下角终端后面显示“行空板”说明连接成功。
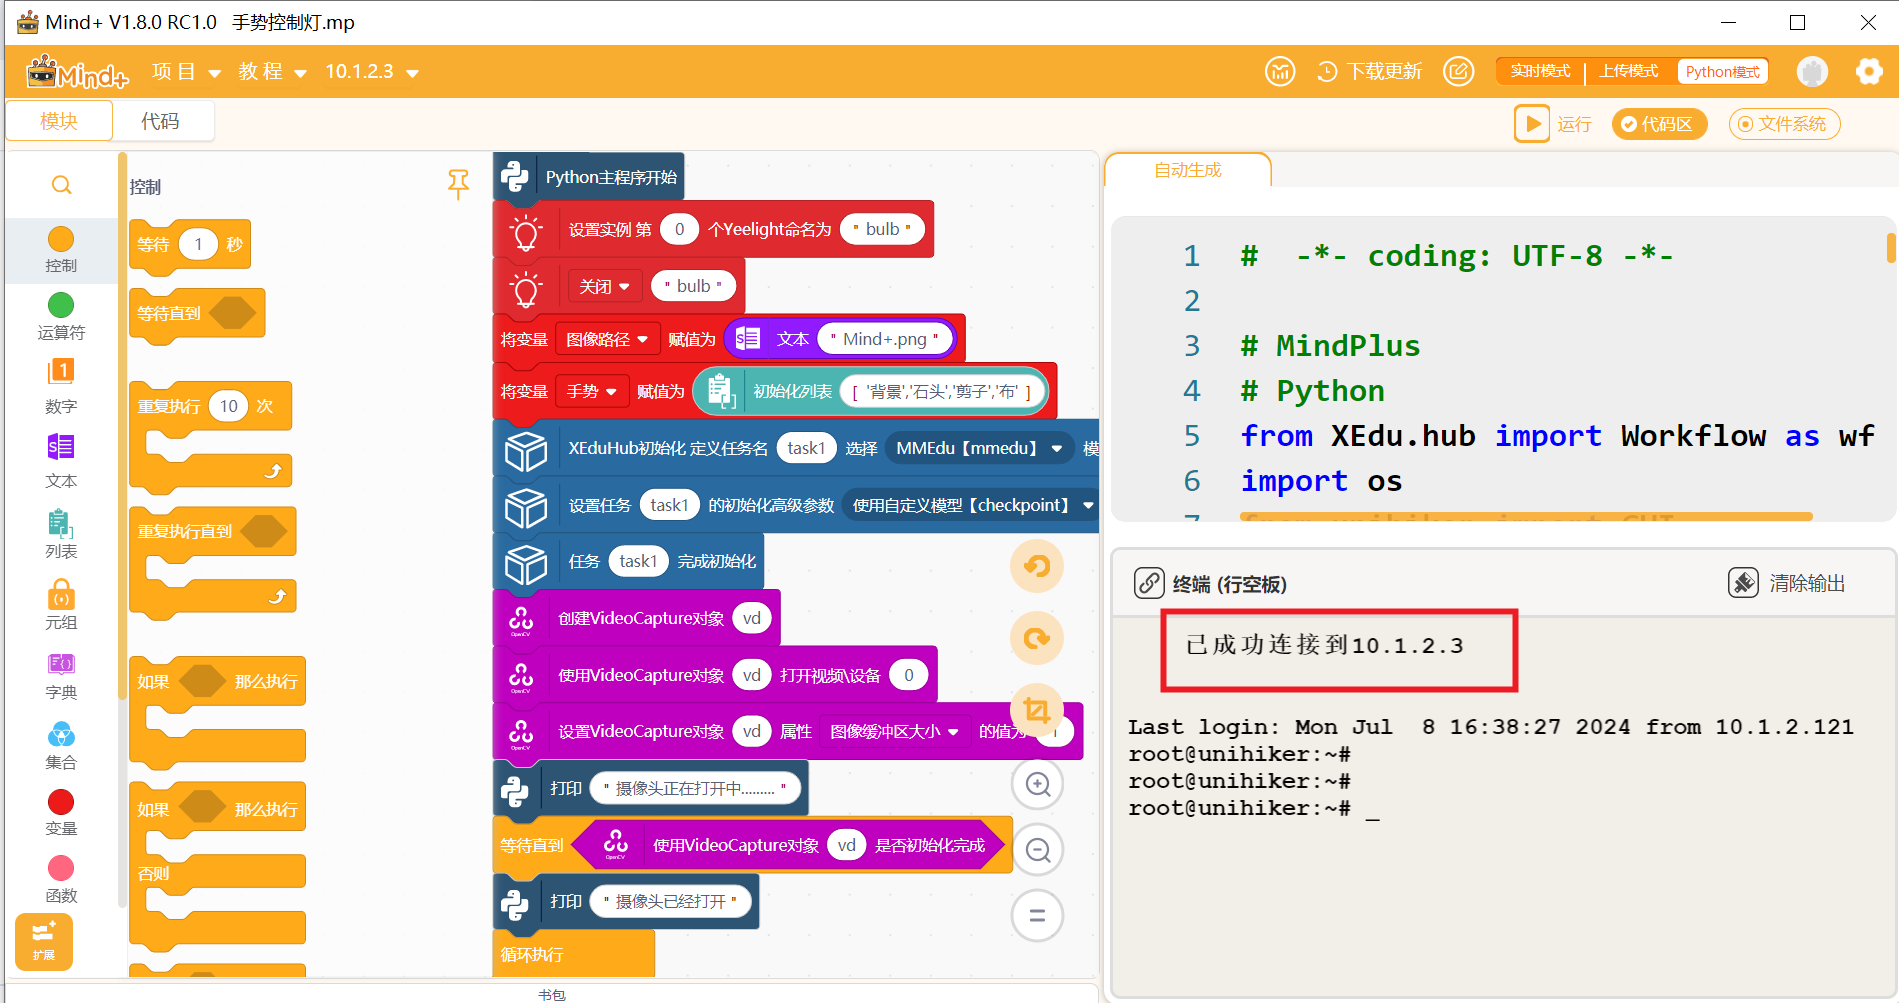
(2).登录http://10.1.2.3,进入行空板,行空板先连接WiFI进行联网,
注意:行空板开机之后需要约40秒才能连接,

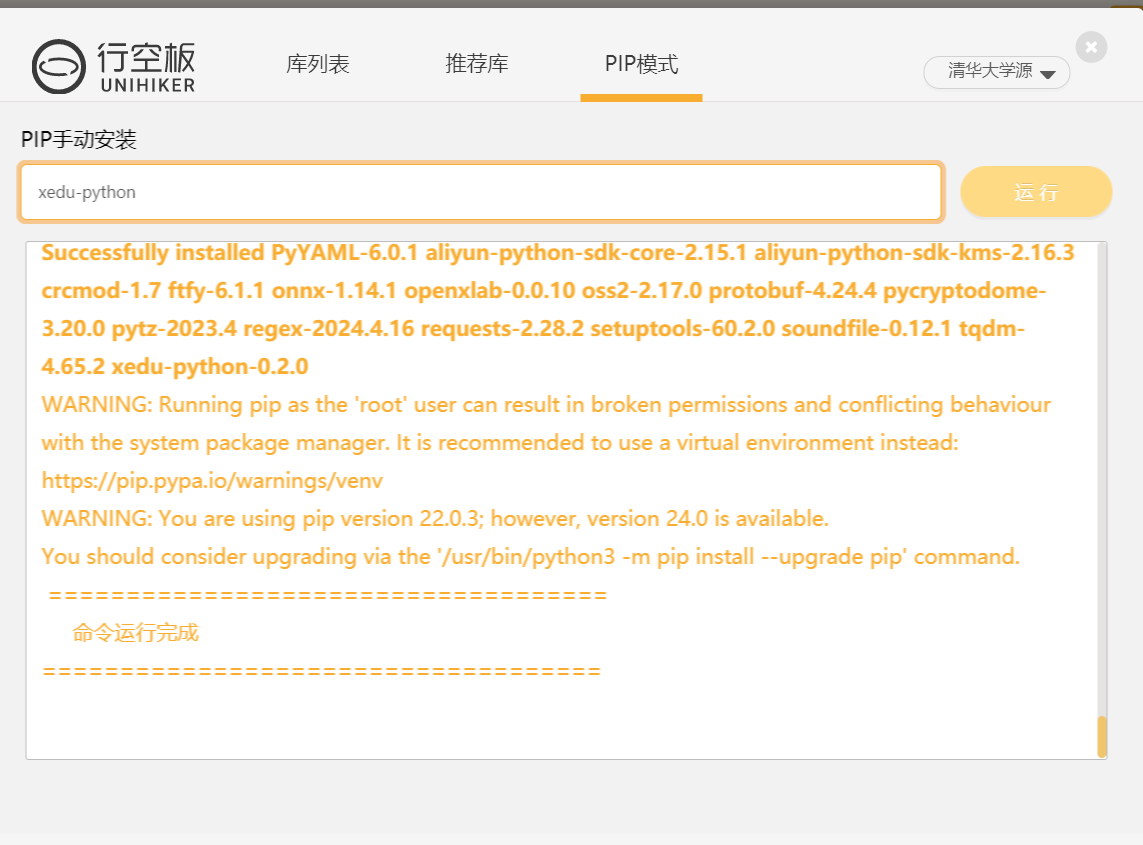
(3)在行空板上安装xedu库
由于代码在行空板上运行,因此需要在行空板上安装xedu库,因此需要让行空板可以上网.
切换到“代码”版块,点击“库管理”,在PIP模式中输入xedu-python后点击运行,等待运行结束(提示“命令运行完成”)之后返回“模块”编程界面。
(5).加载相关积木脚本
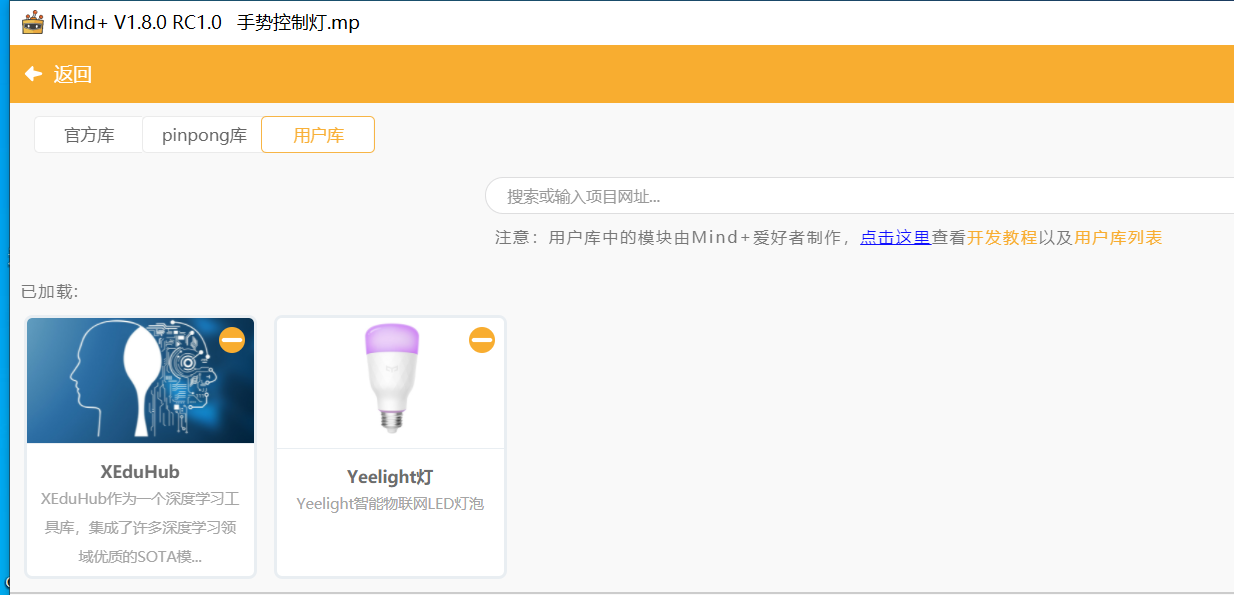
在用户库中搜索xeduhub,加载XEduHub库和Yeelight库。
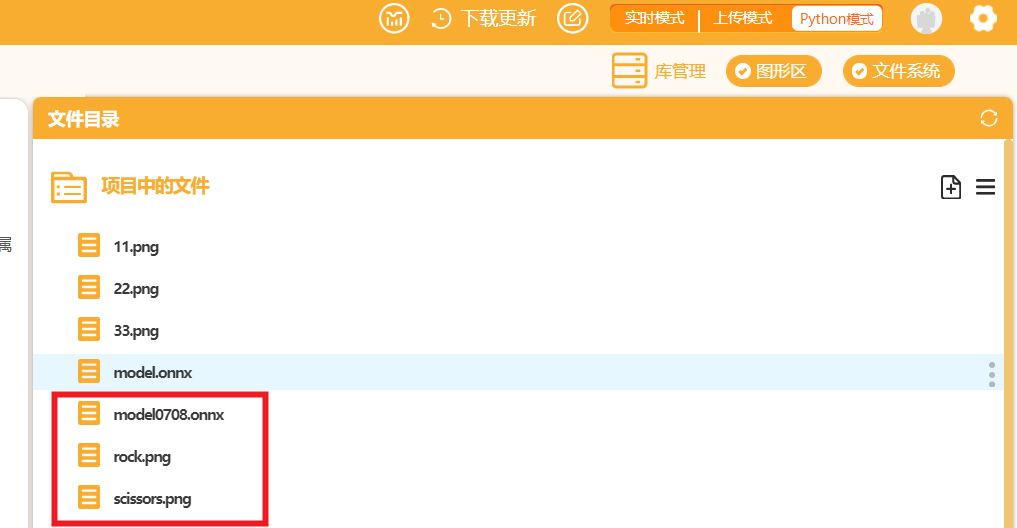
(6).加载模型
复制onnx0708模型文件到项目中,此处同时复制了一张测试用的图片rock.png,为推理模型准备
2. 程序编写
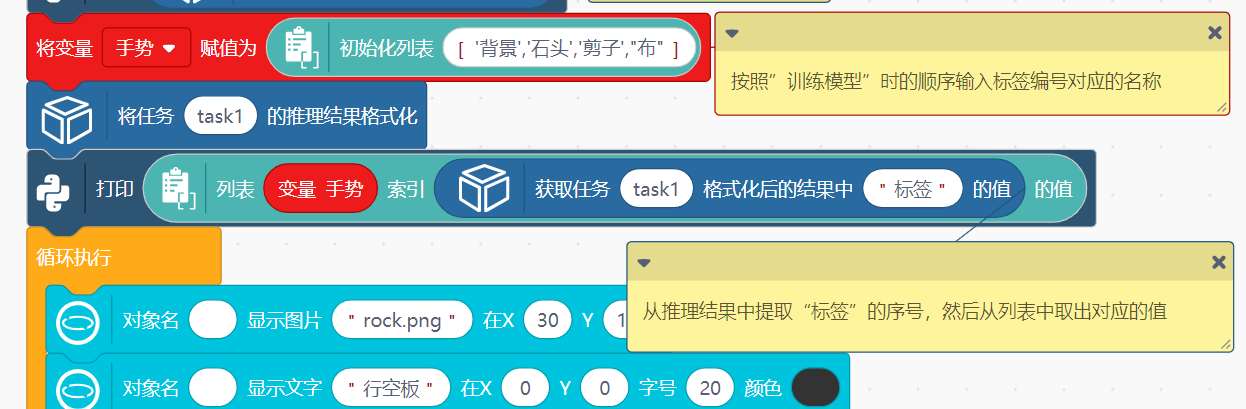
创建手势变量,按照”训练模型”时的顺序输入标签编号对应的名称:背景 石头 剪子 布。
从推理结果中提取“标签”的序号,然后从列表中取出对应的值
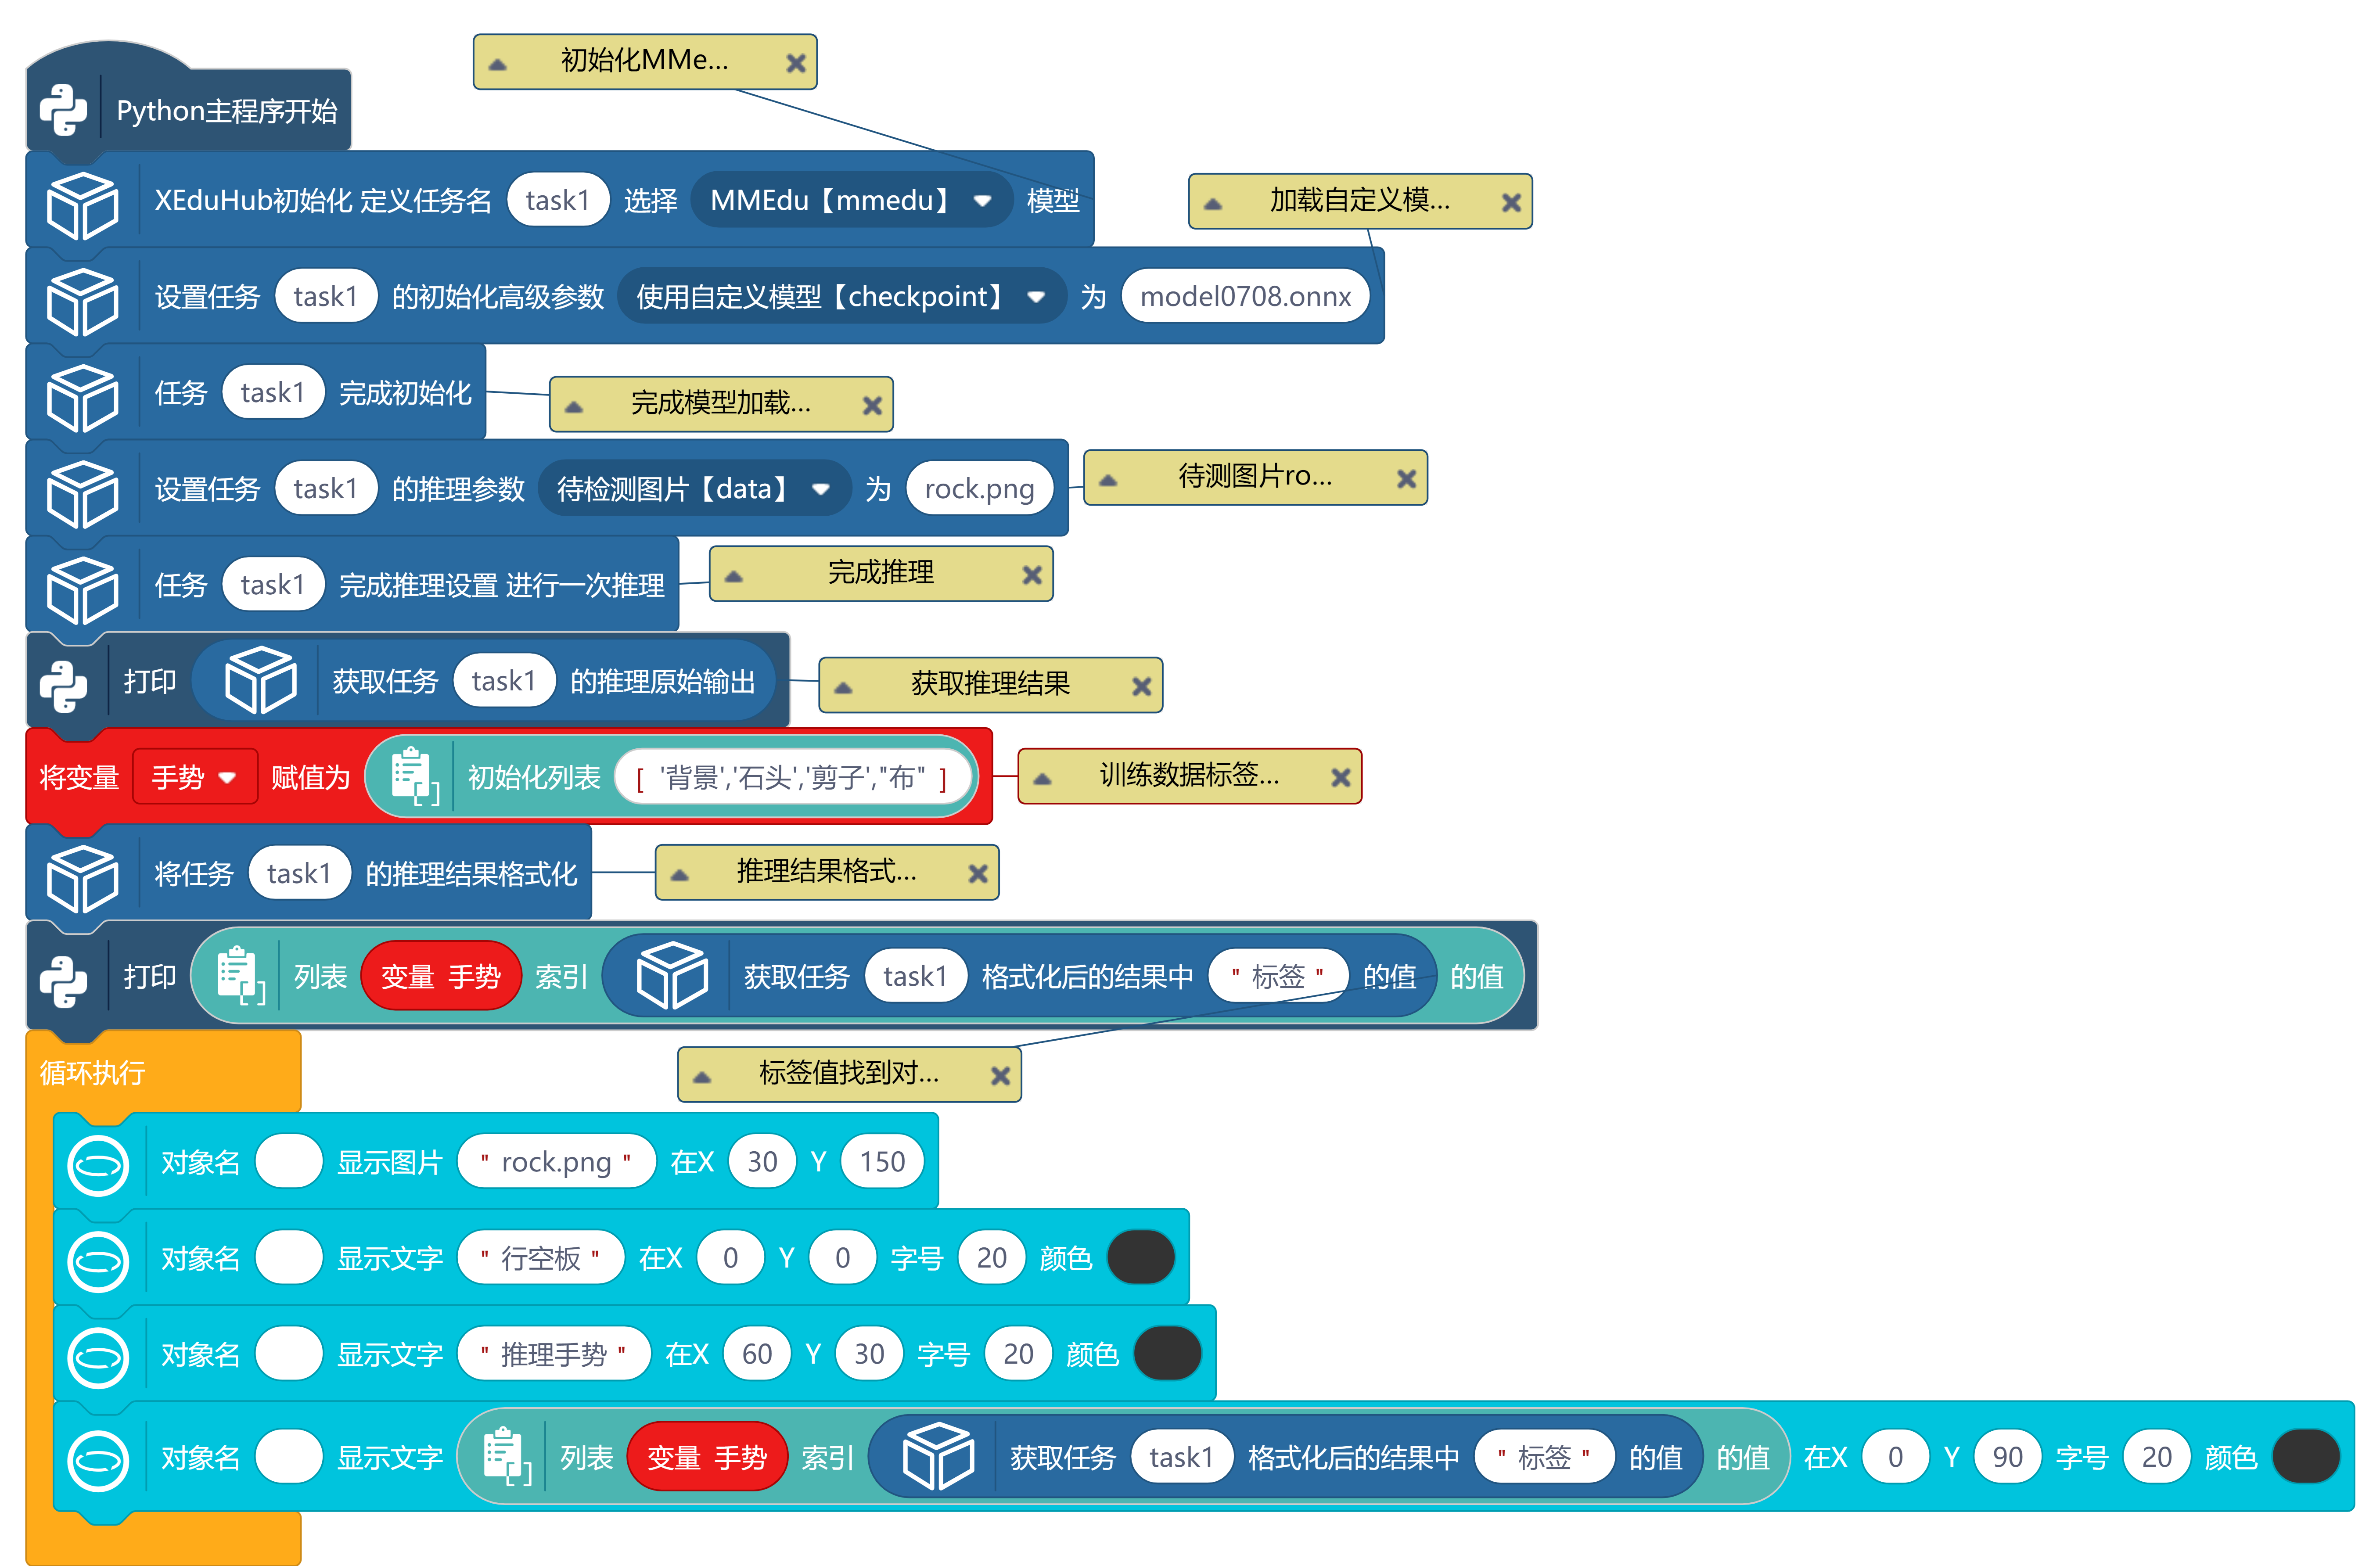
手势推理图形脚本
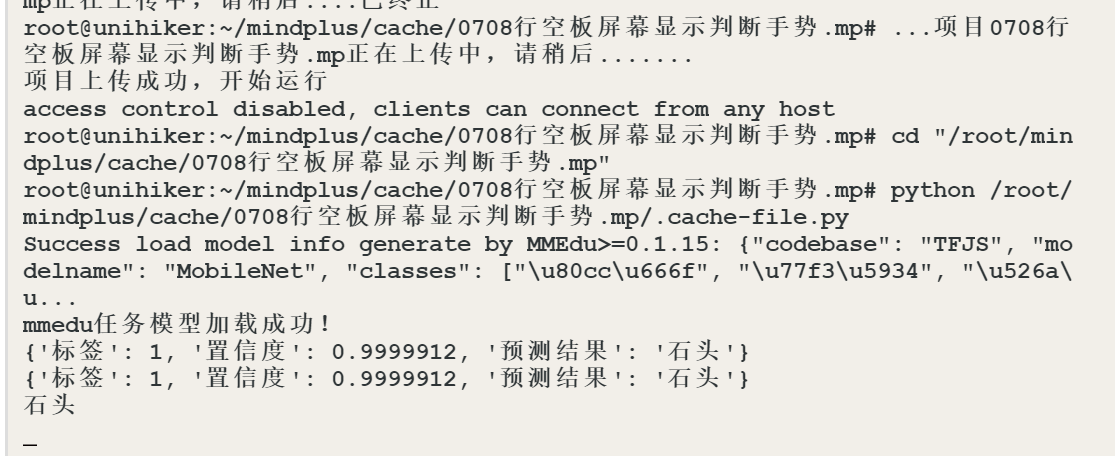
远程终端串口窗口信息
# -*- coding: UTF-8 -*-
# MindPlus
# Python
from XEdu.hub import Workflow as wf
import os
from unihiker import GUI
import sys
import re
def format_valve_output(task):
try:
output_result = ""
output_result = task.format_output(lang="zh")
return output_result
except AttributeError:
return "AttributeError: 请检查输入数据是否正确"
u_gui=GUI()
# 初始化MMedu模型
para_task1 = {}
init_para_task1 = {"task":"mmedu"}
# 加载自定义模型model0708.onnx
init_para_task1["checkpoint"] = "model0708.onnx"
# 完成模型加载初始化
task1 = wf(**init_para_task1)
# 待测图片rock,png
para_task1["data"] = "rock.png"
# 完成推理
if 'task1' in globals() or 'task1' in locals():
rea_result_task1 = task1.inference(**para_task1)
else:
print("init",'task1')
task1 = wf(**init_para_task1)
rea_result_task1 = task1.inference(**para_task1)
print(# 获取推理结果
rea_result_task1)
# 训练数据标签存入变量手势中
ShouShi = ['背景','石头','剪子',"布"]
# 推理结果格式化
output_result_task1 = format_valve_output(task1)
print((ShouShi[# 标签值找到对应手势,推理结果存入变量手势
output_result_task1["标签"]]))
while True:
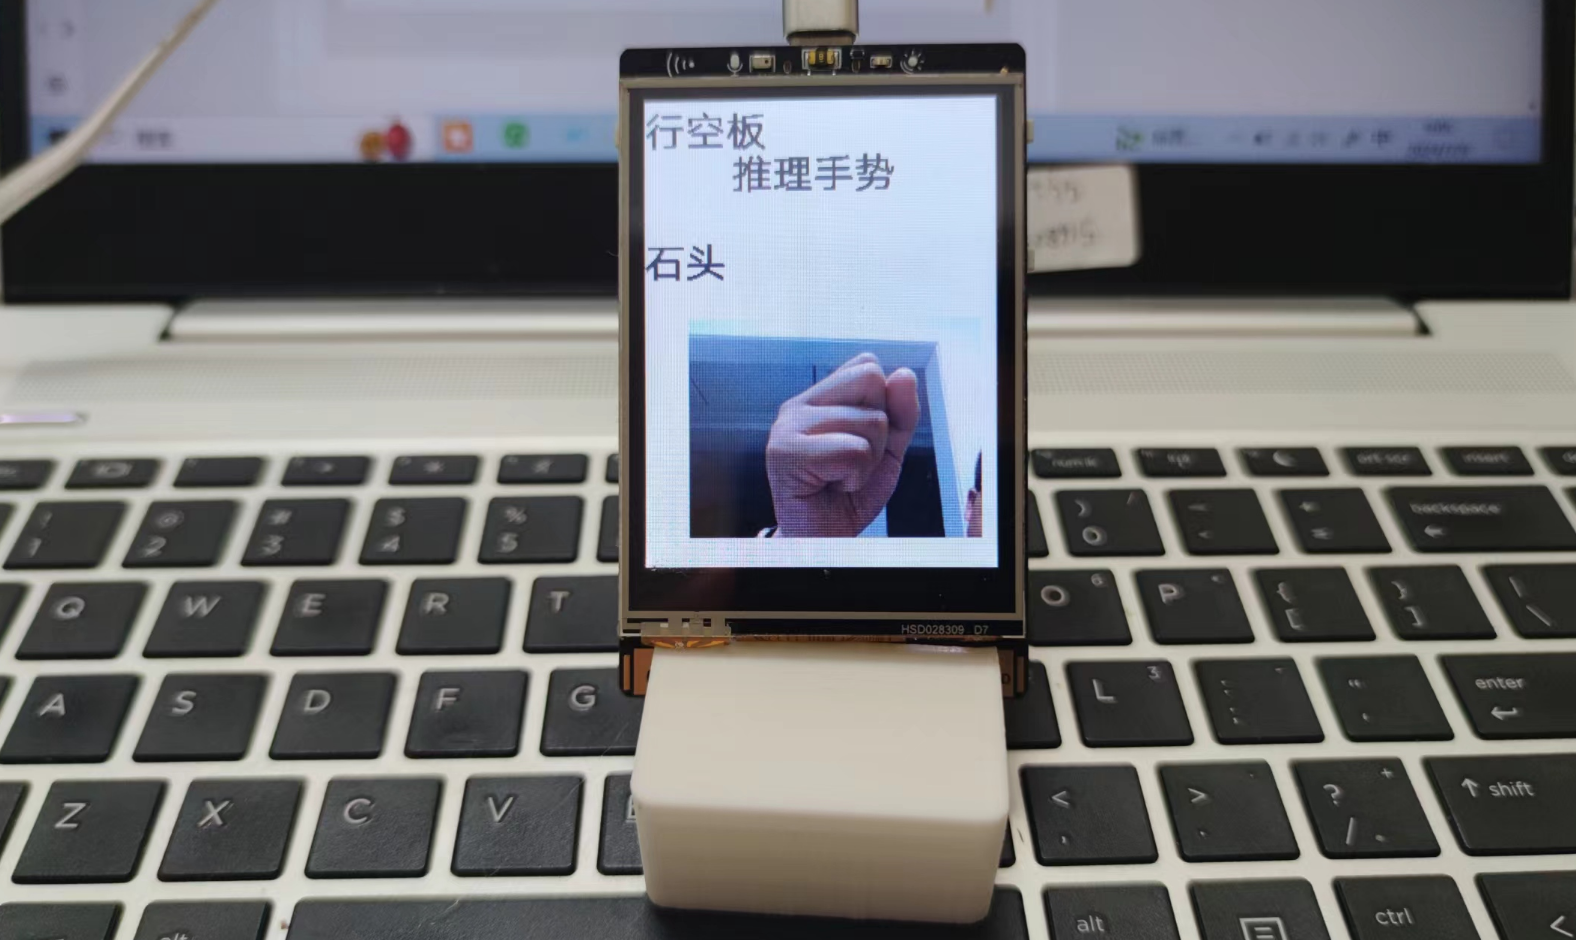
u_gui.draw_image(image="rock.png",x=30,y=150)
u_gui.draw_text(text="行空板",x=0,y=0,font_size=20, color="#333333")
u_gui.draw_text(text="推理手势",x=60,y=30,font_size=20, color="#333333")
u_gui.draw_text(text=(ShouShi[output_result_task1["标签"]]),x=0,y=90,font_size=20, color="#333333")
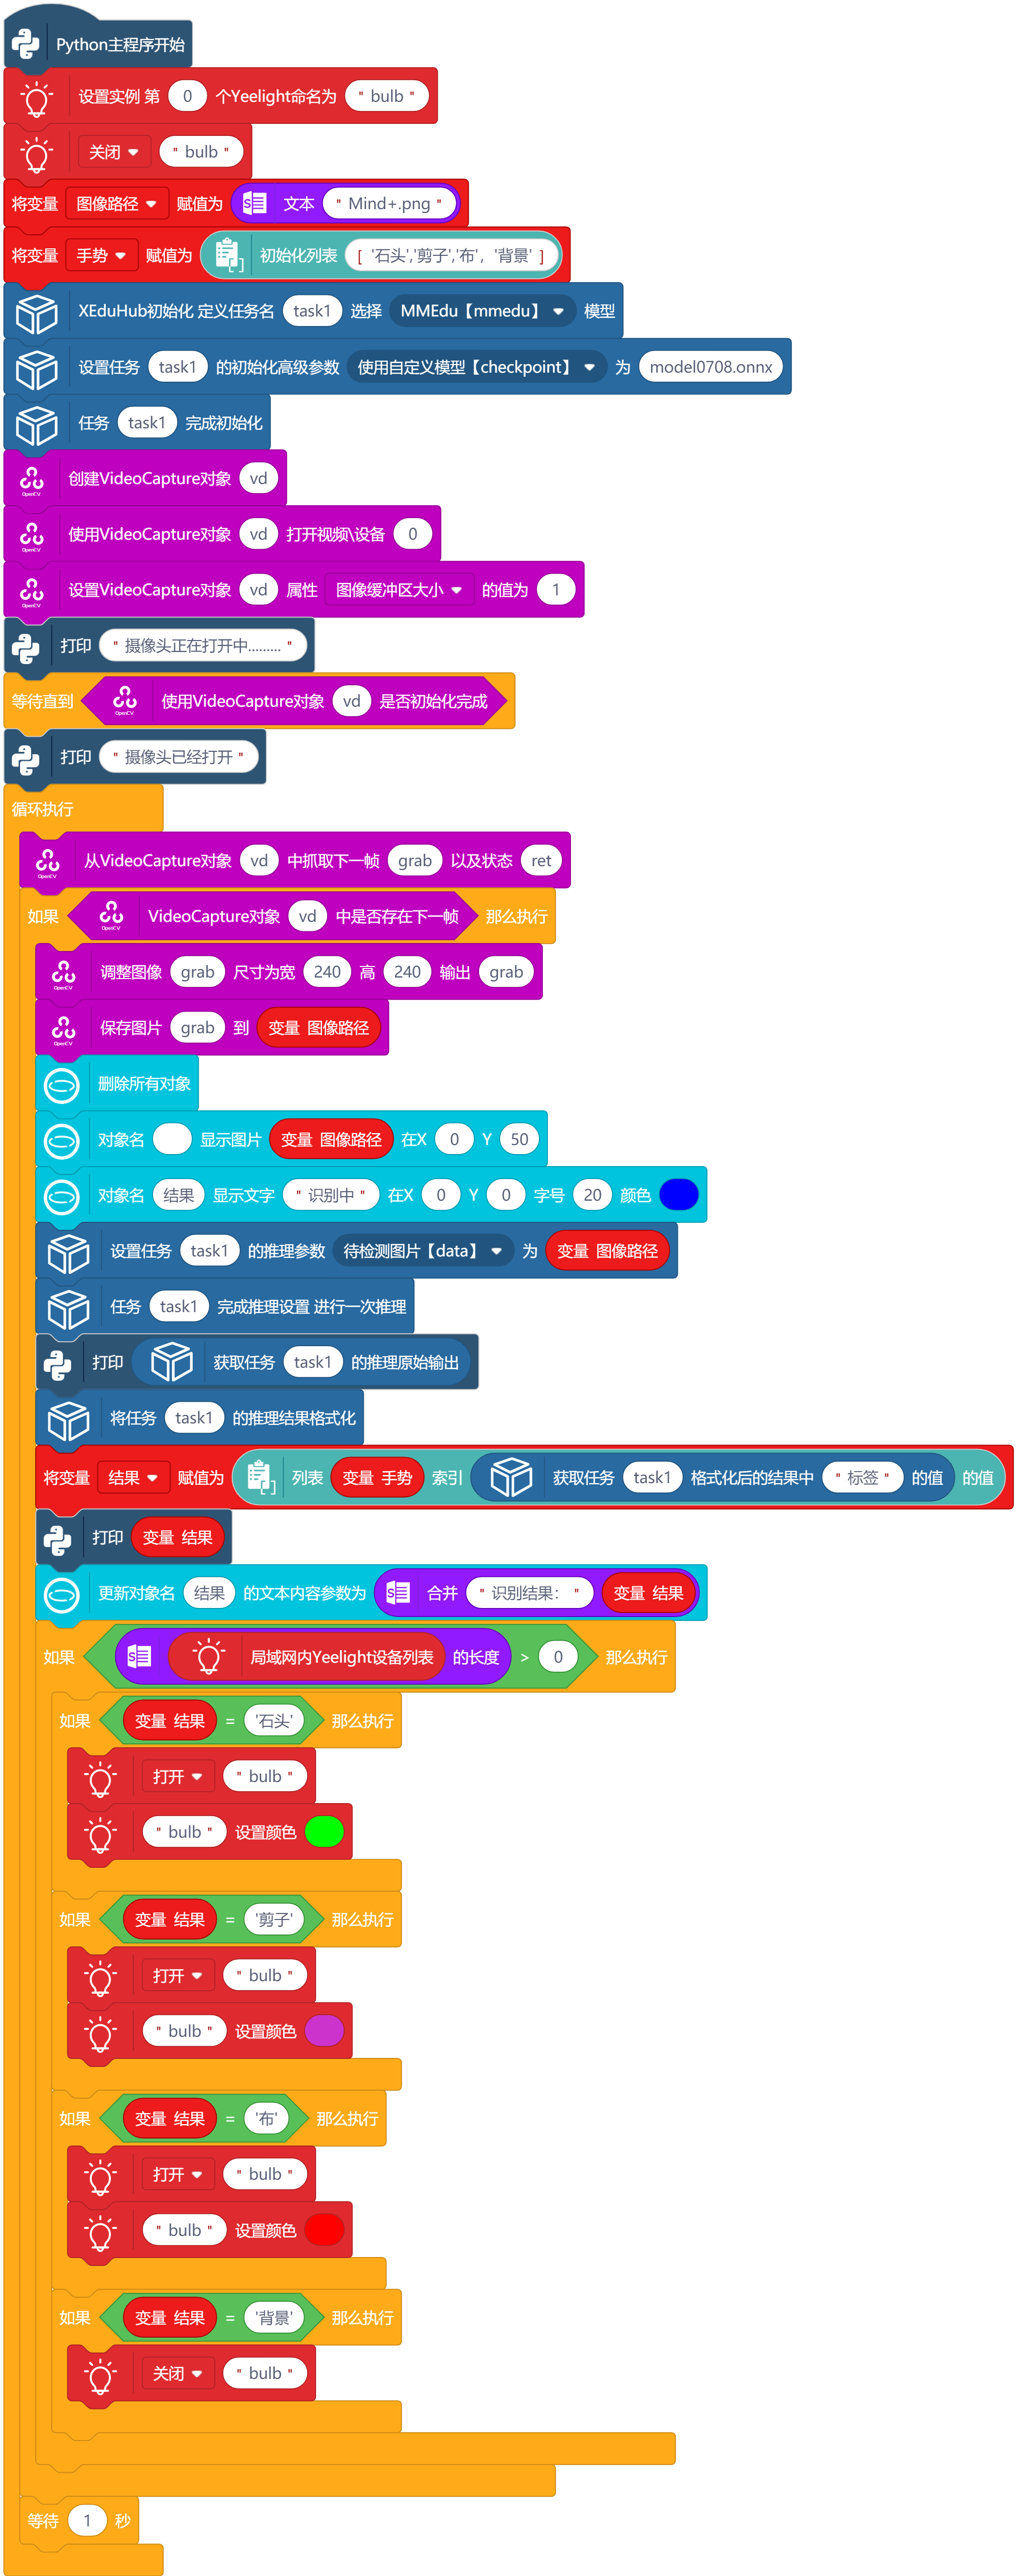
三、手势实时控制灯
步骤1 官方库添加OpenCV ,在用户库添加XEduHub 和 Yeelight灯
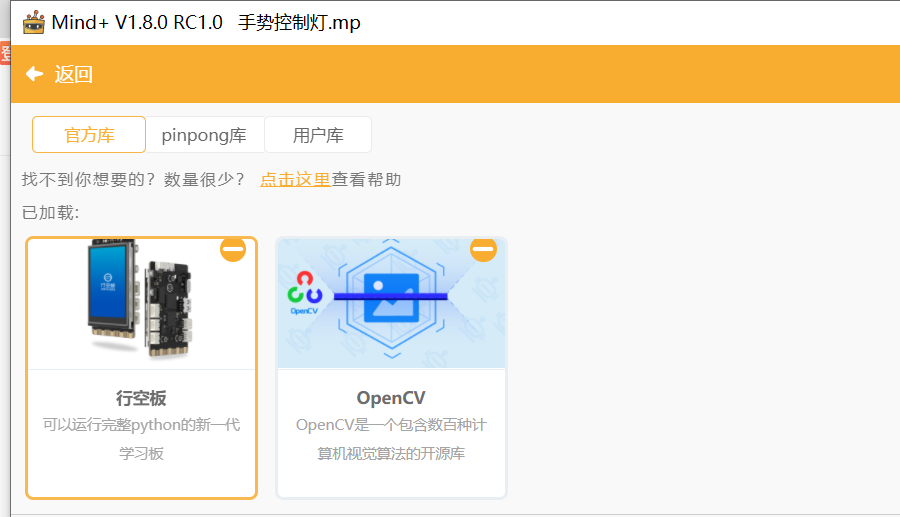
官方库加载行空板和OpenCV
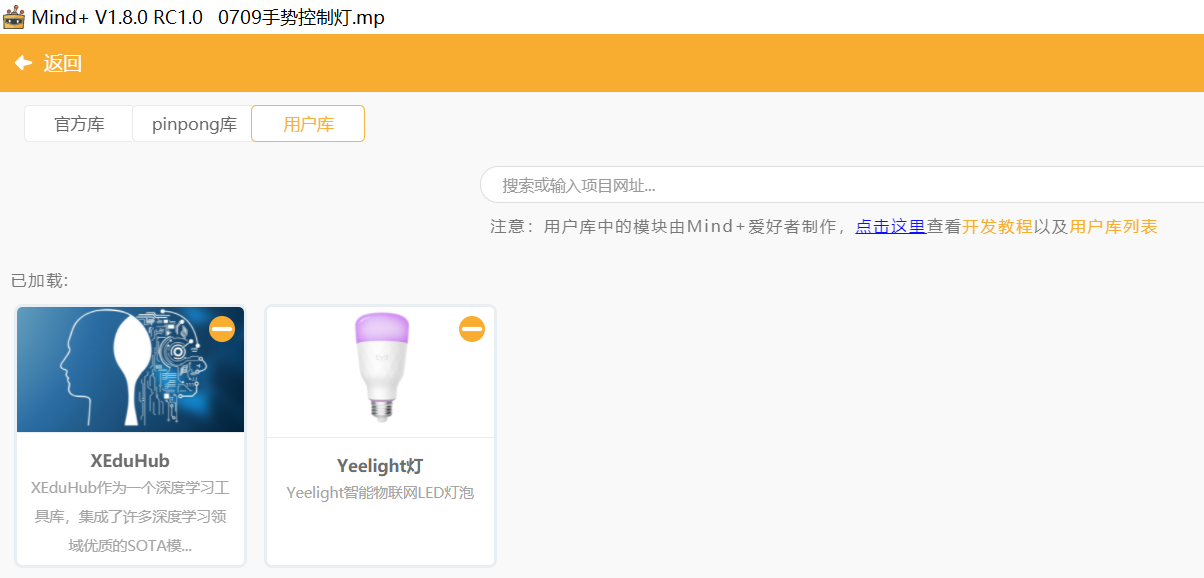
用户库添加XEduHub 和 Yeelight灯
步骤2 在行空板上安装Yeelight库

步骤3 添加相关脚本
1.添加XeduHub脚本

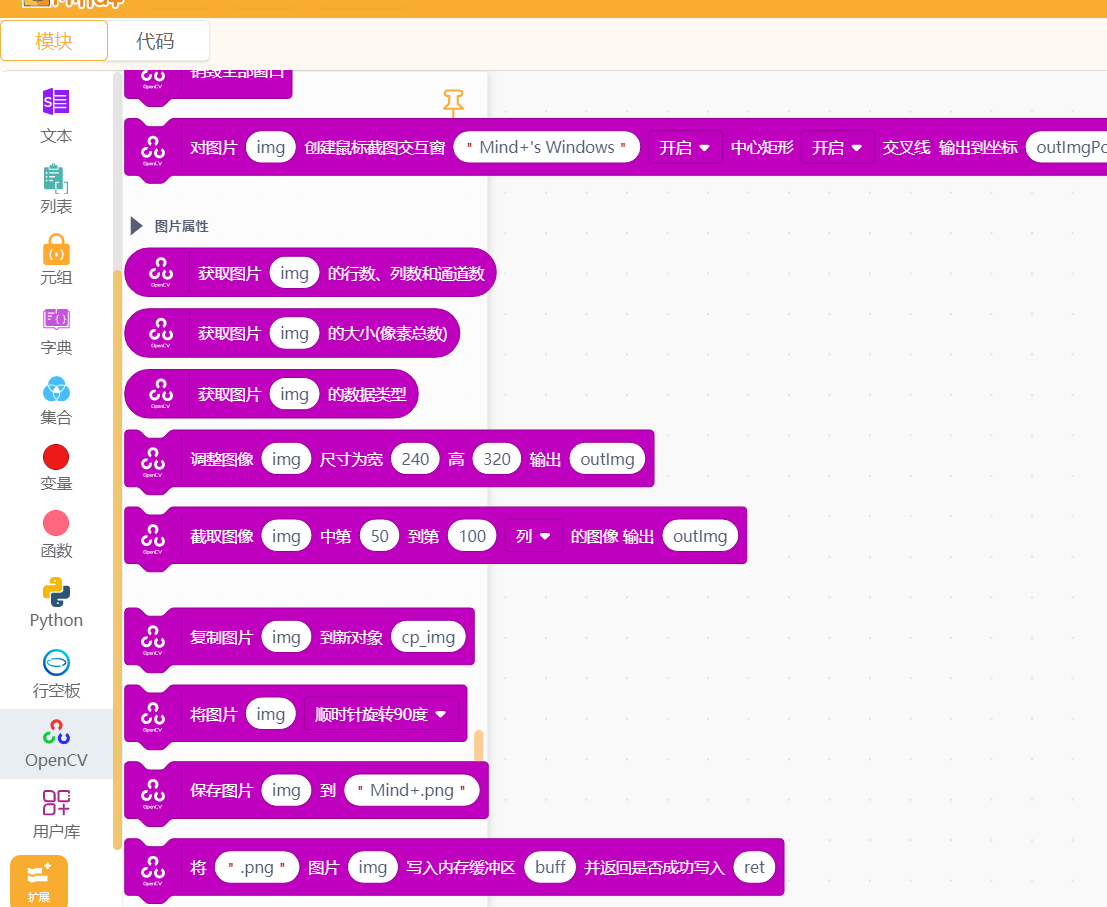
2.添加OpenCV脚本
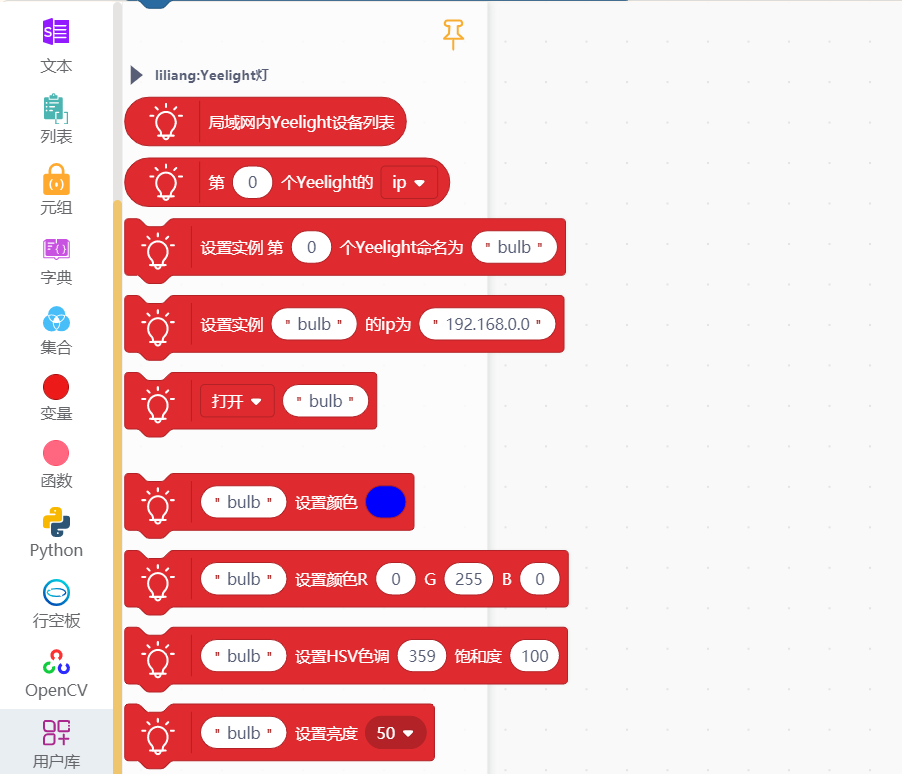
3.添加Yeelight灯


 他的勋章
他的勋章
罗罗罗2024.10.13
666
谭周强2024.08.03
学到了