 返回首页
返回首页
 回到顶部
回到顶部
37款传感器与执行器的提法,在网络上广泛流传,其实Arduino能够兼容的传感器模块肯定是不止这37种的。鉴于本人手头积累了一些传感器和执行器模块,依照实践出真知(一定要动手做)的理念,以学习和交流为目的,这里准备逐一动手尝试系列实验,不管成功(程序走通)与否,都会记录下来—小小的进步或是搞不掂的问题,希望能够抛砖引玉。
【Arduino】168种传感器模块系列实验(资料代码+仿真编程+图形编程)
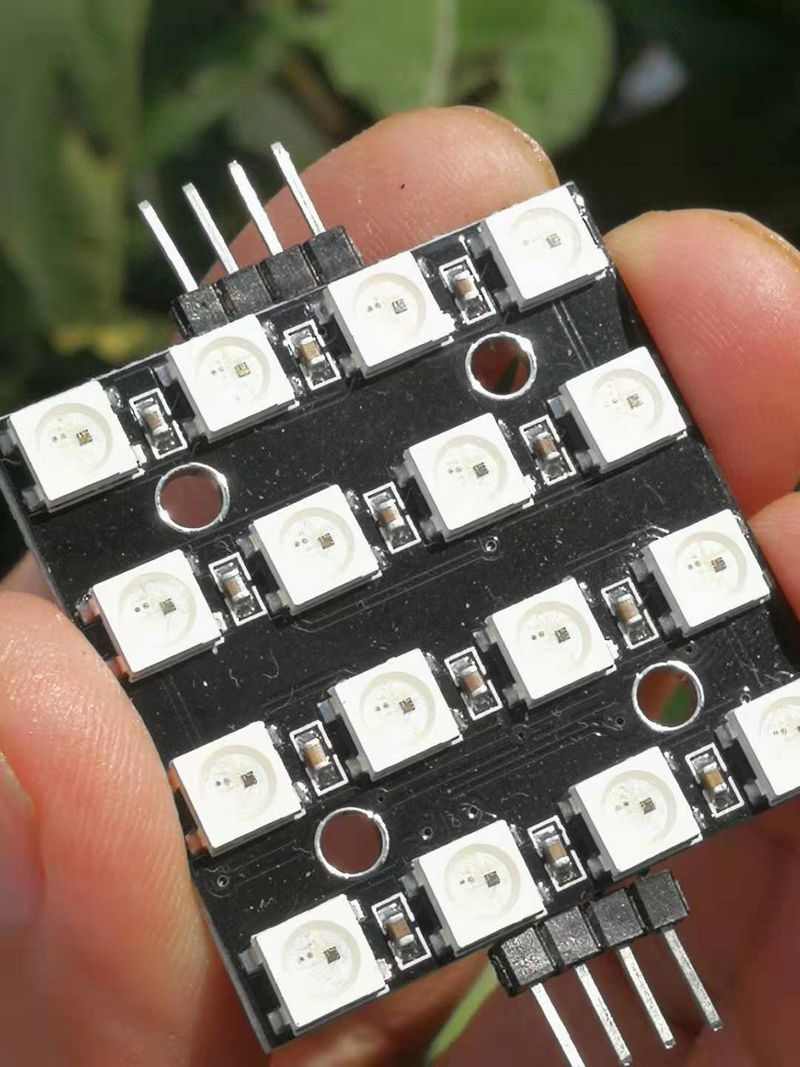
实验八十六:WS2812B-4*4位 RGB LED 全彩驱动16位彩灯开发板模块
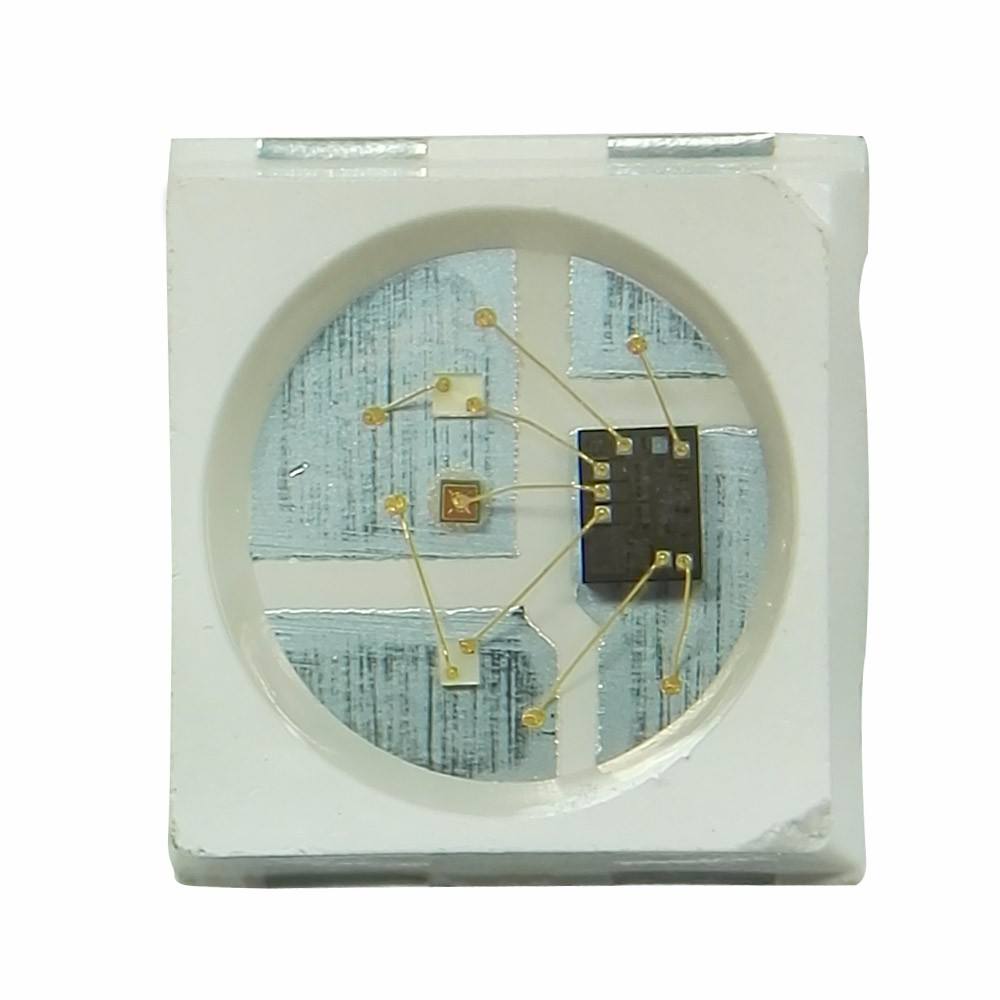
知识点:WS2812B
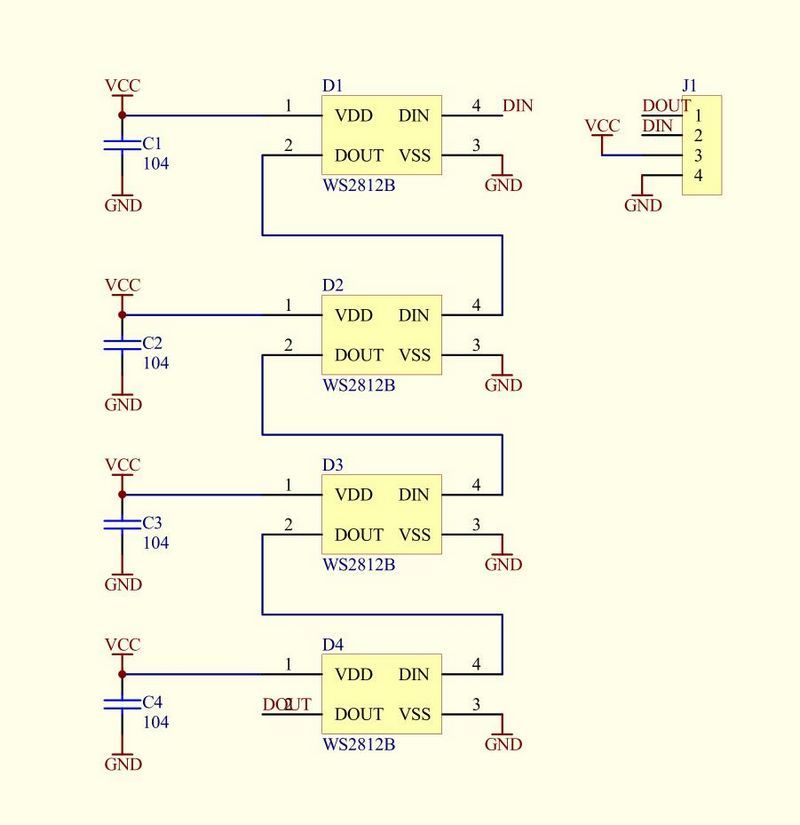
是一个集控制电路与发光电路于一体的智能外控LED光源。其外型与一个5050LED灯珠相同,每个元件即为一个像素点。像素点内部包含了智能数字接口数据锁存信号整形放大驱动电路,还包含有高精度的内部振荡器和12V高压可编程定电流控制部分,有效保证了像素点光的颜色高度一致。数据协议采用单线归零码的通讯方式,像素点在上电复位以后,DIN端接受从控制器传输过来的数据,首先送过来的24bit数据被第一个像素点提取后,送到像素点内部的数据锁存器,剩余的数据经过内部整形处理电路整形放大后通过DO端口开始转发输出给下一个级联的像素点,每经过一个像素点的传输,信号减少24bit。像素点采用自动整形转发技术,使得该像素点的级联个数不受信号传送的限制,仅仅受限信号传输速度要求。
主要特点
● 智能反接保护,电源反接不会损坏IC。
● IC控制电路与LED点光源公用一个电源。
● 控制电路与RGB芯片集成在一个5050封装的元器件中,构成一个完整的外控像素点。
● 内置信号整形电路,任何一个像素点收到信号后经过波形整形再输出,保证线路波形畸变不会累加。
● 内置上电复位和掉电复位电路。
● 每个像素点的三基色颜色可实现256级亮度显示,完成16777216种颜色的全真色彩显示,扫描频率不低于400Hz/s。
● 串行级联接口,能通过一根信号线完成数据的接收与解码。
● 任意两点传传输距离在不超过5米时无需增加任何电路。
● 当刷新速率30帧/秒时,级联数不小于1024点。
● 数据发送速度可达800Kbps。
● 光的颜色高度一致,性价比高。
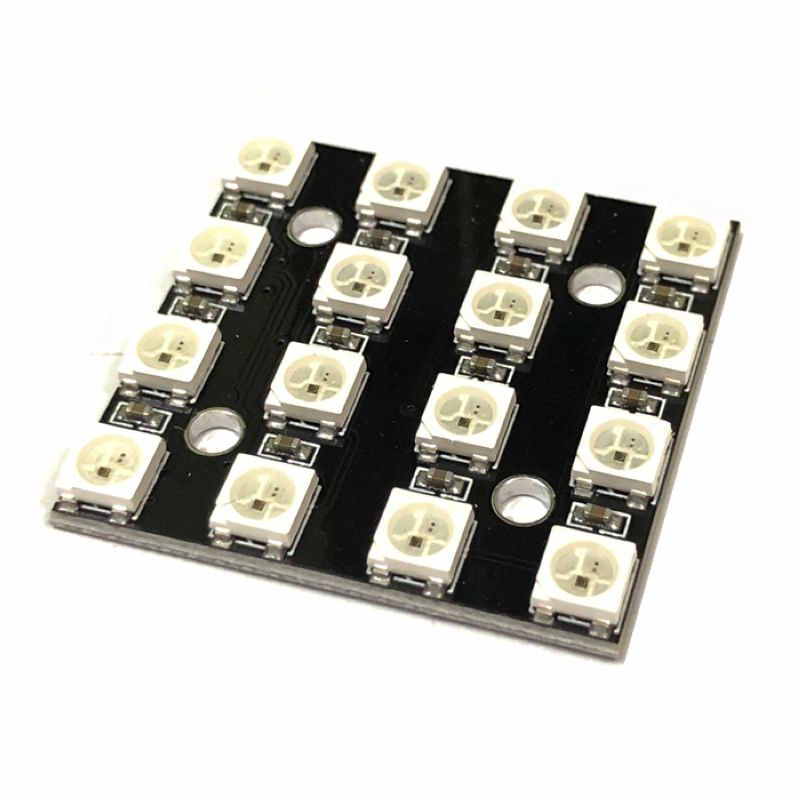
WS2812B-4*4位 RGB LED 全彩驱动16位彩灯开发板模块
5050高亮LED,内置控制芯片,仅需1个IO口即可控制多个LED
芯片内置整形电路,信号畸变不会累计,稳定显示
三基色256级亮度调剂,16万色真彩显示效果,扫描频率不低于400Hz/S
串行连级接口,能通过一根信号线完成数据的接收与解码
刷新速率30帧/秒时,低速连级模式连级数不小于512点
数据收发速度最高可达800Kbps
高亮LED,光色亮度一致性高
两端有l联级接口,可以直接插接
【Arduino】168种传感器模块系列实验(资料+代码+图形+仿真)
实验八十六: WS2812B-4*4位 RGB LED 全彩驱动16位彩灯开发板
项目二十:每个 LED 灯条的颜色校正设置,以及总输出'色温'的总控制
实验接线
Module UNO
VCC —— 3.3V
GND —— GND
DI —— D6
实验开源代码
/*
  【Arduino】168种传感器模块系列实验(资料+代码+图形+仿真)
  实验八十九: WS2812B-4*4位 RGB LED 全彩驱动16位彩灯开发板
  项目二十:每个 LED 灯条的颜色校正设置,以及总输出'色温'的总控制
  实验接线
  Module    UNO
  VCC —— 3.3V
  GND —— GND
  DI  ——  D6
*/

#include <FastLED.h>
#define LED_PIN     6
// Information about the LED strip itself
#define NUM_LEDS    16
#define CHIPSET     WS2811
#define COLOR_ORDER GRB
CRGB leds[NUM_LEDS];
#define BRIGHTNESS  26

// FastLED v2.1 provides two color-management controls:
//   (1) color correction settings for each LED strip, and
//   (2) master control of the overall output 'color temperature'
//
// THIS EXAMPLE demonstrates the second, "color temperature" control.
// It shows a simple rainbow animation first with one temperature profile,
// and a few seconds later, with a different temperature profile.
//
// The first pixel of the strip will show the color temperature.
//
// HELPFUL HINTS for "seeing" the effect in this demo:
// * Don't look directly at the LED pixels.  Shine the LEDs aganst
//   a white wall, table, or piece of paper, and look at the reflected light.
//
// * If you watch it for a bit, and then walk away, and then come back
//   to it, you'll probably be able to "see" whether it's currently using
//   the 'redder' or the 'bluer' temperature profile, even not counting
//   the lowest 'indicator' pixel.
//
//
// FastLED provides these pre-conigured incandescent color profiles:
//     Candle, Tungsten40W, Tungsten100W, Halogen, CarbonArc,
//     HighNoonSun, DirectSunlight, OvercastSky, ClearBlueSky,
// FastLED provides these pre-configured gaseous-light color profiles:
//     WarmFluorescent, StandardFluorescent, CoolWhiteFluorescent,
//     FullSpectrumFluorescent, GrowLightFluorescent, BlackLightFluorescent,
//     MercuryVapor, SodiumVapor, MetalHalide, HighPressureSodium,
// FastLED also provides an "Uncorrected temperature" profile
//    UncorrectedTemperature;

#define TEMPERATURE_1 Tungsten100W
#define TEMPERATURE_2 OvercastSky

// How many seconds to show each temperature before switching
#define DISPLAYTIME 20
// How many seconds to show black between switches
#define BLACKTIME   3

void loop()
{
  // draw a generic, no-name rainbow
  static uint8_t starthue = 0;
  fill_rainbow( leds + 5, NUM_LEDS - 5, --starthue, 20);

  // Choose which 'color temperature' profile to enable.
  uint8_t secs = (millis() / 1000) % (DISPLAYTIME * 2);
  if( secs < DISPLAYTIME) {
    FastLED.setTemperature( TEMPERATURE_1 ); // first temperature
    leds[0] = TEMPERATURE_1; // show indicator pixel
  } else {
    FastLED.setTemperature( TEMPERATURE_2 ); // second temperature
    leds[0] = TEMPERATURE_2; // show indicator pixel
  }

  // Black out the LEDs for a few secnds between color changes
  // to let the eyes and brains adjust
  if( (secs % DISPLAYTIME) < BLACKTIME) {
    memset8( leds, 0, NUM_LEDS * sizeof(CRGB));
  }

  FastLED.show();
  FastLED.delay(8);
}

void setup() {
  delay( 3000 ); // power-up safety delay
  // It's important to set the color correction for your LED strip here,
  // so that colors can be more accurately rendered through the 'temperature' profiles
  FastLED.addLeds<CHIPSET, LED_PIN, COLOR_ORDER>(leds, NUM_LEDS).setCorrection( TypicalSMD5050 );
  FastLED.setBrightness( BRIGHTNESS );
}
【Arduino】168种传感器模块系列实验(资料+代码+图形+仿真)
实验八十六: WS2812B-4*4位 RGB LED 全彩驱动16位彩灯开发板
项目二十一:FastLED“100行代码”演示卷轴动画效果
实验接线
Module UNO
VCC —— 3.3V
GND —— GND
DI —— D6
实验开源代码
/*
  【Arduino】168种传感器模块系列实验(资料+代码+图形+仿真)
  实验八十九: WS2812B-4*4位 RGB LED 全彩驱动16位彩灯开发板
  项目二十一:FastLED“100行代码”演示卷轴动画效果
  实验接线
  Module    UNO
  VCC —— 3.3V
  GND —— GND
  DI  ——  D6
*/

#include <FastLED.h>

FASTLED_USING_NAMESPACE

// FastLED "100-lines-of-code" demo reel, showing just a few
// of the kinds of animation patterns you can quickly and easily
// compose using FastLED.
//
// This example also shows one easy way to define multiple
// animations patterns and have them automatically rotate.
//
// -Mark Kriegsman, December 2014


#define DATA_PIN    6
//#define CLK_PIN   4
#define LED_TYPE    WS2811
#define COLOR_ORDER GRB
#define NUM_LEDS    64
CRGB leds[NUM_LEDS];

#define BRIGHTNESS         26
#define FRAMES_PER_SECOND  120

void setup() {
  delay(3000); // 3 second delay for recovery

  // tell FastLED about the LED strip configuration
  FastLED.addLeds<LED_TYPE,DATA_PIN,COLOR_ORDER>(leds, NUM_LEDS).setCorrection(TypicalLEDStrip);
  //FastLED.addLeds<LED_TYPE,DATA_PIN,CLK_PIN,COLOR_ORDER>(leds, NUM_LEDS).setCorrection(TypicalLEDStrip);

  // set master brightness control
  FastLED.setBrightness(BRIGHTNESS);
}


// List of patterns to cycle through.  Each is defined as a separate function below.
typedef void (*SimplePatternList[])();
SimplePatternList gPatterns = { rainbow, rainbowWithGlitter, confetti, sinelon, juggle, bpm };

uint8_t gCurrentPatternNumber = 0; // Index number of which pattern is current
uint8_t gHue = 0; // rotating "base color" used by many of the patterns

void loop()
{
  // Call the current pattern function once, updating the 'leds' array
  gPatterns[gCurrentPatternNumber]();

  // send the 'leds' array out to the actual LED strip
  FastLED.show();
  // insert a delay to keep the framerate modest
  FastLED.delay(1000/FRAMES_PER_SECOND);

  // do some periodic updates
  EVERY_N_MILLISECONDS( 20 ) { gHue++; } // slowly cycle the "base color" through the rainbow
  EVERY_N_SECONDS( 10 ) { nextPattern(); } // change patterns periodically
}

#define ARRAY_SIZE(A) (sizeof(A) / sizeof((A)[0]))

void nextPattern()
{
  // add one to the current pattern number, and wrap around at the end
  gCurrentPatternNumber = (gCurrentPatternNumber + 1) % ARRAY_SIZE( gPatterns);
}

void rainbow()
{
  // FastLED's built-in rainbow generator
  fill_rainbow( leds, NUM_LEDS, gHue, 7);
}

void rainbowWithGlitter()
{
  // built-in FastLED rainbow, plus some random sparkly glitter
  rainbow();
  addGlitter(80);
}

void addGlitter( fract8 chanceOfGlitter)
{
  if( random8() < chanceOfGlitter) {
    leds[ random16(NUM_LEDS) ] += CRGB::White;
  }
}

void confetti()
{
  // random colored speckles that blink in and fade smoothly
  fadeToBlackBy( leds, NUM_LEDS, 10);
  int pos = random16(NUM_LEDS);
  leds[pos] += CHSV( gHue + random8(64), 200, 255);
}

void sinelon()
{
  // a colored dot sweeping back and forth, with fading trails
  fadeToBlackBy( leds, NUM_LEDS, 20);
  int pos = beatsin16( 13, 0, NUM_LEDS-1 );
  leds[pos] += CHSV( gHue, 255, 192);
}

void bpm()
{
  // colored stripes pulsing at a defined Beats-Per-Minute (BPM)
  uint8_t BeatsPerMinute = 62;
  CRGBPalette16 palette = PartyColors_p;
  uint8_t beat = beatsin8( BeatsPerMinute, 64, 255);
  for( int i = 0; i < NUM_LEDS; i++) { //9948
    leds[i] = ColorFromPalette(palette, gHue+(i*2), beat-gHue+(i*10));
  }
}

void juggle() {
  // eight colored dots, weaving in and out of sync with each other
  fadeToBlackBy( leds, NUM_LEDS, 20);
  uint8_t dothue = 0;
  for( int i = 0; i < 8; i++) {
    leds[beatsin16( i+7, 0, NUM_LEDS-1 )] |= CHSV(dothue, 200, 255);
    dothue += 32;
  }
}
【Arduino】168种传感器模块系列实验(资料+代码+图形+仿真)
实验八十六: WS2812B-4*4位 RGB LED 全彩驱动16位彩灯开发板
项目二十二:随机60帧火焰花
实验接线
Module UNO
VCC —— 3.3V
GND —— GND
DI —— D6
实验开源代码
/*
  【Arduino】168种传感器模块系列实验(资料+代码+图形+仿真)
  实验八十九: WS2812B-4*4位 RGB LED 全彩驱动16位彩灯开发板
  项目二十二:随机60帧火焰花
  实验接线
  Module    UNO
  VCC —— 3.3V
  GND —— GND
  DI  ——  D6
*/

#include <FastLED.h>

#define LED_PIN     6
#define COLOR_ORDER GRB
#define CHIPSET     WS2811
#define NUM_LEDS    16

#define BRIGHTNESS  22
#define FRAMES_PER_SECOND 60

bool gReverseDirection = false;

CRGB leds[NUM_LEDS];

void setup() {
  delay(3000); // sanity delay
  FastLED.addLeds<CHIPSET, LED_PIN, COLOR_ORDER>(leds, NUM_LEDS).setCorrection( TypicalLEDStrip );
  FastLED.setBrightness( BRIGHTNESS );
}

void loop()
{
  // Add entropy to random number generator; we use a lot of it.
  // random16_add_entropy( random());

  Fire2012(); // run simulation frame

  FastLED.show(); // display this frame
  FastLED.delay(1000 / FRAMES_PER_SECOND);
}


// Fire2012 by Mark Kriegsman, July 2012
// as part of "Five Elements" shown here: http://youtu.be/knWiGsmgycY
////
// This basic one-dimensional 'fire' simulation works roughly as follows:
// There's a underlying array of 'heat' cells, that model the temperature
// at each point along the line.  Every cycle through the simulation,
// four steps are performed:
//  1) All cells cool down a little bit, losing heat to the air
//  2) The heat from each cell drifts 'up' and diffuses a little
//  3) Sometimes randomly new 'sparks' of heat are added at the bottom
//  4) The heat from each cell is rendered as a color into the leds array
//     The heat-to-color mapping uses a black-body radiation approximation.
//
// Temperature is in arbitrary units from 0 (cold black) to 255 (white hot).
//
// This simulation scales it self a bit depending on NUM_LEDS; it should look
// "OK" on anywhere from 20 to 100 LEDs without too much tweaking.
//
// I recommend running this simulation at anywhere from 30-100 frames per second,
// meaning an interframe delay of about 10-35 milliseconds.
//
// Looks best on a high-density LED setup (60+ pixels/meter).
//
//
// There are two main parameters you can play with to control the look and
// feel of your fire: COOLING (used in step 1 above), and SPARKING (used
// in step 3 above).
//
// COOLING: How much does the air cool as it rises?
// Less cooling = taller flames.  More cooling = shorter flames.
// Default 50, suggested range 20-100
#define COOLING  55

// SPARKING: What chance (out of 255) is there that a new spark will be lit?
// Higher chance = more roaring fire.  Lower chance = more flickery fire.
// Default 120, suggested range 50-200.
#define SPARKING 120


void Fire2012()
{
  // Array of temperature readings at each simulation cell
  static uint8_t heat[NUM_LEDS];

  // Step 1.  Cool down every cell a little
  for ( int i = 0; i < NUM_LEDS; i++) {
    heat[i] = qsub8( heat[i],  random8(0, ((COOLING * 10) / NUM_LEDS) + 2));
  }

  // Step 2.  Heat from each cell drifts 'up' and diffuses a little
  for ( int k = NUM_LEDS - 1; k >= 2; k--) {
    heat[k] = (heat[k - 1] + heat[k - 2] + heat[k - 2] ) / 3;
  }

  // Step 3.  Randomly ignite new 'sparks' of heat near the bottom
  if ( random8() < SPARKING ) {
    int y = random8(7);
    heat[y] = qadd8( heat[y], random8(160, 255) );
  }

  // Step 4.  Map from heat cells to LED colors
  for ( int j = 0; j < NUM_LEDS; j++) {
    CRGB color = HeatColor( heat[j]);
    int pixelnumber;
    if ( gReverseDirection ) {
      pixelnumber = (NUM_LEDS - 1) - j;
    } else {
      pixelnumber = j;
    }
    leds[pixelnumber] = color;
  }
}
【Arduino】168种传感器模块系列实验(资料+代码+图形+仿真)
实验八十六: WS2812B-4*4位 RGB LED 全彩驱动16位彩灯开发板
项目二十三:带有可编程调色板的 Fire2012 火灾模拟
实验接线
Module UNO
VCC —— 3.3V
GND —— GND
DI —— D6
实验开源代码
/*
  【Arduino】168种传感器模块系列实验(资料+代码+图形+仿真)
  实验八十九: WS2812B-4*4位 RGB LED 全彩驱动16位彩灯开发板
  项目二十三:带有可编程调色板的 Fire2012 火灾模拟
  实验接线
  Module    UNO
  VCC —— 3.3V
  GND —— GND
  DI  ——  D6
*/

#include <FastLED.h>

#define LED_PIN     6
#define COLOR_ORDER GRB
#define CHIPSET     WS2811
#define NUM_LEDS    16

#define BRIGHTNESS  22
#define FRAMES_PER_SECOND 60

bool gReverseDirection = false;

CRGB leds[NUM_LEDS];

// Fire2012 with programmable Color Palette
//
// This code is the same fire simulation as the original "Fire2012",
// but each heat cell's temperature is translated to color through a FastLED
// programmable color palette, instead of through the "HeatColor(...)" function.
//
// Four different static color palettes are provided here, plus one dynamic one.
//
// The three static ones are:
//   1. the FastLED built-in HeatColors_p -- this is the default, and it looks
//      pretty much exactly like the original Fire2012.
//
//  To use any of the other palettes below, just "uncomment" the corresponding code.
//
//   2. a gradient from black to red to yellow to white, which is
//      visually similar to the HeatColors_p, and helps to illustrate
//      what the 'heat colors' palette is actually doing,
//   3. a similar gradient, but in blue colors rather than red ones,
//      i.e. from black to blue to aqua to white, which results in
//      an "icy blue" fire effect,
//   4. a simplified three-step gradient, from black to red to white, just to show
//      that these gradients need not have four components; two or
//      three are possible, too, even if they don't look quite as nice for fire.
//
// The dynamic palette shows how you can change the basic 'hue' of the
// color palette every time through the loop, producing "rainbow fire".

CRGBPalette16 gPal;

void setup() {
  delay(3000); // sanity delay
  FastLED.addLeds<CHIPSET, LED_PIN, COLOR_ORDER>(leds, NUM_LEDS).setCorrection( TypicalLEDStrip );
  FastLED.setBrightness( BRIGHTNESS );

  // This first palette is the basic 'black body radiation' colors,
  // which run from black to red to bright yellow to white.
  gPal = HeatColors_p;

  // These are other ways to set up the color palette for the 'fire'.
  // First, a gradient from black to red to yellow to white -- similar to HeatColors_p
  //   gPal = CRGBPalette16( CRGB::Black, CRGB::Red, CRGB::Yellow, CRGB::White);

  // Second, this palette is like the heat colors, but blue/aqua instead of red/yellow
  //   gPal = CRGBPalette16( CRGB::Black, CRGB::Blue, CRGB::Aqua,  CRGB::White);

  // Third, here's a simpler, three-step gradient, from black to red to white
  //   gPal = CRGBPalette16( CRGB::Black, CRGB::Red, CRGB::White);

}

void loop()
{
  // Add entropy to random number generator; we use a lot of it.
  random16_add_entropy( random());

  // Fourth, the most sophisticated: this one sets up a new palette every
  // time through the loop, based on a hue that changes every time.
  // The palette is a gradient from black, to a dark color based on the hue,
  // to a light color based on the hue, to white.
  //
  //   static uint8_t hue = 0;
  //   hue++;
  //   CRGB darkcolor  = CHSV(hue,255,192); // pure hue, three-quarters brightness
  //   CRGB lightcolor = CHSV(hue,128,255); // half 'whitened', full brightness
  //   gPal = CRGBPalette16( CRGB::Black, darkcolor, lightcolor, CRGB::White);


  Fire2012WithPalette(); // run simulation frame, using palette colors

  FastLED.show(); // display this frame
  FastLED.delay(1000 / FRAMES_PER_SECOND);
}


// Fire2012 by Mark Kriegsman, July 2012
// as part of "Five Elements" shown here: http://youtu.be/knWiGsmgycY
////
// This basic one-dimensional 'fire' simulation works roughly as follows:
// There's a underlying array of 'heat' cells, that model the temperature
// at each point along the line.  Every cycle through the simulation,
// four steps are performed:
//  1) All cells cool down a little bit, losing heat to the air
//  2) The heat from each cell drifts 'up' and diffuses a little
//  3) Sometimes randomly new 'sparks' of heat are added at the bottom
//  4) The heat from each cell is rendered as a color into the leds array
//     The heat-to-color mapping uses a black-body radiation approximation.
//
// Temperature is in arbitrary units from 0 (cold black) to 255 (white hot).
//
// This simulation scales it self a bit depending on NUM_LEDS; it should look
// "OK" on anywhere from 20 to 100 LEDs without too much tweaking.
//
// I recommend running this simulation at anywhere from 30-100 frames per second,
// meaning an interframe delay of about 10-35 milliseconds.
//
// Looks best on a high-density LED setup (60+ pixels/meter).
//
//
// There are two main parameters you can play with to control the look and
// feel of your fire: COOLING (used in step 1 above), and SPARKING (used
// in step 3 above).
//
// COOLING: How much does the air cool as it rises?
// Less cooling = taller flames.  More cooling = shorter flames.
// Default 55, suggested range 20-100
#define COOLING  55

// SPARKING: What chance (out of 255) is there that a new spark will be lit?
// Higher chance = more roaring fire.  Lower chance = more flickery fire.
// Default 120, suggested range 50-200.
#define SPARKING 120


void Fire2012WithPalette()
{
// Array of temperature readings at each simulation cell
  static uint8_t heat[NUM_LEDS];

  // Step 1.  Cool down every cell a little
    for( int i = 0; i < NUM_LEDS; i++) {
      heat[i] = qsub8( heat[i],  random8(0, ((COOLING * 10) / NUM_LEDS) + 2));
    }

    // Step 2.  Heat from each cell drifts 'up' and diffuses a little
    for( int k= NUM_LEDS - 1; k >= 2; k--) {
      heat[k] = (heat[k - 1] + heat[k - 2] + heat[k - 2] ) / 3;
    }

    // Step 3.  Randomly ignite new 'sparks' of heat near the bottom
    if( random8() < SPARKING ) {
      int y = random8(7);
      heat[y] = qadd8( heat[y], random8(160,255) );
    }

    // Step 4.  Map from heat cells to LED colors
    for( int j = 0; j < NUM_LEDS; j++) {
      // Scale the heat value from 0-255 down to 0-240
      // for best results with color palettes.
      uint8_t colorindex = scale8( heat[j], 240);
      CRGB color = ColorFromPalette( gPal, colorindex);
      int pixelnumber;
      if( gReverseDirection ) {
        pixelnumber = (NUM_LEDS-1) - j;
      } else {
        pixelnumber = j;
      }
      leds[pixelnumber] = color;
    }
}
【Arduino】168种传感器模块系列实验(资料+代码+图形+仿真)
实验八十六: WS2812B-4*4位 RGB LED 全彩驱动16位彩灯开发板
项目二十四:骄傲2015动画,不断变化的彩虹
实验接线
Module UNO
VCC —— 3.3V
GND —— GND
DI —— D6
实验开源代码
/*
【Arduino】168种传感器模块系列实验(资料+代码+图形+仿真)
实验八十九: WS2812B-4*4位 RGB LED 全彩驱动16位彩灯开发板
项目二十四:骄傲2015动画,不断变化的彩虹
实验接线
Module UNO
VCC —— 3.3V
GND —— GND
DI —— D6
*/
#include "FastLED.h"
// Pride2015
// Animated, ever-changing rainbows.
// by Mark Kriegsman
#if FASTLED_VERSION < 3001000
#error "Requires FastLED 3.1 or later; check github for latest code."
#endif
#define DATA_PIN 6
//#define CLK_PIN 4
#define LED_TYPE WS2811
#define COLOR_ORDER GRB
#define NUM_LEDS 16
#define BRIGHTNESS 25
CRGB leds[NUM_LEDS];
void setup() {
delay(3000); // 3 second delay for recovery
// tell FastLED about the LED strip configuration
FastLED.addLeds<LED_TYPE,DATA_PIN,COLOR_ORDER>(leds, NUM_LEDS)
.setCorrection(TypicalLEDStrip)
.setDither(BRIGHTNESS < 255);
// set master brightness control
FastLED.setBrightness(BRIGHTNESS);
}
void loop()
{
pride();
FastLED.show();
}
// This function draws rainbows with an ever-changing,
// widely-varying set of parameters.
void pride()
{
static uint16_t sPseudotime = 0;
static uint16_t sLastMillis = 0;
static uint16_t sHue16 = 0;
uint8_t sat8 = beatsin88( 87, 220, 250);
uint8_t brightdepth = beatsin88( 341, 96, 224);
uint16_t brightnessthetainc16 = beatsin88( 203, (25 * 256), (40 * 256));
uint8_t msmultiplier = beatsin88(147, 23, 60);
uint16_t hue16 = sHue16;//gHue * 256;
uint16_t hueinc16 = beatsin88(113, 1, 3000);
uint16_t ms = millis();
uint16_t deltams = ms - sLastMillis ;
sLastMillis = ms;
sPseudotime += deltams * msmultiplier;
sHue16 += deltams * beatsin88( 400, 5,9);
uint16_t brightnesstheta16 = sPseudotime;
for( uint16_t i = 0 ; i < NUM_LEDS; i++) {
hue16 += hueinc16;
uint8_t hue8 = hue16 / 256;
brightnesstheta16 += brightnessthetainc16;
uint16_t b16 = sin16( brightnesstheta16 ) + 32768;
uint16_t bri16 = (uint32_t)((uint32_t)b16 * (uint32_t)b16) / 65536;
uint8_t bri8 = (uint32_t)(((uint32_t)bri16) * brightdepth) / 65536;
bri8 += (255 - brightdepth);
CRGB newcolor = CHSV( hue8, sat8, bri8);
uint16_t pixelnumber = i;
pixelnumber = (NUM_LEDS-1) - pixelnumber;
nblend( leds[pixelnumber], newcolor, 64);
}
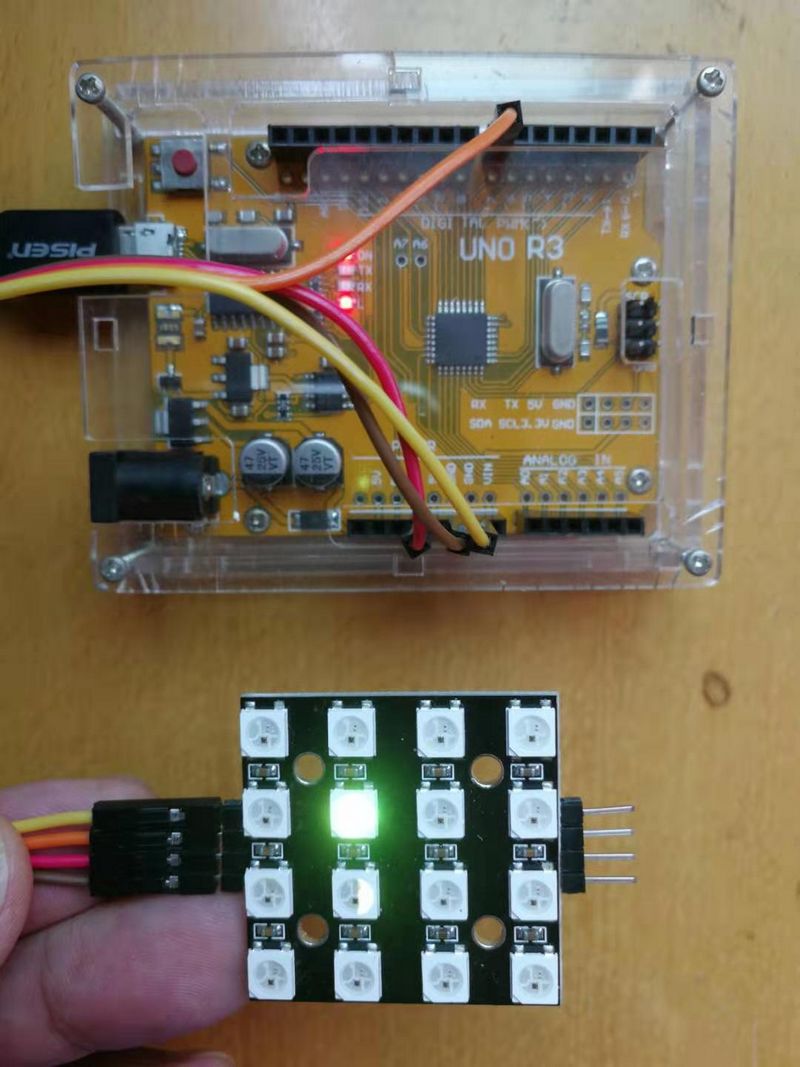
}Arduino实验场景图


 他的勋章
他的勋章

评论