 返回首页
返回首页
 回到顶部
回到顶部

偶然心血来潮,想要做一个音乐可视化的系列专题。这个专题的难度有点高,涉及面也比较广泛,相关的FFT和FHT等算法也相当复杂,不过还是打算从最简单的开始,实际动手做做试验,耐心尝试一下各种方案,逐步积累些有用的音乐频谱可视化的资料,也会争取成型一些实用好玩的音乐可视器项目。
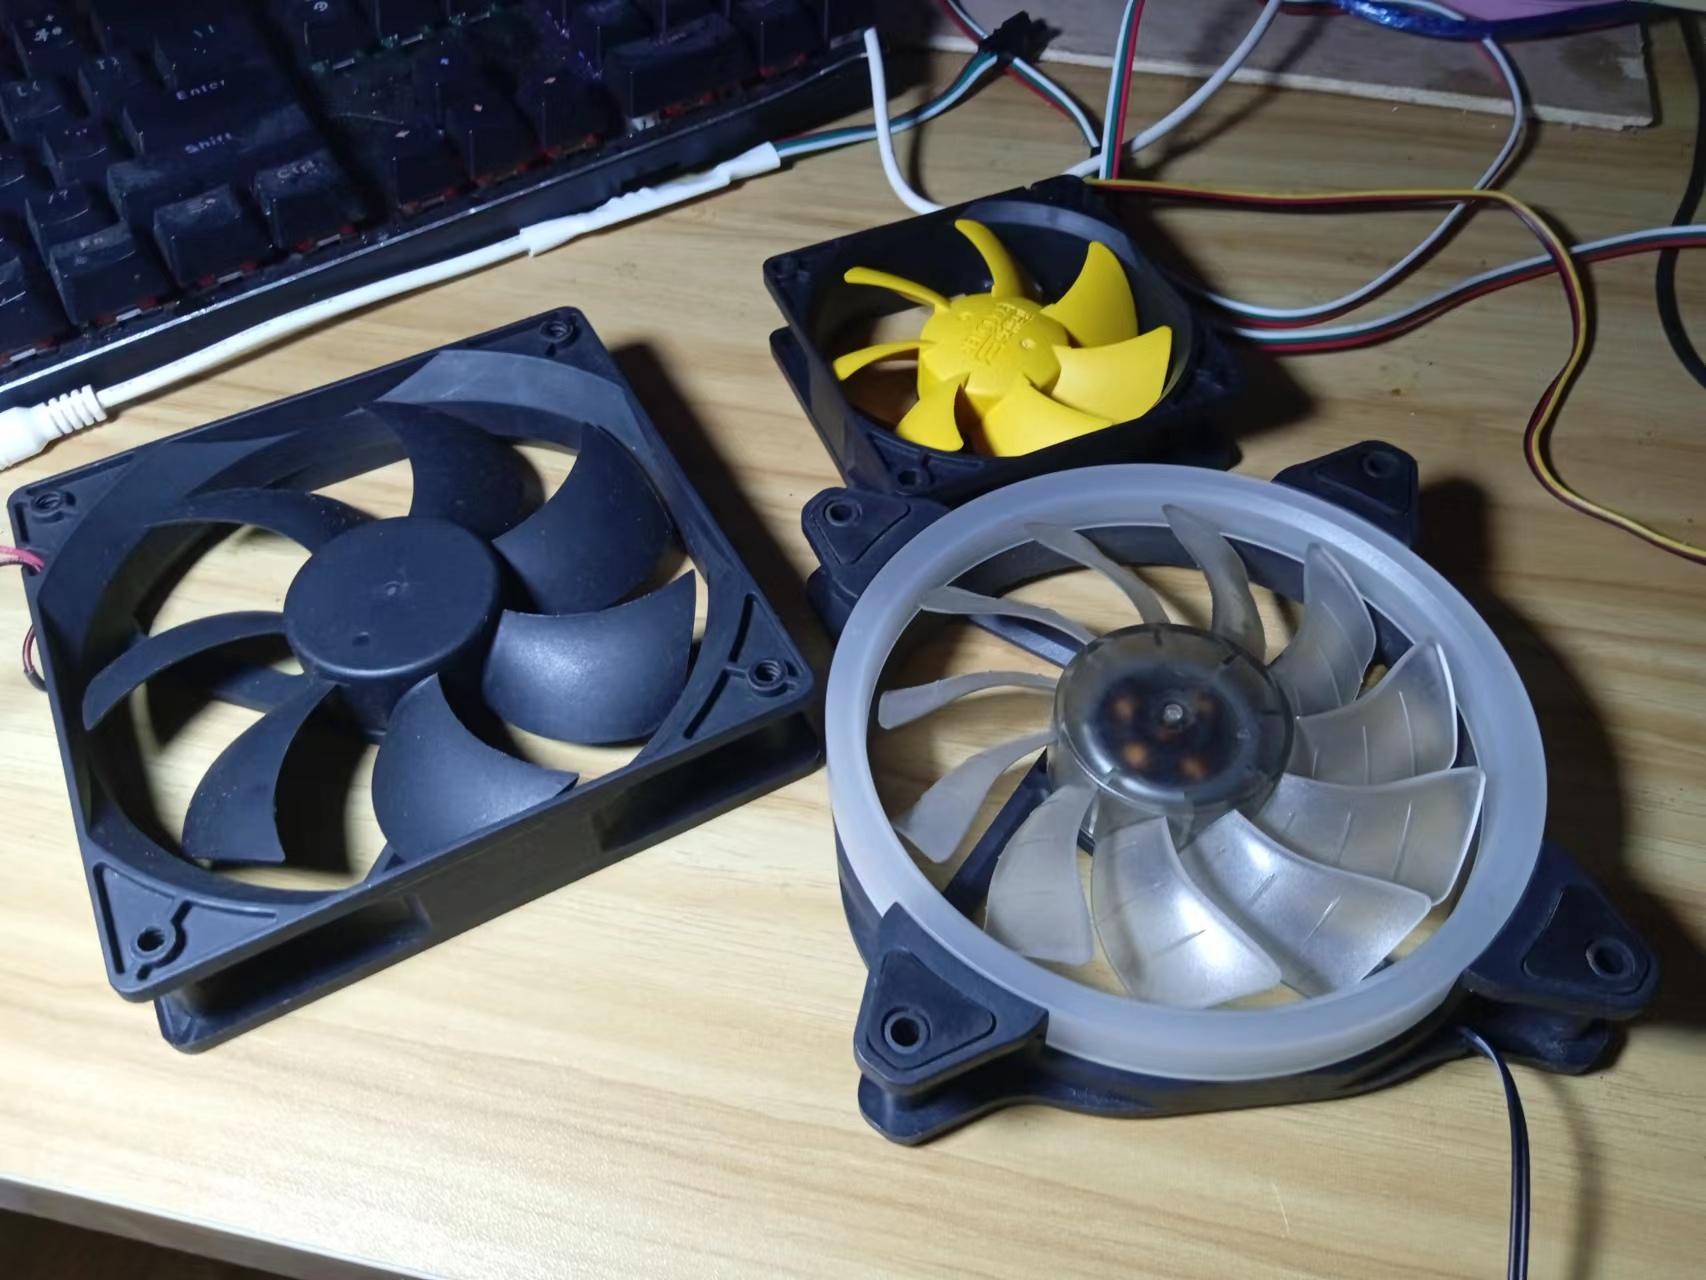
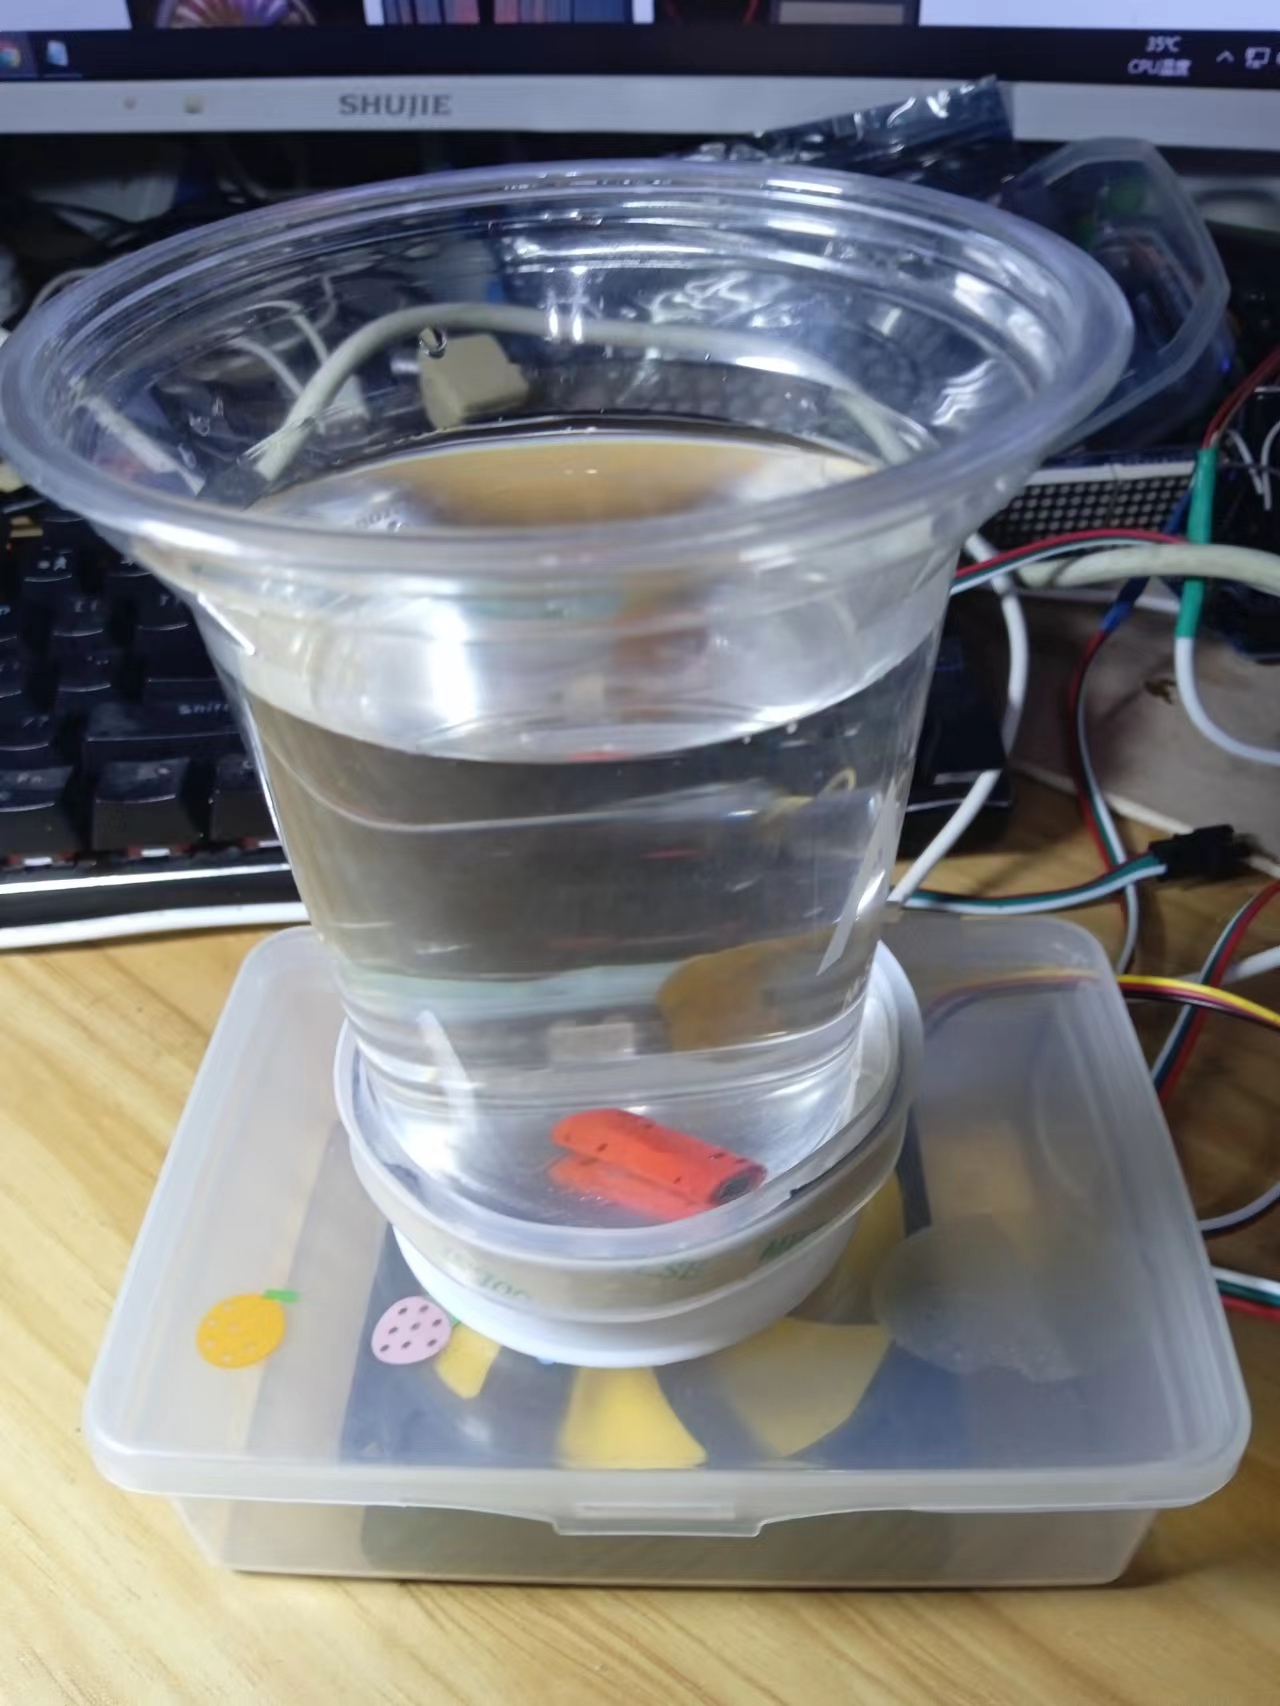
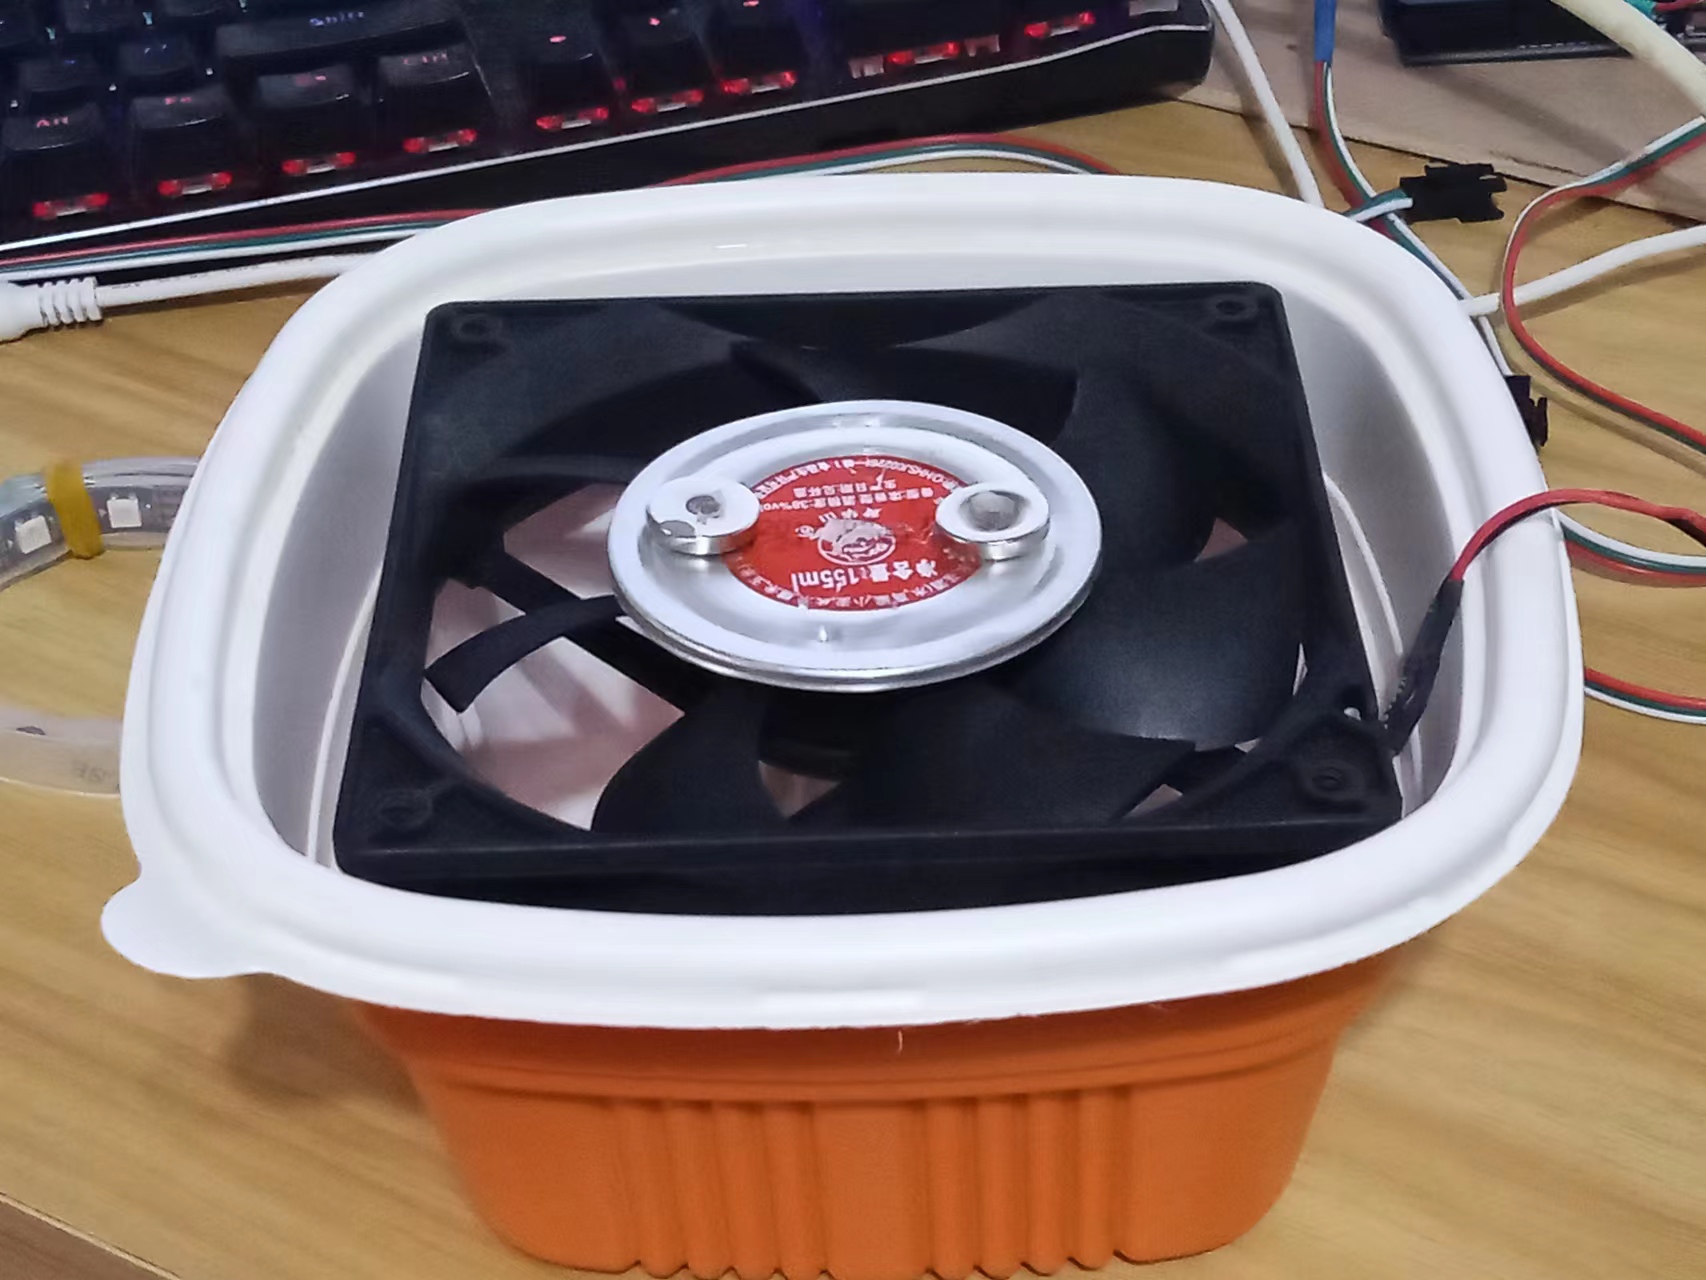
搜索“磁搅”,百度百科上说,磁搅一般指磁力搅拌器(英文Magnetic Stirrers)。 磁力搅拌器是用于液体混合的实验室仪器,主要用于搅拌或同时加热搅拌低粘稠度的液体或固液混合物。其基本原理是利用磁场的同性相斥、异性相吸的原理,使用磁场推动放置在容器中带磁性的搅拌子进行圆周运转,从而达到搅拌液体的目的。其动力一般使用电动机,为简化实验环节,这里找到了三只电脑上的散热风扇。
使用一个饮料瓶盖作为钕磁固定平台
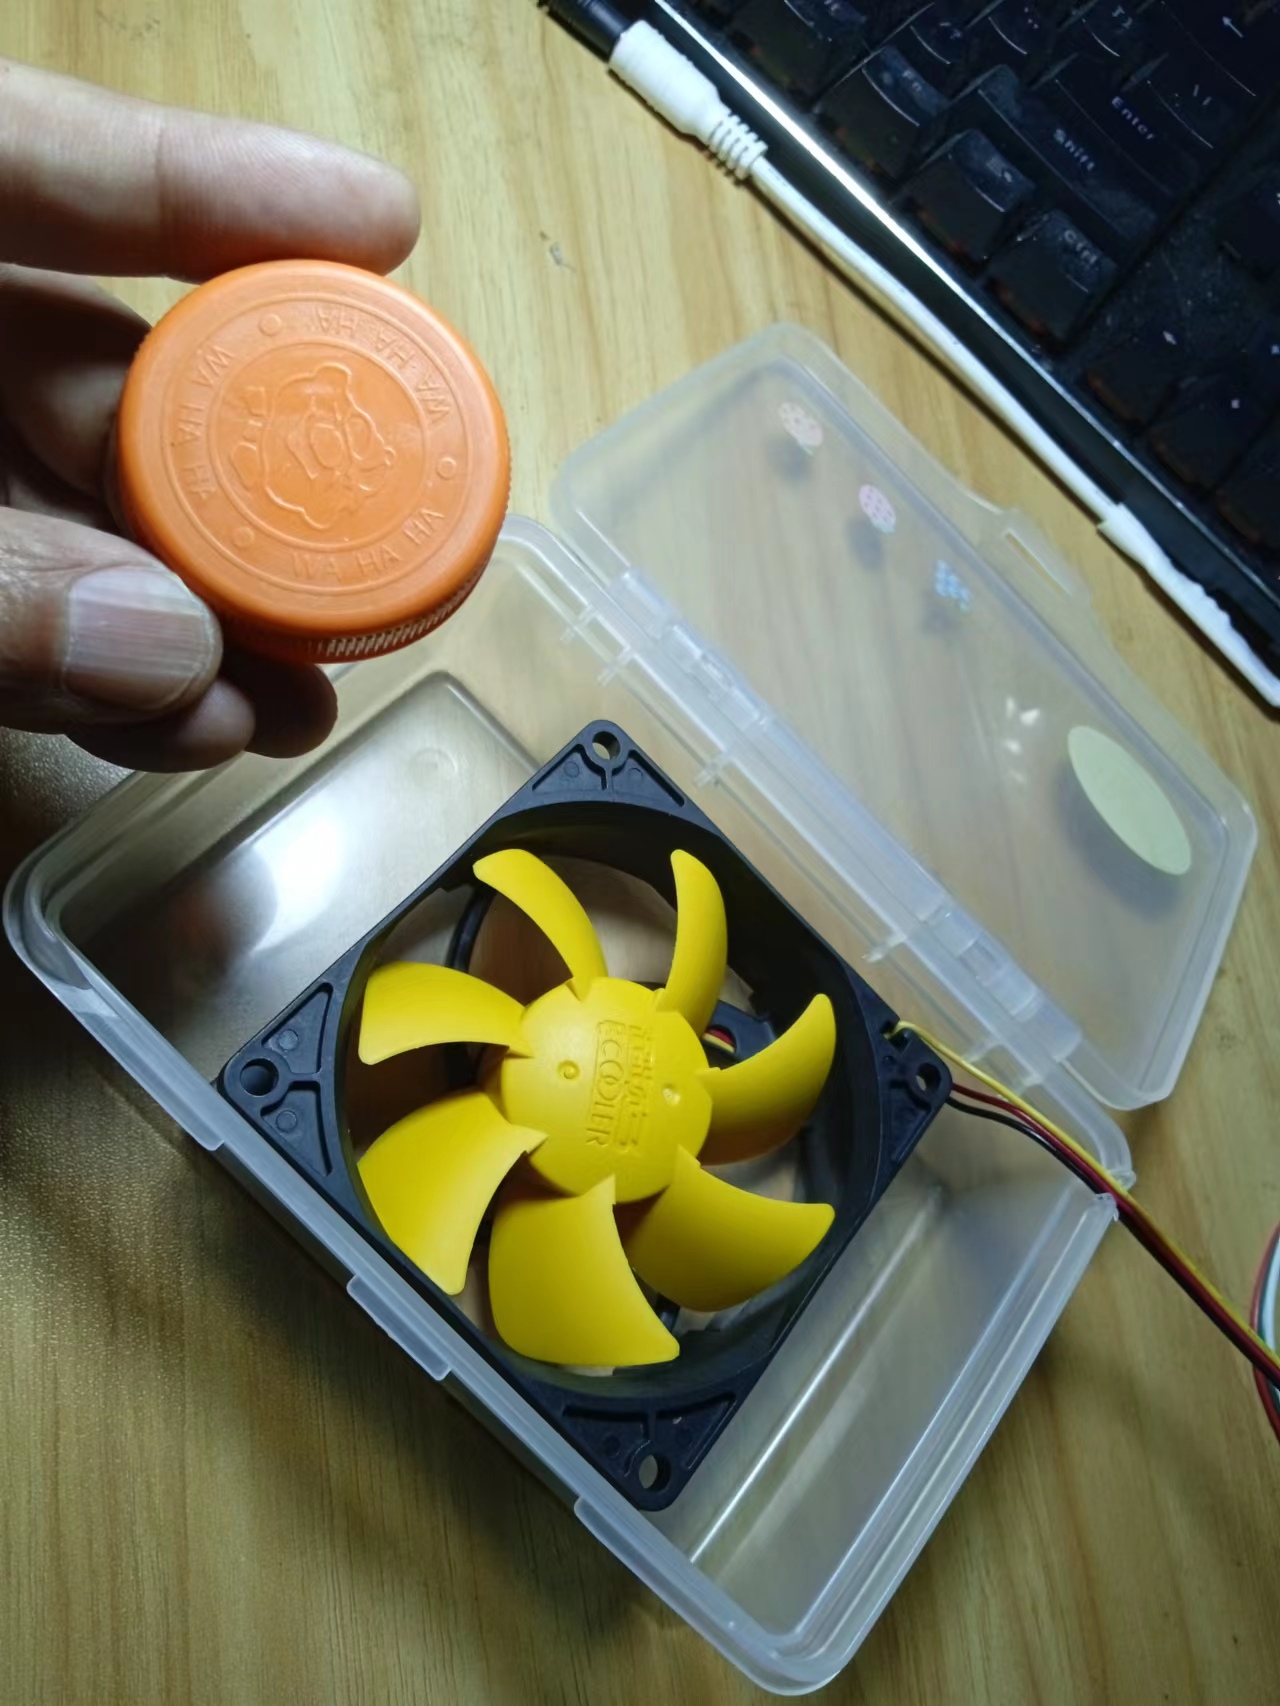
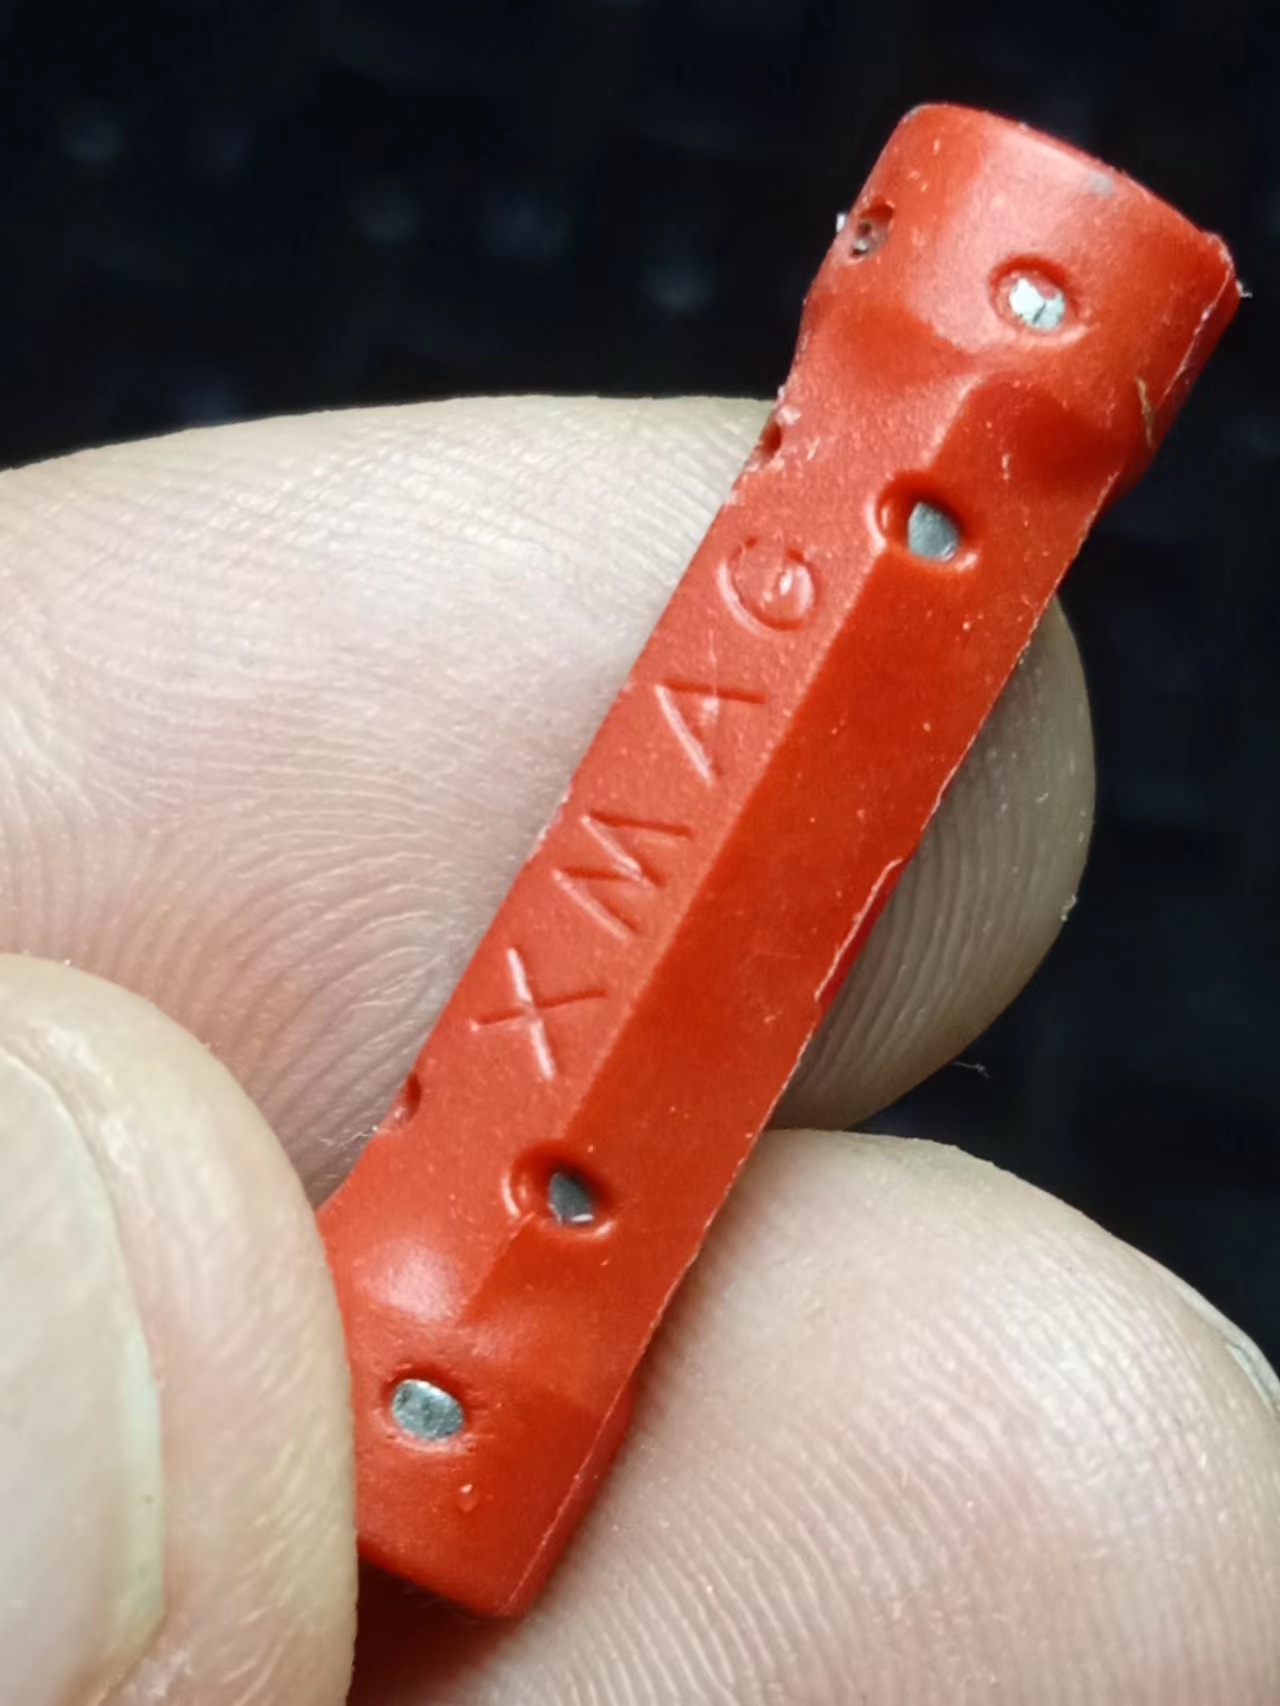
用热干胶固定二颗钕强磁块
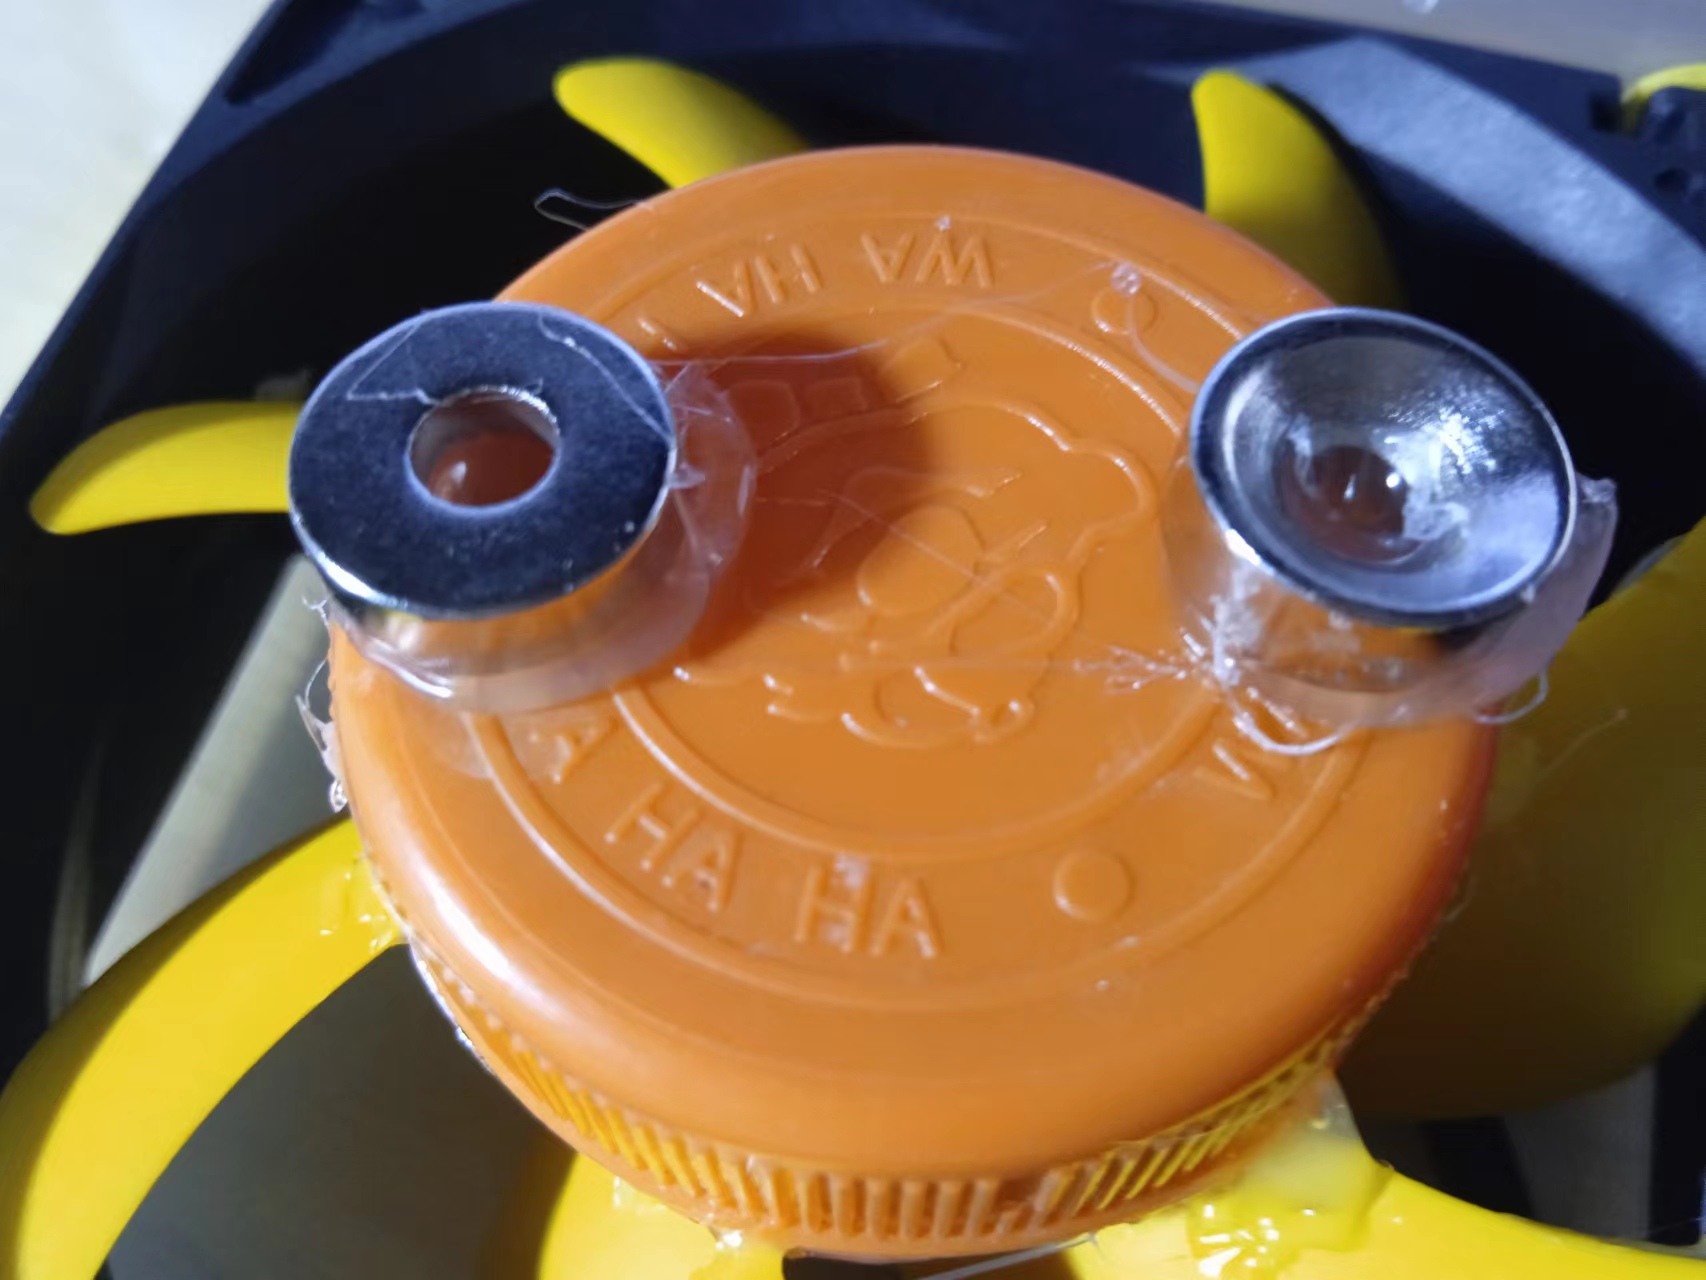
简易的磁搅头
实验场景图
WS2812B灯带选用的是每米60灯黑底裸板
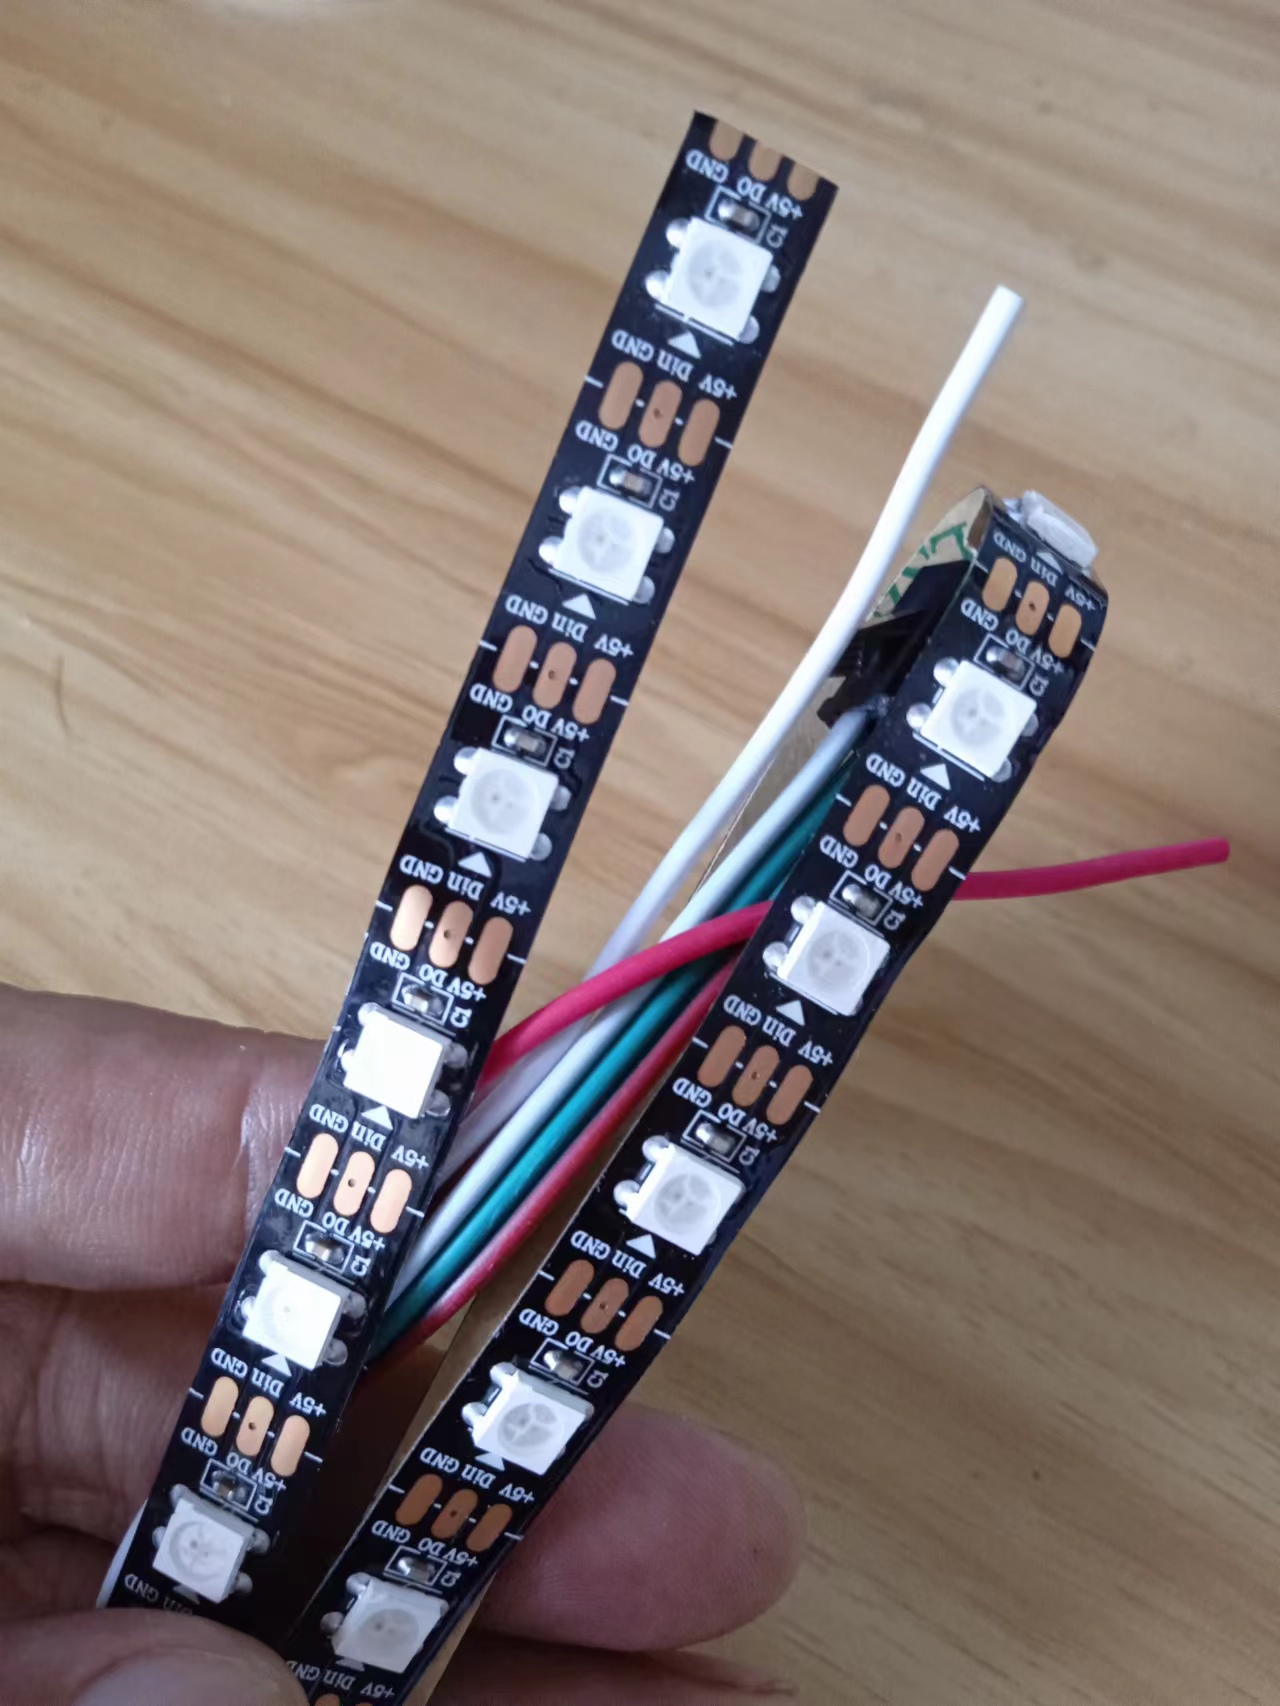
WS2812B其主要特点
智能反接保护,电源反接不会损坏IC。
IC控制电路与LED点光源公用一个电源。
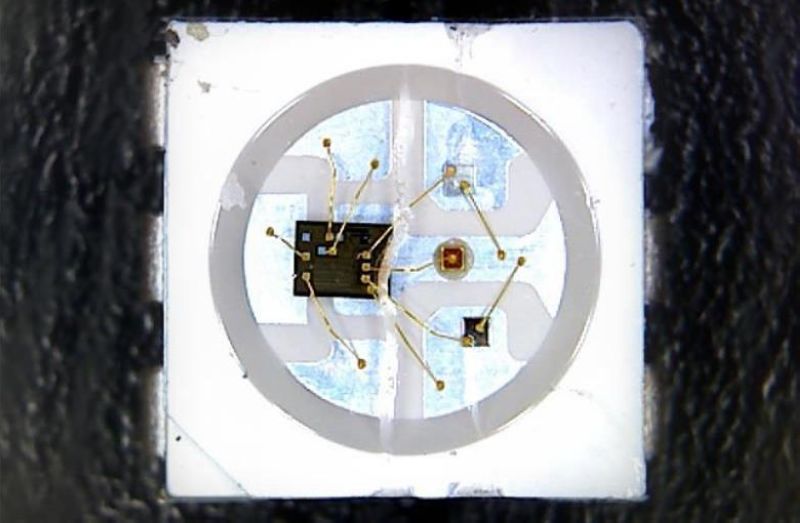
控制电路与RGB芯片集成在一个5050封装的元器件中,构成一个完整的外控像素点。
内置信号整形电路,任何一个像素点收到信号后经过波形整形再输出,保证线路波形畸变不会累加。
内置上电复位和掉电复位电路。
每个像素点的三基色颜色可实现256级亮度显示,完成16777216种颜色的全真色彩显示,扫描频率不低于400Hz/s。
串行级联接口,能通过一根信号线完成数据的接收与解码。
任意两点传传输距离在不超过5米时无需增加任何电路。
当刷新速率30帧/秒时,级联数不小于1024点。
数据发送速度可达800Kbps。
光的颜色高度一致,性价比高。
主要应用领域
LED全彩发光字灯串,LED全彩模组, LED全彩软灯条硬灯条,LED护栏管。
LED点光源,LED像素屏,LED异形屏,各种电子产品,电器设备跑马灯。
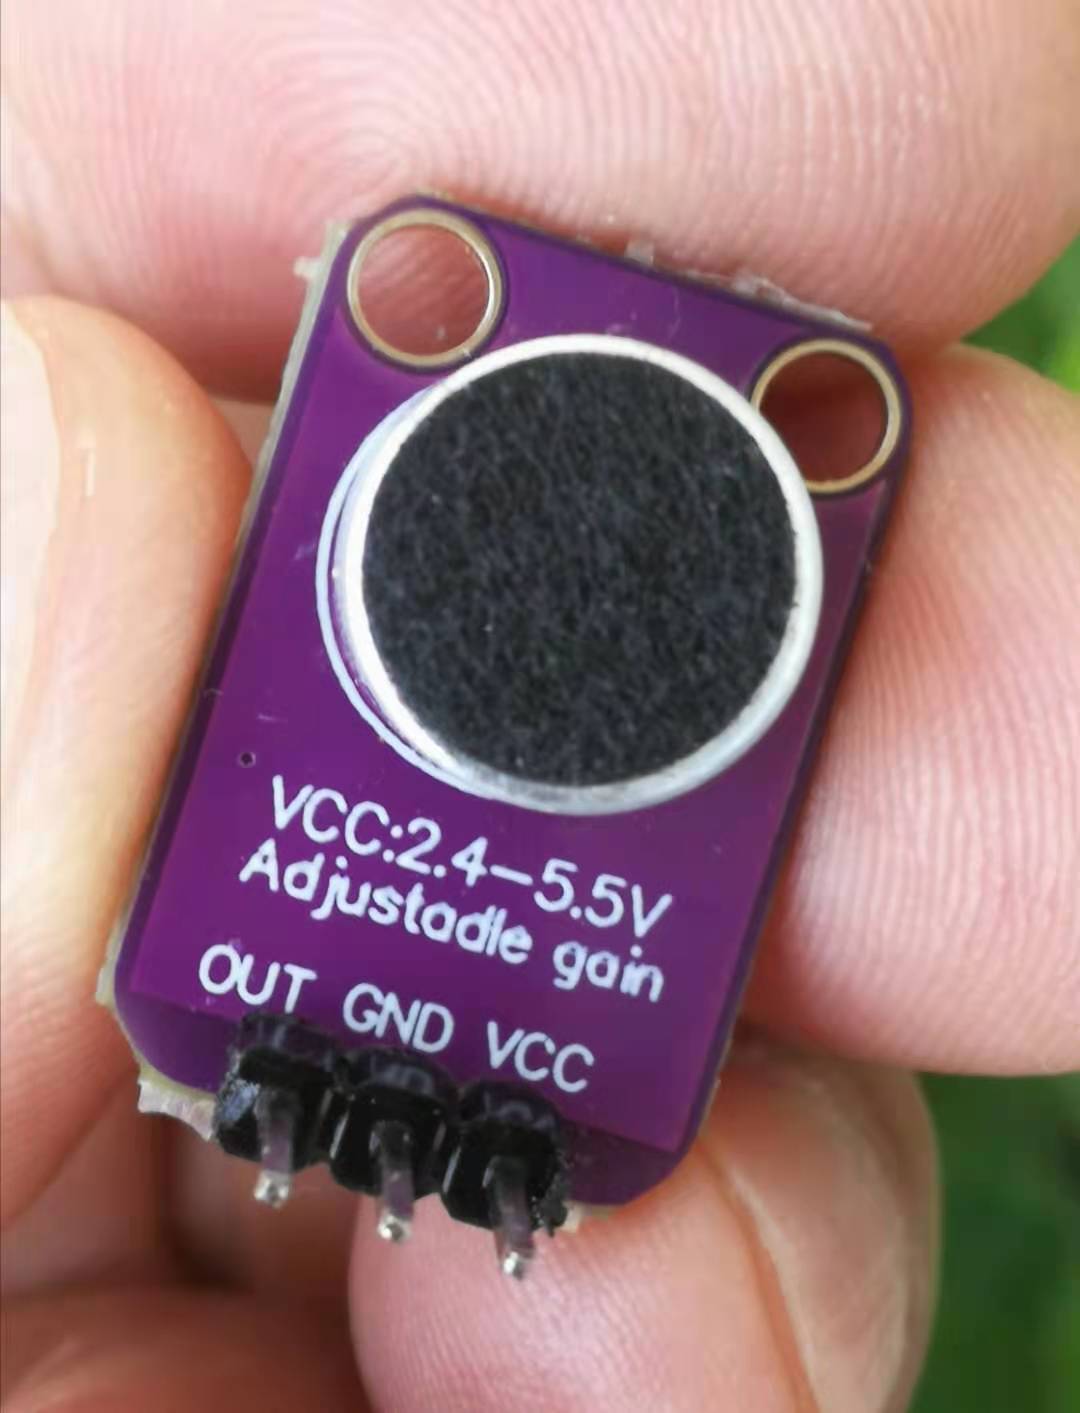
声音模块,使用性价比更高的MAX4466声音传感器。
MAX4466
是微功率运算放大器,经过优化,可用作麦克风前置放大器。它们提供了优化的增益带宽产品与电源电流的理想组合,以及超小型封装中实现低电压工件环境。 MAX4466具有增益稳定特性,仅需24μA的电源电流即可提供200kHz的增益带宽。经过解压缩,可实现+5V/V的最小稳定增益,并提供600KHZ增益带宽。此外这些放大器具有轨到轨输出,高 AVOL ,以及出色的电源抑制和共模抑制比,适合在嘈杂环境中工作。广泛应用于蜂窝电话、数字复读装置、耳机、助听器、麦克风前置放大器、便携计算机和语音识别系统中。
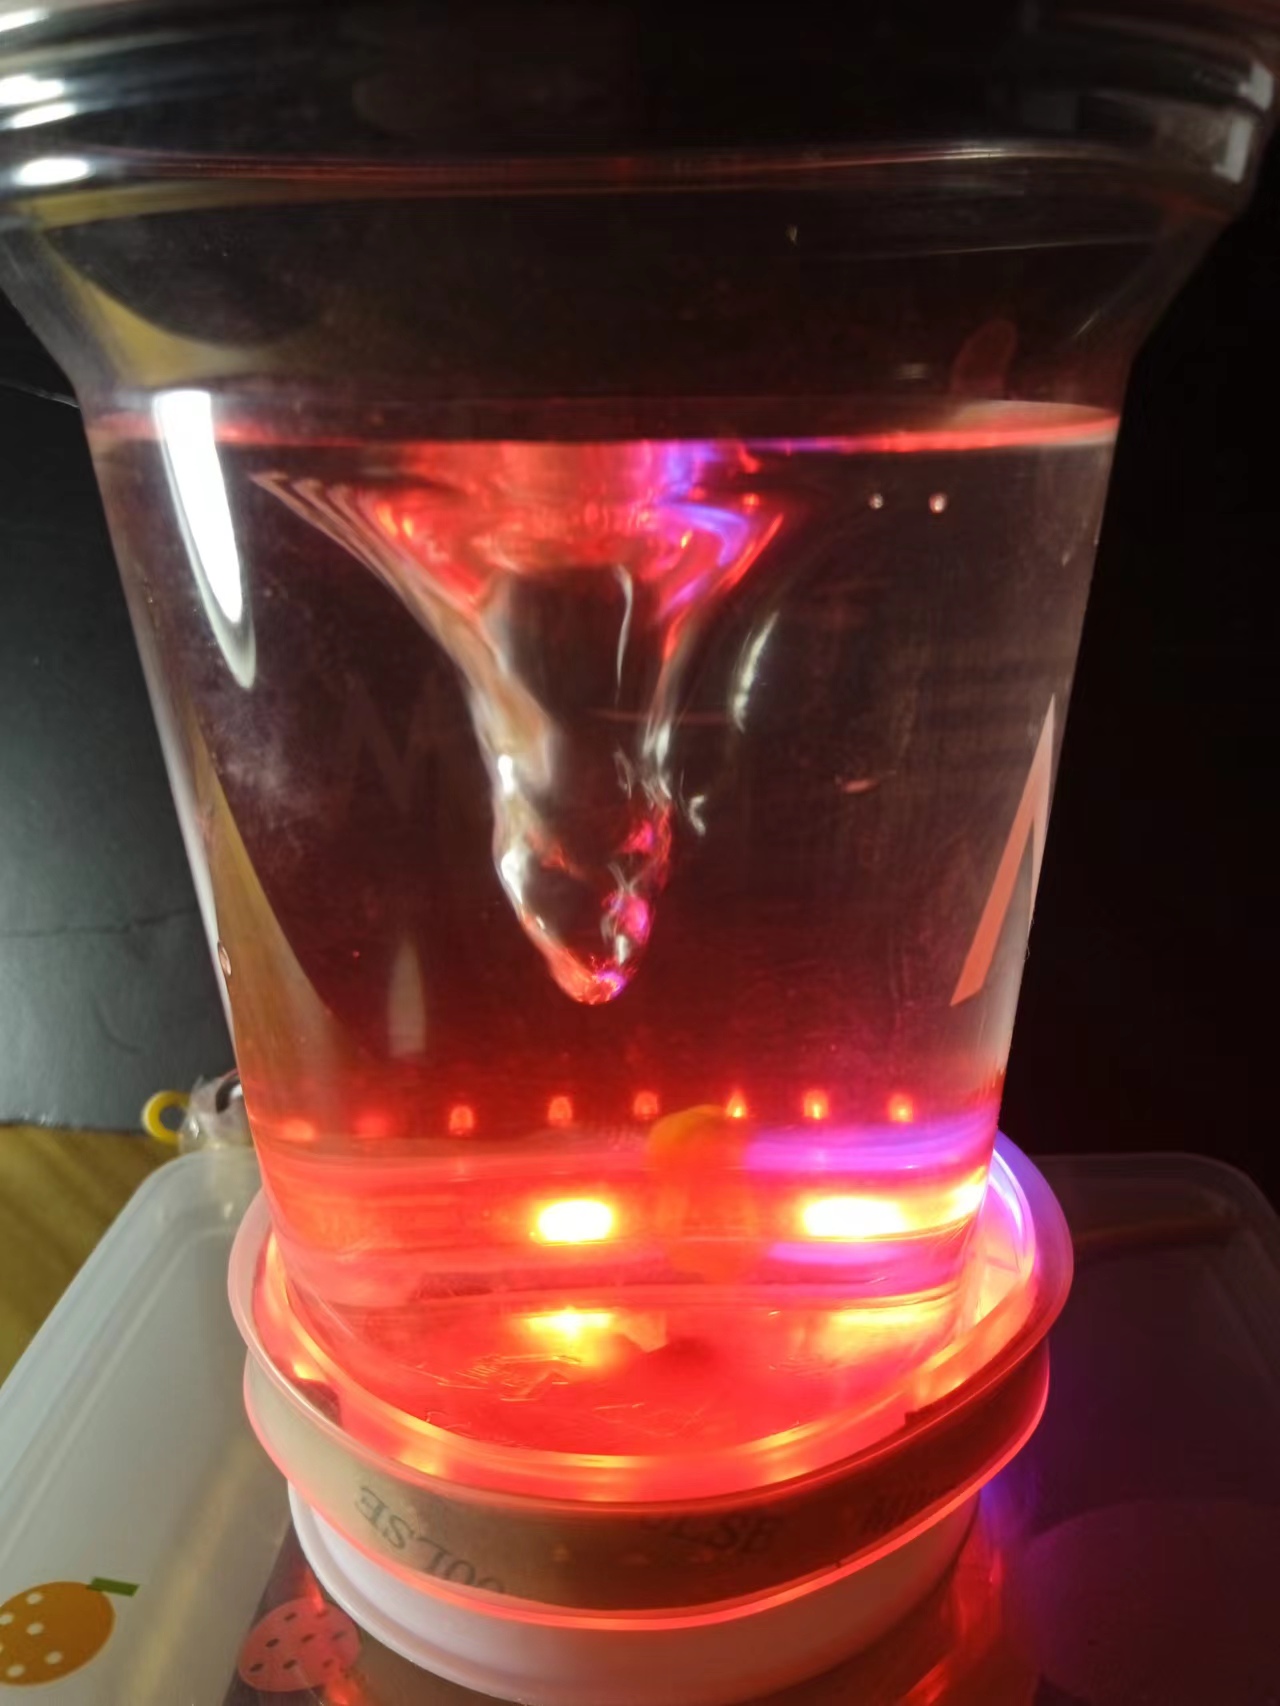
【花雕动手做】有趣好玩的音乐可视化系列项目(27)--磁搅LED水旋灯
项目程序之一:四色彩灯循环测试
模块接线:WS2812B接D6
MAX4466 UNO
VCC 5V
GND GND
OUT D6
/*
 【花雕动手做】有趣好玩的音乐可视化系列项目(27)--磁搅LED水旋灯
  项目程序之一:四色彩灯循环测试
  模块接线:WS2812B接D6
  MAX4466      UNO
  VCC          5V
  GND         GND
  OUT          D6
*/

#include <FastLED.h>
#define LEDPIN 6
#define NUMOFLEDS 16
CRGB leds[NUMOFLEDS];

void setup() {
  FastLED.addLeds<WS2812, LEDPIN, GRB>(leds, NUMOFLEDS);
}

void loop() {
  for (int i = 0; i <= 15; i++) {
    leds[i] = CRGB(0, 0, 255);
    FastLED.show();
    delay(40);
  }
  for (int i = 15; i >= 0; i--) {
    leds[i] = CRGB(255, 0, 0);
    FastLED.show();
    delay(40);
  }
  for (int i = 0; i <= 15; i++) {
    leds[i] = CRGB(0, 255, 0);
    FastLED.show();
    delay(40);
  }
  for (int i = 15; i >= 0; i--) {
    leds[i] = CRGB(255, 255, 255);
    FastLED.show();
    delay(40);
  }
}
实验场景图 动态图
实验的视频记录
优酷:https://v.youku.com/v_show/id_XNTkwODc0MDE4MA==.html?spm=a2hcb.playlsit.page.1
B站:https://www.bilibili.com/video/BV1wg411v7Tx/?vd_source=98c6b1fc23b2787403d97f8d3cc0b7e5
实验场景图
【花雕动手做】有趣好玩的音乐可视化系列项目(27)--磁搅LED水旋灯
项目程序之二:磁搅LED水旋音乐反应节奏灯
模块接线:WS2812B接D6
MAX4466 UNO
VCC 5V
GND GND
OUT D6
/*
 【花雕动手做】有趣好玩的音乐可视化系列项目(27)--磁搅LED水旋灯
  项目程序之二:磁搅LED水旋音乐反应节奏灯
  模块接线:WS2812B接D6
  MAX4466      UNO
  VCC          5V
  GND         GND
  OUT          D6
*/

#include<FastLED.h>
#define LED_PIN 6
#define NUM_LEDS 16

CRGB leds[NUM_LEDS];
uint8_t hue = 0;
int soundsensor = A0;

void setup() {
  delay(2000);
  FastLED.addLeds<WS2812B, LED_PIN, GRB>(leds, NUM_LEDS);
  FastLED.setBrightness(255);
  pinMode(soundsensor, INPUT);
}

void loop() {
  int sensval = digitalRead(soundsensor);

  if (sensval == 1) {
    leds[0] = CRGB :: Red;
    fill_solid(leds, NUM_LEDS, CRGB :: Blue);
    rainbow_moving();
    FastLED.show();
    delay(10);
  }
  else {
    leds[0] = CRGB :: Black;
    fill_solid(leds, NUM_LEDS, CRGB :: Black);
    FastLED.show();
    delay(10);
  }
}

void rainbow_moving() {
  for (int i = 0; i < NUM_LEDS; i++) {
    leds[i] = CHSV(hue + (i * 10), 255, 255);
  }
  EVERY_N_MILLISECONDS(10) {
    hue++;
  }
}【花雕动手做】有趣好玩的音乐可视化系列项目(27)--磁搅LED水旋灯
项目程序之三:磁搅LED水旋MegunoLink音乐节拍灯
模块接线:WS2812B接D6
MAX4466 UNO
VCC 5V
GND GND
OUT A0
/*
  【花雕动手做】有趣好玩的音乐可视化系列项目(27)--磁搅LED水旋灯
  项目程序之三:磁搅LED水旋MegunoLink音乐节拍灯
  模块接线:WS2812B接D6
  MAX4466      UNO
  VCC          5V
  GND         GND
  OUT          A0
*/

#include<FastLED.h>
#include<MegunoLink.h>
#include<Filter.h>

#define N_PIXELS  16
#define MIC_PIN   A0
#define LED_PIN   6
#define NOISE 10
#define TOP   (N_PIXELS+2)
#define LED_TYPE  WS2811
#define BRIGHTNESS  10
#define COLOR_ORDER GRB

CRGB leds[N_PIXELS];
int lvl = 0, minLvl = 0, maxLvl = 10;

ExponentialFilter<long> ADCFilter(5, 0);

void setup() {
  FastLED.addLeds<LED_TYPE, LED_PIN, COLOR_ORDER>(leds, N_PIXELS).setCorrection(TypicalLEDStrip);
  FastLED.setBrightness(BRIGHTNESS);
}

void loop() {
  int n, height;
  n = analogRead(MIC_PIN);
  n = abs(1023 - n);
  n = (n <= NOISE) ? 0 : abs(n - NOISE);
  ADCFilter.Filter(n);
  lvl = ADCFilter.Current();
  //  Serial.print(n);
  //  Serial.print(" ");
  //  Serial.println(lvl);
  height = TOP * (lvl - minLvl) / (long)(maxLvl - minLvl);
  if (height < 0L) height = 0;
  else if (height > TOP) height = TOP;
  for (uint8_t i = 0; i < N_PIXELS; i++) {
    if (i >= height) leds[i] = CRGB(0, 0, 0);
    else leds[i] = Wheel( map( i, 0, N_PIXELS - 1, 30, 150 ) );
  }
  FastLED.show();
}

CRGB Wheel(byte WheelPos) {
  if (WheelPos < 85)
    return CRGB(WheelPos * 3, 255 - WheelPos * 3, 0);
  else if (WheelPos < 170) {
    WheelPos -= 85;
    return CRGB(255 - WheelPos * 3, 0, WheelPos * 3);
  } else {
    WheelPos -= 170;
    return CRGB(0, WheelPos * 3, 255 - WheelPos * 3);
  }
}
实验的视频记录
优酷:https://v.youku.com/v_show/id_XNTkwODc1MzQ4MA==.html?spm=a2hcb.playlsit.page.1
B站:https://www.bilibili.com/video/BV1pe4y1z7uA/?vd_source=98c6b1fc23b2787403d97f8d3cc0b7e5
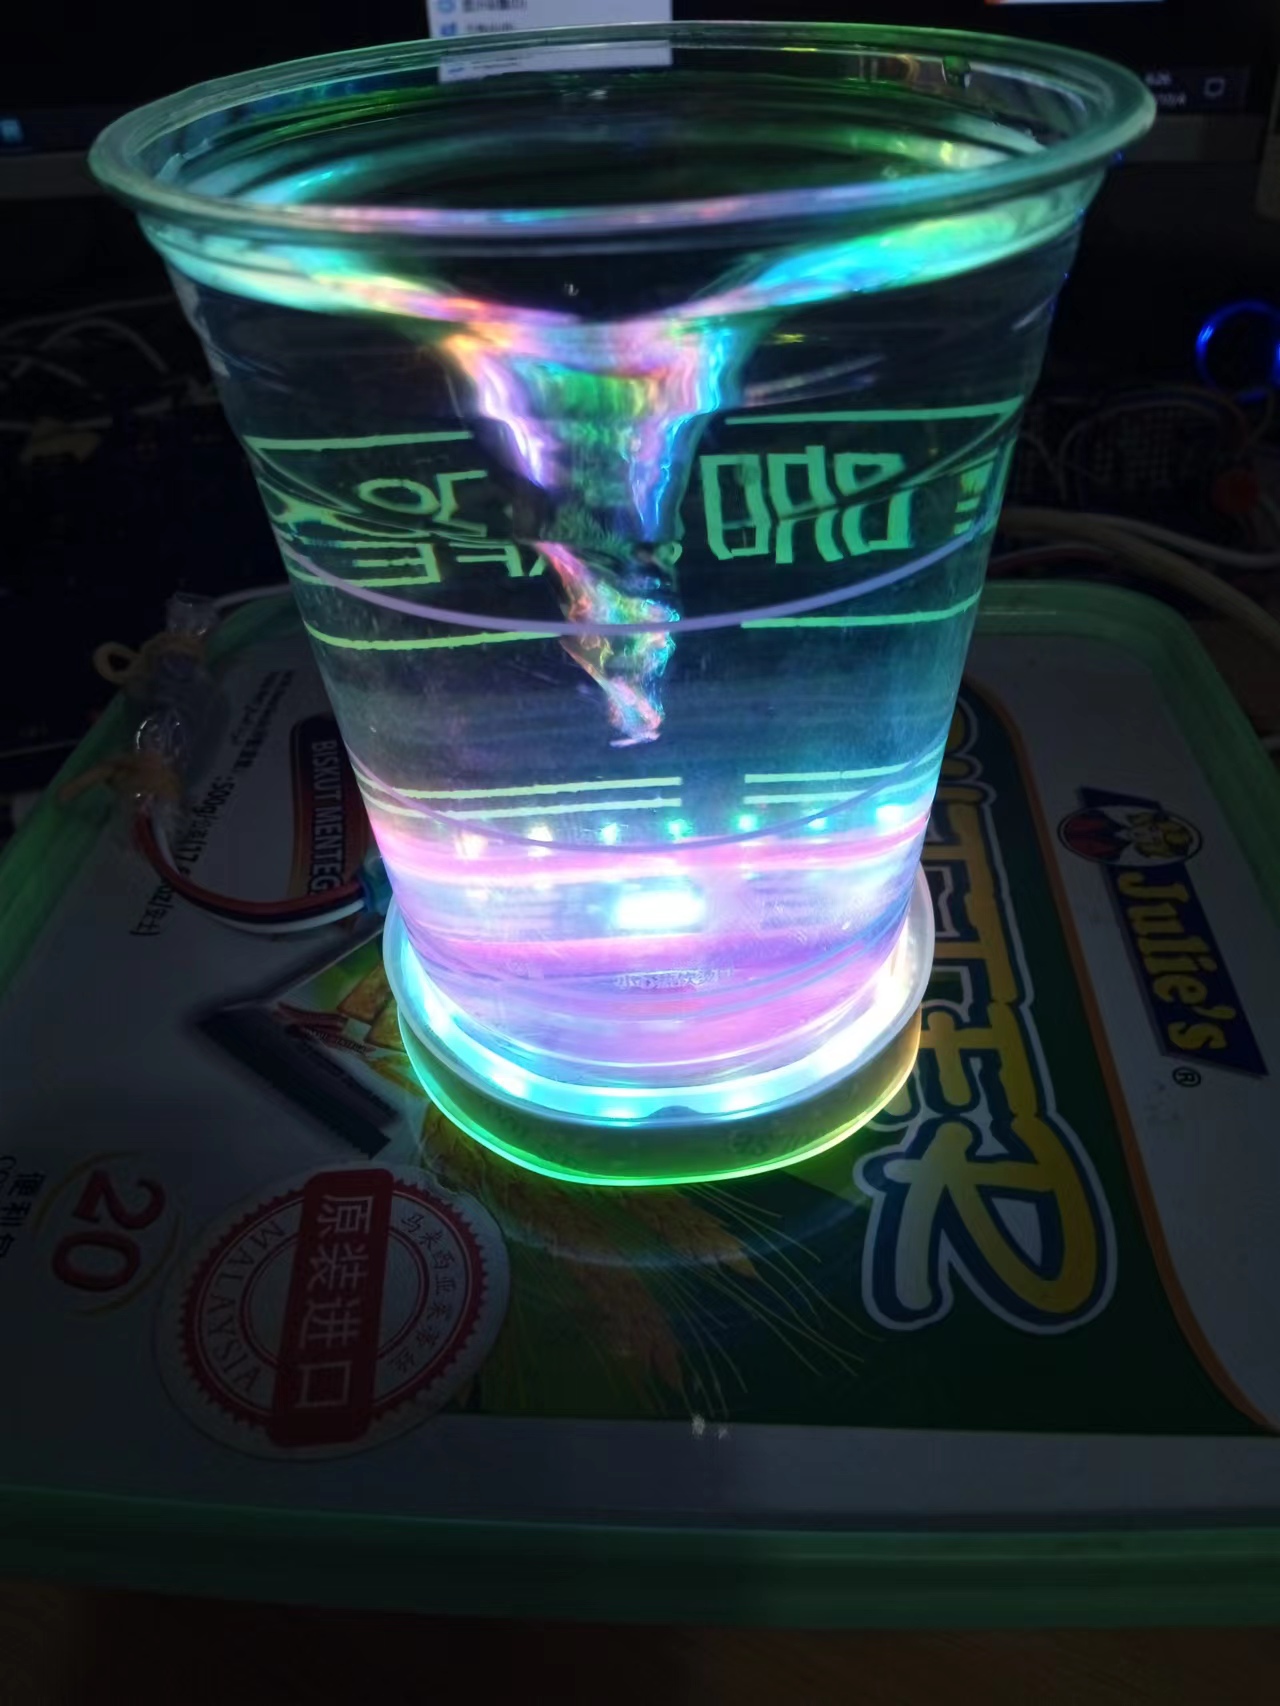
实验场景图

尝试大一号的散热风扇
【花雕动手做】有趣好玩的音乐可视化系列项目(27)--磁搅LED水旋灯
项目程序之四:磁搅LED水旋NeoPixel 环形灯条
模块接线:WS2812B接D6
MAX4466 UNO
VCC 5V
GND GND
OUT A0
/*
  【花雕动手做】有趣好玩的音乐可视化系列项目(27)--磁搅LED水旋灯
  项目程序之四:磁搅LED水旋NeoPixel 环形灯条
  模块接线:WS2812B接D6
  MAX4466      UNO
  VCC          5V
  GND         GND
  OUT          A0
*/

#include <Adafruit_NeoPixel.h>
#ifdef __AVR__
#include <avr/power.h> // Required for 16 MHz Adafruit Trinket
#endif

// Which pin on the Arduino is connected to the NeoPixels?
// On a Trinket or Gemma we suggest changing this to 1:
#define LED_PIN    6

// How many NeoPixels are attached to the Arduino?
#define LED_COUNT 16

// Declare our NeoPixel strip object:
Adafruit_NeoPixel strip(LED_COUNT, LED_PIN, NEO_GRB + NEO_KHZ800);
// Argument 1 = Number of pixels in NeoPixel strip
// Argument 2 = Arduino pin number (most are valid)
// Argument 3 = Pixel type flags, add together as needed:
//   NEO_KHZ800  800 KHz bitstream (most NeoPixel products w/WS2812 LEDs)
//   NEO_KHZ400  400 KHz (classic 'v1' (not v2) FLORA pixels, WS2811 drivers)
//   NEO_GRB     Pixels are wired for GRB bitstream (most NeoPixel products)
//   NEO_RGB     Pixels are wired for RGB bitstream (v1 FLORA pixels, not v2)
//   NEO_RGBW    Pixels are wired for RGBW bitstream (NeoPixel RGBW products)


// setup() function -- runs once at startup --------------------------------

void setup() {
  // These lines are specifically to support the Adafruit Trinket 5V 16 MHz.
  // Any other board, you can remove this part (but no harm leaving it):
#if defined(__AVR_ATtiny85__) && (F_CPU == 16000000)
  clock_prescale_set(clock_div_1);
#endif
  // END of Trinket-specific code.

  strip.begin();           // INITIALIZE NeoPixel strip object (REQUIRED)
  strip.show();            // Turn OFF all pixels ASAP
  strip.setBrightness(250); // Set BRIGHTNESS to about 1/5 (max = 255)
}


// loop() function -- runs repeatedly as long as board is on ---------------

void loop() {
  // Fill along the length of the strip in various colors...
  colorWipe(strip.Color(255,   0,   0), 250); // Red
  colorWipe(strip.Color(  0, 255,   0), 250); // Green
  colorWipe(strip.Color(  0,   0, 255), 250); // Blue

  // Do a theater marquee effect in various colors...
  theaterChase(strip.Color(127, 127, 127), 250); // White, half brightness
  theaterChase(strip.Color(127,   0,   0), 250); // Red, half brightness
  theaterChase(strip.Color(  0,   0, 127), 250); // Blue, half brightness

  rainbow(10);             // Flowing rainbow cycle along the whole strip
  theaterChaseRainbow(50); // Rainbow-enhanced theaterChase variant
}


// Some functions of our own for creating animated effects -----------------

// Fill strip pixels one after another with a color. Strip is NOT cleared
// first; anything there will be covered pixel by pixel. Pass in color
// (as a single 'packed' 32-bit value, which you can get by calling
// strip.Color(red, green, blue) as shown in the loop() function above),
// and a delay time (in milliseconds) between pixels.
void colorWipe(uint32_t color, int wait) {
  for (int i = 0; i < strip.numPixels(); i++) { // For each pixel in strip...
    strip.setPixelColor(i, color);         //  Set pixel's color (in RAM)
    strip.show();                          //  Update strip to match
    delay(30);                           //  Pause for a moment
  }
}

// Theater-marquee-style chasing lights. Pass in a color (32-bit value,
// a la strip.Color(r,g,b) as mentioned above), and a delay time (in ms)
// between frames.
void theaterChase(uint32_t color, int wait) {
  for (int a = 0; a < 20; a++) { // Repeat 10 times...
    for (int b = 0; b < 3; b++) { //  'b' counts from 0 to 2...
      strip.clear();         //   Set all pixels in RAM to 0 (off)
      // 'c' counts up from 'b' to end of strip in steps of 3...
      for (int c = b; c < strip.numPixels(); c += 3) {
        strip.setPixelColor(c, color); // Set pixel 'c' to value 'color'
      }
      strip.show(); // Update strip with new contents
      delay(30);  // Pause for a moment
    }
  }
}

// Rainbow cycle along whole strip. Pass delay time (in ms) between frames.
void rainbow(int wait) {
  // Hue of first pixel runs 5 complete loops through the color wheel.
  // Color wheel has a range of 65536 but it's OK if we roll over, so
  // just count from 0 to 5*65536. Adding 256 to firstPixelHue each time
  // means we'll make 5*65536/256 = 1280 passes through this outer loop:
  for (long firstPixelHue = 0; firstPixelHue < 2 * 65536; firstPixelHue += 256) {
    for (int i = 0; i < strip.numPixels(); i++) { // For each pixel in strip...
      // Offset pixel hue by an amount to make one full revolution of the
      // color wheel (range of 65536) along the length of the strip
      // (strip.numPixels() steps):
      int pixelHue = firstPixelHue + (i * 65536L / strip.numPixels());
      // strip.ColorHSV() can take 1 or 3 arguments: a hue (0 to 65535) or
      // optionally add saturation and value (brightness) (each 0 to 255).
      // Here we're using just the single-argument hue variant. The result
      // is passed through strip.gamma32() to provide 'truer' colors
      // before assigning to each pixel:
      strip.setPixelColor(i, strip.gamma32(strip.ColorHSV(pixelHue)));
    }
    strip.show(); // Update strip with new contents
    delay(2);  // Pause for a moment
  }
}

// Rainbow-enhanced theater marquee. Pass delay time (in ms) between frames.
void theaterChaseRainbow(int wait) {
  int firstPixelHue = 0;     // First pixel starts at red (hue 0)
  for (int a = 0; a < 30; a++) { // Repeat 30 times...
    for (int b = 0; b < 3; b++) { //  'b' counts from 0 to 2...
      strip.clear();         //   Set all pixels in RAM to 0 (off)
      // 'c' counts up from 'b' to end of strip in increments of 3...
      for (int c = b; c < strip.numPixels(); c += 3) {
        // hue of pixel 'c' is offset by an amount to make one full
        // revolution of the color wheel (range 65536) along the length
        // of the strip (strip.numPixels() steps):
        int      hue   = firstPixelHue + c * 65536L / strip.numPixels();
        uint32_t color = strip.gamma32(strip.ColorHSV(hue)); // hue -> RGB
        strip.setPixelColor(c, color); // Set pixel 'c' to value 'color'
      }
      strip.show();                // Update strip with new contents
      delay(50);                 // Pause for a moment
      firstPixelHue += 65536 / 90; // One cycle of color wheel over 90 frames
    }
  }
}
实验的视频记录
优酷:https://v.youku.com/v_show/id_XNTkwNzE3NjM2OA==.html?spm=a2hcb.playlsit.page.1
B站:https://www.bilibili.com/video/BV1te4y1J7QG/?vd_source=98c6b1fc23b2787403d97f8d3cc0b7e5
实验场景图


 他的勋章
他的勋章
花生编程2023.02.17
赞
驴友花雕2023.05.05
谢谢老师的鼓励!
驴友花雕2023.05.05
谢谢老师的鼓励!
驴友花雕2023.05.05
谢谢老师的鼓励!
驴友花雕2023.05.05
谢谢老师的鼓励!
花生编程2023.02.17
厉害
驴友花雕2023.05.05
谢谢老师的鼓励!
驴友花雕2023.05.05
谢谢老师的鼓励!
驴友花雕2023.05.05
谢谢老师的鼓励!
驴友花雕2023.05.05
谢谢老师的鼓励!
三春牛-创客2023.01.14
呵呵呵呵
三春牛-创客2023.01.14
厉害厉害
笑笑121354生2022.11.15
您好,请问有完整的代码吗,我们发现代码只是操控灯带的,声音传感器并没有播放出声音
驴友花雕2022.12.04
这个就是完整代码,声音传感器是接收声音信号,并由此信号来控制LED,为音乐可视化专题的一个项目
笑笑121354生2022.11.14
作者大大,有点问题想要问,看见了有空能回一下吗,这可是一个求知人士的困惑呜呜呜!
笑笑121354生2022.11.14
就是我把程序放进arduino以后,显示项目上传出错,我是非专业的,在灯带的连接上也有些问题。
驴友花雕2022.11.15
您好,看到了,什么问题可以直接留言
驴友花雕2022.11.15
上传出错的原因,会有好几种,具体情况需要具体了解