 返回首页
返回首页
 回到顶部
回到顶部

偶然心血来潮,想要做一个音乐可视化的系列专题。这个专题的难度有点高,涉及面也比较广泛,相关的FFT和FHT等算法也相当复杂,不过还是打算从最简单的开始,实际动手做做试验,耐心尝试一下各种方案,逐步积累些有用的音乐频谱可视化的资料,也会争取成型一些实用好玩的音乐可视器项目。
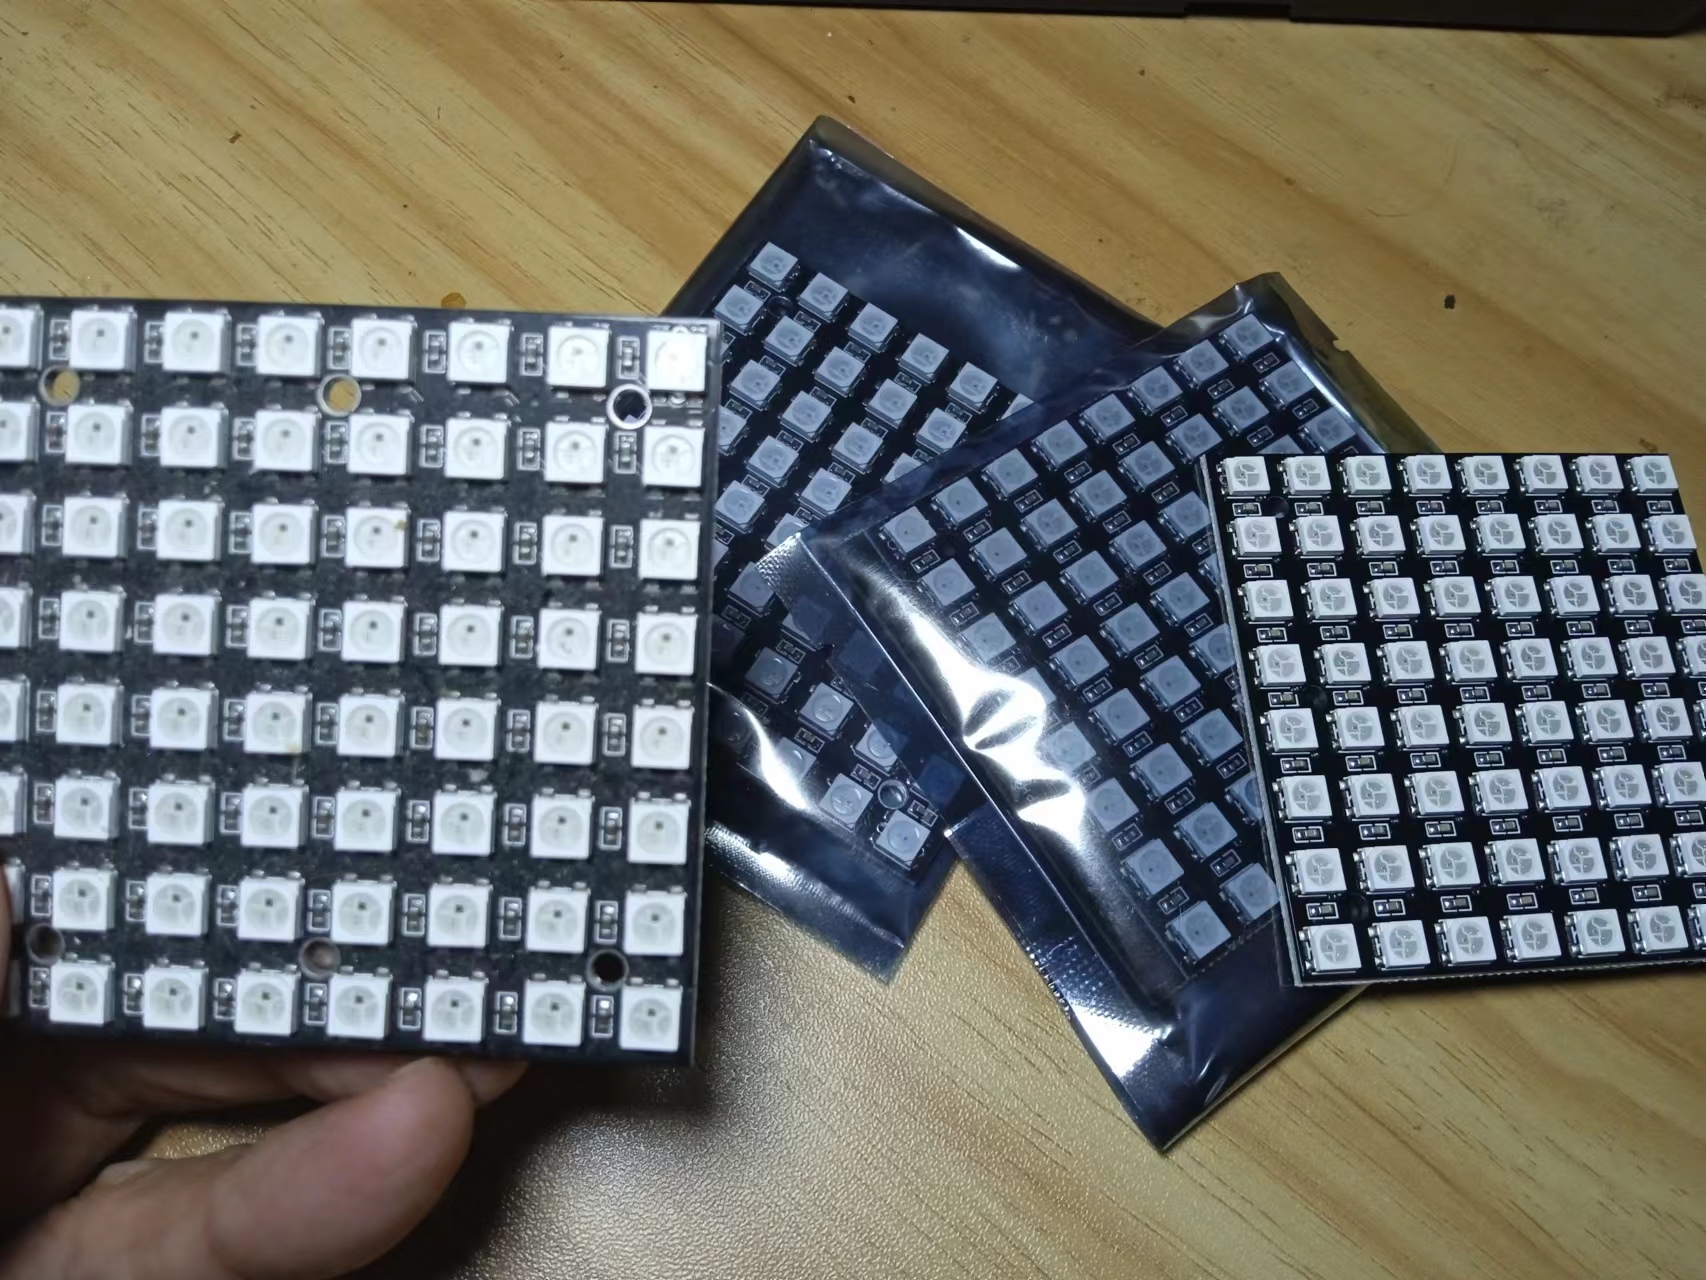
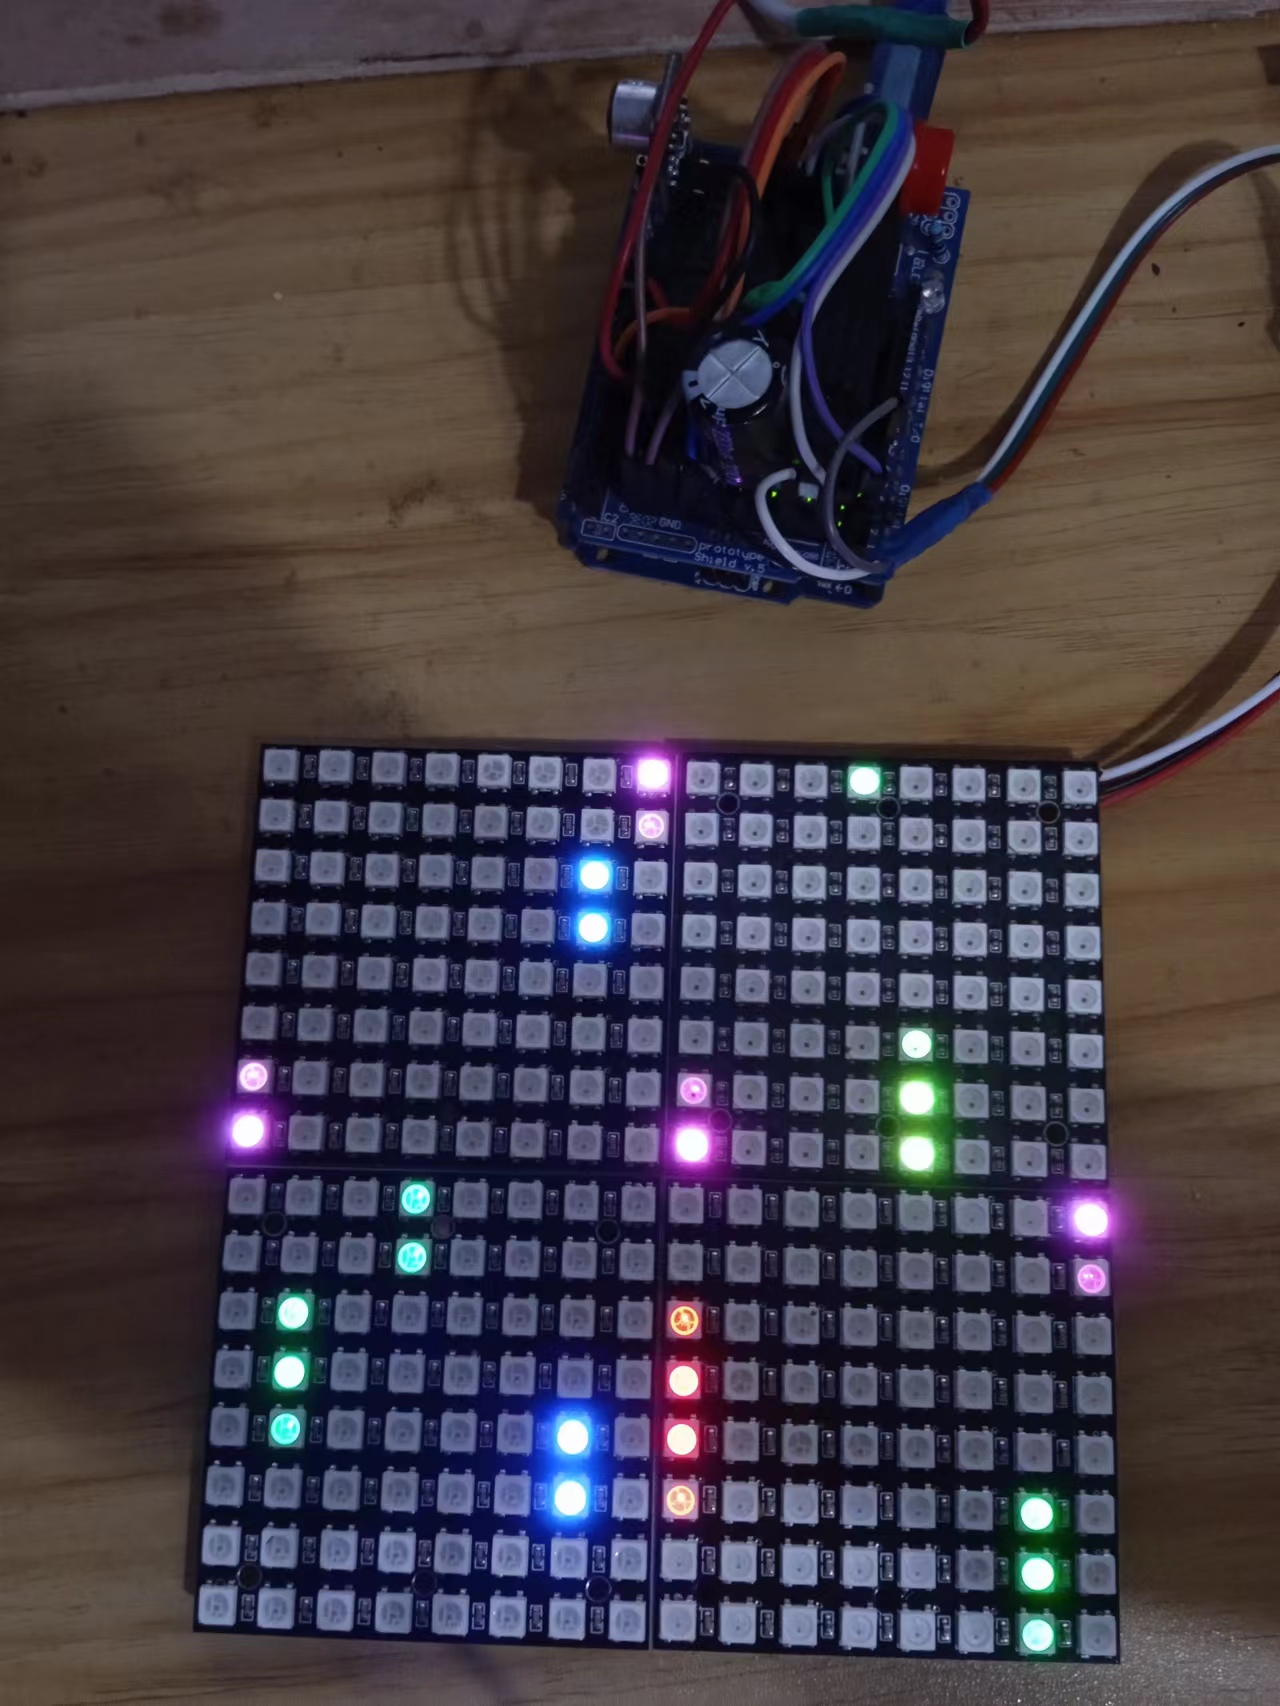
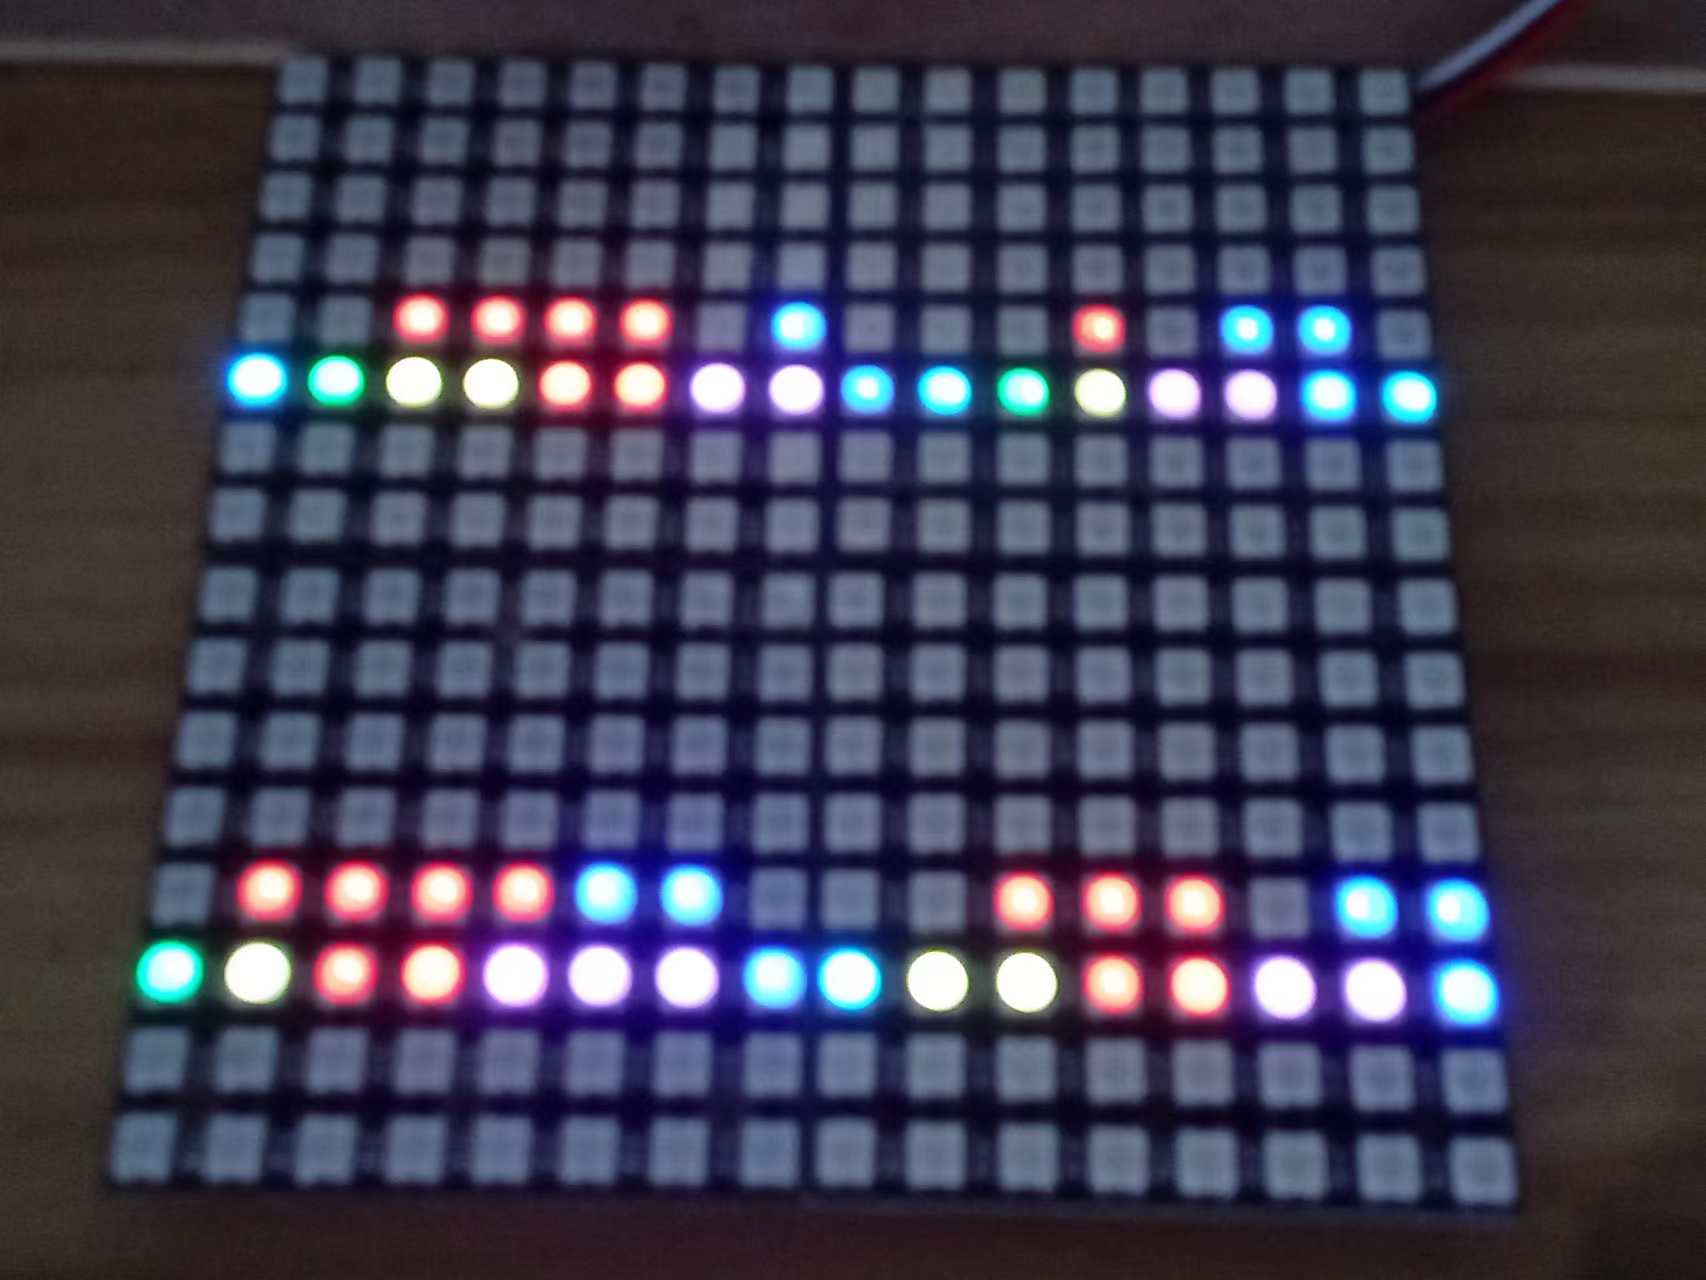
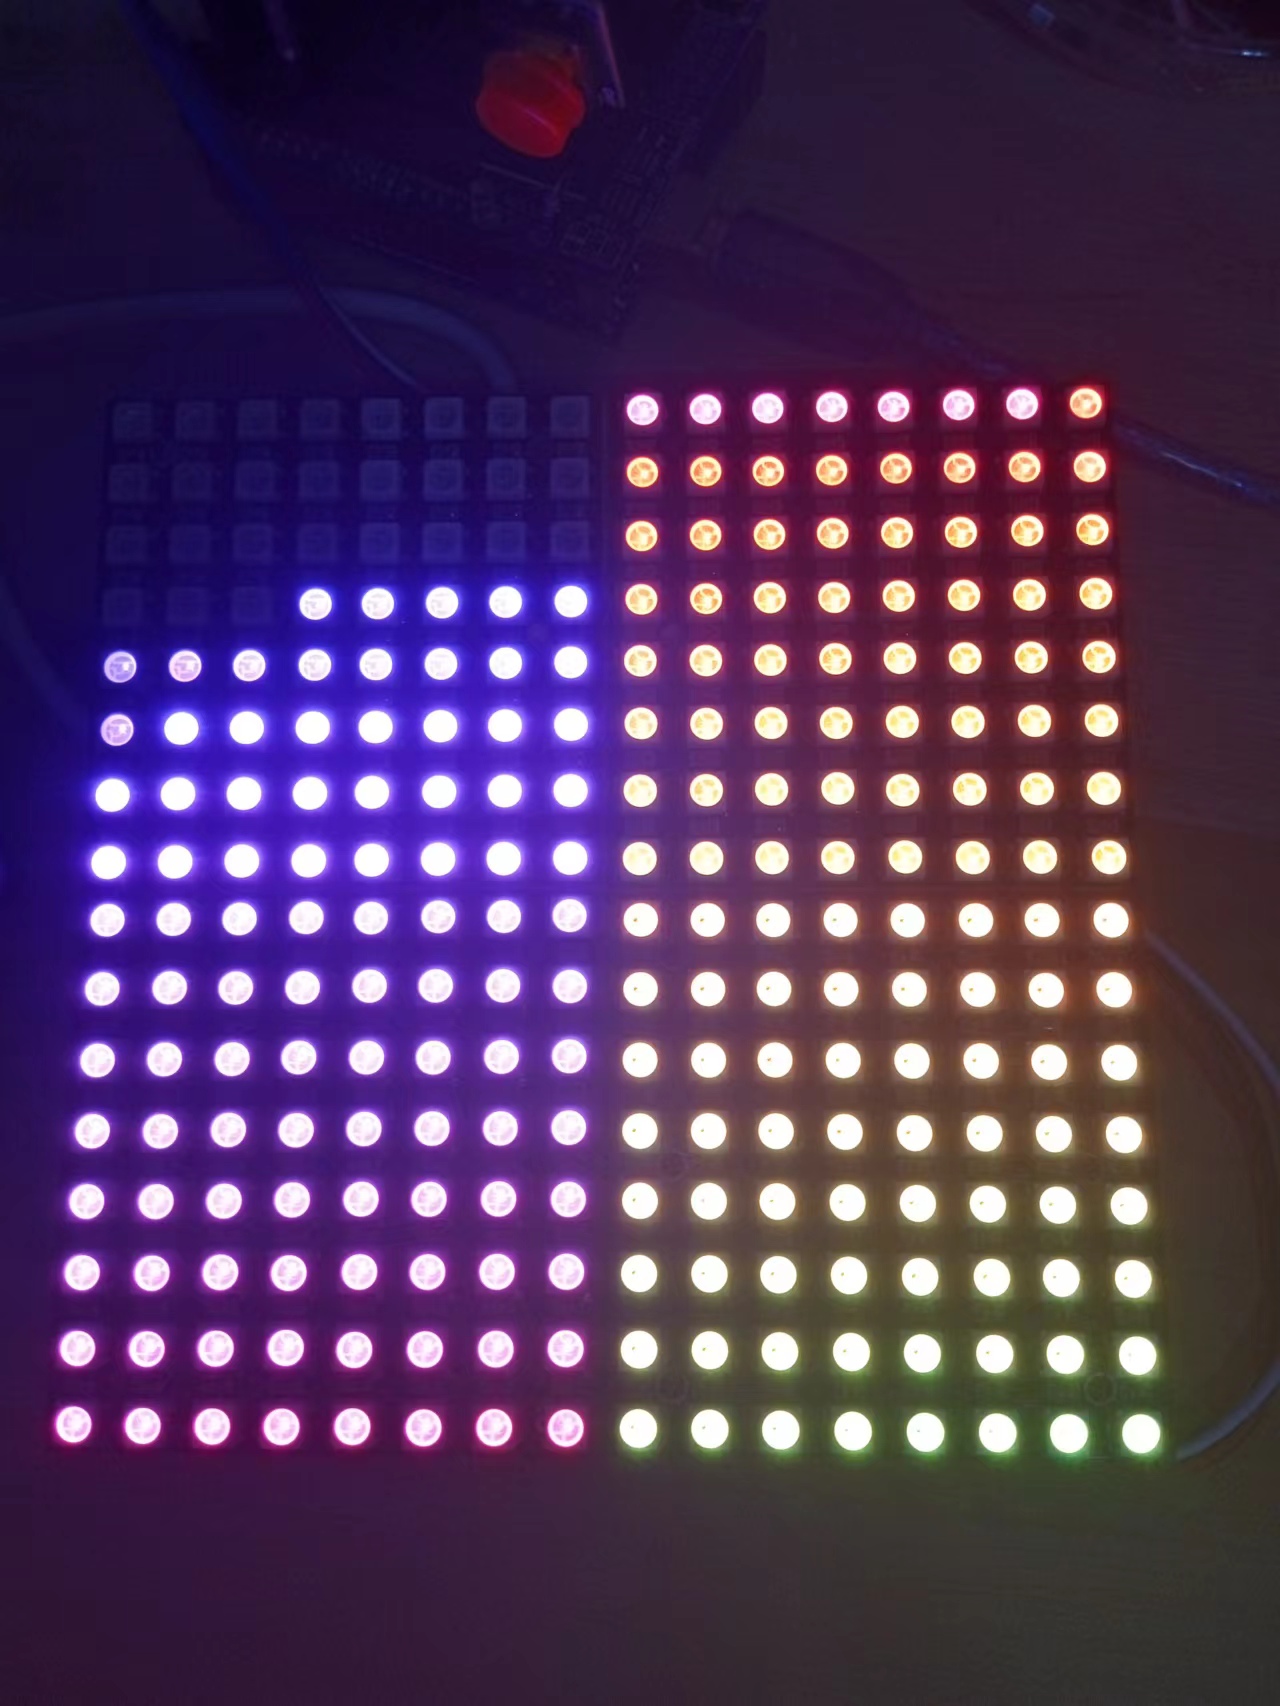
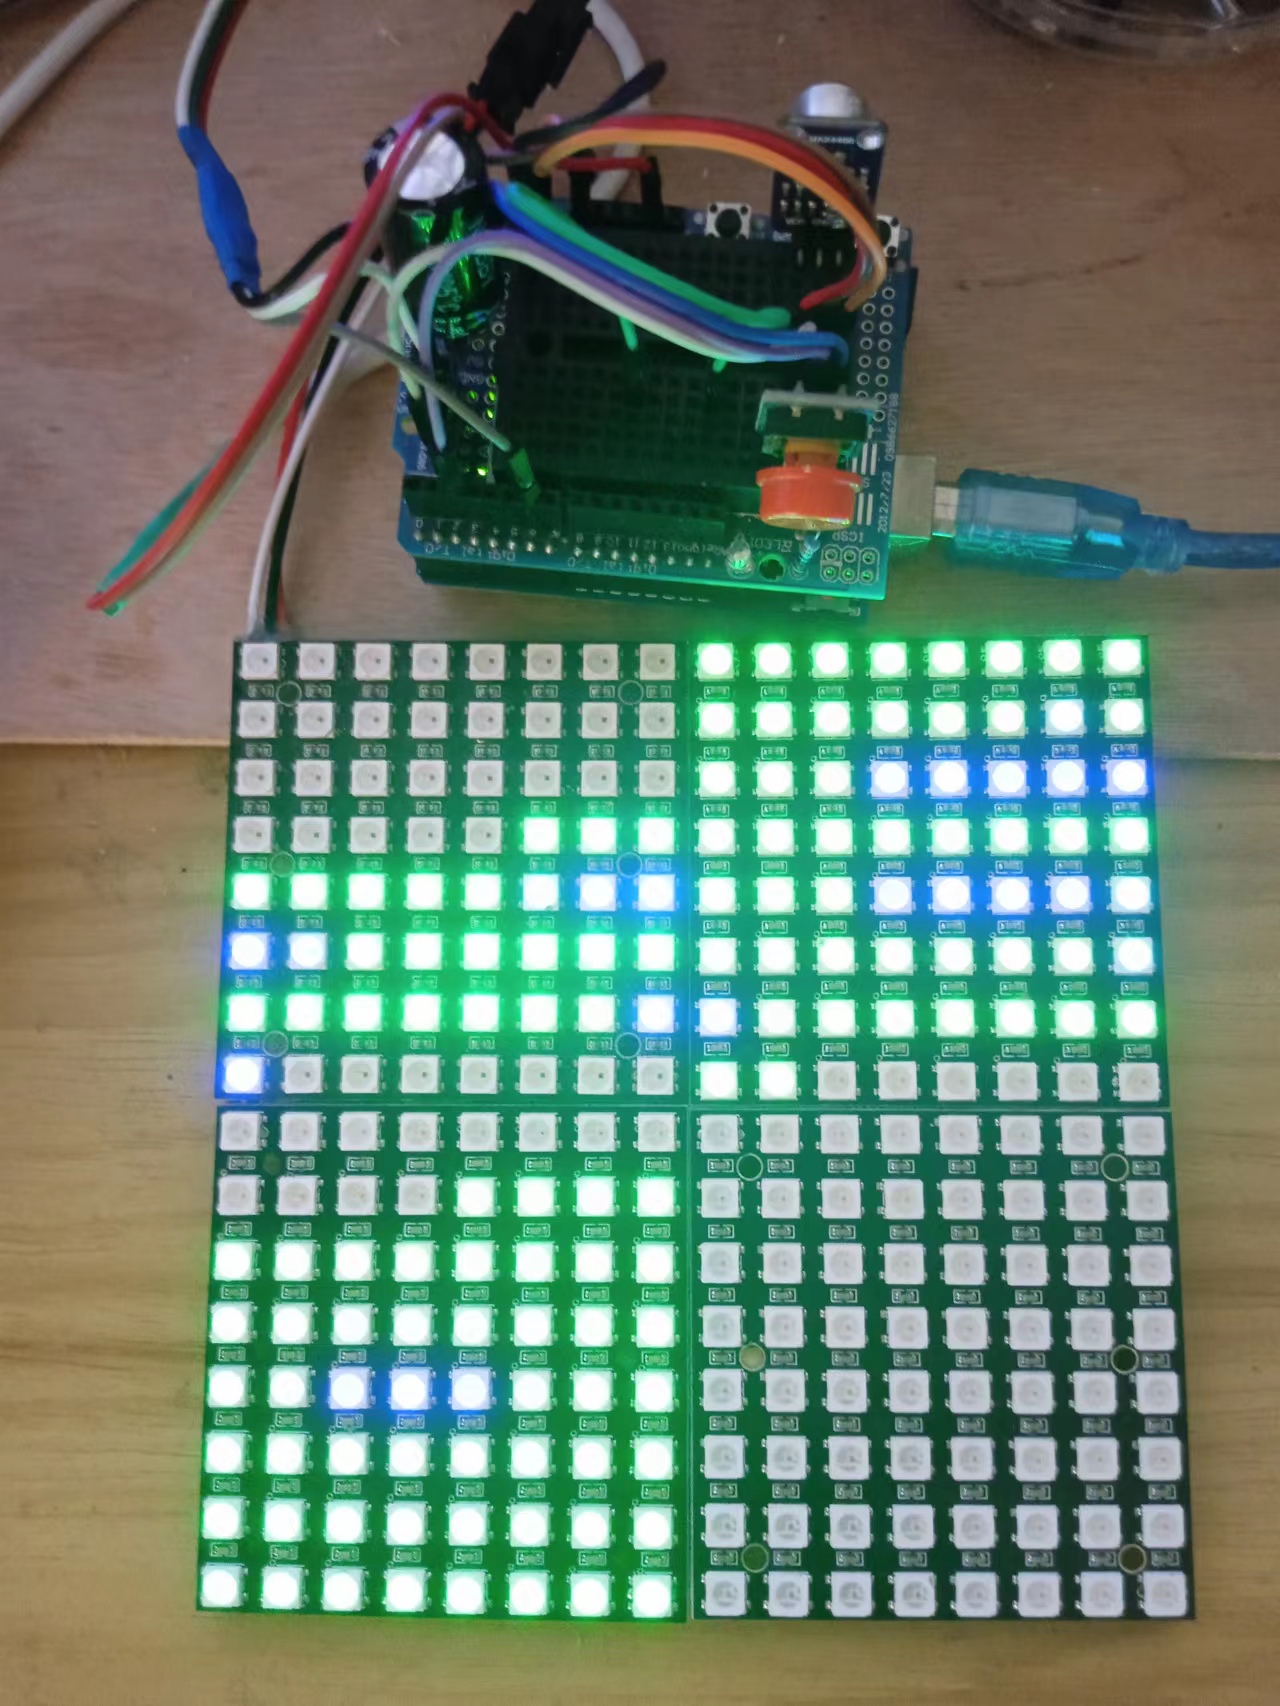
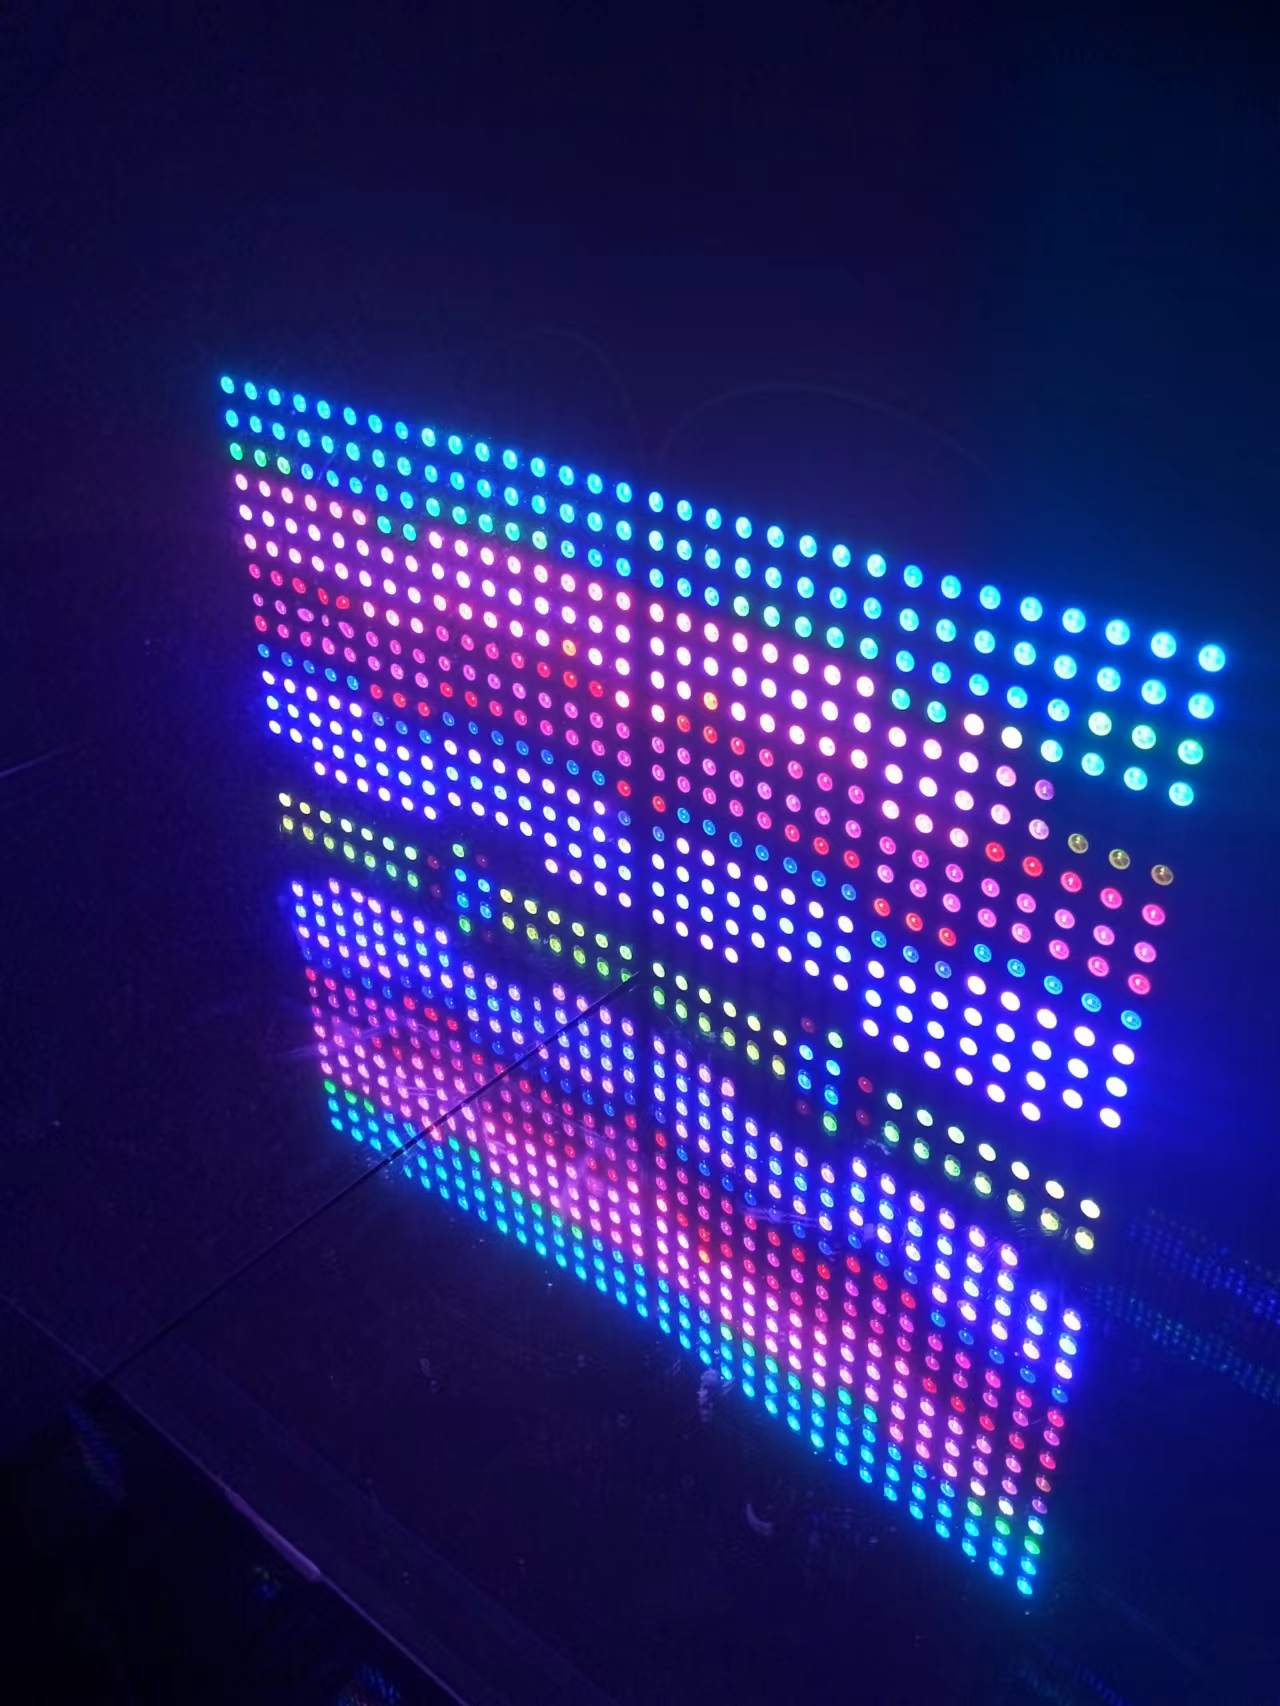
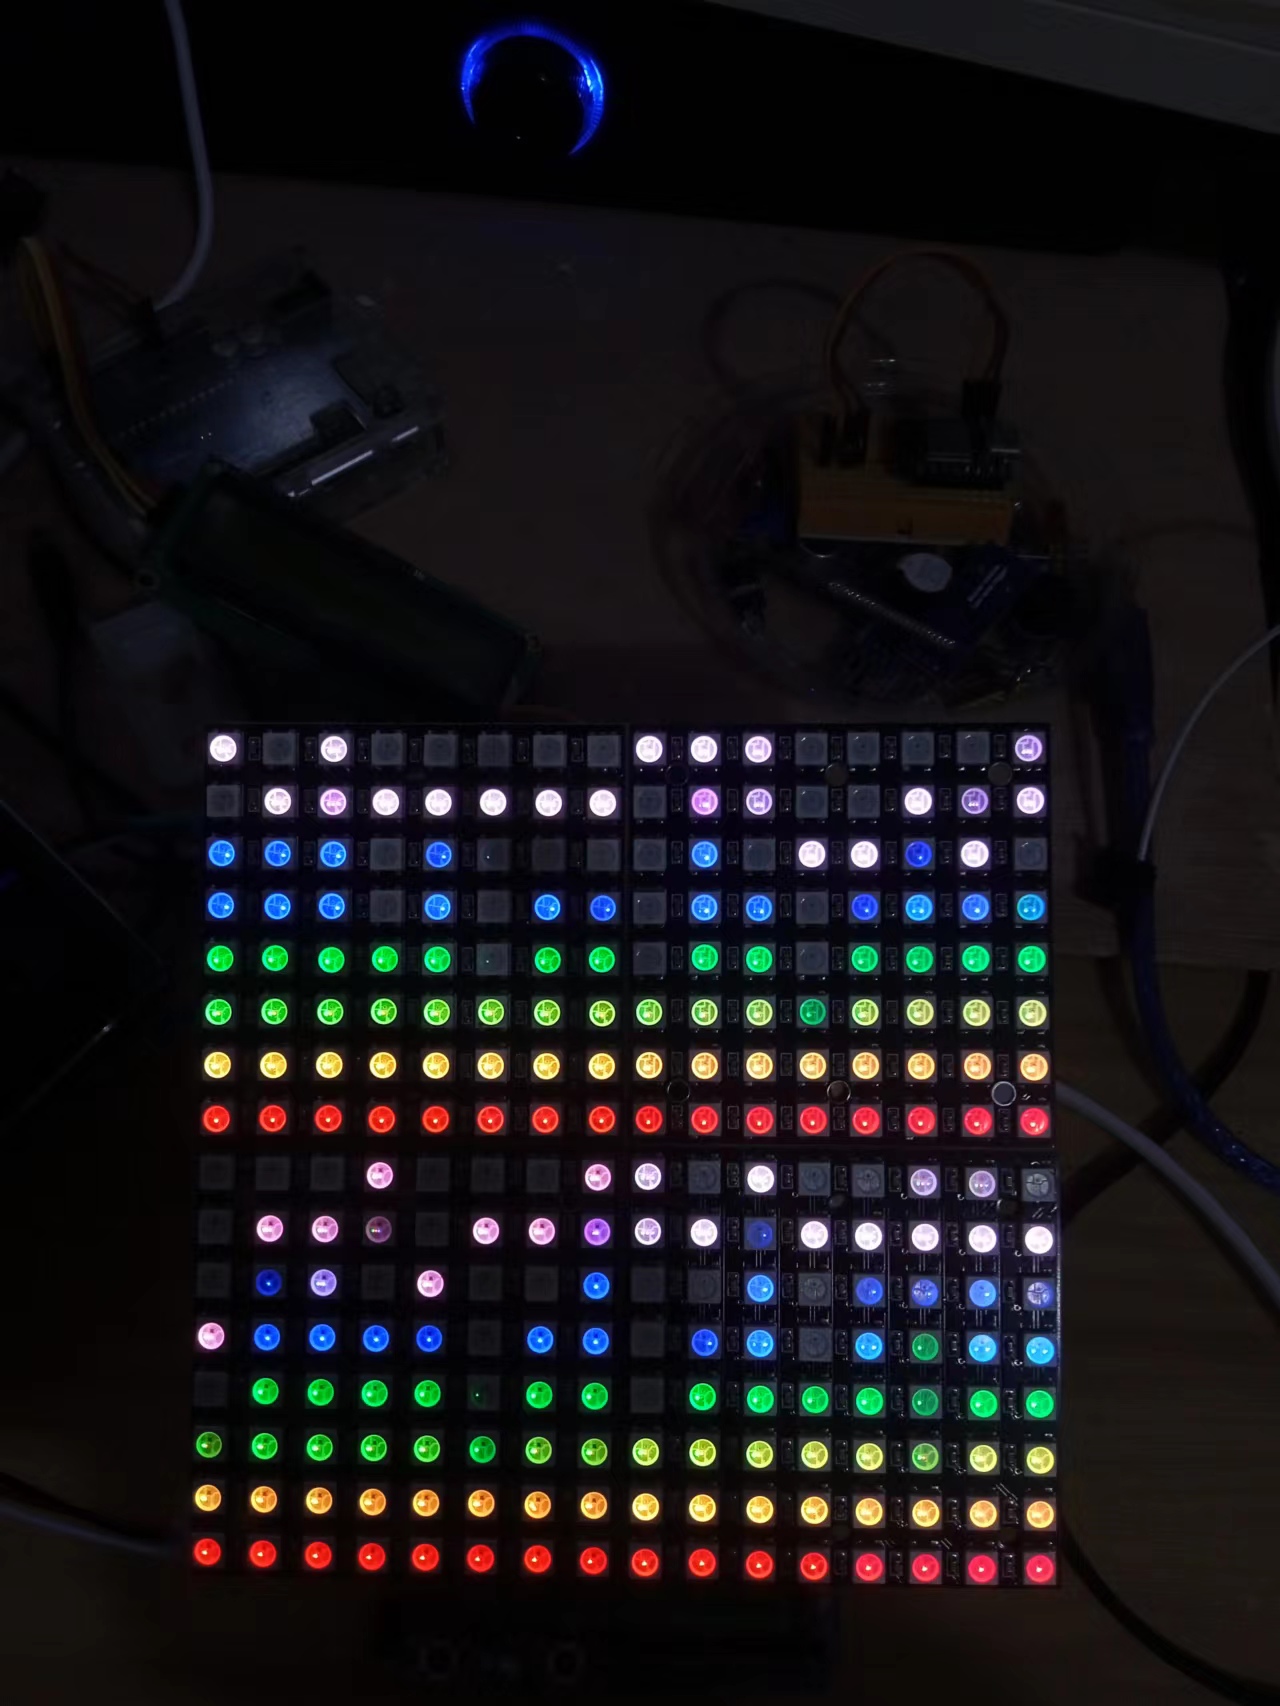
正好手头还有四片8X8硬屏,于是把它们拼在一起,组成一块16X16的WS2812B硬屏,继续尝试音乐可视化的项目。
背面
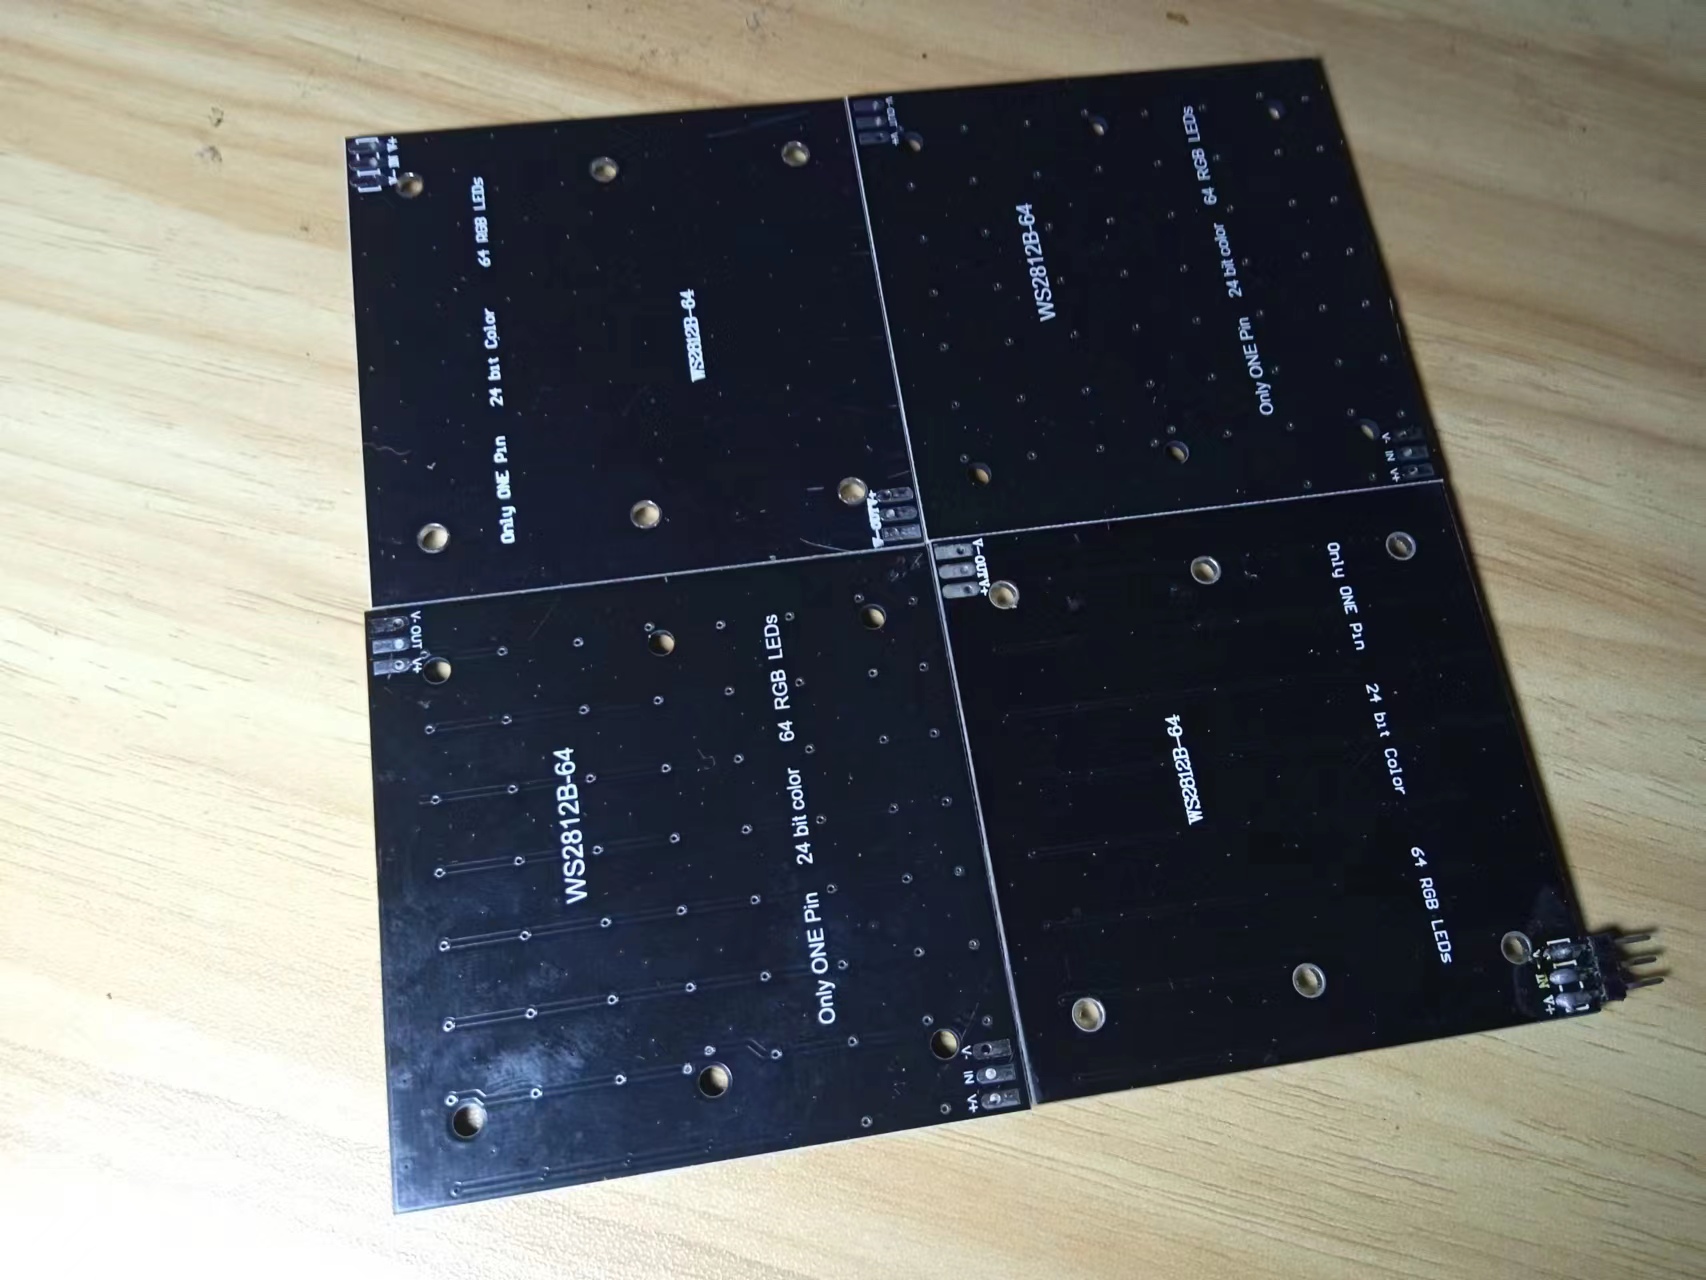
拼装成16X16的像素WS2812灯

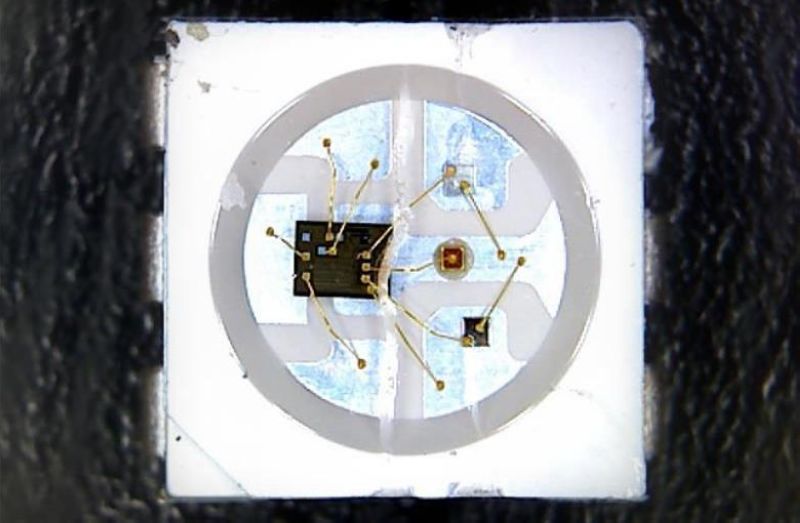
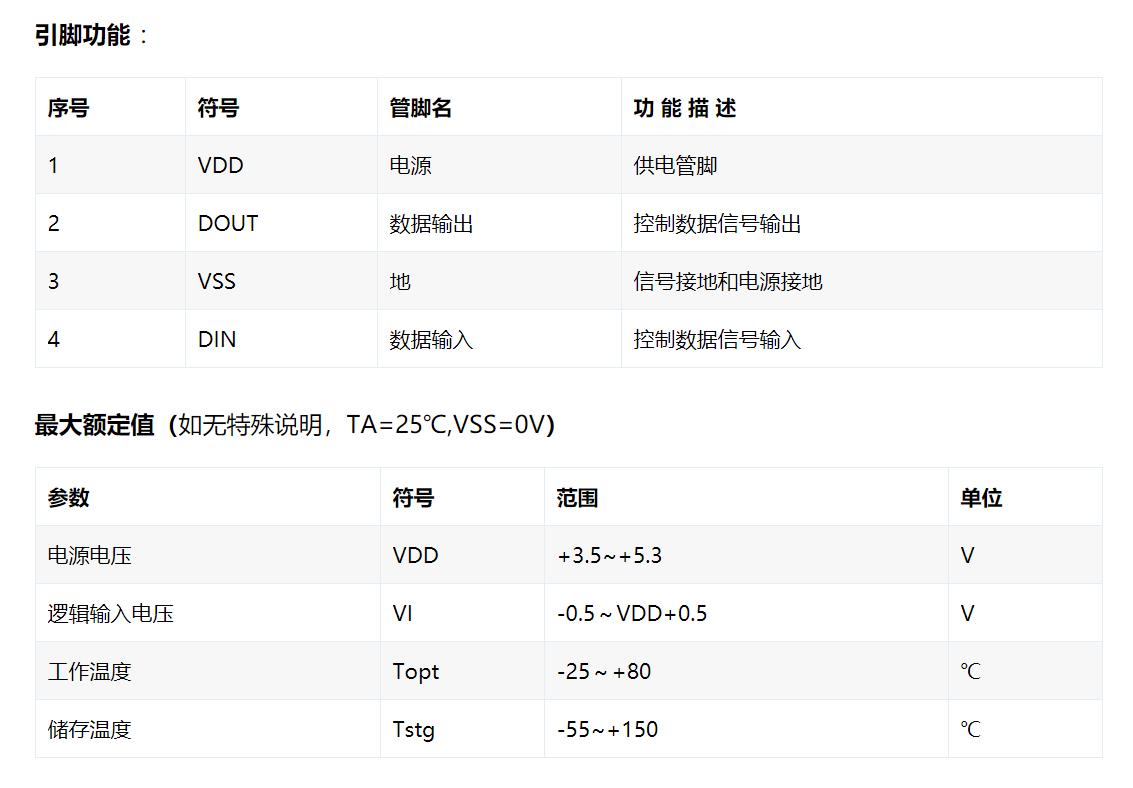
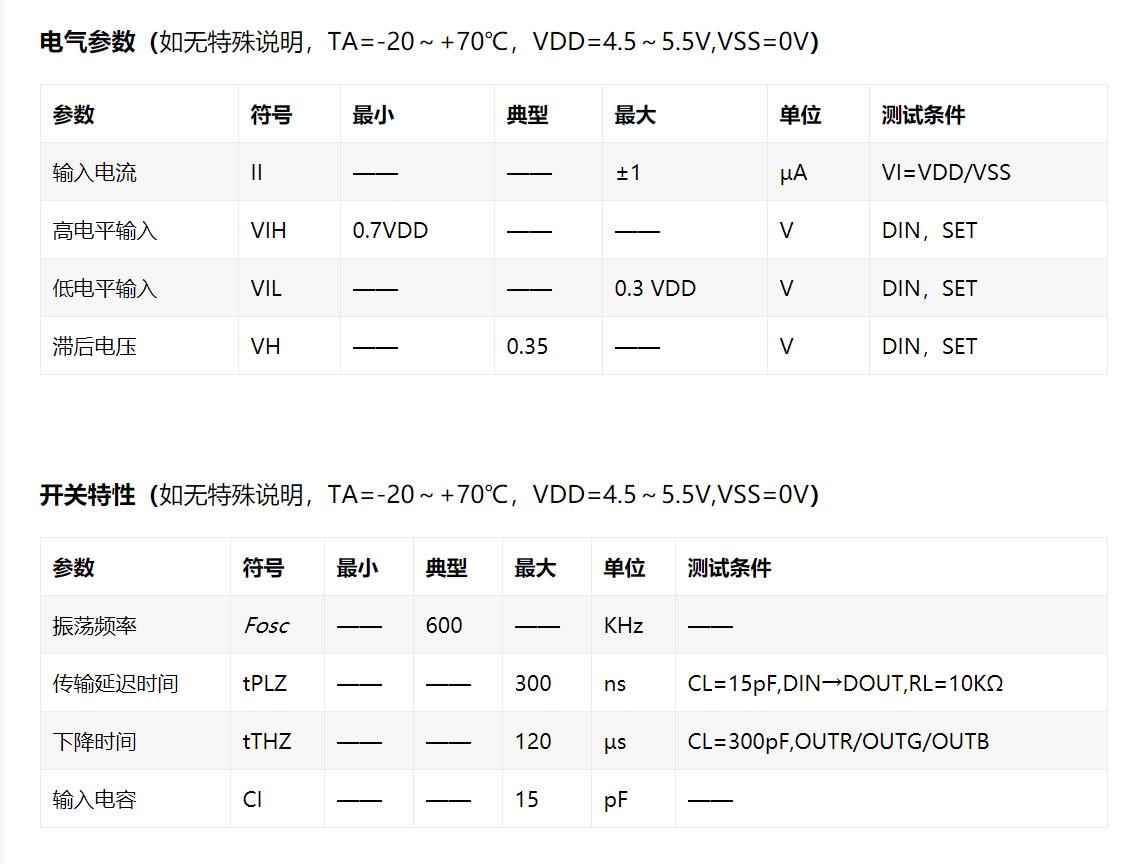
WS2812B
是一个集控制电路与发光电路于一体的智能外控LED光源。其外型与一个5050LED灯珠相同,每个元件即为一个像素点。像素点内部包含了智能数字接口数据锁存信号整形放大驱动电路,还包含有高精度的内部振荡器和12V高压可编程定电流控制部分,有效保证了像素点光的颜色高度一致。
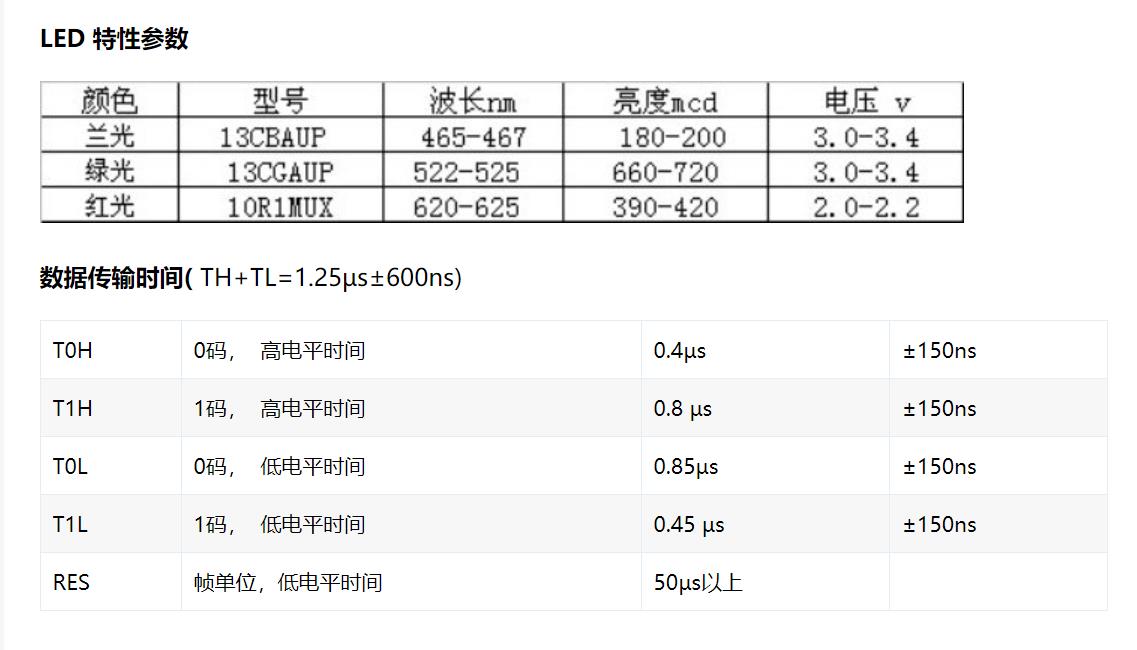
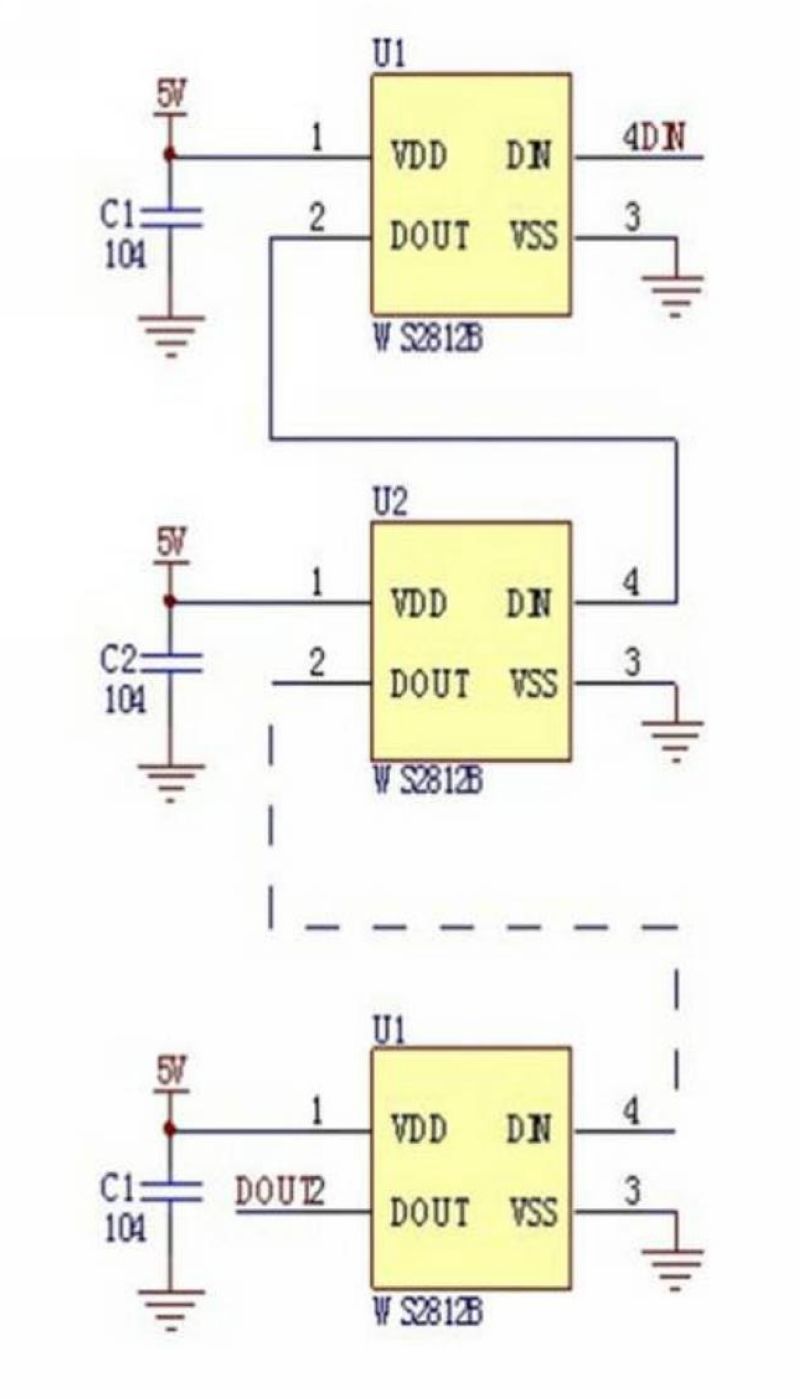
数据协议采用单线归零码的通讯方式,像素点在上电复位以后,DIN端接受从控制器传输过来的数据,首先送过来的24bit数据被第一个像素点提取后,送到像素点内部的数据锁存器,剩余的数据经过内部整形处理电路整形放大后通过DO端口开始转发输出给下一个级联的像素点,每经过一个像素点的传输,信号减少24bit。像素点采用自动整形转发技术,使得该像素点的级联个数不受信号传送的限制,仅仅受限信号传输速度要求。
LED具有低电压驱动,环保节能,亮度高,散射角度大,一致性好,超低功率,超长寿命等优点。将控制电路集成于LED上面,电路变得更加简单,体积小,安装更加简便。
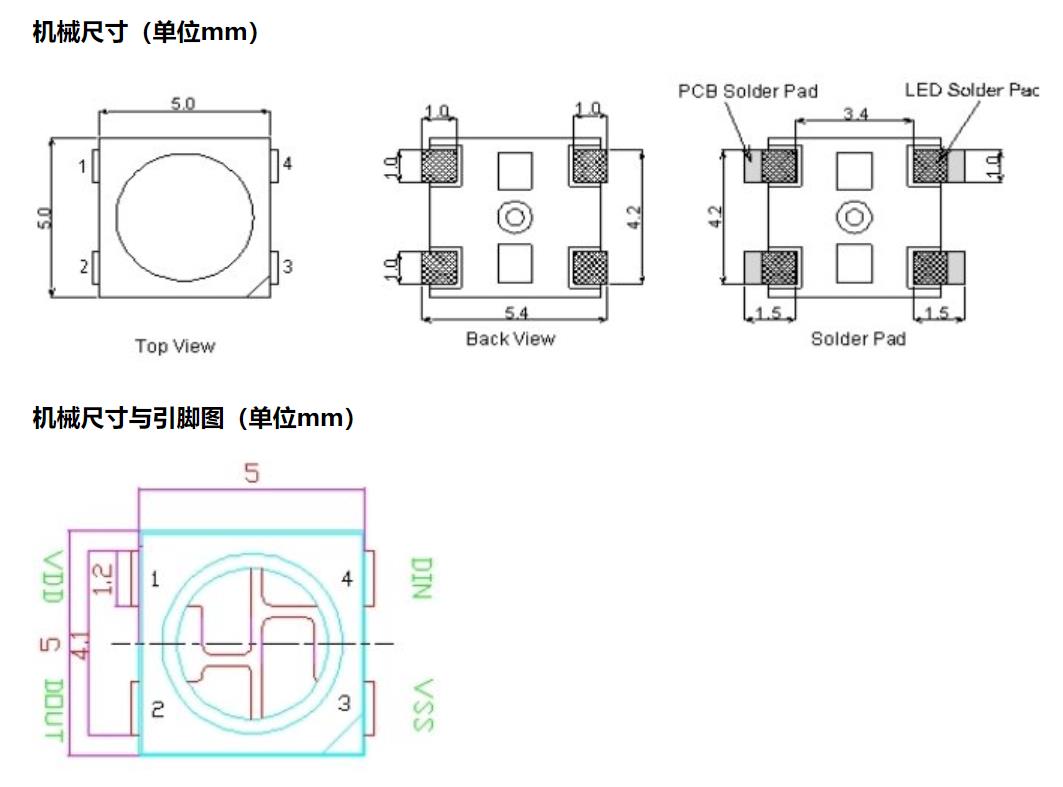
模块电原理图
【花雕动手做】有趣好玩的音乐可视化系列项目(29)--16X16硬屏灯
项目之一:WS2812FX库最简单的点亮形式
/*
  【花雕动手做】有趣好玩的音乐可视化系列项目(29)--16X16硬屏灯
  项目之一:WS2812FX库最简单的点亮形式
*/

#include <WS2812FX.h> //导入库
#define LED_COUNT 256 //WS2812B LED数量
#define LED_PIN    6 //WS2812B LED接脚

WS2812FX ws2812fx = WS2812FX(LED_COUNT, LED_PIN, NEO_GRB + NEO_KHZ800);

void setup() {
  ws2812fx.init(); //初始化
  ws2812fx.setBrightness(35); //设置亮度(0-255),可以控制总电流(重要!)
  ws2812fx.setSpeed(100); // 设置速度
  ws2812fx.setMode(FX_MODE_FIREWORKS_RANDOM);// 设置模式(内置63种模式)
  ws2812fx.start(); //启动
}

void loop() {
  ws2812fx.service(); //循环运行
}
实验场景图 动态图
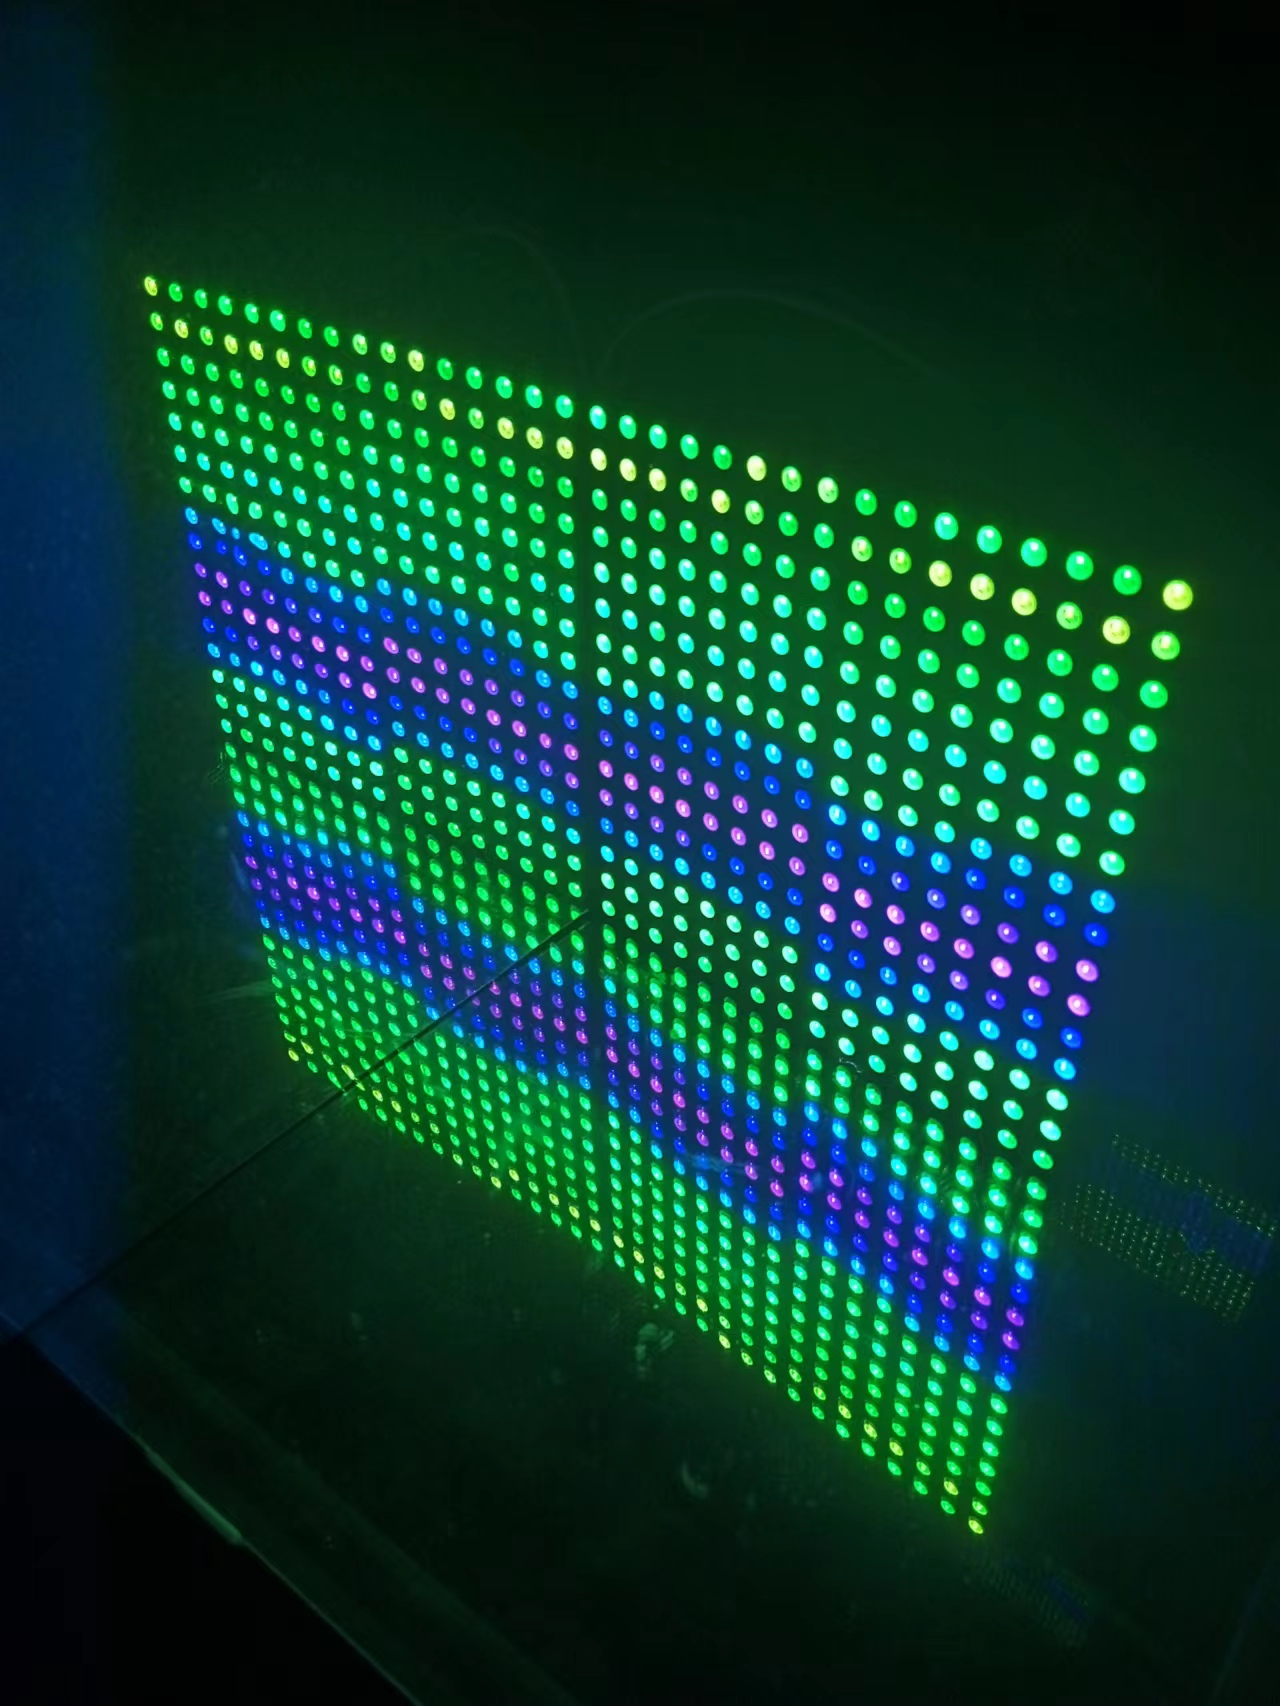
实验场景图
【花雕动手做】有趣好玩的音乐可视化系列项目(29)--16X16硬屏灯
项目之二:RGB传输测试满屏变幻彩灯
/*
  【花雕动手做】有趣好玩的音乐可视化系列项目(29)--16X16硬屏灯
  项目之二:RGB传输测试满屏变幻彩灯
*/


#include <Adafruit_NeoPixel.h>
#ifdef __AVR__
#include <avr/power.h> // Required for 16 MHz Adafruit Trinket
#endif

// Which pin on the Arduino is connected to the NeoPixels?
// On a Trinket or Gemma we suggest changing this to 1:
#define LED_PIN     6

// How many NeoPixels are attached to the Arduino?
#define LED_COUNT  256

// NeoPixel brightness, 0 (min) to 255 (max)
#define BRIGHTNESS 30

// Declare our NeoPixel strip object:
Adafruit_NeoPixel strip(LED_COUNT, LED_PIN, NEO_GRBW + NEO_KHZ800);
// Argument 1 = Number of pixels in NeoPixel strip
// Argument 2 = Arduino pin number (most are valid)
// Argument 3 = Pixel type flags, add together as needed:
//   NEO_KHZ800  800 KHz bitstream (most NeoPixel products w/WS2812 LEDs)
//   NEO_KHZ400  400 KHz (classic 'v1' (not v2) FLORA pixels, WS2811 drivers)
//   NEO_GRB     Pixels are wired for GRB bitstream (most NeoPixel products)
//   NEO_RGB     Pixels are wired for RGB bitstream (v1 FLORA pixels, not v2)
//   NEO_RGBW    Pixels are wired for RGBW bitstream (NeoPixel RGBW products)

void setup() {
  // These lines are specifically to support the Adafruit Trinket 5V 16 MHz.
  // Any other board, you can remove this part (but no harm leaving it):
#if defined(__AVR_ATtiny85__) && (F_CPU == 16000000)
  clock_prescale_set(clock_div_1);
#endif
  // END of Trinket-specific code.

  strip.begin();           // INITIALIZE NeoPixel strip object (REQUIRED)
  strip.show();            // Turn OFF all pixels ASAP
  strip.setBrightness(50); // Set BRIGHTNESS to about 1/5 (max = 255)
}

void loop() {
  // Fill along the length of the strip in various colors...
  colorWipe(strip.Color(255,   0,   0)     , 50); // Red
  colorWipe(strip.Color(  0, 255,   0)     , 50); // Green
  colorWipe(strip.Color(  0,   0, 255)     , 50); // Blue
  colorWipe(strip.Color(  0,   0,   0, 255), 50); // True white (not RGB white)

  whiteOverRainbow(75, 5);

  pulseWhite(5);

  rainbowFade2White(3, 3, 1);
}

// Fill strip pixels one after another with a color. Strip is NOT cleared
// first; anything there will be covered pixel by pixel. Pass in color
// (as a single 'packed' 32-bit value, which you can get by calling
// strip.Color(red, green, blue) as shown in the loop() function above),
// and a delay time (in milliseconds) between pixels.
void colorWipe(uint32_t color, int wait) {
  for(int i=0; i<strip.numPixels(); i++) { // For each pixel in strip...
    strip.setPixelColor(i, color);         //  Set pixel's color (in RAM)
    strip.show();                          //  Update strip to match
    delay(3);                           //  Pause for a moment
  }
}

void whiteOverRainbow(int whiteSpeed, int whiteLength) {

  if(whiteLength >= strip.numPixels()) whiteLength = strip.numPixels() - 1;

  int      head          = whiteLength - 1;
  int      tail          = 0;
  int      loops         = 3;
  int      loopNum       = 0;
  uint32_t lastTime      = millis();
  uint32_t firstPixelHue = 0;

  for(;;) { // Repeat forever (or until a 'break' or 'return')
    for(int i=0; i<strip.numPixels(); i++) {  // For each pixel in strip...
      if(((i >= tail) && (i <= head)) ||      //  If between head & tail...
         ((tail > head) && ((i >= tail) || (i <= head)))) {
        strip.setPixelColor(i, strip.Color(0, 0, 0, 255)); // Set white
      } else {                                             // else set rainbow
        int pixelHue = firstPixelHue + (i * 65536L / strip.numPixels());
        strip.setPixelColor(i, strip.gamma32(strip.ColorHSV(pixelHue)));
      }
    }

    strip.show(); // Update strip with new contents
    // There's no delay here, it just runs full-tilt until the timer and
    // counter combination below runs out.

    firstPixelHue += 40; // Advance just a little along the color wheel

    if((millis() - lastTime) > whiteSpeed) { // Time to update head/tail?
      if(++head >= strip.numPixels()) {      // Advance head, wrap around
        head = 0;
        if(++loopNum >= loops) return;
      }
      if(++tail >= strip.numPixels()) {      // Advance tail, wrap around
        tail = 0;
      }
      lastTime = millis();                   // Save time of last movement
    }
  }
}

void pulseWhite(uint8_t wait) {
  for(int j=0; j<256; j++) { // Ramp up from 0 to 255
    // Fill entire strip with white at gamma-corrected brightness level 'j':
    strip.fill(strip.Color(0, 0, 0, strip.gamma8(j)));
    strip.show();
    delay(3);
  }

  for(int j=255; j>=0; j--) { // Ramp down from 255 to 0
    strip.fill(strip.Color(0, 0, 0, strip.gamma8(j)));
    strip.show();
    delay(3);
  }
}

void rainbowFade2White(int wait, int rainbowLoops, int whiteLoops) {
  int fadeVal=0, fadeMax=100;

  // Hue of first pixel runs 'rainbowLoops' complete loops through the color
  // wheel. Color wheel has a range of 65536 but it's OK if we roll over, so
  // just count from 0 to rainbowLoops*65536, using steps of 256 so we
  // advance around the wheel at a decent clip.
  for(uint32_t firstPixelHue = 0; firstPixelHue < rainbowLoops*65536;
    firstPixelHue += 256) {

    for(int i=0; i<strip.numPixels(); i++) { // For each pixel in strip...

      // Offset pixel hue by an amount to make one full revolution of the
      // color wheel (range of 65536) along the length of the strip
      // (strip.numPixels() steps):
      uint32_t pixelHue = firstPixelHue + (i * 65536L / strip.numPixels());

      // strip.ColorHSV() can take 1 or 3 arguments: a hue (0 to 65535) or
      // optionally add saturation and value (brightness) (each 0 to 255).
      // Here we're using just the three-argument variant, though the
      // second value (saturation) is a constant 255.
      strip.setPixelColor(i, strip.gamma32(strip.ColorHSV(pixelHue, 255,
        255 * fadeVal / fadeMax)));
    }

    strip.show();
    delay(3);

    if(firstPixelHue < 65536) {                              // First loop,
      if(fadeVal < fadeMax) fadeVal++;                       // fade in
    } else if(firstPixelHue >= ((rainbowLoops-1) * 65536)) { // Last loop,
      if(fadeVal > 0) fadeVal--;                             // fade out
    } else {
      fadeVal = fadeMax; // Interim loop, make sure fade is at max
    }
  }

  for(int k=0; k<whiteLoops; k++) {
    for(int j=0; j<256; j++) { // Ramp up 0 to 255
      // Fill entire strip with white at gamma-corrected brightness level 'j':
      strip.fill(strip.Color(0, 0, 0, strip.gamma8(j)));
      strip.show();
    }
    delay(100); // Pause 1 second
    for(int j=255; j>=0; j--) { // Ramp down 255 to 0
      strip.fill(strip.Color(0, 0, 0, strip.gamma8(j)));
      strip.show();
    }
  }

  delay(5); // Pause 1/2 second
}
实验场景图
【花雕动手做】有趣好玩的音乐可视化系列项目(29)--16X16硬屏灯
项目之三:应用Adafruit_NeoPixel库的入门极简程序
/*
  【花雕动手做】有趣好玩的音乐可视化系列项目(29)--16X16硬屏灯
  项目之三:应用Adafruit_NeoPixel库的入门极简程序
*/


#include <Adafruit_NeoPixel.h>
#define PIN        6 //接脚
#define NUMPIXELS 256 //数量
Adafruit_NeoPixel pixels(NUMPIXELS, PIN, NEO_GRB + NEO_KHZ800);
#define DELAYVAL 10 //延时

void setup() {
  pixels.setBrightness(22);//亮度
  pixels.begin();//启动
}

void loop() {
  pixels.clear();
  for (int i = 0; i < NUMPIXELS; i++) {
    pixels.setPixelColor(i, pixels.Color(50, 250, 0));//绿色
    pixels.show();
    delay(1);
  }
}
实验场景图
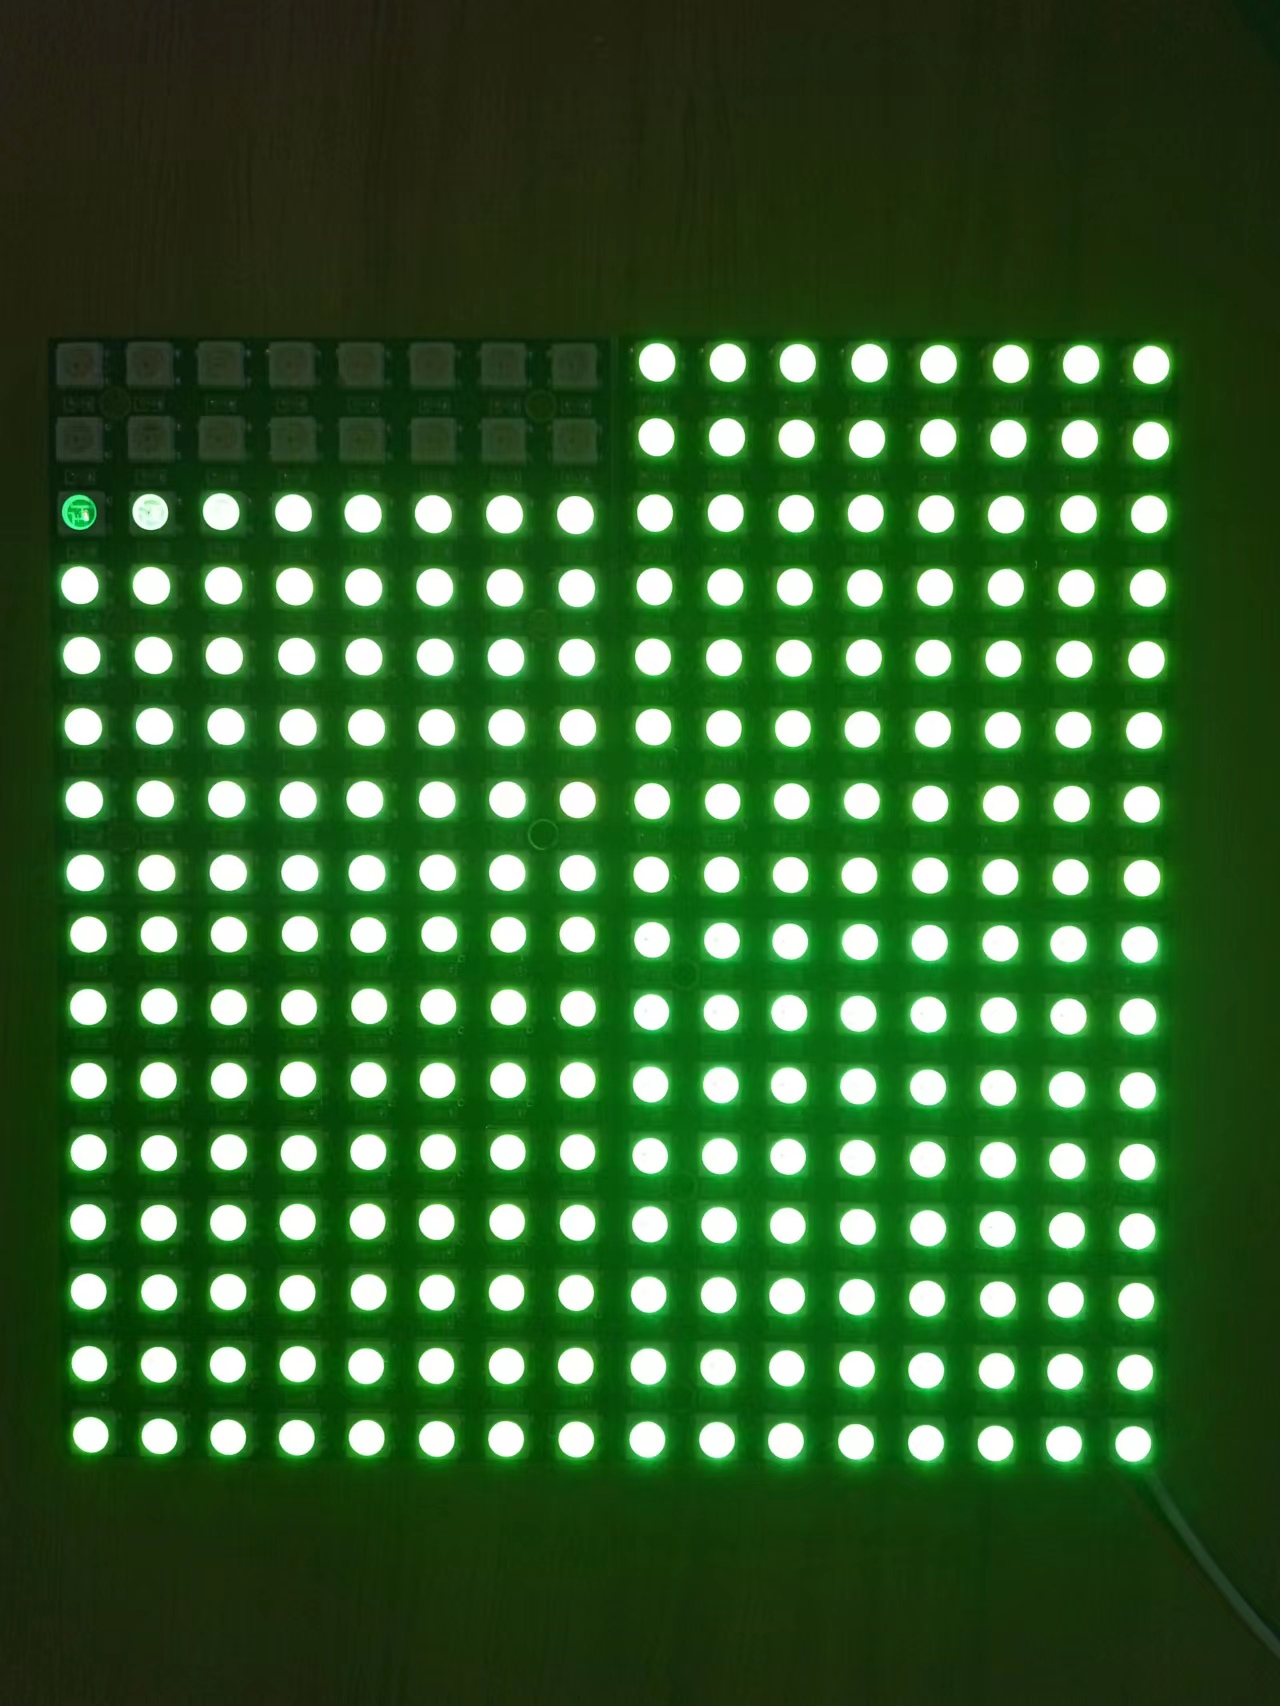
【花雕动手做】有趣好玩的音乐可视化系列项目(29)--16X16硬屏灯
项目之四:256位音乐频谱灯
/*
  【花雕动手做】有趣好玩的音乐可视化系列项目(29)--16X16硬屏灯
  项目之四:256位音乐频谱灯
*/

#include "FastLED.h"

#define OCTAVE 1 //   // Group buckets into octaves  (use the log output function LOG_OUT 1)
#define OCT_NORM 0 // Don't normalise octave intensities by number of bins
#define FHT_N 256 // set to 256 point fht
#include <FHT.h> // include the library
//int noise[] = {204,188,68,73,150,98,88,68}; // noise level determined by playing pink noise and seeing levels [trial and error]{204,188,68,73,150,98,88,68}


// int noise[] = {204,190,108,85,65,65,55,60}; // noise for mega adk
int noise[] = {204, 195, 100, 90, 85, 80, 75, 75}; // noise for NANO
//int noise[] = {204,198,100,85,85,80,80,80};
float noise_fact[] = {15, 7, 1.5, 1, 1.2, 1.4, 1.7, 3}; // noise level determined by playing pink noise and seeing levels [trial and error]{204,188,68,73,150,98,88,68}
float noise_fact_adj[] = {15, 7, 1.5, 1, 1.2, 1.4, 1.7, 3}; // noise level determined by playing pink noise and seeing levels [trial and error]{204,188,68,73,150,98,88,68}


#define LED_PIN     6
#define LED_TYPE    WS2812
#define COLOR_ORDER GRB


// Params for width and height
const uint8_t kMatrixWidth = 8;
const uint8_t kMatrixHeight = 32;
//#define NUM_LEDS (kMatrixWidth * kMatrixHeight)
#define NUM_LEDS    256

CRGB leds[NUM_LEDS];

int counter2 = 0;


void setup() {
  Serial.begin(9600);
  delay(1000);
  FastLED.addLeds<LED_TYPE, LED_PIN, COLOR_ORDER>(leds, NUM_LEDS).setCorrection( TypicalLEDStrip );

  FastLED.setBrightness (33);
  fill_solid(leds, NUM_LEDS, CRGB::Black);
  FastLED.show();
  // TIMSK0 = 0; // turn off timer0 for lower jitter
  ADCSRA = 0xe5; // set the adc to free running mode
  ADMUX = 0x40; // use adc0
  DIDR0 = 0x01; // turn off the digital input for adc0

}


void loop() {
  int prev_j[8];
  int beat = 0;
  int prev_oct_j;
  int counter = 0;
  int prev_beat = 0;
  int led_index = 0;
  int saturation = 0;
  int saturation_prev = 0;
  int brightness = 0;
  int brightness_prev = 0;

  while (1) { // reduces jitter

    cli();  // UDRE interrupt slows this way down on arduino1.0

    for (int i = 0 ; i < FHT_N ; i++) { // save 256 samples
      while (!(ADCSRA & 0x10)); // wait for adc to be ready
      ADCSRA = 0xf5; // restart adc
      byte m = ADCL; // fetch adc data
      byte j = ADCH;
      int k = (j << 8) | m; // form into an int
      k -= 0x0200; // form into a signed int
      k <<= 6; // form into a 16b signed int
      fht_input[i] = k; // put real data into bins
    }
    fht_window(); // window the data for better frequency response
    fht_reorder(); // reorder the data before doing the fht
    fht_run(); // process the data in the fht
    fht_mag_octave(); // take the output of the fht  fht_mag_log()

    // every 50th loop, adjust the volume accourding to the value on A2 (Pot)
    if (counter >= 50) {
      ADMUX = 0x40 | (1 & 0x07); // set admux to look at Analogpin A1 - Master Volume


      while (!(ADCSRA & 0x10)); // wait for adc to be ready
      ADCSRA = 0xf5; // restart adc
      delay(10);
      while (!(ADCSRA & 0x10)); // wait for adc to be ready
      ADCSRA = 0xf5; // restart adc
      byte m = ADCL; // fetch adc data
      byte j = ADCH;
      int k = (j << 8) | m; // form into an int
      float master_volume = (k + 0.1) / 1000 + .75; // so the valu will be between ~0.5 and 1.---------------------+.75 was .5
      Serial.println (master_volume);


      for (int i = 1; i < 8; i++) {
        noise_fact_adj[i] = noise_fact[i] * master_volume;
      }

      ADMUX = 0x40 | (0 & 0x07); // set admux back to look at A0 analog pin (to read the microphone input
      counter = 0;
    }

    sei();
    counter++;


    // End of Fourier Transform code - output is stored in fht_oct_out[i].

    // i=0-7 frequency (octave) bins (don't use 0 or 1), fht_oct_out[1]= amplitude of frequency for bin 1
    // for loop a) removes background noise average and takes absolute value b) low / high pass filter as still very noisy
    // c) maps amplitude of octave to a colour between blue and red d) sets pixel colour to amplitude of each frequency (octave)

    for (int i = 1; i < 8; i++) {  // goes through each octave. skip the first 1, which is not useful

      int j;
      j = (fht_oct_out[i] - noise[i]); // take the pink noise average level out, take the asbolute value to avoid negative numbers
      if (j < 10) {
        j = 0;
      }
      j = j * noise_fact_adj[i];

      if (j < 10) {
        j = 0;
      }
      else {
        j = j * noise_fact_adj[i];
        if (j > 180) {
          if (i >= 7) {
            beat += 2;
          }
          else {
            beat += 1;
          }
        }
        j = j / 30;
        j = j * 30; // (force it to more discrete values)
      }

      prev_j[i] = j;

      //     Serial.print(j);
      //     Serial.print(" ");


      // this fills in 11 LED's with interpolated values between each of the 8 OCT values
      if (i >= 2) {
        led_index = 2 * i - 3;
        prev_oct_j = (j + prev_j[i - 1]) / 2;

        saturation = constrain(j + 50, 0, 255); //-----------50 was 30
        saturation_prev = constrain(prev_oct_j + 50, 0, 255);
        brightness = constrain(j, 0, 255);
        brightness_prev = constrain(prev_oct_j, 0, 255);
        if (brightness == 255) {
          saturation = 50;
          brightness = 200;
        }
        if (brightness_prev == 255) {
          saturation_prev = 50;
          brightness_prev = 200;
        }


        for (uint8_t y = 0; y < kMatrixHeight; y++) {
          leds[XY(led_index - 1, y)] = CHSV(j + y * 30, saturation, brightness);
          if (i > 2) {
            prev_oct_j = (j + prev_j[i - 1]) / 2;
            leds[ XY(led_index - 2, y)] = CHSV(prev_oct_j + y * 30, saturation_prev, brightness_prev);
          }
        }
      }
    }


    if (beat >= 7) {
      fill_solid(leds, NUM_LEDS, CRGB::Gray);
      FastLED.setBrightness(200);


    }
    else {
      if (prev_beat != beat) {
        FastLED.setBrightness(40 + beat * beat * 5);
        prev_beat = beat;
      }

    }

    FastLED.show();
    if (beat) {
      counter2 += ((beat + 4) / 2 - 2);
      if (counter2 < 0) {
        counter2 = 1000;
      }
      if (beat > 3 && beat < 7) {
        FastLED.delay (20);
      }
      beat = 0;
    }

    // Serial.println();
  }
}


// Param for different pixel layouts
const bool    kMatrixSerpentineLayout = false;
// Set 'kMatrixSerpentineLayout' to false if your pixels are
// laid out all running the same way, like this:

// Set 'kMatrixSerpentineLayout' to true if your pixels are
// laid out back-and-forth, like this:

uint16_t XY( uint8_t x, uint8_t y)
{
  uint16_t i;

  if ( kMatrixSerpentineLayout == false) {
    i = (y * kMatrixWidth) + x;
  }

  if ( kMatrixSerpentineLayout == true) {
    if ( y & 0x01) {
      // Odd rows run backwards
      uint8_t reverseX = (kMatrixWidth - 1) - x;
      i = (y * kMatrixWidth) + reverseX;

    } else {
      // Even rows run forwards
      i = (y * kMatrixWidth) + x;

    }
  }

  i = (i + counter2) % NUM_LEDS;
  return i;
}
实验场景图 动态图
实验的视频记录
优酷:https://v.youku.com/v_show/id_XNTkxNTA3OTM0NA==.html?spm=a2hcb.playlsit.page.1
B站:https://www.bilibili.com/video/BV1Wg411z7QR/?vd_source=98c6b1fc23b2787403d97f8d3cc0b7e5
实验场景图
【花雕动手做】有趣好玩的音乐可视化系列项目(29)--16X16硬屏灯
项目之五:多彩MegunoLink音乐节拍灯
/*
  【花雕动手做】有趣好玩的音乐可视化系列项目(29)--16X16硬屏灯
  项目之五:多彩MegunoLink音乐节拍灯
*/

#include<FastLED.h>
#include<MegunoLink.h>
#include<Filter.h>

#define N_PIXELS  23
#define MIC_PIN   A0
#define LED_PIN   6
#define NOISE 10
#define TOP   (N_PIXELS+2)
#define LED_TYPE  WS2811
#define BRIGHTNESS  10
#define COLOR_ORDER GRB

CRGB leds[N_PIXELS];
int lvl = 0, minLvl = 0, maxLvl = 10;

ExponentialFilter<long> ADCFilter(5, 0);

void setup() {
  FastLED.addLeds<LED_TYPE, LED_PIN, COLOR_ORDER>(leds, N_PIXELS).setCorrection(TypicalLEDStrip);
  FastLED.setBrightness(BRIGHTNESS);
}

void loop() {
  int n, height;
  n = analogRead(MIC_PIN);
  n = abs(1023 - n);
  n = (n <= NOISE) ? 0 : abs(n - NOISE);
  ADCFilter.Filter(n);
  lvl = ADCFilter.Current();
  //  Serial.print(n);
  //  Serial.print(" ");
  //  Serial.println(lvl);
  height = TOP * (lvl - minLvl) / (long)(maxLvl - minLvl);
  if (height < 0L) height = 0;
  else if (height > TOP) height = TOP;
  for (uint8_t i = 0; i < N_PIXELS; i++) {
    if (i >= height) leds[i] = CRGB(0, 0, 0);
    else leds[i] = Wheel( map( i, 0, N_PIXELS - 1, 30, 150 ) );
  }
  FastLED.show();
}

CRGB Wheel(byte WheelPos) {
  if (WheelPos < 85)
    return CRGB(WheelPos * 3, 255 - WheelPos * 3, 0);
  else if (WheelPos < 170) {
    WheelPos -= 85;
    return CRGB(255 - WheelPos * 3, 0, WheelPos * 3);
  } else {
    WheelPos -= 170;
    return CRGB(0, WheelPos * 3, 255 - WheelPos * 3);
  }
}
实验场景图 动态图
实验的视频记录
优酷:
B站:https://www.bilibili.com/video/BV1kd4y1y75d/?vd_source=98c6b1fc23b2787403d97f8d3cc0b7e5
实验场景图
【花雕动手做】有趣好玩的音乐可视化系列项目(29)--16X16硬屏灯
项目之六:Arduino 和 FastLED多彩音乐节奏灯
/*
  【花雕动手做】有趣好玩的音乐可视化系列项目(29)--16X16硬屏灯
  项目之六:Arduino 和 FastLED多彩音乐节奏灯
*/

#include <FastLED.h>
#define SAMPLEPERIODUS 200
#define MIC_PIN A0
#define LED_DT 6
#define COLOR_ORDER GRB
#define LED_TYPE WS2812
#define NUM_LEDS 256
uint8_t max_bright = 33;
struct CRGB leds[NUM_LEDS];
CRGBPalette16 currentPalette = RainbowColors_p;
CRGBPalette16 targetPalette;

void setup() {
  pinMode(LED_BUILTIN, OUTPUT);
  LEDS.addLeds<LED_TYPE, LED_DT, COLOR_ORDER>(leds, NUM_LEDS);
  FastLED.setBrightness(max_bright);
}

float bassFilter(float sample) {
  static float xv[3] = {0, 0, 0}, yv[3] = {0, 0, 0};
  xv[0] = xv[1]; xv[1] = xv[2];
  xv[2] = sample / 9.1f;
  yv[0] = yv[1]; yv[1] = yv[2];
  yv[2] = (xv[2] - xv[0]) + (-0.7960060012f * yv[0]) + (1.7903124146f * yv[1]);
  return yv[2];
}

float envelopeFilter(float sample) {
  static float xv[2] = {0, 0}, yv[2] = {0, 0};
  xv[0] = xv[1];
  xv[1] = sample / 160.f;
  yv[0] = yv[1];
  yv[1] = (xv[0] + xv[1]) + (0.9875119299f * yv[0]);
  return yv[1];
}

float beatFilter(float sample) {
  static float xv[3] = {0, 0, 0}, yv[3] = {0, 0, 0};
  xv[0] = xv[1]; xv[1] = xv[2];
  xv[2] = sample / 7.015f;
  yv[0] = yv[1]; yv[1] = yv[2];
  yv[2] = (xv[2] - xv[0]) + (-0.7169861741f * yv[0]) + (1.4453653501f * yv[1]);
  return yv[2];
}

void loop() {
  unsigned long time = micros();
  float sample, value, envelope, beat, thresh, micLev;
  for (uint8_t i = 0; ; ++i) {
    sample = (float)analogRead(MIC_PIN);
    micLev = ((micLev * 67) + sample) / 68;
    sample -= micLev;
    value = bassFilter(sample);
    value = abs(value);
    envelope = envelopeFilter(value);
    if (i == 200) {
      beat = beatFilter(envelope);
      thresh = 0.02f * 75.;

      if (beat > thresh) {
        digitalWrite(LED_BUILTIN, LOW);

        int strt = random8(NUM_LEDS / 2);
        int ende = strt + random8(NUM_LEDS / 2);
        for (int i = strt; i < ende; i++) {
          uint8_t index = inoise8(i * 30, millis() + i * 30);
          leds[i] = ColorFromPalette(currentPalette, index, 255, LINEARBLEND);
        }
      } else {
        digitalWrite(LED_BUILTIN, HIGH);
      }
      i = 0;
    }

    EVERY_N_SECONDS(5) {
      uint8_t baseC = random8();
      targetPalette = CRGBPalette16(CHSV(baseC + random8(32), 255, random8(128, 255)),
                                    CHSV(baseC + random8(64), 255, random8(128, 255)),
                                    CHSV(baseC + random8(64), 192, random8(128, 255)),
                                    CHSV(baseC + random8(),   255, random8(128, 255)));
    }

    EVERY_N_MILLISECONDS(50) {
      uint8_t maxChanges = 24;
      nblendPaletteTowardPalette(currentPalette, targetPalette, maxChanges);
    }

    EVERY_N_MILLIS(50) {
      fadeToBlackBy(leds, NUM_LEDS, 64);
      FastLED.show();
    }

    for (unsigned long up = time + SAMPLEPERIODUS; time > 20 && time < up; time = micros()) {  }

  } // for i
} // loop()
实验场景图 动态图
实验的视频记录
优酷:
B站:https://www.bilibili.com/video/BV1C14y157zB/?vd_source=98c6b1fc23b2787403d97f8d3cc0b7e5
实验场景图
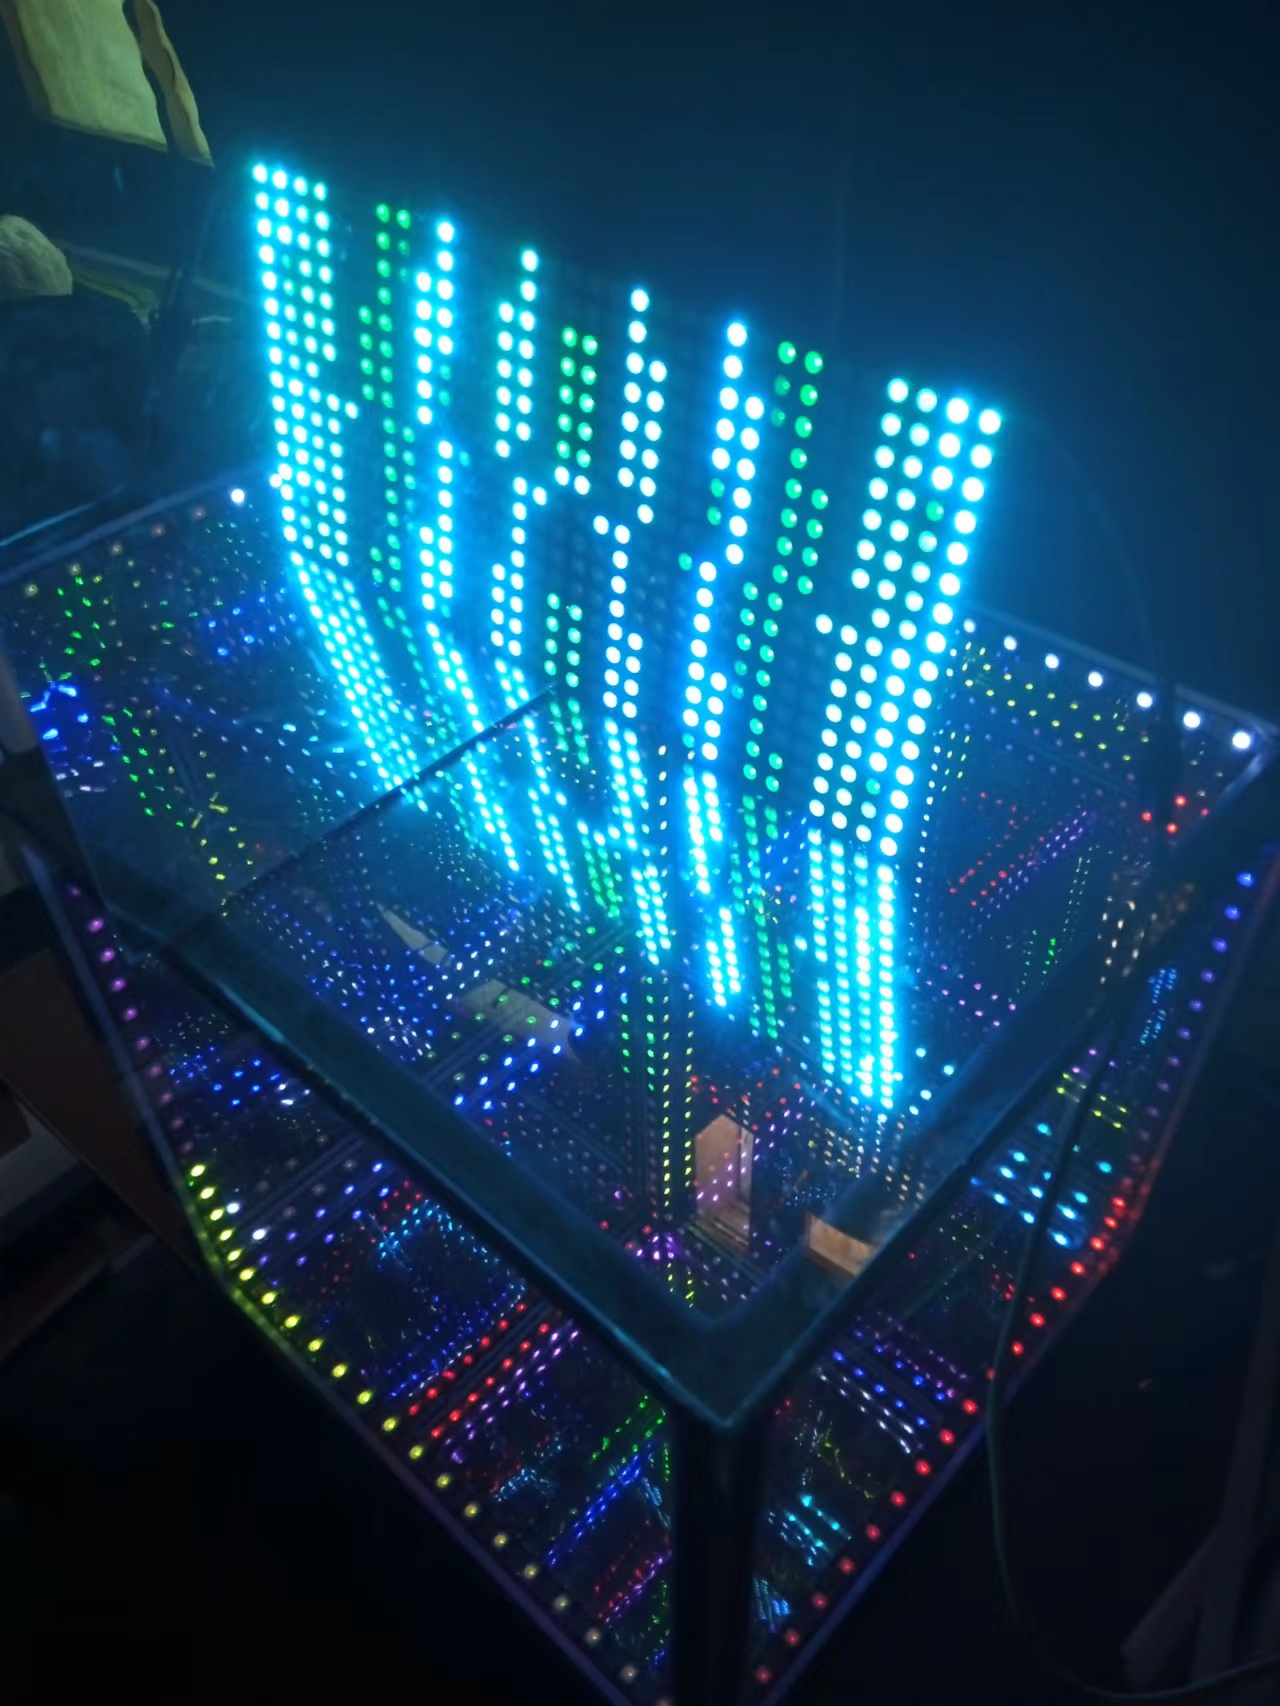
镜像扩展的实验场景图

实验的视频记录
优酷:
B站:https://www.bilibili.com/video/BV1nW4y1j7Rs/?vd_source=98c6b1fc23b2787403d97f8d3cc0b7e5
实验场景图 动态图
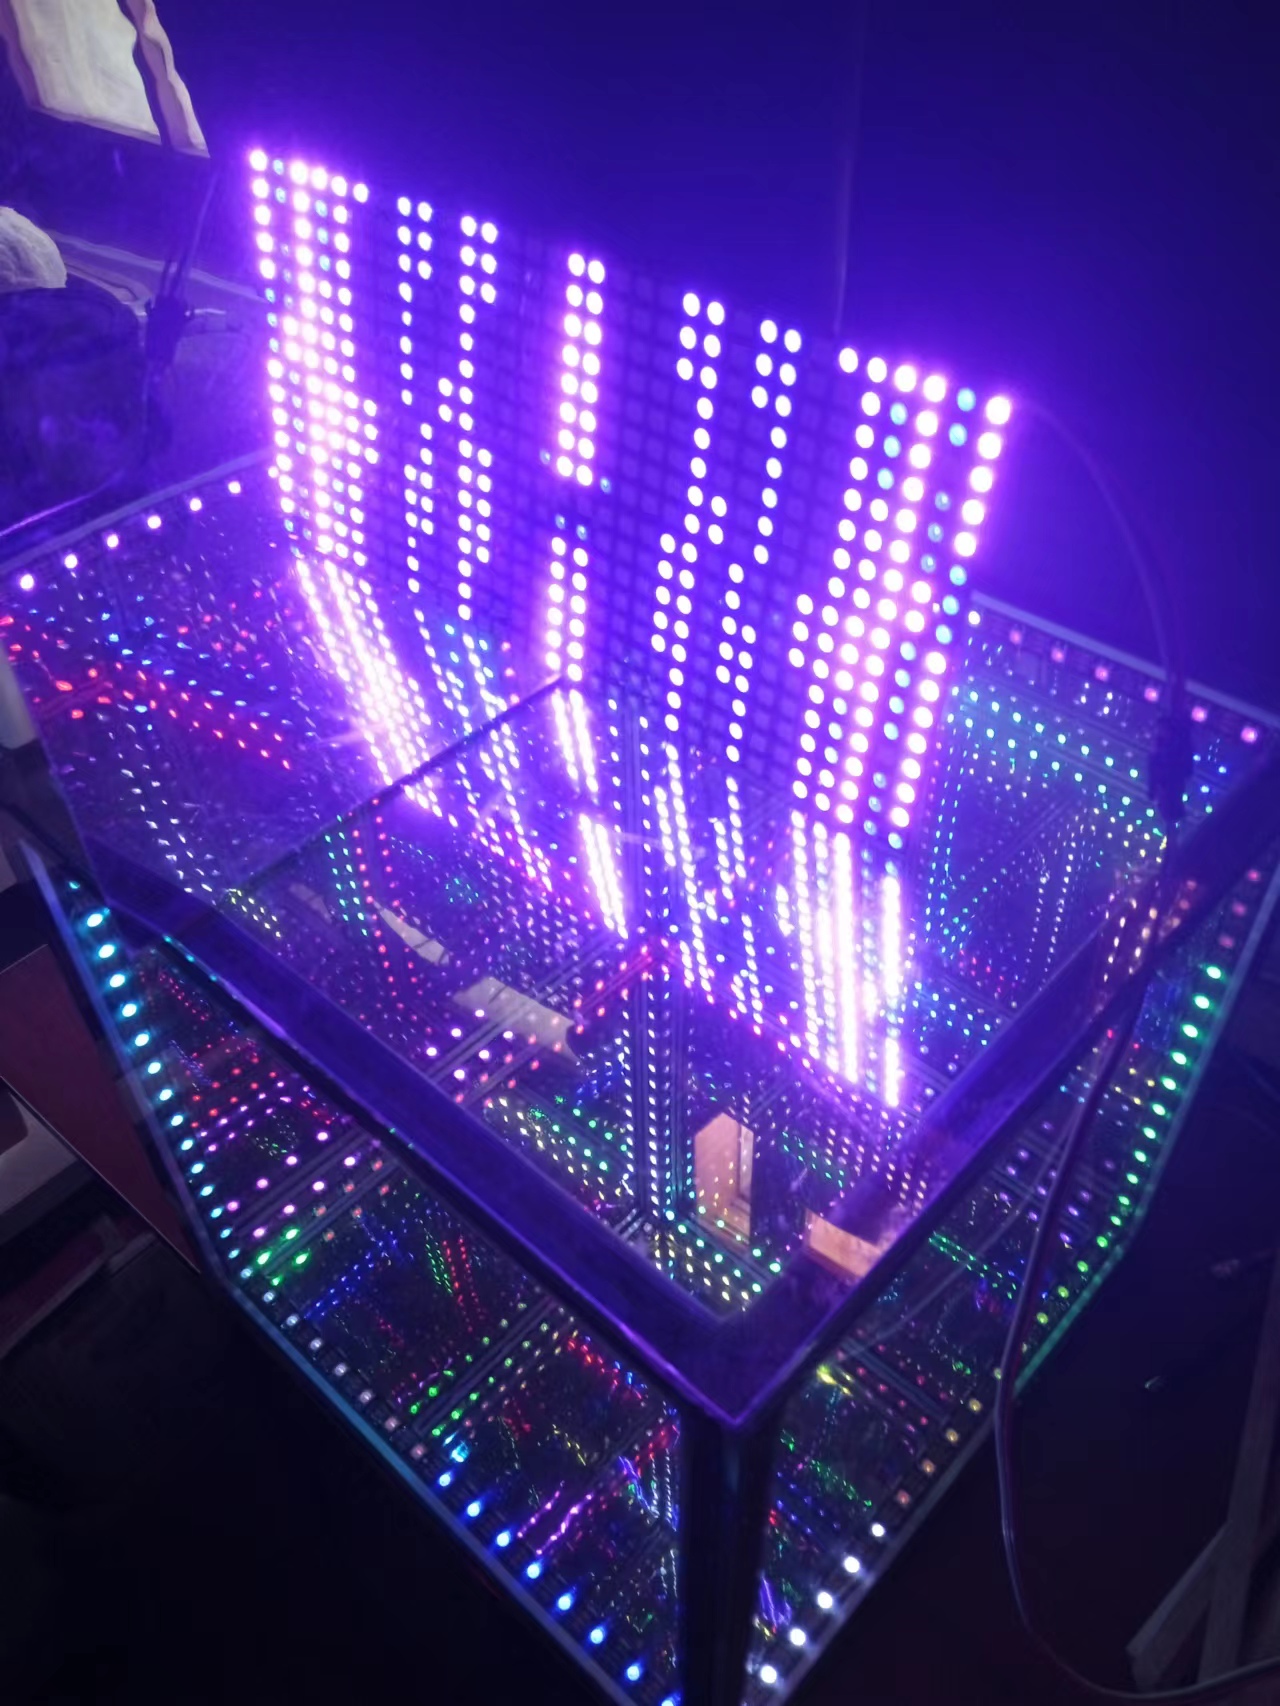
【花雕动手做】有趣好玩音乐可视化16X16硬屏灯(镜像扩展)之二
实验的视频记录
优酷:
B站:https://www.bilibili.com/video/BV1yd4y1k7bT/?vd_source=98c6b1fc23b2787403d97f8d3cc0b7e5
实验场景图
【花雕动手做】有趣好玩音乐可视化16X16硬屏灯(镜像扩展)之三
实验的视频记录
优酷:
B站:https://www.bilibili.com/video/BV1Tg41167Mh/?vd_source=98c6b1fc23b2787403d97f8d3cc0b7e5
实验场景图
【花雕动手做】有趣好玩音乐可视化16X16硬屏灯(组合镜像)
实验场景图
实验场景图 动态图
【花雕动手做】有趣好玩音乐可视化16X16硬屏灯(组合镜像)
实验的视频记录
优酷:https://v.youku.com/v_show/id_XNTkxNTgyMjAxNg==.html?spm=a2hcb.playlsit.page.3
B站:https://www.bilibili.com/video/BV1yP4y1S7FJ/?vd_source=98c6b1fc23b2787403d97f8d3cc0b7e5
实验场景图
【花雕动手做】有趣好玩音乐可视化16X16硬屏灯(组合镜像)之二
实验的视频记录
优酷:https://v.youku.com/v_show/id_XNTkxNTgxOTE5Ng==.html?spm=a2hcb.playlsit.page.1
B站:https://www.bilibili.com/video/BV1BG4y1h7rs/?vd_source=98c6b1fc23b2787403d97f8d3cc0b7e5
【花雕动手做】有趣好玩音乐可视化16X16硬屏灯(组合镜像)之三
实验的视频记录
优酷:https://v.youku.com/v_show/id_XNTkxNTgyNjQ1Ng==.html?spm=a2hcb.playlsit.page.5
B站:https://www.bilibili.com/video/BV1Tg41167Mh/?vd_source=98c6b1fc23b2787403d97f8d3cc0b7e5
实验场景图

【Arduino】168种传感器模块系列实验(资料代码+仿真编程+图形编程)
实验一百七十七:Wemos D1 R32 ESP32开发板
项目之四十七:快速傅里叶变换256位频谱仪
/*
  【Arduino】168种传感器模块系列实验(资料代码+仿真编程+图形编程)
  实验一百七十七:Wemos D1 R32 ESP32开发板
  项目之四十七:快速傅里叶变换256位频谱仪
*/

#include  "arduinoFFT.h"
#include <FastLED.h>

#define NUM_LEDS 256
#define LED_TYPE WS2812
#define COLOR_ORDER GRB

arduinoFFT FFT = arduinoFFT();
CRGB leds[NUM_LEDS];

#define CHANNEL 39
#define DATA_PIN 23

const uint8_t max_bright = 2;
const uint16_t samples = NUM_LEDS / 4;
const byte halfsamples = samples / 2;
uint8_t gHue;
int value;
double vReal[samples];
double vImag[samples];
char toData[halfsamples];

int pointJump[halfsamples];
int uJump[halfsamples];
int dJump[halfsamples];

int uValue;
int dValue;
int tValue;
int toDown = 0;
uint8_t toDownSpeed = 3;
int pointDown = 0;
uint8_t pointDownSpeed = 9;

void setup(){
  delay(100);
  Serial.println("Ready");
  FastLED.addLeds<LED_TYPE, DATA_PIN, COLOR_ORDER>(leds, NUM_LEDS).setCorrection(TypicalLEDStrip);
  FastLED.setBrightness(max_bright);
}

void loop(){
  FastLED.clear();
  EVERY_N_MILLISECONDS(10) {
    gHue += 10;
  }
  for (int i = 0; i < samples; i++)
  {
    value = analogRead(CHANNEL);
    vReal[i] = value;
    vImag[i] = 0.0;
  }

  FFT.Windowing(vReal, samples, FFT_WIN_TYP_HAMMING, FFT_FORWARD);
  FFT.Compute(vReal, vImag, samples, FFT_FORWARD);
  FFT.ComplexToMagnitude(vReal, vImag, samples);

  for (int i = 0; i < halfsamples; i++)
  {
    toData[i] = vReal[i + halfsamples / 2];
    toData[i] = constrain(toData[i], 0, 100);
    toData[i] = map(toData[i], 0, 100, 1, 7);
  }
  for (int i = 0; i < halfsamples; i++)
  {
    uValue = toData[i];
    uJump[i]++;
    if (uValue > uJump[i])
    {
      uValue = uJump[i];
    }
    else
    {
      uJump[i] = uValue;
    }
    dValue = uValue;
    toDown++;
    if (toDown % toDownSpeed == 0)
    {
      dJump[i]--;
      toDown = 0;
    }
    if (dValue > pointJump[i])
    {
      dJump[i] = dValue;
    }
    else
    {
      dValue = dJump[i];
    }
    tValue = uValue;
    pointDown++;
    if (pointDown % pointDownSpeed == 0)
    {
      pointJump[i]--;
      pointDown = 0;
    }
    if (tValue > pointJump[i])
    {
      pointJump[i] = tValue;
    }
    else
    {
      tValue = pointJump[i];
    }
    fill_rainbow(leds + 8 * i, uValue, gHue, 30);
    fill_rainbow(leds + 8 * i, dValue, gHue, 30);
    fill_solid(leds + 8 * i + tValue, 1, CRGB::White);

  }
  FastLED.show();
  delay(2);
}
实验场景图
实验场景图 动态图
实验的视频记录
优酷:
B站:https://www.bilibili.com/video/BV1nD4y147xD/?vd_source=98c6b1fc23b2787403d97f8d3cc0b7e5


 他的勋章
他的勋章
孙洪尧19852024.06.28
可以图形化编程吗?
驴友花雕2024.07.20
这个没有试过
驴友花雕2024.07.26
估计难度比较高,没有试过
腿毛利小五郎2023.07.05
厉害
腿毛利小五郎2023.07.03
666
9mm2023.05.06
666
驴友花雕2023.05.09
谢谢鼓励,有空多交流
花生编程2023.01.26
不错
花生编程2023.01.26
厉害厉害
三春牛-创客2023.01.06
666
三春牛-创客2023.01.06
厉害
摸鱼的网民2022.12.17
太6了
摸鱼的网民2022.12.17
喔喔喔代码好长啊