 返回首页
返回首页
 回到顶部
回到顶部
1.项目介绍
1.1项目简介
本项目基于 YOLOv8 的目标检测功能,训练出车牌识别(License Plate Recognition)模型,结合中文车牌号码识别算法实现车牌号提取,结合行空板M10等硬件设备,记录进出停车场的车辆并完成自动计费。通过训练 YOLOv8模型,将模型部署到行空板M10上,USB摄像头实时捕捉进出车辆画面,训练的车牌识别模型(LPR 模型)识别输出车牌号码,系统自动记录进出时间戳及计算停留时长,并自动计费,为智慧停车、无人值守等场景提供高效、低成本的技术支持。
本项目核心功能如下:
实时车牌检测:利用 YOLOv8 算法对摄像头捕获的画面实时检测车牌。通过YOLO训练出车牌模型 用于检测车牌在画面中的区域、车牌类型(如蓝色车牌:油车;绿色车牌:新能源车)
车牌号码识别:通过车牌号码识别算法(PaddleOCR算法/HyperLPR3算法)对检测区域进行字符分割与序列识别,实现车牌号码的识别。YOLO 车牌识别模型用于检测车牌区域,中文车牌号码识别算法 用于识别车牌字符,二者协同实现车牌识别任务 。
自动计费结算:根据车牌号码匹配车辆进出记录,自动计算停车时长与费用,联动闸机实现自动抬杆/落杆。
1.2项目效果视频
基于YOLO的停车场计费装置(车牌识别)
2.车牌号码识别算法介绍与本项目制作框架
本项目是通过YOLO目标检测算法,使用车牌数据集,加载预训练YOLOv8s模型,训练出车牌识别模型。再结合车牌号码识别算法实现车牌号提取,进而记录进出停车场的车辆并完成自动计费。
常见的车牌号码识别算法有以下:
(1)PaddleOCR算法:PaddleOCR算法利用 DBNet/PAN 快速框出文本区域,再用 卷积神经网络 模型或 Transformer 结构模型把每个框里的字符读出来,辅以方向校正、模型压缩和多后端部署,然后实现中英文混排识别。(官方文档https://paddlepaddle.github.io/PaddleOCR/v2.10.0/algorithm/overview.html)
(2)HyperLRP3算法:HyperLRP3算法是一个开源的、基于深度学习高性能中文车牌识别库,支持PHP、C/C++、Python语言,Windows/Mac/Linux/Android/IOS 等平台。(官方文档https://github.com/szad670401/HyperLPR)
下图是我们的项目制作框架图,我们在电脑端完成模型的训练与测试,将模型部署到智能硬件——行空板M10中完成车牌识别同时显示车牌号,并制作出停车场计费装置。
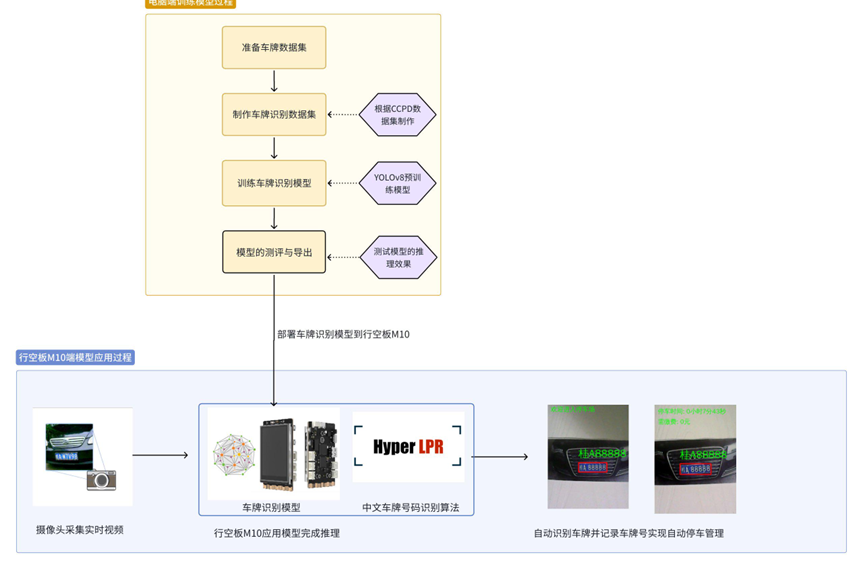
(基于YOLO的车牌识别停车场计费装置项目框架图)
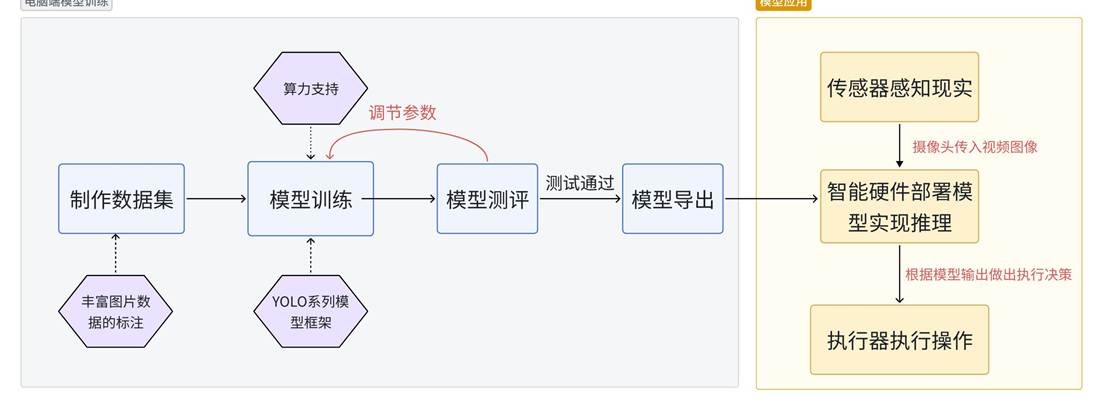
(YOLO项目框架图,供参考)
3.软硬件环境准备
3.1软硬件器材清单
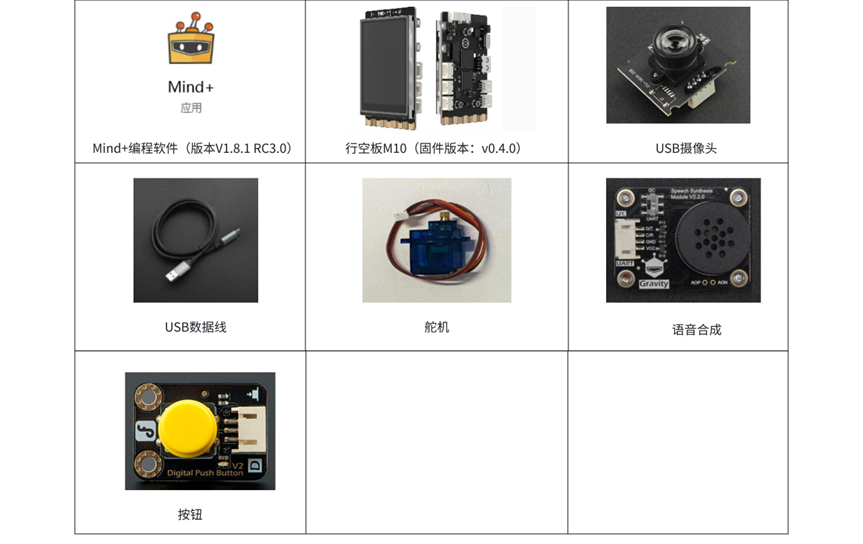
注意行空板M10固件在0.3.5——0.4.0的版本均可以用于制作本项目,但都需要为行空板装conda环境,详情见3.3硬件环境准备。
3.2软件环境准备
由于我们使用电脑进行训练货物位置检测模型,因此需要在电脑端安装相应的库。
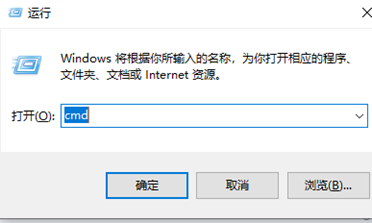
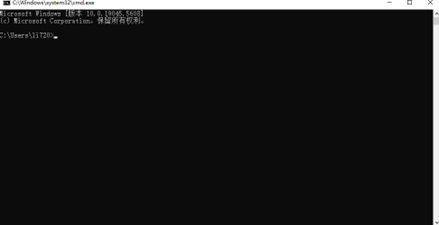
首先按下win+R,输入cmd进入窗口。
在命令行窗口中依次输入以下指令,安装ultralytics库
pip install ultralytics
pip install onnx==1.16.1
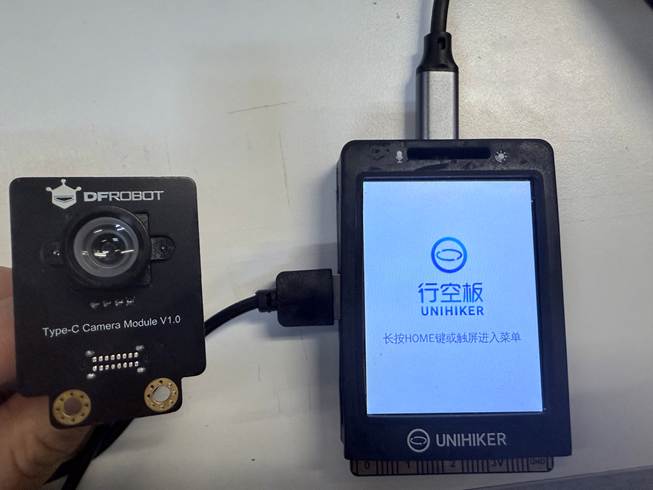
pip install onnxruntime==1.17.1
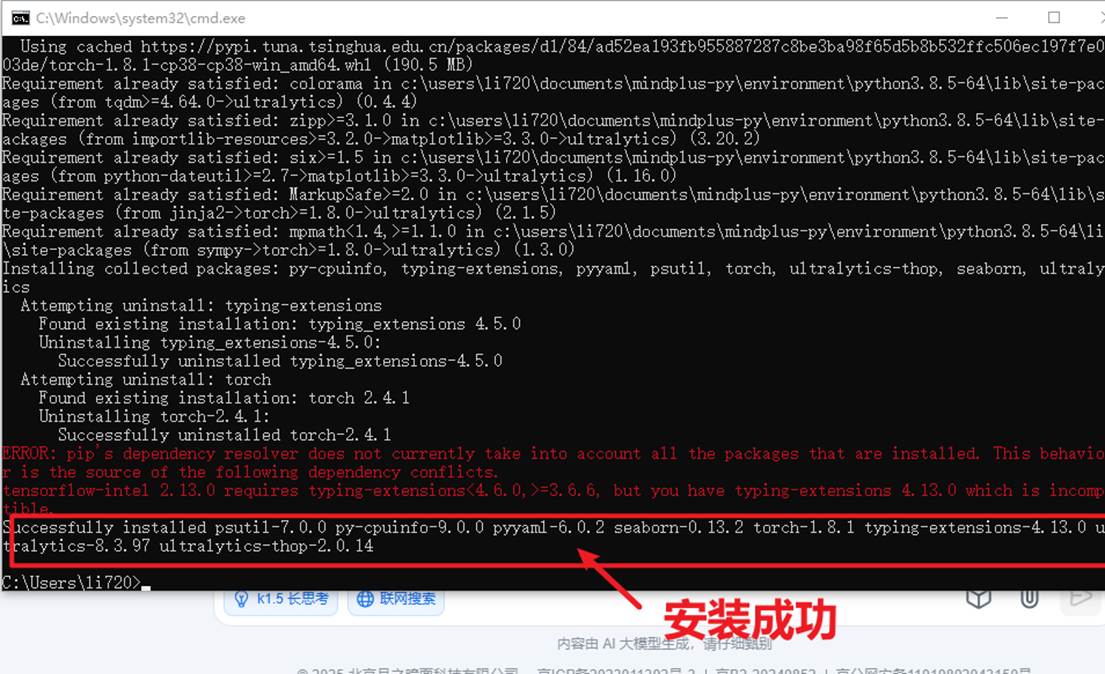
输入之后会出现以下页面。
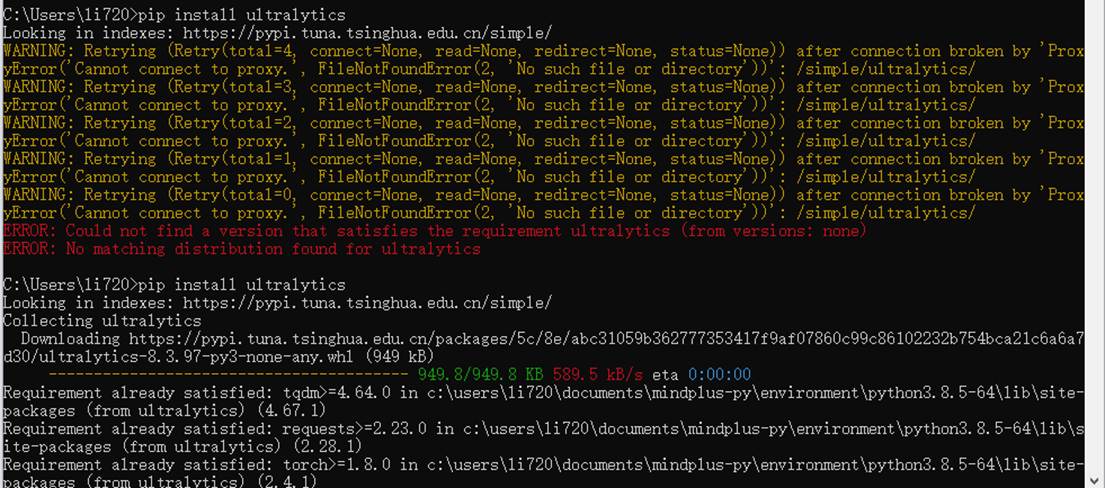
当命令运行完成,出现以下截图表示安装成功。
3.3硬件环境准备
在本项目中我们将要将训练好的YOLOv8框架的模型部署到行空板中,进行推理和执行操作。为了在行空板上成功运行YOLOv8,我们将使用Ultralytics官方提供的库进行部署 。
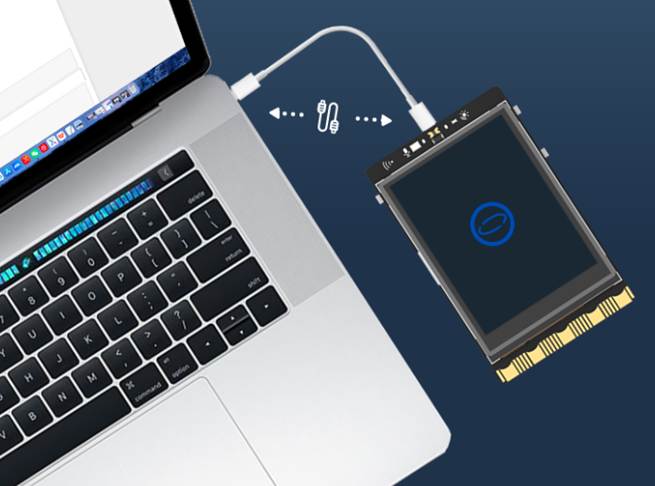
使用USB数据线连接行空板与电脑,等待行空板屏幕亮起表示行空板开机成功。
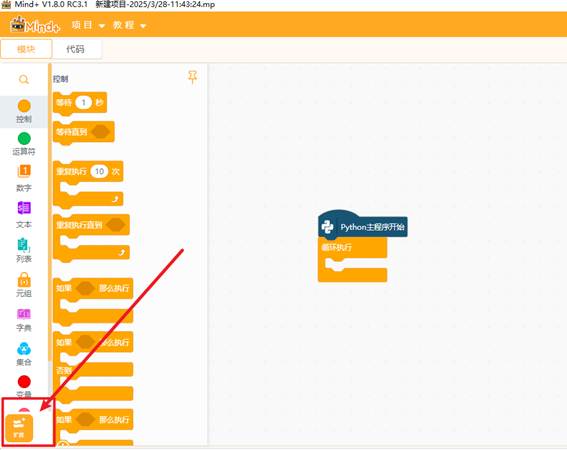
打开编程软件Mind+,点击左下角的扩展,在官方库中找到行空板库点击加载
|
|

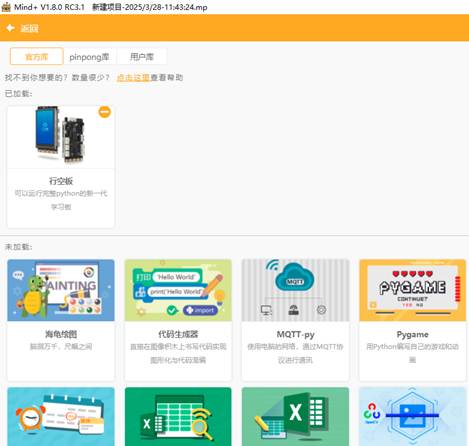
点击返回,点击连接设备,找到10.1.2.3.点击连接,等待连接成功.
请参考此篇帖子的环境配置教程:如何在行空板上运行 YOLOv10n?
请按照这篇帖子的教程完成到Step 7 安装utralytics,如下图。
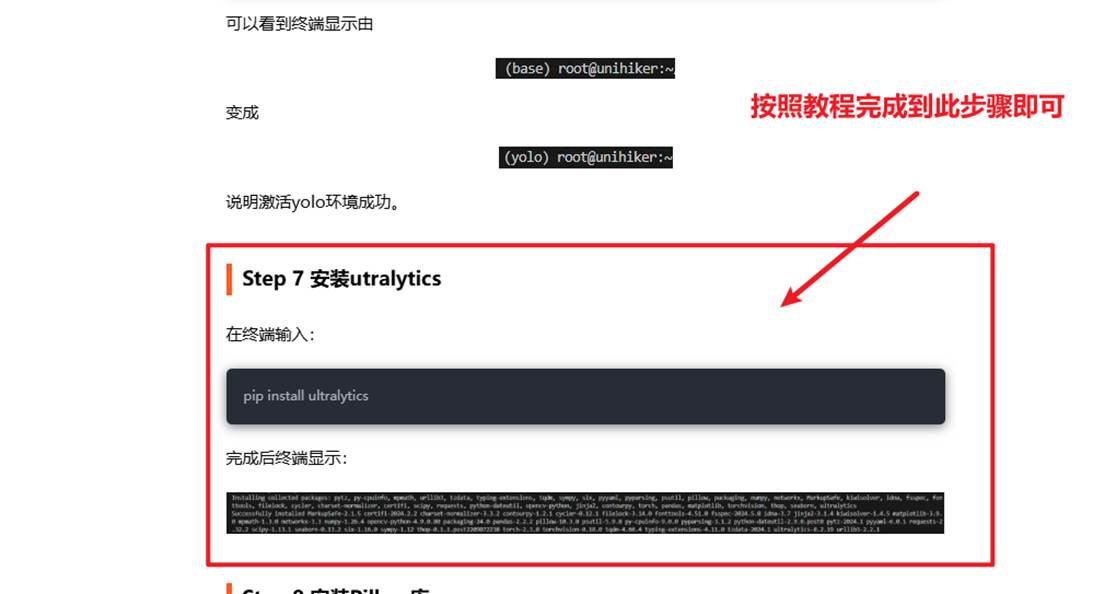
除了utralytics库本项目还需要使用onnx、onnxruntime、opencv -python 和pinpong库
依次在Mind+终端输入以下命令
(注意行空板需要联网,行空板联网操作教程:https://www.unihiker.com.cn/wiki/m10/webmenu#%E7%BD%91%E7%BB%9C%E8%AE%BE%E7%BD%AE)
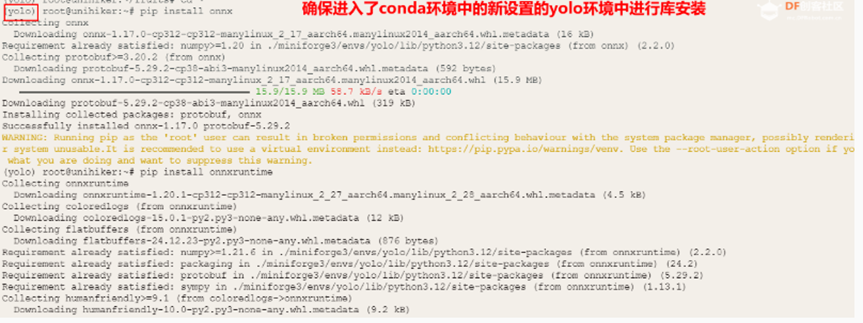
pip install onnx==1.16.1
pip install onnxruntime==1.17.1
pip install opencv-python
pip install pinpong
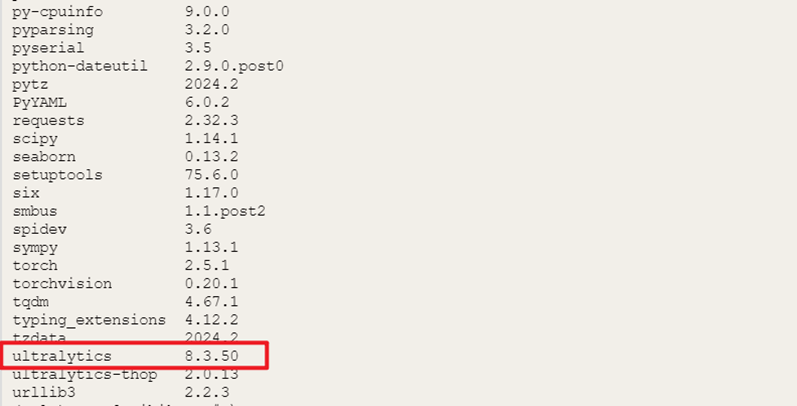
在Mind+终端输入以下指令,可以检查相应库是否安装成功
pip list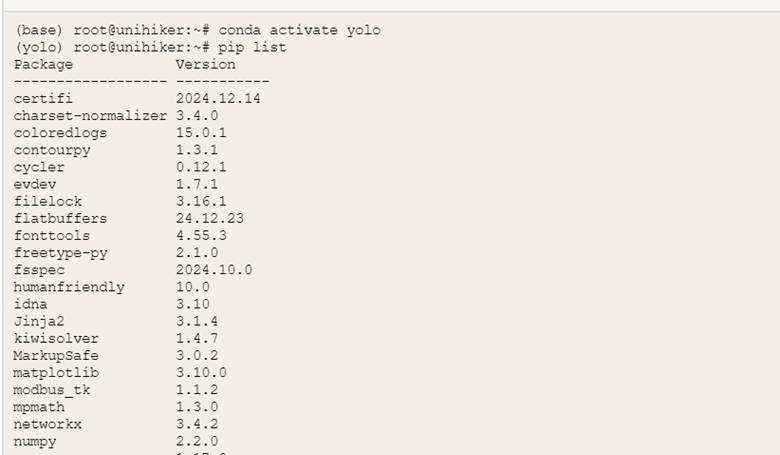
4. 制作步骤
4.1数据集准备:
4.1.1采集图片
本文训练模型使用的数据集为CPDD2020部分绿牌数据集与CCPD2019部分蓝牌数据集。数据集下载地址:https://github.com/detectRecog/CCPD CCPD是一个大型的、多样化的、经过仔细标注的中国城市车牌开源数据集。CCPD2019数据集车牌类型仅有普通车牌(蓝色车牌),CCPD2020数据集车牌类型仅有新能源车牌(绿色车牌)。在CCPD数据集中,每张图片仅包含一张车牌,并且每幅图像都包含大量的标注信息,但是CCPD数据集没有专门的标注文件,每张图像的文件名就是该图像对应的数据标注。
本文使用的数据集一共包含10881张车牌数据(详情见文档末尾附件)。部分图片如下:

数据集中图片的命名规则如下:图片命名:“025-95_113-154&383_386&473-386&473_177&454_154&383_363&402-0_0_22_27_27_33_16-37-15.jpg”
解释:
1. 025:车牌区域占整个画面的比例;
2. 95_113:车牌水平和垂直角度, 水平95°, 竖直113°
3. 154&383_386&473:标注框左上、右下坐标,左上(154, 383), 右下(386, 473)
4. 86&473_177&454_154&383_363&402:标注框四个角点坐标,顺序为右下、左下、左上、右上
5. 0_0_22_27_27_33_16:车牌号码映射关系如下: 第一个0为省份 对应省份字典provinces中的’皖’,;第二个0是该车所在地的地市一级代码,对应地市一级代码字典alphabets的’A’;后5位为字母和文字, 查看车牌号ads字典,如22为Y,27为3,33为9,16为S,最终车牌号码为皖AY339S
省份:[“皖”, “沪”, “津”, “渝”, “冀”, “晋”, “蒙”, “辽”, “吉”, “黑”, “苏”, “浙”, “京”, “闽”, “赣”, “鲁”, “豫”, “鄂”, “湘”, “粤”, “桂”, “琼”, “川”, “贵”, “云”, “藏”, “陕”, “甘”, “青”, “宁”, “新”]
地市:[‘A’, ‘B’, ‘C’, ‘D’, ‘E’, ‘F’, ‘G’, ‘H’, ‘J’, ‘K’, ‘L’, ‘M’, ‘N’, ‘P’, ‘Q’, ‘R’, ‘S’, ‘T’, ‘U’, ‘V’, ‘W’,‘X’, ‘Y’, ‘Z’]
车牌字典:[‘A’, ‘B’, ‘C’, ‘D’, ‘E’, ‘F’, ‘G’, ‘H’, ‘J’, ‘K’, ‘L’, ‘M’, ‘N’, ‘P’, ‘Q’, ‘R’, ‘S’, ‘T’, ‘U’, ‘V’, ‘W’, ‘X’,‘Y’, ‘Z’, ‘0’, ‘1’, ‘2’, ‘3’, ‘4’, ‘5’, ‘6’, ‘7’, ‘8’, ‘9’]
4.1.2生成数据标注
目标:将 CCPD 数据集中图片文件名中解析出的车牌位置和车牌颜色等信息,转换成 YOLO 格式的标注文件(.txt)。
功能:通过代码解析文件名,并将标注信息保存到txt文件中。
注意:在自己电脑运行时,代码中的文件路径均需改为自己电脑端路径。
import shutil
import cv2
import os

def txt_translate(path, txt_path):
    print(path)
    print(txt_path)
    for filename in os.listdir(path):
        if filename.endswith('.txt'):
            continue

        # 解析文件名
        parts = filename.split('-')
        if len(parts) < 6:
            print(f"文件名格式不正确:{filename}")
            continue

        # 提取车牌号码部分
        license_plate_indices = parts[4].split('_')
        if len(license_plate_indices) < 7:
            print(f"文件名格式不正确:{filename}, 车牌号码部分: {license_plate_indices}")
            continue

        # 判断车牌类型
        # 绿牌(新能源车牌)通常有 8 位字符,蓝牌(普通车牌)通常有 7 位字符
        if len(license_plate_indices) == 8:
            class_id = 1  # 绿牌
        elif len(license_plate_indices) == 7:
            class_id = 0  # 蓝牌
        else:
            print(f"未知的车牌类型:{filename}, 车牌号码部分: {license_plate_indices}")
            continue

        # 提取边界框坐标
        bbox_coords = parts[2].split('_')
        if len(bbox_coords) < 2:
            print(f"文件名格式不正确:{filename}, 边界框坐标部分: {bbox_coords}")
            continue

        lt, rb = bbox_coords
        lx, ly = map(int, lt.split('&'))
        rx, ry = map(int, rb.split('&'))

        # 计算边界框的宽度和高度
        width = int(rx) - int(lx)
        height = int(ry) - int(ly)
        cx = float(lx) + width / 2
        cy = float(ly) + height / 2

        # 读取图片以获取图片尺寸
        img = cv2.imread(os.path.join(path, filename))
        if img is None:
            print(f"无法读取图片:{filename}")
            continue

        img_height, img_width, _ = img.shape

        # 归一化坐标
        cx /= img_width
        cy /= img_height
        width /= img_width
        height /= img_height

        # 写入标注文件
        txt_name = os.path.splitext(filename)[0] + '.txt'
        txt_file = os.path.join(txt_path, txt_name)
        os.makedirs(os.path.dirname(txt_file), exist_ok=True)

        with open(txt_file, "w") as f:
            f.write(f"{class_id} {cx:.6f} {cy:.6f} {width:.6f} {height:.6f}\n")


if __name__ == '__main__':
    # 图片存储地址
    trainDir = r"C:/Users/HYPAB/Desktop/YOLOv8-license-plate-recognize/shujuji/CCPD2020/ccpd_green/train/"
    validDir = r"C:/Users/HYPAB/Desktop/YOLOv8-license-plate-recognize/shujuji/CCPD2020/ccpd_green/val/"
    testDir = r"C:/Users/HYPAB/Desktop/YOLOv8-license-plate-recognize/shujuji/CCPD2020/ccpd_green/test/"
    # 标签存储地址
    train_txt_path = r"C:/Users/HYPAB/Desktop/YOLOv8-license-plate-recognize/shujuji/CCPD2020/ccpd_green/trainlabels/"
    val_txt_path = r"C:/Users/HYPAB/Desktop/YOLOv8-license-plate-recognize/shujuji/CCPD2020/ccpd_green/vallabels/"
    test_txt_path = r"C:/Users/HYPAB/Desktop/YOLOv8-license-plate-recognize/shujuji/CCPD2020/ccpd_green/testlabels/"
    txt_translate(trainDir, train_txt_path)
    txt_translate(validDir, val_txt_path)
    txt_translate(testDir, test_txt_path)
在mind+中运行上面这段代码,制作完成之后如下图所示:
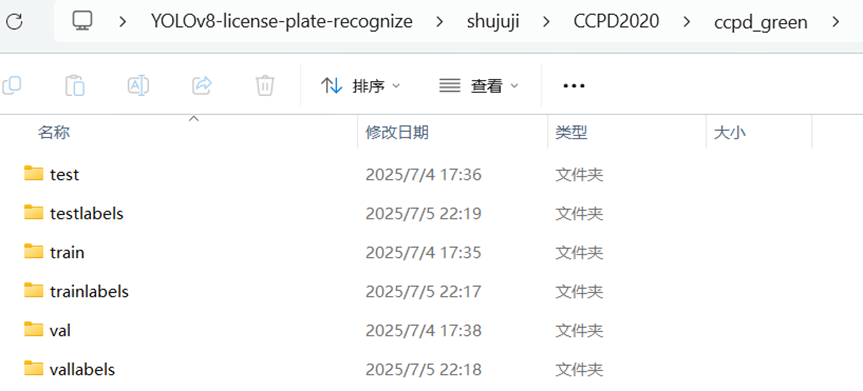
说明:testlabels是训练集标注信息文件,vallabels是验证集标注信息文件,testlables是测试集标注信息文件。
4.1.3划分训练集和验证集
根据前面标注信息文件,把相应的图片及标注文件放到训练集和验证集文件夹内:
PlateData/             //车牌数据集
│
├── train/                  // 训练集,使用训练集的数据进行模型训练
│   ├── images/             // 训练集的图片文件夹
│   └── labels/             // 训练集中图片的标注信息文件夹,作用是提供图像中车牌信息。
│
├── val/                    // 验证集,验证集用于评估模型在未见过的数据上的表现
│   ├── images/             // 验证集的图片文件夹
│   └── labels/             // 验证集图片的标注信息文件夹
│
└── data.yaml             // 数据集配置文件,用于定义数据集的参数,通常是一个 YAML 文件。
4.2车牌识别模型训练
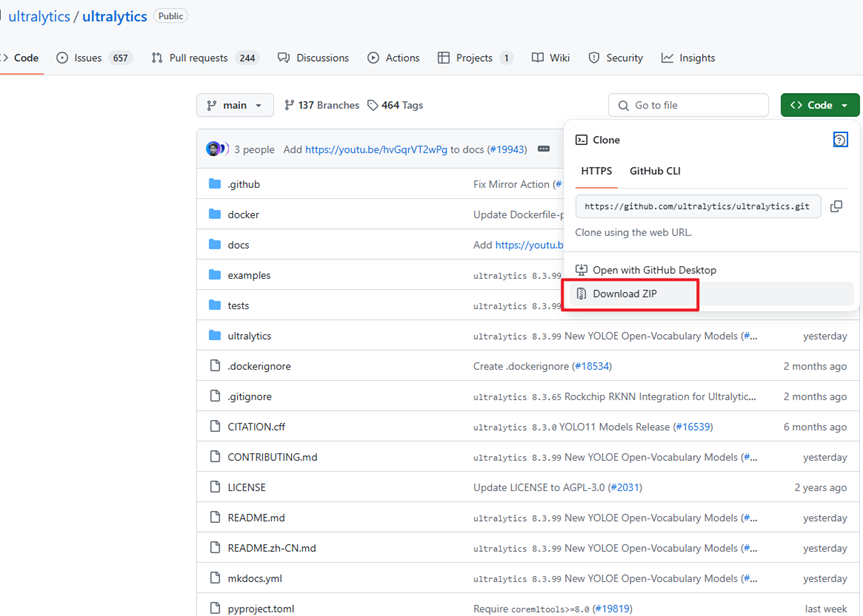
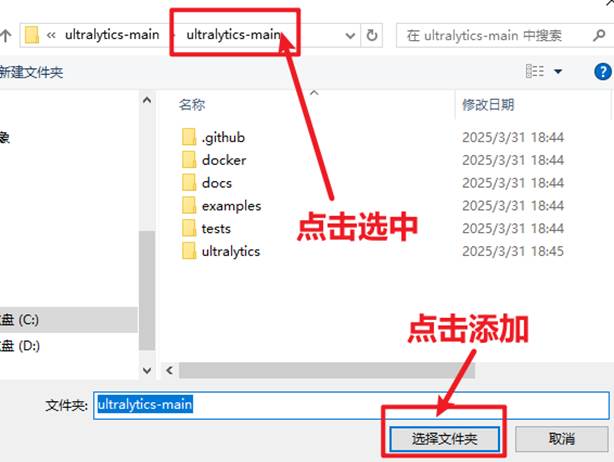
我们首先要去ultralytics的官方仓库下载YOLO项目文件。链接:https://github.com/ultralytics/ultralytics。如下图,将官方文件夹下载下来,并解压(文件夹已附在在本篇文档的最后)。
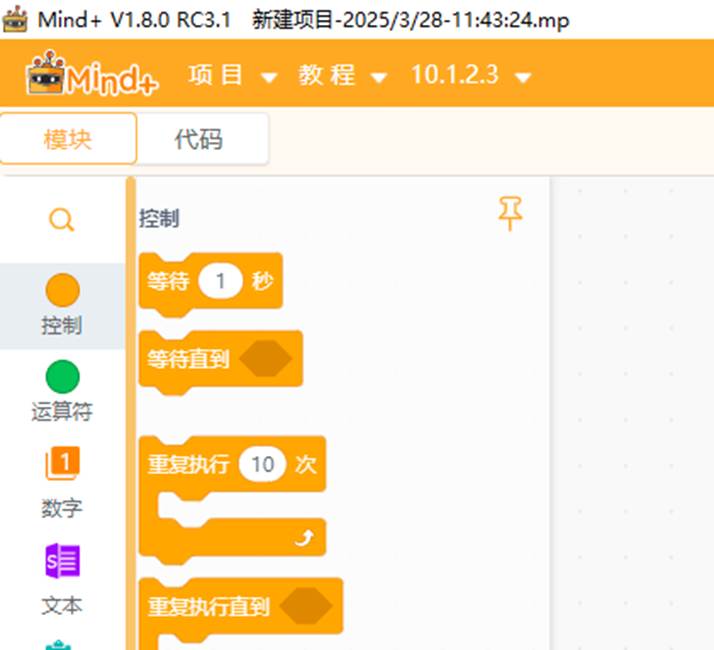
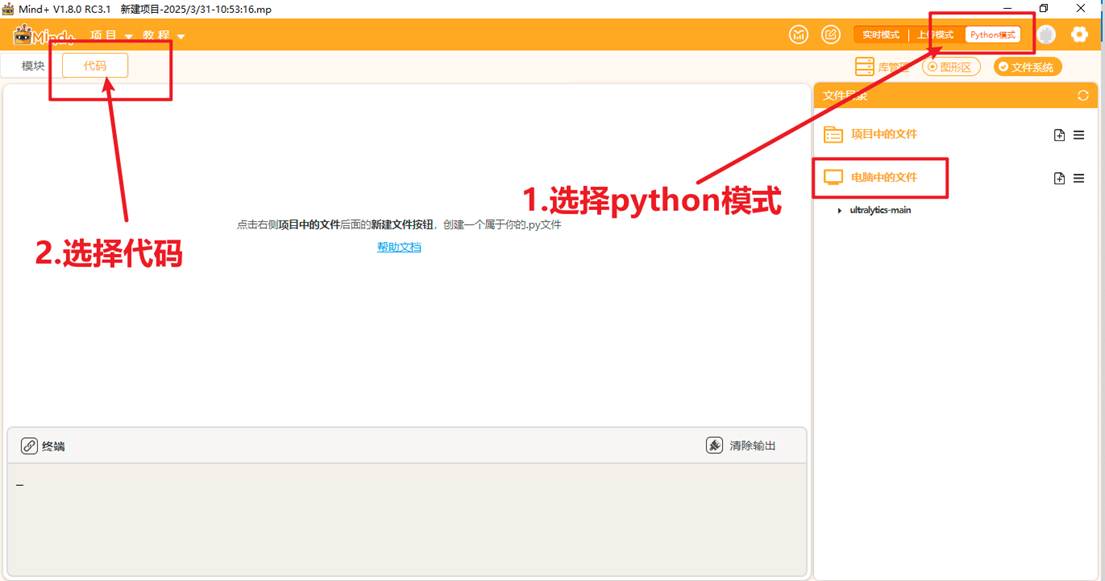
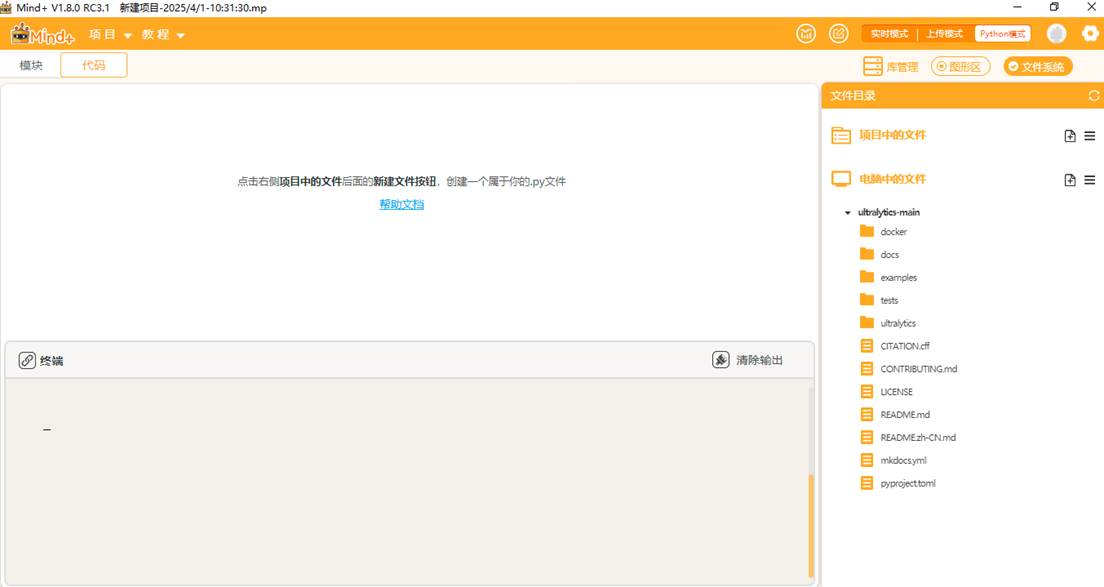
将文件放到一个能找到的路径,打开Mind+,选择Python模式下的代码模式,如下图。
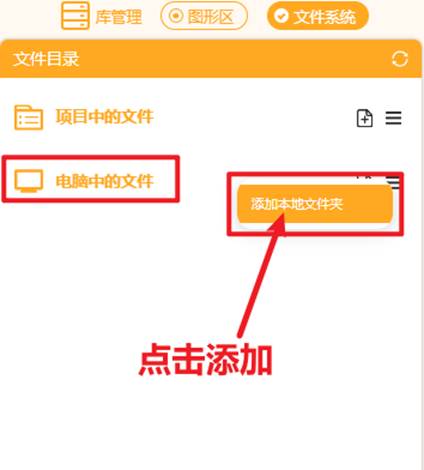
在右侧“文件系统”中找到"电脑中的文件",找到此文件夹进行添加。
|
|
添加好后可以观察到如此下图。
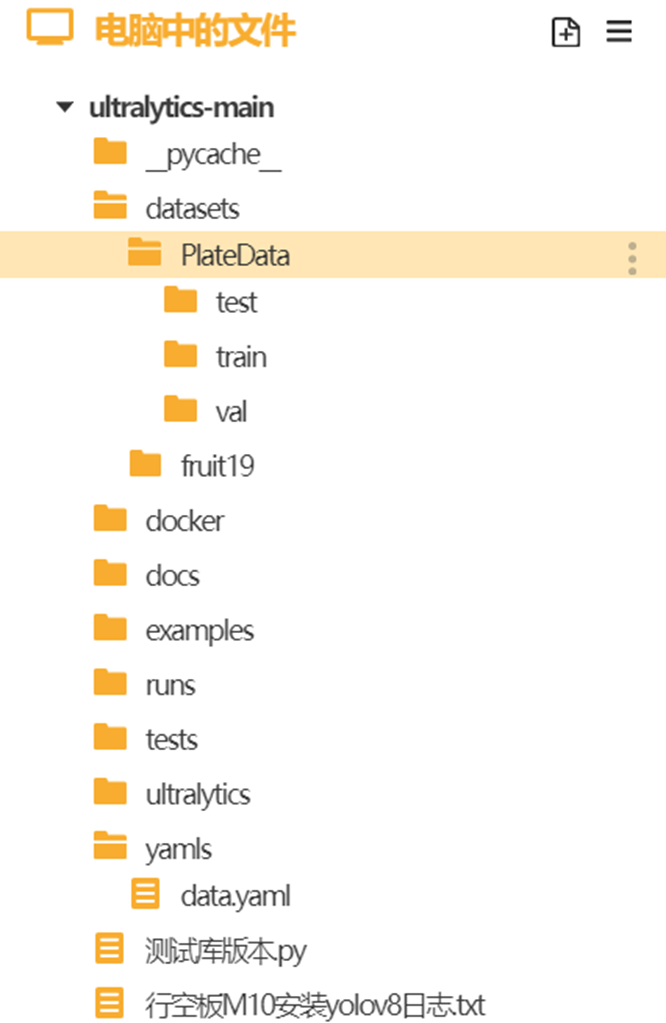
点击"新建文件夹",在ultralytics文件夹中分别新建三个文件夹,依次命名为"datasets"(用于存放数据集),"yamls"(用于存放数据集对应的yaml文件)"runs"(用于存放训练模型的py文件)。

建好后如下图。
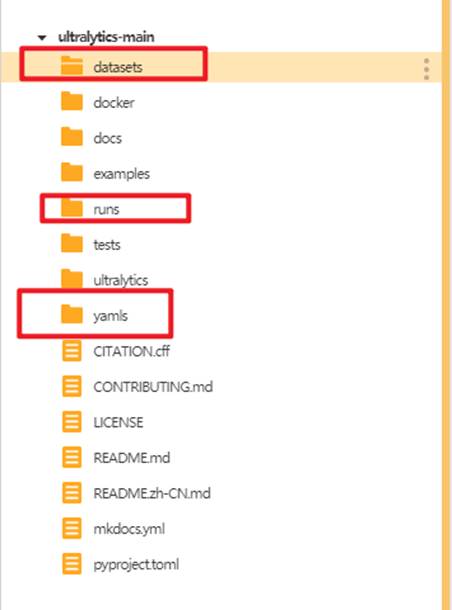
将车牌检测数据集的训练集和验证集文件夹放入"datasets"文件夹,将车牌检测数据集的yaml文件放入"yamls"文件夹。
完成之后文件夹是以下布局:
车牌检测数据集的yaml文件如下(0是蓝牌,1是绿牌):
train: ../datasets/PlateData/train/images
val: ../datasets/PlateData/val/images

nc: 2
names: ['BlueLicense','GreenLicense']
接着我们在"runs"文件夹中建立一个叫做"train.py"的文件,在此文件中编写训练YOLO模型的代码。
将训练代码粘贴到train.py中点击运行。我们在预训练模型"yolov8s.pt"基础上进行车牌检测模型的训练,设置训练轮次是2轮。图片的尺寸是320。
from ultralytics import YOLO   # 导入YOLO类,用于加载和训练模型
import time
import os

# 打印当前工作目录
print("Current working directory:", os.getcwd())

# 加载模型
model = YOLO("yolov8s.pt")  #建议使用yolov8n-seg.pt或yolov8s.pt更轻量
# 开始训练
results = model.train(
    data=os.path.join(os.getcwd(), '..', 'yamls', 'data.yaml'),  # 使用相对路径,确保指向正确的yamls文件夹
    epochs=2,   # 设置训练轮数为2(通常需要更多轮数,这里选用2次,可以修改)
    imgsz=320,  # 设置输入图像大小为320x320,降低图像大小可以减少显存占用,适合资源有限的环境
    device='cpu',  # 单CPU训练
    workers=0,   # 数据加载线程数(Windows系统建议设置为0)
               # workers=0 表示主进程加载数据,避免多线程问题
    batch=2,     # 设置批量大小为2,降低批量大小可以减少显存占用,但可能影响训练效率
    cache=False   # 不使用缓存(避免内存占用过多)
)
time.sleep(10)
运行时可观察终端,自动下载预训练模型"yolov8s.pt",进行模型的训练。
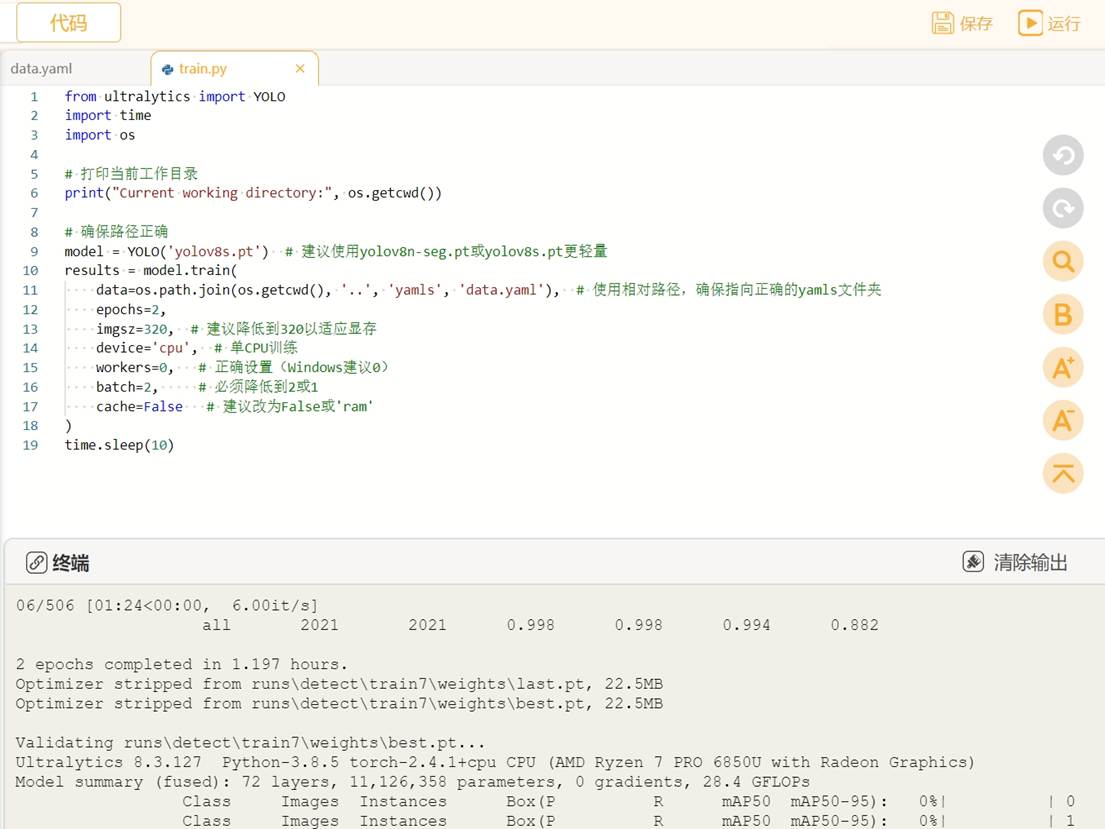
YOLO模型的训练对电脑的配置要求比较高,使用电脑CPU一般训练时间较长,可以考虑使用GPU或者云端算力进行训练,这里我们使用的时本地电脑的CPU训练方法,操作比较简单,耗时略长。当训练完成后,我们可以观察"runs"文件夹中自动生成了"detect"文件夹,里面存放了训练模型的数据和训练好的模型文件。
|
|
4.3车牌识别模型测评
我们先在电脑端测试一下车牌识别模型的性能,这里使用pt模型,也可以使用onnx模型(需转换)。
在"ultralytics-main"文件夹下新建"tupian.py"的程序文件,测试图片在"ultralytics-main\datasets\PlateData\test"文件夹内。
4.3.1测试车牌识别模型检测效果
• 将以下代码复制到"tupian.py"文件中进行图片推理测试。
测试图片推理代码
from ultralytics import YOLO
import cv2
# 所需加载的模型目录
path = 'C:/Users/HYPAB/Desktop/ultralytics-main/runs/runs/detect/train8/weights/best.pt'
# 需要检测的图片地址
#img_path = "C:/Users/HYPAB/Desktop/ultralytics-main/datasets/PlateData/test/0240625-95_264-206&378_437&483-437&483_207&450_206&378_435&402-0_0_3_24_30_25_29_25-163-89.jpg"
img_path = "C:/Users/HYPAB/Desktop/ultralytics-main/datasets/PlateData/test/0199-0_4-260&451_476&528-476&525_267&528_260&454_469&451-0_0_20_31_19_33_32-149-82.jpg"

# 加载预训练模型
# conf 0.25 object confidence threshold for detection
# iou 0.7 intersection over union (IoU) threshold for NMS
model = YOLO(path, task='detect')
# model = YOLO(path, task='detect',conf=0.5)

# 检测图片
results = model(img_path)
#print(results)
#boxes = results[0].boxes
#print(boxes)
res = results[0].plot()
# res = cv2.resize(res,dsize=None,fx=0.3,fy=0.3,interpolation=cv2.INTER_LINEAR)
cv2.imshow("YOLOv8 Detection", res)
cv2.waitKey(0)
点击Mind+右上角的”运行",程序里面可以选择不同类型车牌验证,运行代码观察效果。
蓝牌检测效果:

观察终端信息,可以看到车牌数量、车牌类别、各阶段耗时等信息。

绿牌检测效果:
观察终端信息,可以看到车牌数量、车牌类别、各阶段耗时等信息。

打印下results的值,信息如下:
YAML
打印results值详细信息
boxes: ultralytics.engine.results.Boxes object
keypoints: None
masks: None
names: {0: 'BlueLicense', 1: 'GreenLicense'}
obb: None
orig_img: array([[[133, 112, 115],
        [127, 106, 109],
        [118,  97, 100],
        ...,
        [184, 109,  77],
        [184, 109,  77],
       [[133, 112, 115],,
        [126, 105, 108],
        [117,  96,  99],
        ...,
        [184, 109,  77],
        [184, 109,  77],
        [184, 109,  77]],

       [[134, 113, 116],
        [127, 106, 109],
        [117,  96,  99],
        ...,
        [184, 109,  77],
        [184, 109,  77],
        [184, 109,  77]],

       ...,

       [[177, 162, 143],
        [177, 162, 143],
        [177, 162, 143],
        ...,
        [115,  92,  96],
        [111,  88,  92],
        [107,  84,  88]],

       [[177, 162, 143],
        [177, 162, 143],
        [177, 162, 143],
        ...,
        [117,  94,  98],
        [114,  91,  95],
        [111,  88,  92]],

       [[177, 162, 143],
        [177, 162, 143],
        [177, 162, 143],
        ...,
        [118,  95,  99],
        [116,  93,  97],
        [113,  90,  94]]], dtype=uint8)
orig_shape: (1160, 720)
path: 'C:\\Users\\HYPAB\\Desktop\\ultralytics-main\\datasets\\PlateData\\test\\0240625-95_264-206&378_437&483-437&483_207&450_206&378_435&402-0_0_3_24_30_25_29_25-163-89.jpg'
probs: None
save_dir: 'runs\\detect\\predict'
speed: {'preprocess': 1.168599999999742, 'inference': 47.173399999999255, 'postprocess': 0.8631000000001166}]
YAML
打印boxes值详细信息
cls: tensor([1.])
conf: tensor([0.8307])
data: tensor([[199.6578, 375.5983, 430.6550, 483.8450,   0.8307,   1.0000]])
id: None
is_track: False
orig_shape: (1160, 720)
shape: torch.Size([1, 6])
xywh: tensor([[315.1564, 429.7216, 230.9972, 108.2468]])
xywhn: tensor([[0.4377, 0.3704, 0.3208, 0.0933]])
xyxy: tensor([[199.6578, 375.5983, 430.6550, 483.8450]])
xyxyn: tensor([[0.2773, 0.3238, 0.5981, 0.4171]])
results详细信息解释:
其中boxes里的值可以重点了解:
boxes值详细信息解释:

接着我们可以继续创建一个叫做"shipin.py"的文件(测试实时视频流下的推理效果),将以下推理代码粘贴到"shipin.py"文件中。
实时视频流推理
from ultralytics import YOLO
import cv2

# 1. 模型路径
path = r'C:/Users/HYPAB/Desktop/ultralytics-main/runs/runs/detect/train8/weights/best.pt'
model = YOLO(path, task='detect')          # 也可加 conf=0.5, iou=0.7 等参数

# 2. 打开摄像头(0=默认摄像头;1=外接USB/RTSP摄像头)
cap = cv2.VideoCapture(1)
if not cap.isOpened():
    raise IOError("Cannot open camera!")

# 3. 实时循环检测
while True:
    ret, frame = cap.read()
    if not ret:
        print("Failed to grab frame")
        break

    # 4. 推理
    results = model(frame, stream=True)    # stream=True 减少延迟

    # 5. 画框 & 显示
    for r in results:
        annotated = r.plot()               # 带标签的 BGR 图像
        cv2.imshow("YOLOv8 Live", annotated)

    # 6. 按 q 退出
    if cv2.waitKey(1) & 0xFF == ord('q'):
        break

# 7. 释放资源
cap.release()
cv2.destroyAllWindows()
运行程序,可以发现一个窗口实时显示摄像头捕捉画面,并实时显示当前车牌类别和置信度等信息。
4.3.2提取车牌号并显示
接下来我们在车牌识别的基础上需要使用把车牌号识别出来,并且标写在图片上:
1、安装paddlepaddle库和paddleocr库,在mind+库管理里面输入库名安装。

2.将以下代码复制到"tupianLPR.py"文件中,进行图片推理测试。
import cv2
from ultralytics import YOLO
from paddleocr import PaddleOCR
from PIL import Image, ImageDraw, ImageFont
import numpy as np
# 初始化 PaddleOCR
ocr = PaddleOCR(use_angle_cls=True, lang="ch")
# 加载 YOLOv8 模型
model = YOLO('C:/Users/HYPAB/Desktop/ultralytics-main/runs/runs/detect/train8/weights/best.pt')
# 读取图片
image_path = "C:/Users/HYPAB/Desktop/ultralytics-main/datasets/PlateData/test/0240625-95_264-206&378_437&483-437&483_207&450_206&378_435&402-0_0_3_24_30_25_29_25-163-89.jpg"
image = cv2.imread(image_path)
# 使用 YOLOv8 检测车牌
results = model(image)
# 提取第一个检测结果(单张图片)
result = results[0]
# 创建一个副本用于绘制
image_with_rect = image.copy()
# 提取边界框和置信度
boxes = result.boxes.xyxy.cpu().numpy() # 转换为 NumPy 数组
confidences = result.boxes.conf.cpu().numpy() # 转换为 NumPy 数组
# 遍历检测结果
for box, confidence in zip(boxes, confidences):
if confidence > 0.5: # 置信度阈值
# 提取边界框坐标
x1, y1, x2, y2 = map(int, box)
plate_region = image[y1:y2, x1:x2] # 提取车牌区域
# 使用 PaddleOCR 识别车牌号码
ocr_results = ocr.ocr(plate_region)
if ocr_results:
# 获取识别的车牌号并移除中间的点
plate_number = ocr_results[0][0][1][0].replace('·', ' ')
print(f"车牌号码: {plate_number}, 置信度: {confidence.item()}")
# 在图片上绘制车牌区域(使用 OpenCV 绘制红色边框)
cv2.rectangle(image_with_rect, (x1, y1), (x2, y2), (0, 0, 255), 2)
# 创建一个 Pillow 图像对象以便绘制中文字符
pil_image = Image.fromarray(cv2.cvtColor(image_with_rect, cv2.COLOR_BGR2RGB))
# 使用中文字体
font_path = "C:/Windows/Fonts/simhei.ttf" # 黑体字体路径
font = ImageFont.truetype(font_path, 50)
draw = ImageDraw.Draw(pil_image)
# 遍历检测结果并绘制文字
for box, confidence in zip(boxes, confidences):
if confidence > 0.5: # 置信度阈值
x1, y1, x2, y2 = map(int, box)
plate_number = ocr_results[0][0][1][0].replace('·', ' ') if ocr_results else "无法识别"
draw.text((x1, y1 - 50), plate_number, fill=(0, 255, 0), font=font)
# 将 Pillow 图像转换回 OpenCV 格式
result_image = cv2.cvtColor(np.array(pil_image), cv2.COLOR_RGB2BGR)
# 显示结果
cv2.imshow('YOLOv8 License Plate Detection and Recognition', result_image)
cv2.waitKey(0)
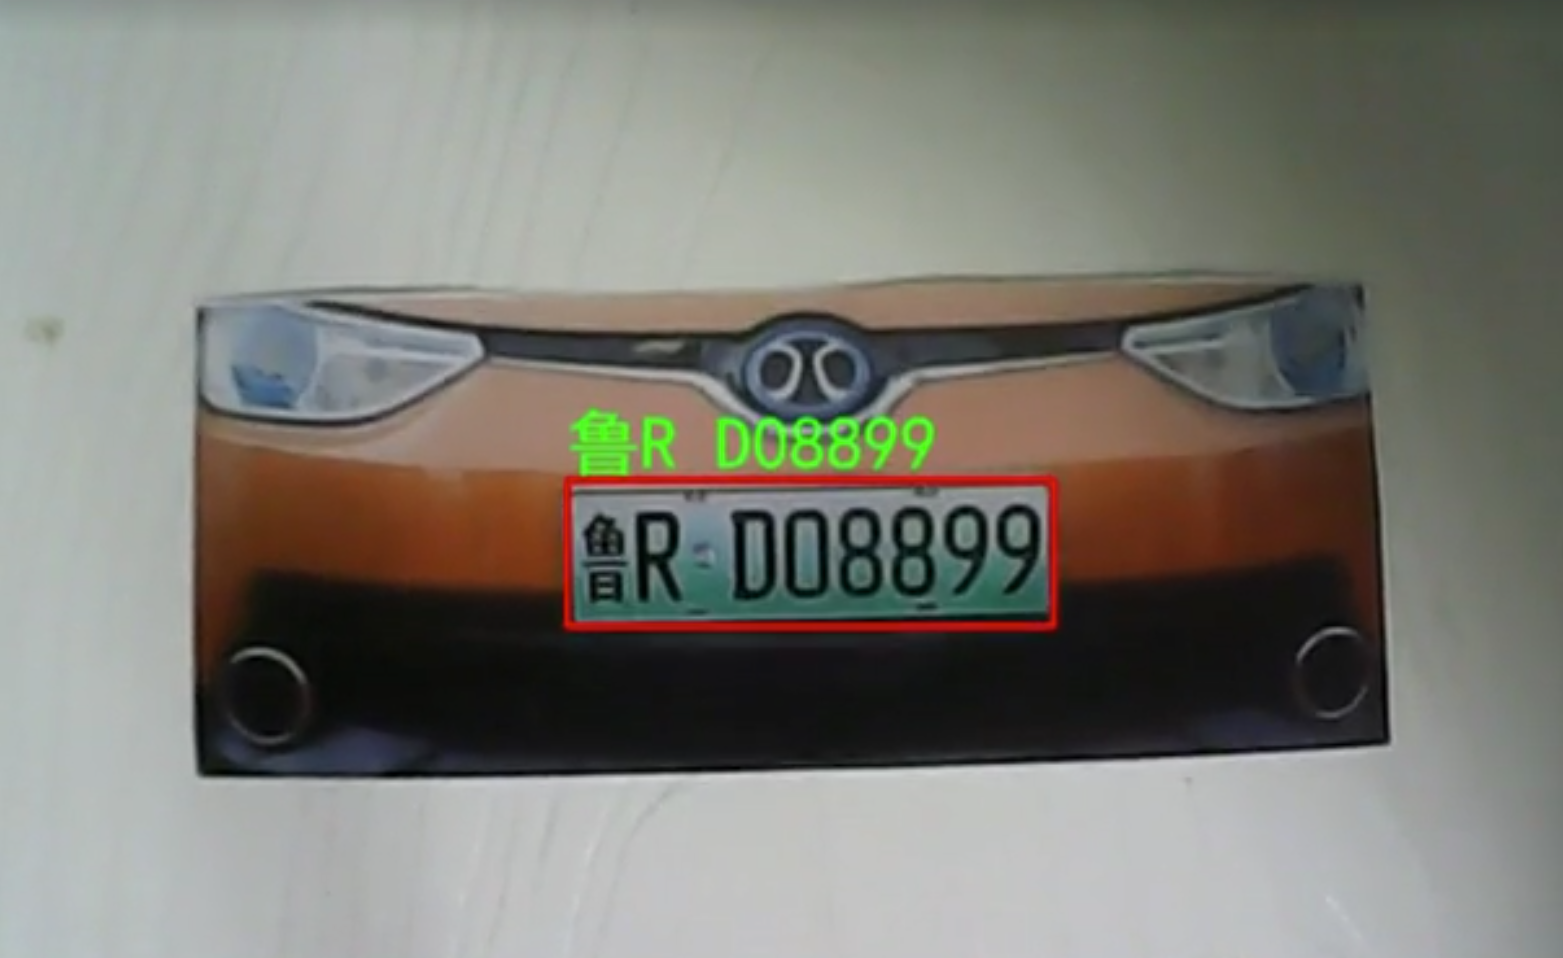
cv2.destroyAllWindows()效果如下图(可看到图片上的车牌号被提取并显示):
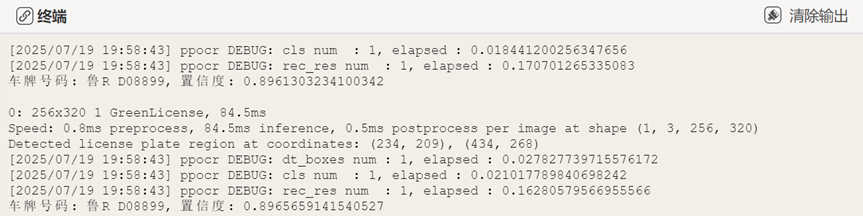
终端显示信息:
3.将以下代码复制到"shipinLPR.py"文件中,进行实时视频流推理测试。
from ultralytics import YOLO
import cv2
import numpy as np
from paddleocr import PaddleOCR
from PIL import Image, ImageDraw, ImageFont

# 初始化
ocr = PaddleOCR(use_angle_cls=True, lang="ch")
model = YOLO('C:/Users/HYPAB/Desktop/ultralytics-main/runs/runs/detect/train8/weights/best.pt')
cap = cv2.VideoCapture(1)
font = ImageFont.truetype("C:/Windows/Fonts/simhei.ttf", 30)

def is_sharp(img, threshold=100):
    gray = cv2.cvtColor(img, cv2.COLOR_BGR2GRAY)
    return cv2.Laplacian(gray, cv2.CV_64F).var() > threshold

while True:
    ret, frame = cap.read()
    if not ret:
        break

    results = model(frame)[0]
    for box, confidence in zip(results.boxes.xyxy.cpu().numpy(), results.boxes.conf.cpu().numpy()):
        if confidence < 0.3:
            continue
        x1, y1, x2, y2 = map(int, box)
        plate = frame[y1:y2, x1:x2]
        print(f"Detected license plate region at coordinates: ({x1}, {y1}), ({x2}, {y2})")

        if not is_sharp(plate):
            cv2.rectangle(frame, (x1, y1), (x2, y2), (0, 0, 255), 2)
            cv2.putText(frame, "Blur", (x1, y1 - 10), cv2.FONT_HERSHEY_SIMPLEX, 0.6, (255, 255, 255), 2)
            continue

        ocr_res = ocr.ocr(plate)
        if ocr_res and ocr_res[0]:
            plate_number = ocr_res[0][0][1][0].replace('·', ' ')
            print(f"车牌号码: {plate_number}, 置信度: {confidence.item()}")
            pil_img = Image.fromarray(cv2.cvtColor(frame, cv2.COLOR_BGR2RGB))
            draw = ImageDraw.Draw(pil_img)
            draw.text((x1, y1 - 30), plate_number, fill=(0, 255, 0), font=font)
            frame = cv2.cvtColor(np.array(pil_img), cv2.COLOR_RGB2BGR)
            cv2.rectangle(frame, (x1, y1), (x2, y2), (0, 0, 255), 2)

    cv2.imshow('License Plate Detection', frame)
    if cv2.waitKey(1) & 0xFF == ord('q'):
        break

cap.release()
cv2.destroyAllWindows()
运行程序,可以发现一个窗口实时显示摄像头捕捉画面,并实时显示当前车牌号。
终端显示信息(有车牌号码和置信度等信息):
4.4部署模型到行空板完成执行操作
接着我们可以部署模型到行空板中制作车牌识别的停车场计费装置。使用USB数据线连接电脑与行空板。

连接行空板与摄像头。
打开编程软件Mind+,点击左下角的扩展,在官方库中找到行空板库点击加载
|
|

点击返回,点击连接设备,找到10.1.2.3点击连接,等待连接成功。
在"ultralytics-main"文件夹中找到模型文件(路径:ultralytics-main/runs/runs/detect/train8/weights/best.pt),选中模型文件点击上传到行空板中。上传成功能在行空板的根目录下找到模型文件。
|
|
因为需要屏幕显示货物位置信息等结果,所以新建了"autoLPRpark.py"文件(文章末尾的mp文件里面有该文件)。
保持行空板的连接,在终端输入以下指令来激活行空板的yolo环境(请确保完成3.2硬件环境部署准备)。
conda activate yolo
在运行程序之前,需要先安装hyperlpr3库,在yolo环境下输入:pip install hyperlpr3,点击回车等待安装完成。
(yolo) root@unihiker:~# pip install hyperlpr3
^[[OCollecting hyperlpr3
  Downloading hyperlpr3-0.1.3-py3-none-any.whl.metadata (656 bytes)
Requirement already satisfied: opencv-python in ./miniforge3/envs/yolo/lib/python3.11/site-packages (from hyperlpr3) (4.12.0.88)
Requirement already satisfied: onnxruntime in ./miniforge3/envs/yolo/lib/python3.11/site-packages (from hyperlpr3) (1.22.1)
Requirement already satisfied: tqdm in ./miniforge3/envs/yolo/lib/python3.11/site-packages (from hyperlpr3) (4.67.1)
Requirement already satisfied: requests in ./miniforge3/envs/yolo/lib/python3.11/site-packages (from hyperlpr3) (2.32.4)
Collecting fastapi (from hyperlpr3)
  Downloading fastapi-0.116.1-py3-none-any.whl.metadata (28 kB)
Collecting uvicorn (from hyperlpr3)
  Downloading uvicorn-0.35.0-py3-none-any.whl.metadata (6.5 kB)
Collecting python-multipart (from hyperlpr3)
  Downloading python_multipart-0.0.20-py3-none-any.whl.metadata (1.8 kB)
Collecting loguru (from hyperlpr3)
  Downloading loguru-0.7.3-py3-none-any.whl.metadata (22 kB)
Collecting starlette<0.48.0,>=0.40.0 (from fastapi->hyperlpr3)
  Downloading starlette-0.47.1-py3-none-any.whl.metadata (6.2 kB)
Requirement already satisfied: pydantic!=1.8,!=1.8.1,!=2.0.0,!=2.0.1,!=2.1.0,<3.0.0,>=1.7.4 in ./miniforge3/envs/yolo/lib/python3.11/site-packages (from fastapi->hyperlpr3) (2.11.7)
Requirement already satisfied: typing-extensions>=4.8.0 in ./miniforge3/envs/yolo/lib/python3.11/site-packages (from fastapi->hyperlpr3) (4.14.1)
Requirement already satisfied: annotated-types>=0.6.0 in ./miniforge3/envs/yolo/lib/python3.11/site-packages (from pydantic!=1.8,!=1.8.1,!=2.0.0,!=2.0.1,!=2.1.0,<3.0.0,>=1.7.4->fastapi->hyperlpr3) (0.7.0)
Requirement already satisfied: pydantic-core==2.33.2 in ./miniforge3/envs/yolo/lib/python3.11/site-packages (from pydantic!=1.8,!=1.8.1,!=2.0.0,!=2.0.1,!=2.1.0,<3.0.0,>=1.7.4->fastapi->hyperlpr3) (2.33.2)
Requirement already satisfied: typing-inspection>=0.4.0 in ./miniforge3/envs/yolo/lib/python3.11/site-packages (from pydantic!=1.8,!=1.8.1,!=2.0.0,!=2.0.1,!=2.1.0,<3.0.0,>=1.7.4->fastapi->hyperlpr3) (0.4.1)
Requirement already satisfied: anyio<5,>=3.6.2 in ./miniforge3/envs/yolo/lib/python3.11/site-packages (from starlette<0.48.0,>=0.40.0->fastapi->hyperlpr3) (4.9.0)
Requirement already satisfied: idna>=2.8 in ./miniforge3/envs/yolo/lib/python3.11/site-packages (from anyio<5,>=3.6.2->starlette<0.48.0,>=0.40.0->fastapi->hyperlpr3) (3.10)
Requirement already satisfied: sniffio>=1.1 in ./miniforge3/envs/yolo/lib/python3.11/site-packages (from anyio<5,>=3.6.2->starlette<0.48.0,>=0.40.0->fastapi->hyperlpr3) (1.3.1)
Requirement already satisfied: coloredlogs in ./miniforge3/envs/yolo/lib/python3.11/site-packages (from onnxruntime->hyperlpr3) (15.0.1)
Requirement already satisfied: flatbuffers in ./miniforge3/envs/yolo/lib/python3.11/site-packages (from onnxruntime->hyperlpr3) (25.2.10)
Requirement already satisfied: numpy>=1.21.6 in ./miniforge3/envs/yolo/lib/python3.11/site-packages (from onnxruntime->hyperlpr3) (2.2.6)
Requirement already satisfied: packaging in ./miniforge3/envs/yolo/lib/python3.11/site-packages (from onnxruntime->hyperlpr3) (24.2)
Requirement already satisfied: protobuf in ./miniforge3/envs/yolo/lib/python3.11/site-packages (from onnxruntime->hyperlpr3) (6.31.1)
Requirement already satisfied: sympy in ./miniforge3/envs/yolo/lib/python3.11/site-packages (from onnxruntime->hyperlpr3) (1.14.0)
Requirement already satisfied: humanfriendly>=9.1 in ./miniforge3/envs/yolo/lib/python3.11/site-packages (from coloredlogs->onnxruntime->hyperlpr3) (10.0)
Requirement already satisfied: charset_normalizer<4,>=2 in ./miniforge3/envs/yolo/lib/python3.11/site-packages (from requests->hyperlpr3) (3.4.2)
Requirement already satisfied: urllib3<3,>=1.21.1 in ./miniforge3/envs/yolo/lib/python3.11/site-packages (from requests->hyperlpr3) (2.5.0)
Requirement already satisfied: certifi>=2017.4.17 in ./miniforge3/envs/yolo/lib/python3.11/site-packages (from requests->hyperlpr3) (2025.7.14)
Requirement already satisfied: mpmath<1.4,>=1.1.0 in ./miniforge3/envs/yolo/lib/python3.11/site-packages (from sympy->onnxruntime->hyperlpr3) (1.3.0)
^[[ICollecting click>=7.0 (from uvicorn->hyperlpr3)
  Downloading click-8.2.1-py3-none-any.whl.metadata (2.5 kB)
Requirement already satisfied: h11>=0.8 in ./miniforge3/envs/yolo/lib/python3.11/site-packages (from uvicorn->hyperlpr3) (0.16.0)
Downloading hyperlpr3-0.1.3-py3-none-any.whl (23 kB)
Downloading fastapi-0.116.1-py3-none-any.whl (95 kB)
Downloading starlette-0.47.1-py3-none-any.whl (72 kB)
Downloading loguru-0.7.3-py3-none-any.whl (61 kB)
Downloading python_multipart-0.0.20-py3-none-any.whl (24 kB)
Downloading uvicorn-0.35.0-py3-none-any.whl (66 kB)
Downloading click-8.2.1-py3-none-any.whl (102 kB)
Installing collected packages: python-multipart, loguru, click, uvicorn, starlette, fastapi, hyperlpr3
Successfully installed click-8.2.1 fastapi-0.116.1 hyperlpr3-0.1.3 loguru-0.7.3 python-multipart-0.0.20 starlette-0.47.1 uvicorn-0.35.0
WARNING: Running pip as the 'root' user can result in broken permissions and conflicting behaviour with the system package manager, possibly rendering your system unusable. It is recommended to use a virtual environment instead: https://pip.pypa.io/warnings/venv. Use the --root-user-action option if you know what you are doing and want to suppress this warning.
接着在终端输入以下指令,在行空板中运行"autoLPRpark.py"文件,第一次加载模型比较慢,请耐心等待。
python autoLPRpark.py
运行成功后,可以实现以下功能:
进入停车场:调整摄像头角度直到正对着车牌,然后按下P23按钮进行识别,识别成功之后图片会显示"车牌号和欢迎进入停车场",语音播报"欢迎进入停车场"同时闸机打开,闸机打开2秒后关闭。
离开停车场:调整摄像头角度直到正对着车牌,然后按下P21按钮进行识别,识别成功之后图片会显示"车牌号和停车时间、需缴费用",语音播报"停车时间和需缴费用"同时闸机打开,闸机打开2秒后关闭。
终端显示信息:

4.5核心代码解析
我们一起来看一下在行空板上运行的'autoLPRpark.py'代码的核心功能代码。
1.使用以下代码完成加载模型、摄像头初始化、硬件初始化。
#!/usr/bin/env python3
import cv2
import time
import numpy as np
from ultralytics import YOLO
import hyperlpr3 as lpr3
from PIL import Image, ImageDraw, ImageFont
from pinpong.board import Servo
from pinpong.board import Board, Pin
from pinpong.libs.dfrobot_speech_synthesis import DFRobot_SpeechSynthesis_I2C
from pinpong.extension.unihiker import *
from datetime import datetime

Board().begin()
p_gravitysynthesis = DFRobot_SpeechSynthesis_I2C()
p_gravitysynthesis.begin(p_gravitysynthesis.V2)
p_p21_in = Pin(Pin.P21, Pin.IN)
p_p23_in = Pin(Pin.P23, Pin.IN)
servo1 = Servo(Pin((Pin.P22)))
servo1.write_angle(90)

# ---------------- 初始化 ----------------
plate_catcher = lpr3.LicensePlateCatcher()  # HyperLPR3
model = YOLO('best.pt')                     # YOLOv8 车牌检测模型

# 屏幕分辨率
W, H = 240, 320

# 打开摄像头
cap = cv2.VideoCapture(0, cv2.CAP_V4L2)   # v4l2 加速
cap.set(cv2.CAP_PROP_FRAME_WIDTH, 240)
cap.set(cv2.CAP_PROP_FRAME_HEIGHT, 320)
cap.set(cv2.CAP_PROP_BUFFERSIZE, 1)

# 全屏窗口
cv2.namedWindow('LPR', cv2.WINDOW_NORMAL)
cv2.setWindowProperty('LPR', cv2.WND_PROP_FULLSCREEN, cv2.WINDOW_FULLSCREEN)

# 中文字体
font_path = "/usr/share/fonts/truetype/wqy/wqy-zenhei.ttc"
try:
    plate_font = ImageFont.truetype(font_path, 30)  # 车牌号字体大小
    info_font = ImageFont.truetype(font_path, 18)   # 其他信息字体大小
except OSError:
    plate_font = ImageFont.load_default()
    info_font = ImageFont.load_default()
2.以下代码的功能是设置车牌保存路径、计时函数、计费函数。
# 保存车牌记录的文件路径
record_file = "parking_record.txt"

# ---------------- 辅助函数 ----------------
def update_entry_time(plate):
    """更新车牌的进入时间,如果已存在则覆盖"""
    entry_time = datetime.now().strftime("%Y-%m-%d %H:%M:%S")
    records = {}
    # 读取现有记录
    try:
        with open(record_file, "r") as f:
            for line in f.readlines():
                saved_plate, saved_time = line.strip().split(",")
                records[saved_plate] = saved_time
    except FileNotFoundError:
        pass  # 文件不存在时忽略

    # 更新或添加记录
    records[plate] = entry_time

    # 写回文件
    with open(record_file, "w") as f:
        for p, t in records.items():
            f.write(f"{p},{t}\n")

    return entry_time

def calculate_parking_fee(plate):
    """计算停车时间和费用"""
    try:
        with open(record_file, "r") as f:
            for line in f.readlines():
                saved_plate, entry_time_str = line.strip().split(",")
                if saved_plate == plate:
                    entry_time = datetime.strptime(entry_time_str, "%Y-%m-%d %H:%M:%S")
                    parking_duration = datetime.now() - entry_time
                    parking_seconds = parking_duration.total_seconds()
                    hours = parking_seconds // 3600
                    minutes = (parking_seconds % 3600) // 60
                    seconds = parking_seconds % 60

                    # 计算费用
                    if parking_seconds <= 20 * 60:  # 20分钟内免费
                        fee = 0
                    elif parking_seconds <= 2 * 3600:  # 超过20分钟但少于2小时
                        fee = 5
                    else:  # 超过2小时,每增加1小时加1元
                        extra_hours = (parking_seconds - 2 * 3600) // 3600
                        fee = 5 + extra_hours

                    duration_str = f"{int(hours)}小时{int(minutes)}分{int(seconds)}秒"
                    fee_str = f"{fee}元"
                    return duration_str, fee_str
    except FileNotFoundError:
        pass  # 文件不存在时忽略

    return None, None
results详细信息解释:
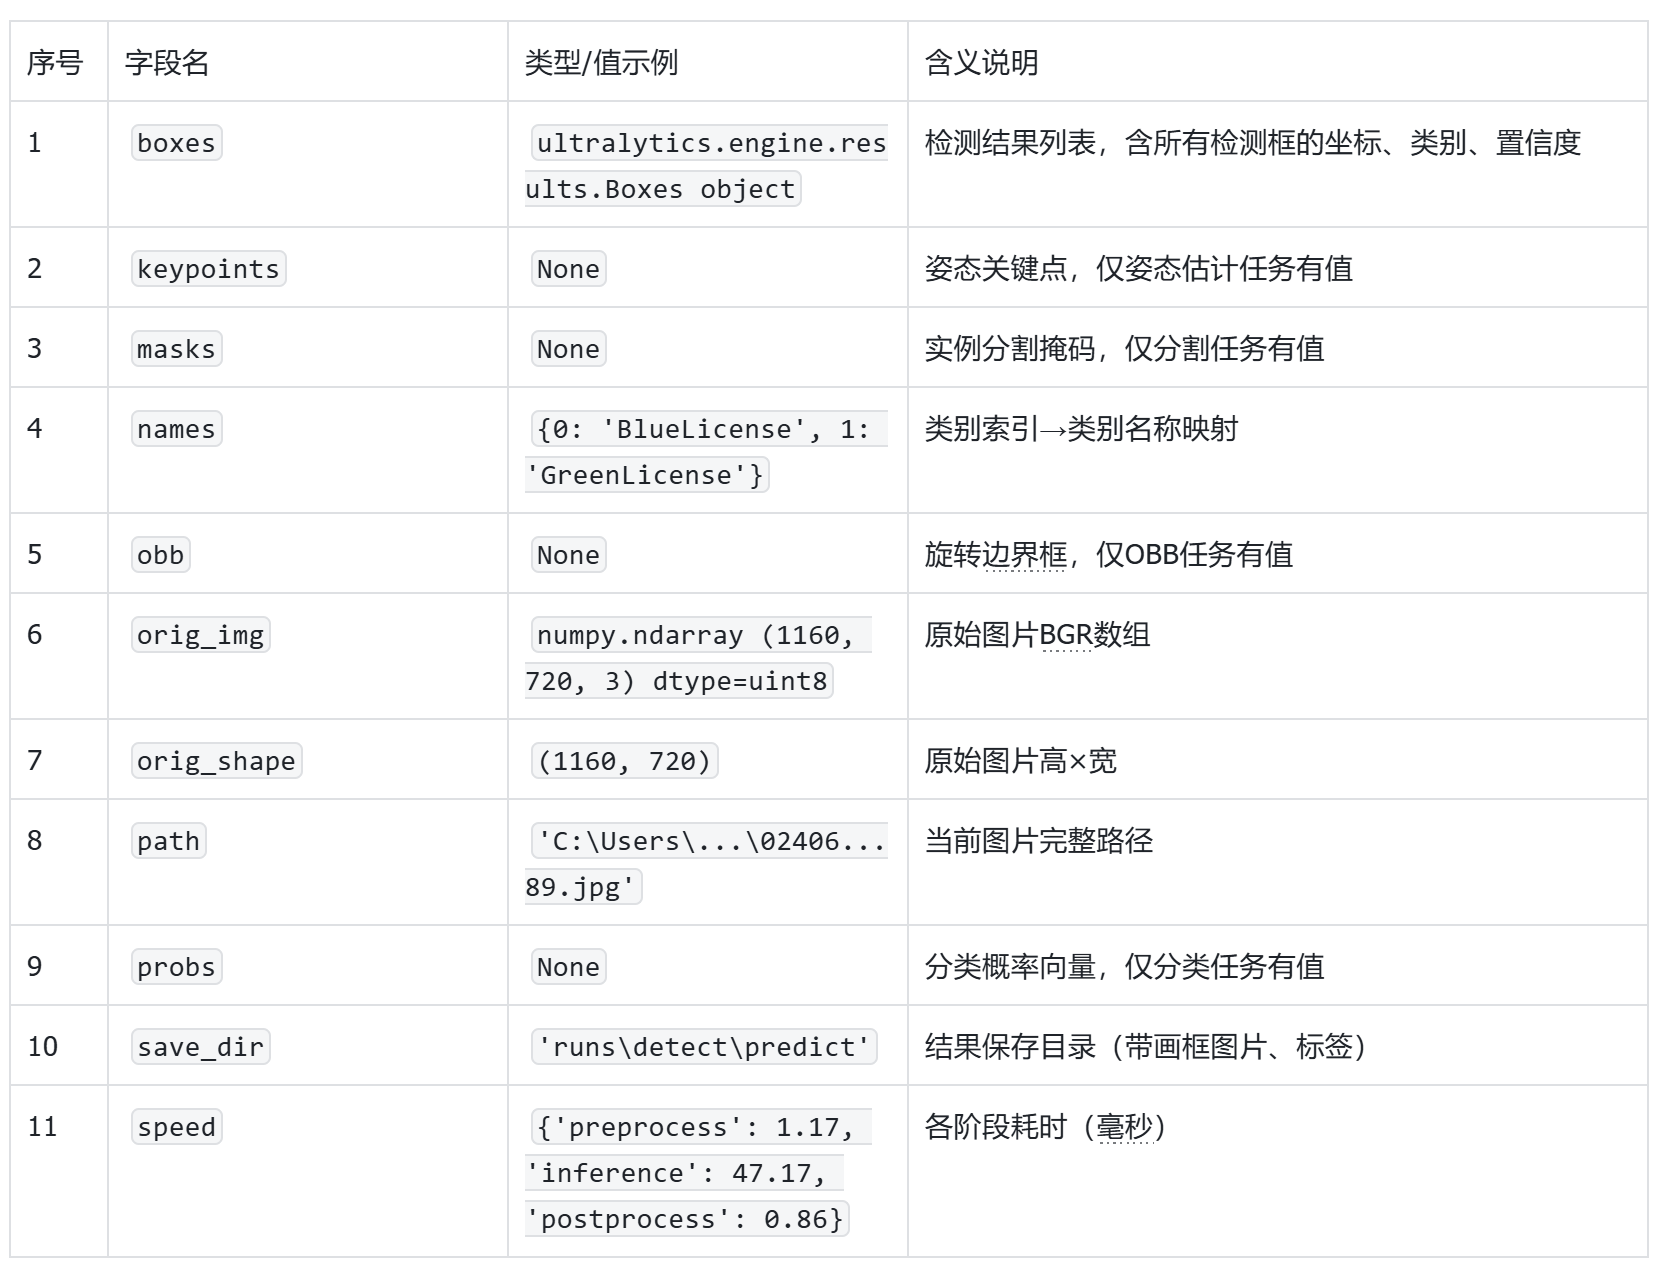
我们可以观察到原始的推理输出有比较多的内容,在项目的制作中不是每一个输出数据都要用到,其中本项目最常用的数据是"names"和"boxes"。names: 提供类别ID到类别名称的映射,用于将检测结果转换为人类可读的类别名称。boxes:检测结果列表,含所有检测框的坐标、类别、置信度。
完整代码如下所示:
#!/usr/bin/env python3
import cv2
import time
import numpy as np
from ultralytics import YOLO
import hyperlpr3 as lpr3
from PIL import Image, ImageDraw, ImageFont
from pinpong.board import Servo
from pinpong.board import Board, Pin
from pinpong.libs.dfrobot_speech_synthesis import DFRobot_SpeechSynthesis_I2C
from pinpong.extension.unihiker import *
from datetime import datetime

Board().begin()
p_gravitysynthesis = DFRobot_SpeechSynthesis_I2C()
p_gravitysynthesis.begin(p_gravitysynthesis.V2)
p_p21_in = Pin(Pin.P21, Pin.IN)
p_p23_in = Pin(Pin.P23, Pin.IN)
servo1 = Servo(Pin((Pin.P22)))
servo1.write_angle(90)

# ---------------- 初始化 ----------------
plate_catcher = lpr3.LicensePlateCatcher()  # HyperLPR3
model = YOLO('best.pt')                     # YOLOv8 车牌检测模型

# 屏幕分辨率
W, H = 240, 320

# 打开摄像头
cap = cv2.VideoCapture(0, cv2.CAP_V4L2)   # v4l2 加速
cap.set(cv2.CAP_PROP_FRAME_WIDTH, 240)
cap.set(cv2.CAP_PROP_FRAME_HEIGHT, 320)
cap.set(cv2.CAP_PROP_BUFFERSIZE, 1)

# 全屏窗口
cv2.namedWindow('LPR', cv2.WINDOW_NORMAL)
cv2.setWindowProperty('LPR', cv2.WND_PROP_FULLSCREEN, cv2.WINDOW_FULLSCREEN)

# 中文字体
font_path = "/usr/share/fonts/truetype/wqy/wqy-zenhei.ttc"
try:
    plate_font = ImageFont.truetype(font_path, 30)  # 车牌号字体大小
    info_font = ImageFont.truetype(font_path, 18)   # 其他信息字体大小
except OSError:
    plate_font = ImageFont.load_default()
    info_font = ImageFont.load_default()

# 保存车牌记录的文件路径
record_file = "parking_record.txt"

# ---------------- 辅助函数 ----------------
def update_entry_time(plate):
    """更新车牌的进入时间,如果已存在则覆盖"""
    entry_time = datetime.now().strftime("%Y-%m-%d %H:%M:%S")
    records = {}
    # 读取现有记录
    try:
        with open(record_file, "r") as f:
            for line in f.readlines():
                saved_plate, saved_time = line.strip().split(",")
                records[saved_plate] = saved_time
    except FileNotFoundError:
        pass  # 文件不存在时忽略

    # 更新或添加记录
    records[plate] = entry_time

    # 写回文件
    with open(record_file, "w") as f:
        for p, t in records.items():
            f.write(f"{p},{t}\n")

    return entry_time

def calculate_parking_fee(plate):
    """计算停车时间和费用"""
    try:
        with open(record_file, "r") as f:
            for line in f.readlines():
                saved_plate, entry_time_str = line.strip().split(",")
                if saved_plate == plate:
                    entry_time = datetime.strptime(entry_time_str, "%Y-%m-%d %H:%M:%S")
                    parking_duration = datetime.now() - entry_time
                    parking_seconds = parking_duration.total_seconds()
                    hours = parking_seconds // 3600
                    minutes = (parking_seconds % 3600) // 60
                    seconds = parking_seconds % 60

                    # 计算费用
                    if parking_seconds <= 20 * 60:  # 20分钟内免费
                        fee = 0
                    elif parking_seconds <= 2 * 3600:  # 超过20分钟但少于2小时
                        fee = 5
                    else:  # 超过2小时,每增加1小时加1元
                        extra_hours = (parking_seconds - 2 * 3600) // 3600
                        fee = 5 + extra_hours

                    duration_str = f"{int(hours)}小时{int(minutes)}分{int(seconds)}秒"
                    fee_str = f"{fee}元"
                    return duration_str, fee_str
    except FileNotFoundError:
        pass  # 文件不存在时忽略

    return None, None

# ---------------- 主循环 ----------------
while True:
    ret, frame = cap.read()
    if not ret:
        break

    # 1. 裁剪到 240×320 比例并拉伸
    h, w = frame.shape[:2]
    if w / h > W / H:          # 宽多,裁宽
        new_w = int(h * W / H)
        offset = (w - new_w) // 2
        crop = frame[:, offset:offset + new_w]
    else:                      # 高多,裁高
        new_h = int(w * H / W)
        offset = (h - new_h) // 2
        crop = frame[offset:offset + new_h, :]
    disp = cv2.resize(crop, (W, H), interpolation=cv2.INTER_AREA)

    # 实时预览
    cv2.imshow('LPR', disp)

    # 按 P23 触发记录车牌进入
    if p_p23_in.read_digital() == True:
        results = model(disp, conf=0.25)
        draw_img = disp.copy()

        for r in results:
            boxes = r.boxes.xyxy.cpu().numpy().astype(int)
            confs = r.boxes.conf.cpu().numpy()
            for (x1, y1, x2, y2), cf in zip(boxes, confs):
                # 截取车牌
                plate_roi = disp[y1:y2, x1:x2]
                lpr_res = plate_catcher(plate_roi)
                if lpr_res:
                    plate = lpr_res[0][0].replace('·', '-').replace('.', '-')
                    conf_lpr = float(lpr_res[0][1])
                    entry_time = update_entry_time(plate)
                    print(f"车牌记录: {plate}, 置信度: {conf_lpr:.3f}, 进入时间: {entry_time}")

                    # 绘制红色框框
                    cv2.rectangle(draw_img, (x1, y1), (x2, y2), (0, 0, 255), 2)  # 红色框框

                    # 显示欢迎信息
                    pil_img = Image.fromarray(cv2.cvtColor(draw_img, cv2.COLOR_BGR2RGB))
                    draw = ImageDraw.Draw(pil_img)
                    draw.text((10, 10), "欢迎进入停车场", fill=(255, 0, 0), font=info_font)  # 使用较小字体
                    draw.text((x1, max(y1 - 45, 0)), plate, fill=(0, 255, 0), font=plate_font)  # 使用车牌字体

                    draw_img = cv2.cvtColor(np.array(pil_img), cv2.COLOR_RGB2BGR)
                    cv2.imshow('LPR', draw_img)
                    cv2.waitKey(5000)
                    p_gravitysynthesis.speak("欢迎进入停车场")
                    servo1.write_angle(150)
                    time.sleep(2)
                    servo1.write_angle(90)
                else:
                    print("未识别到车牌")
                break

    # 按 P21 触发计算停车时间和费用
    if p_p21_in.read_digital() == True:
        results = model(disp, conf=0.25)
        draw_img = disp.copy()

        for r in results:
            boxes = r.boxes.xyxy.cpu().numpy().astype(int)
            confs = r.boxes.conf.cpu().numpy()
            for (x1, y1, x2, y2), cf in zip(boxes, confs):
                # 截取车牌
                plate_roi = disp[y1:y2, x1:x2]
                lpr_res = plate_catcher(plate_roi)
                if lpr_res:
                    plate = lpr_res[0][0].replace('·', '-').replace('.', '-')
                    conf_lpr = float(lpr_res[0][1])
                    print(f"车牌记录: {plate}, 置信度: {conf_lpr:.3f}")

                    duration_str, fee_str = calculate_parking_fee(plate)
                    if duration_str and fee_str:
                        print(f"停车时间: {duration_str}, 需缴费: {fee_str}")

                        # 绘制红色框框
                        cv2.rectangle(draw_img, (x1, y1), (x2, y2), (0, 0, 255), 2)  # 红色框框

                        # 显示停车信息
                        pil_img = Image.fromarray(cv2.cvtColor(draw_img, cv2.COLOR_BGR2RGB))
                        draw = ImageDraw.Draw(pil_img)

                        # 第一行停车时间(小字体)
                        draw.text((10, 10), f"停车时间: {duration_str}", fill=(255, 0, 0), font=info_font)

                        # 第二行费用信息(小字体)
                        draw.text((10, 40), f"需缴费: {fee_str}", fill=(255, 0, 0), font=info_font)

                        # 车牌号(保持字体大小)
                        draw.text((x1, max(y1 - 45, 0)), plate, fill=(0, 255, 0), font=plate_font)

                        draw_img = cv2.cvtColor(np.array(pil_img), cv2.COLOR_RGB2BGR)
                        cv2.imshow('LPR', draw_img)
                        cv2.waitKey(5000)
                        p_gravitysynthesis.speak(f"停车时间: {duration_str}")
                        p_gravitysynthesis.speak(f"需缴费: {fee_str}")
                        servo1.write_angle(150)
                        time.sleep(2)
                        servo1.write_angle(90)
                    else:
                        print("未找到进入记录,请先按P21登记车牌进入时间!")
                else:
                    print("未识别到车牌")
                break

    # 退出按键
    if cv2.waitKey(10) & 0xff == ord('q') or button_b.is_pressed() == True:
        break

# ---------------- 清理 ----------------
cap.release()
cv2.destroyAllWindows()
项目扩展思考:后续可以使用更多样化的车牌数据集(包含不同的字体、颜色、位置、光照条件等)以提升模型的泛化能力。还可以集成停车位检测系统,为车主推荐最近的空闲停车位。集成多种支付方式(如二维码支付、NFC支付、银行卡支付)。最后是将识别数据上传至云端进行存储和管理,方便后续分析和运营优化。
5.项目相关资料附录
项目文件链接: https://pan.baidu.com/s/1KiulS_40SUz7VpBQil8w6A?pwd=etpf


 他的勋章
他的勋章


罗罗罗2025.11.18
666
孙洪尧19852025.08.12
要是能图形化该多好啊