【项目背景】
让“聋人”看到声音
世界上有各种各样的残障人士,这些人或不能说话,或听不见声音,就是因为各种不方便让其在这个世界上生活极为不方便。
比如有人敲门,水龙头忘关、孩子在卧室里啼哭,可是“聋人”他们听不见。
【项目设计】
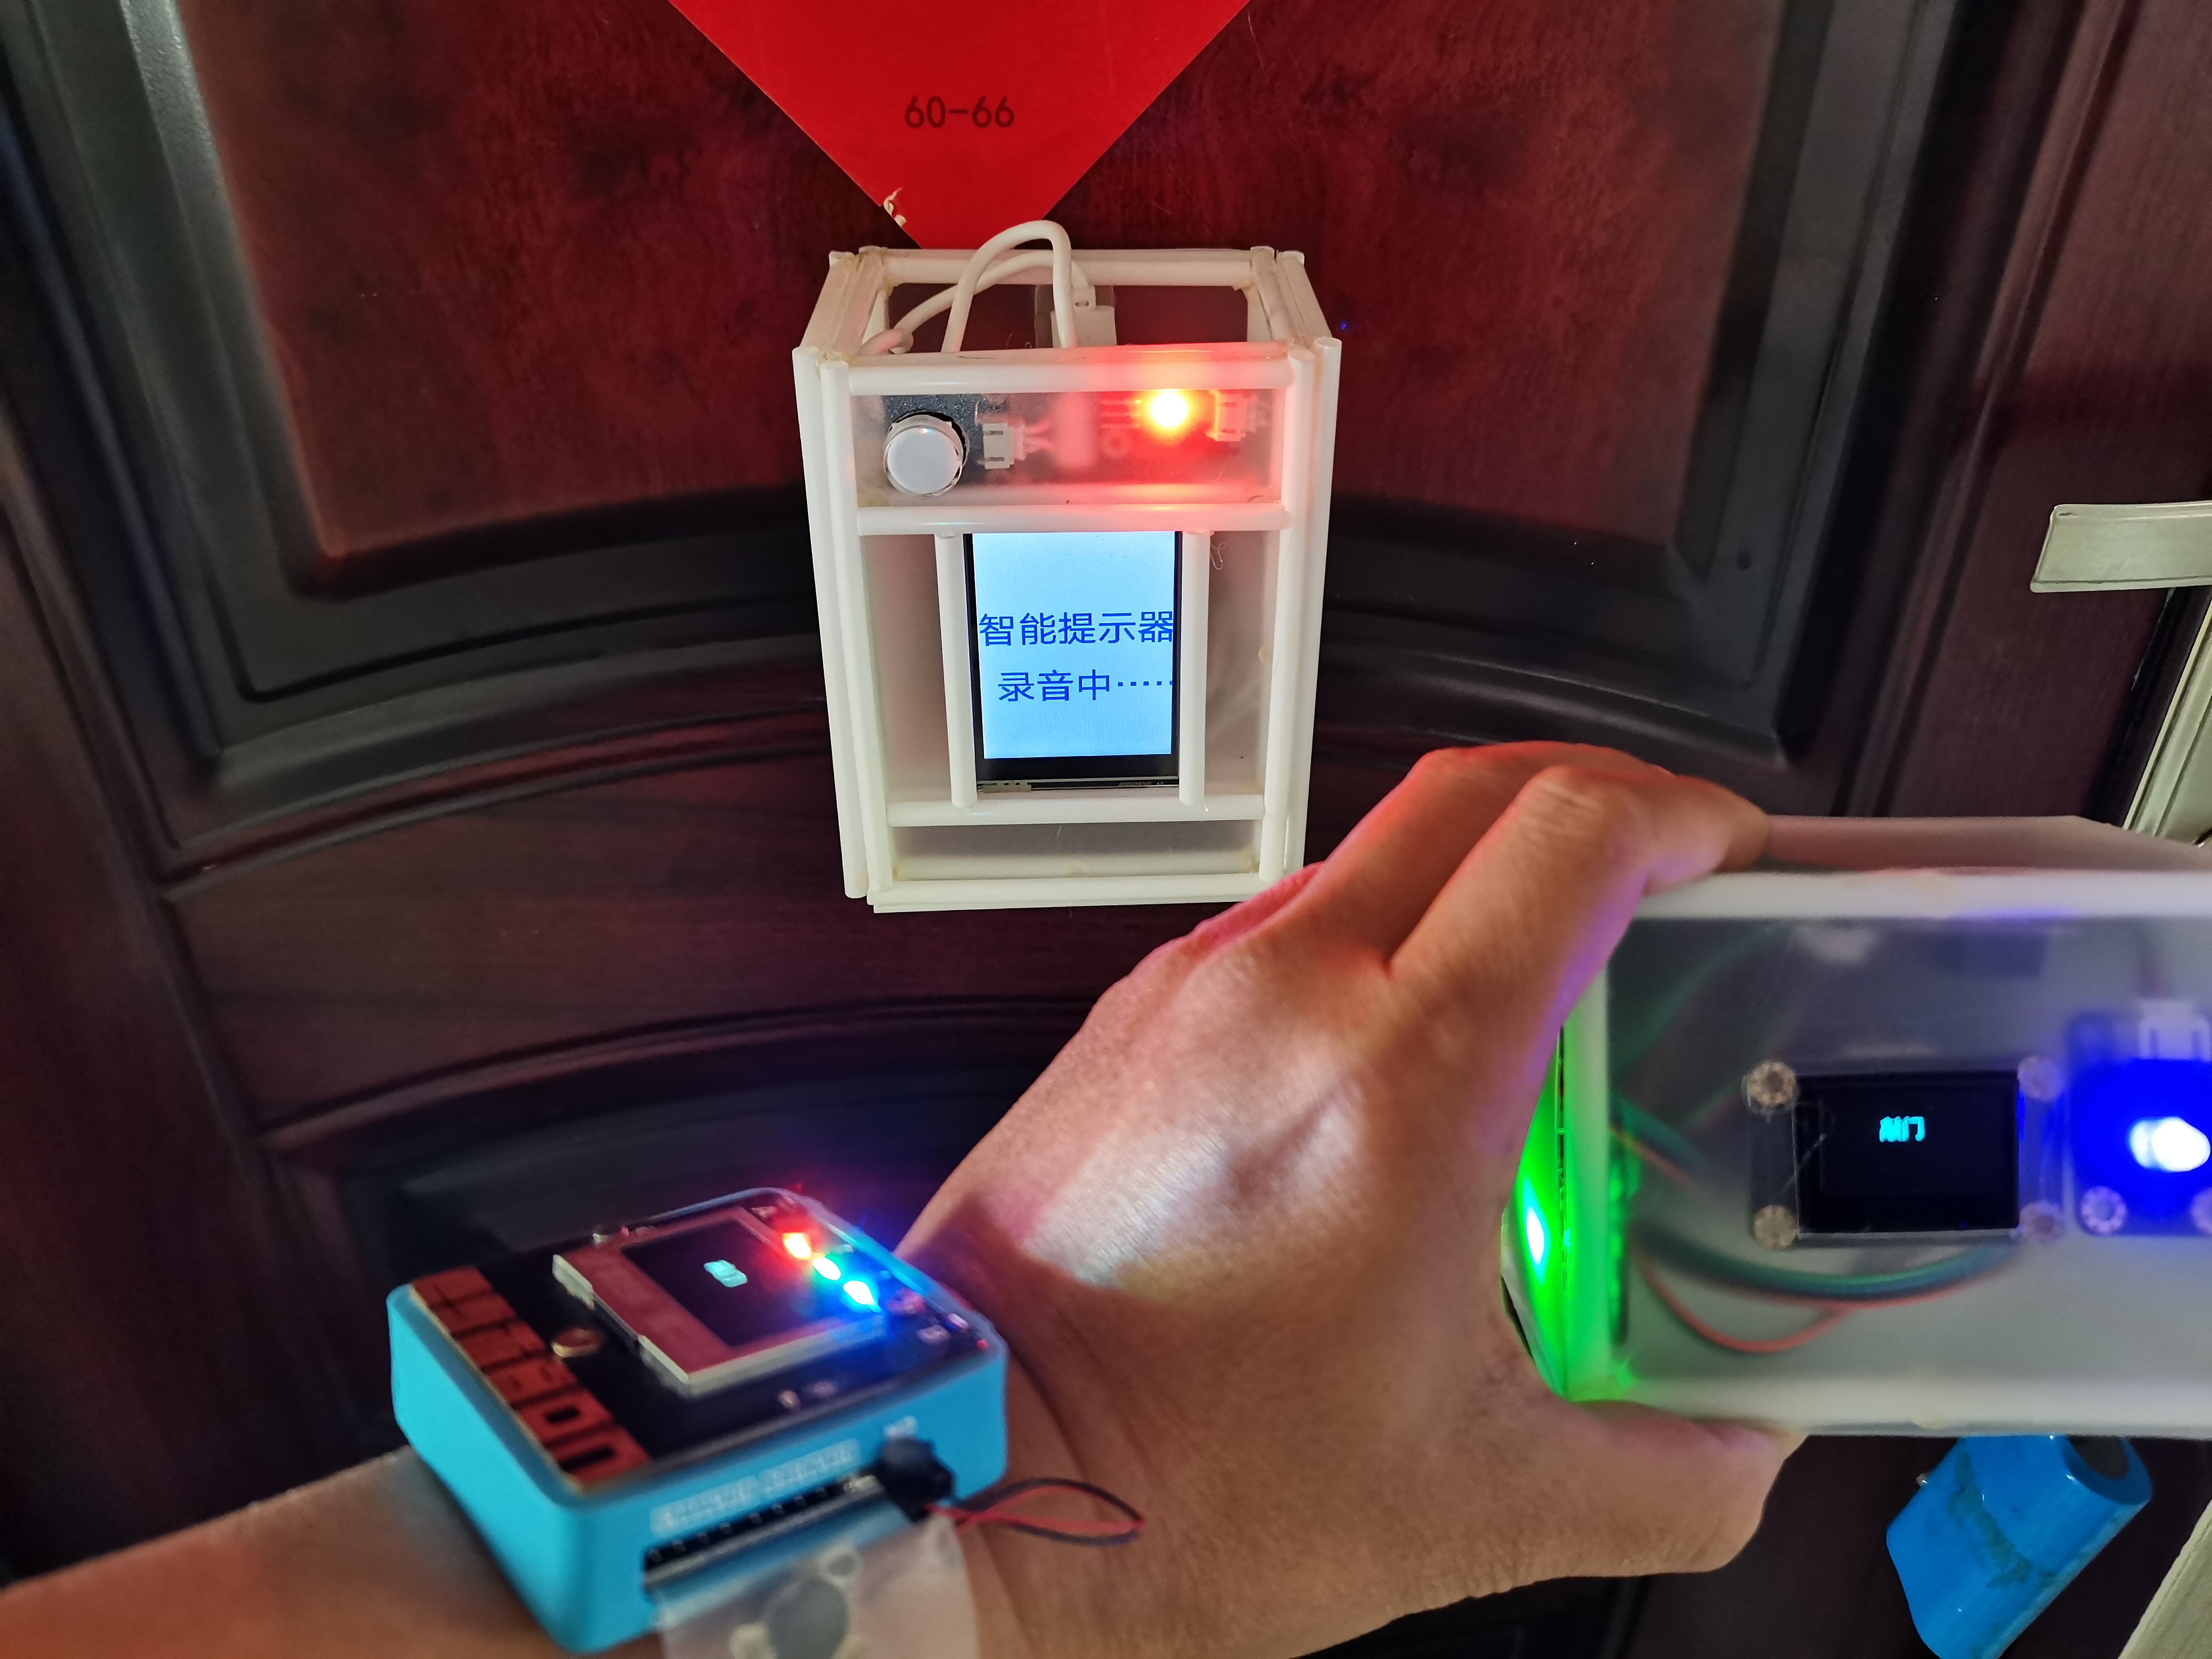
利用人工智能,让模型学习各种声音,使用行空板采集声音,通过物联网将相应文字信息发送给Arduino主板在显示屏上显示并利用灯光提醒,并且利用Micro:bit制作的手表进行文字、灯光加震动提醒。
【制作装置】
1、行空板主控
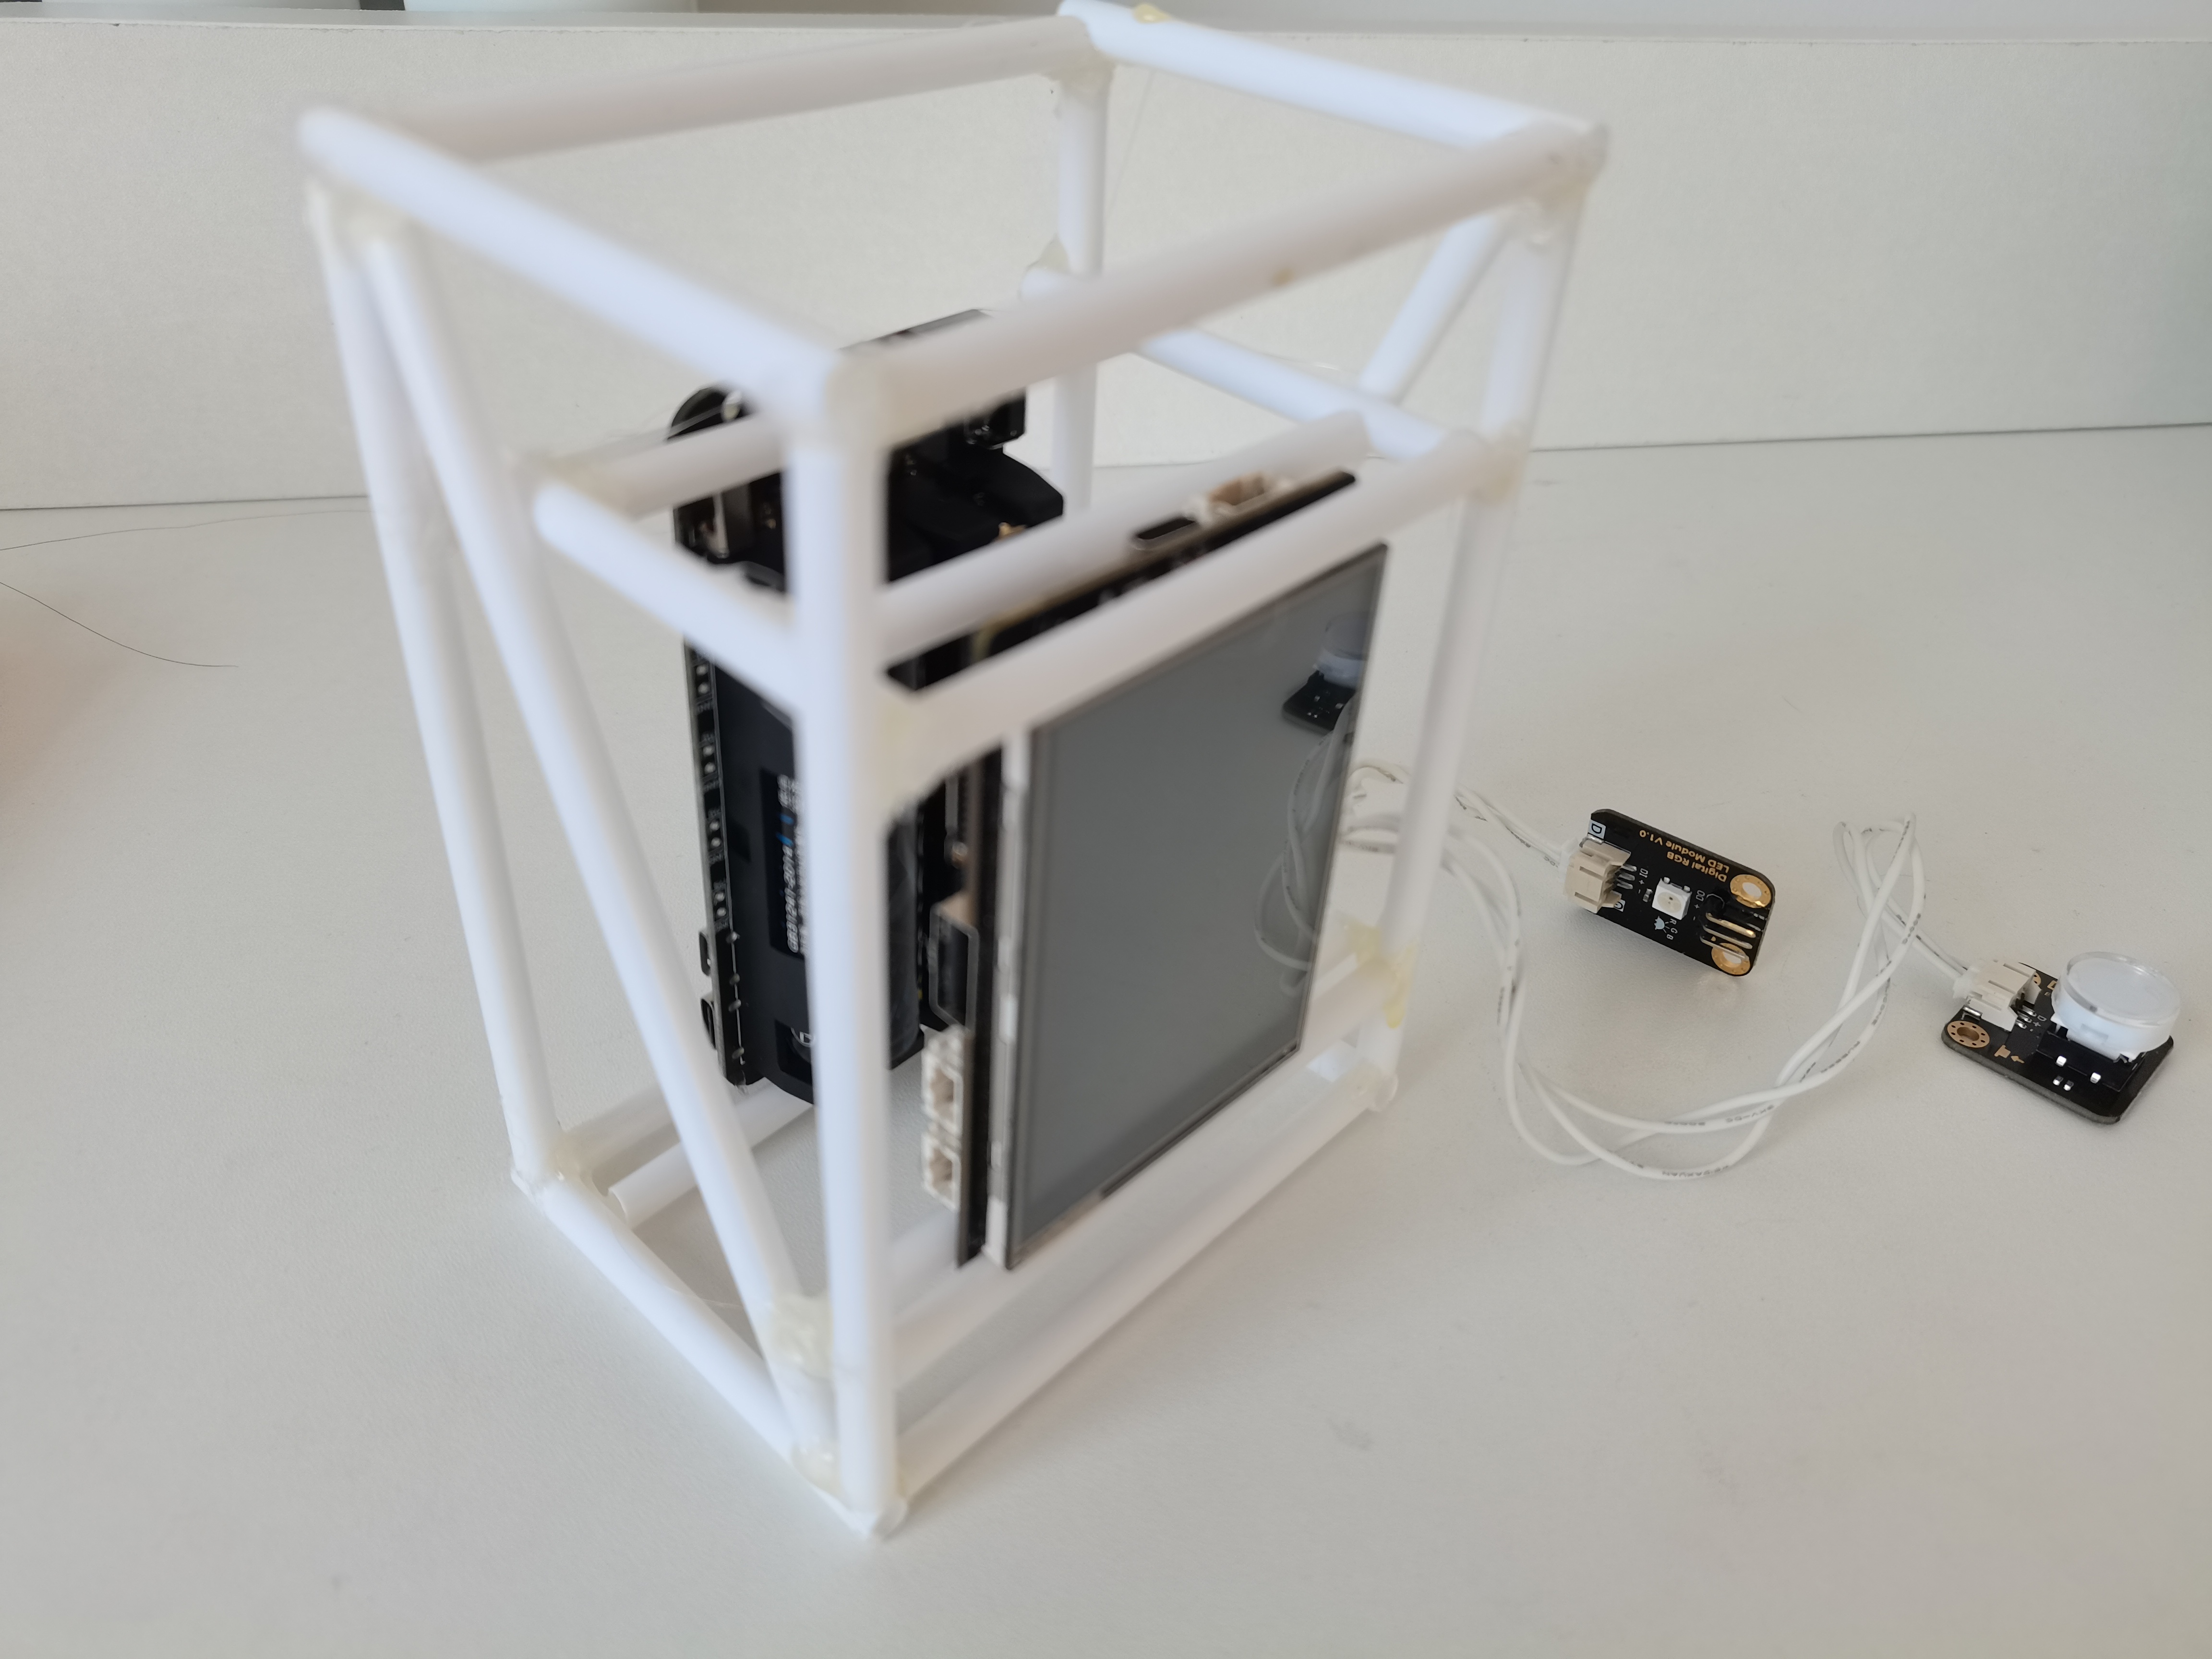
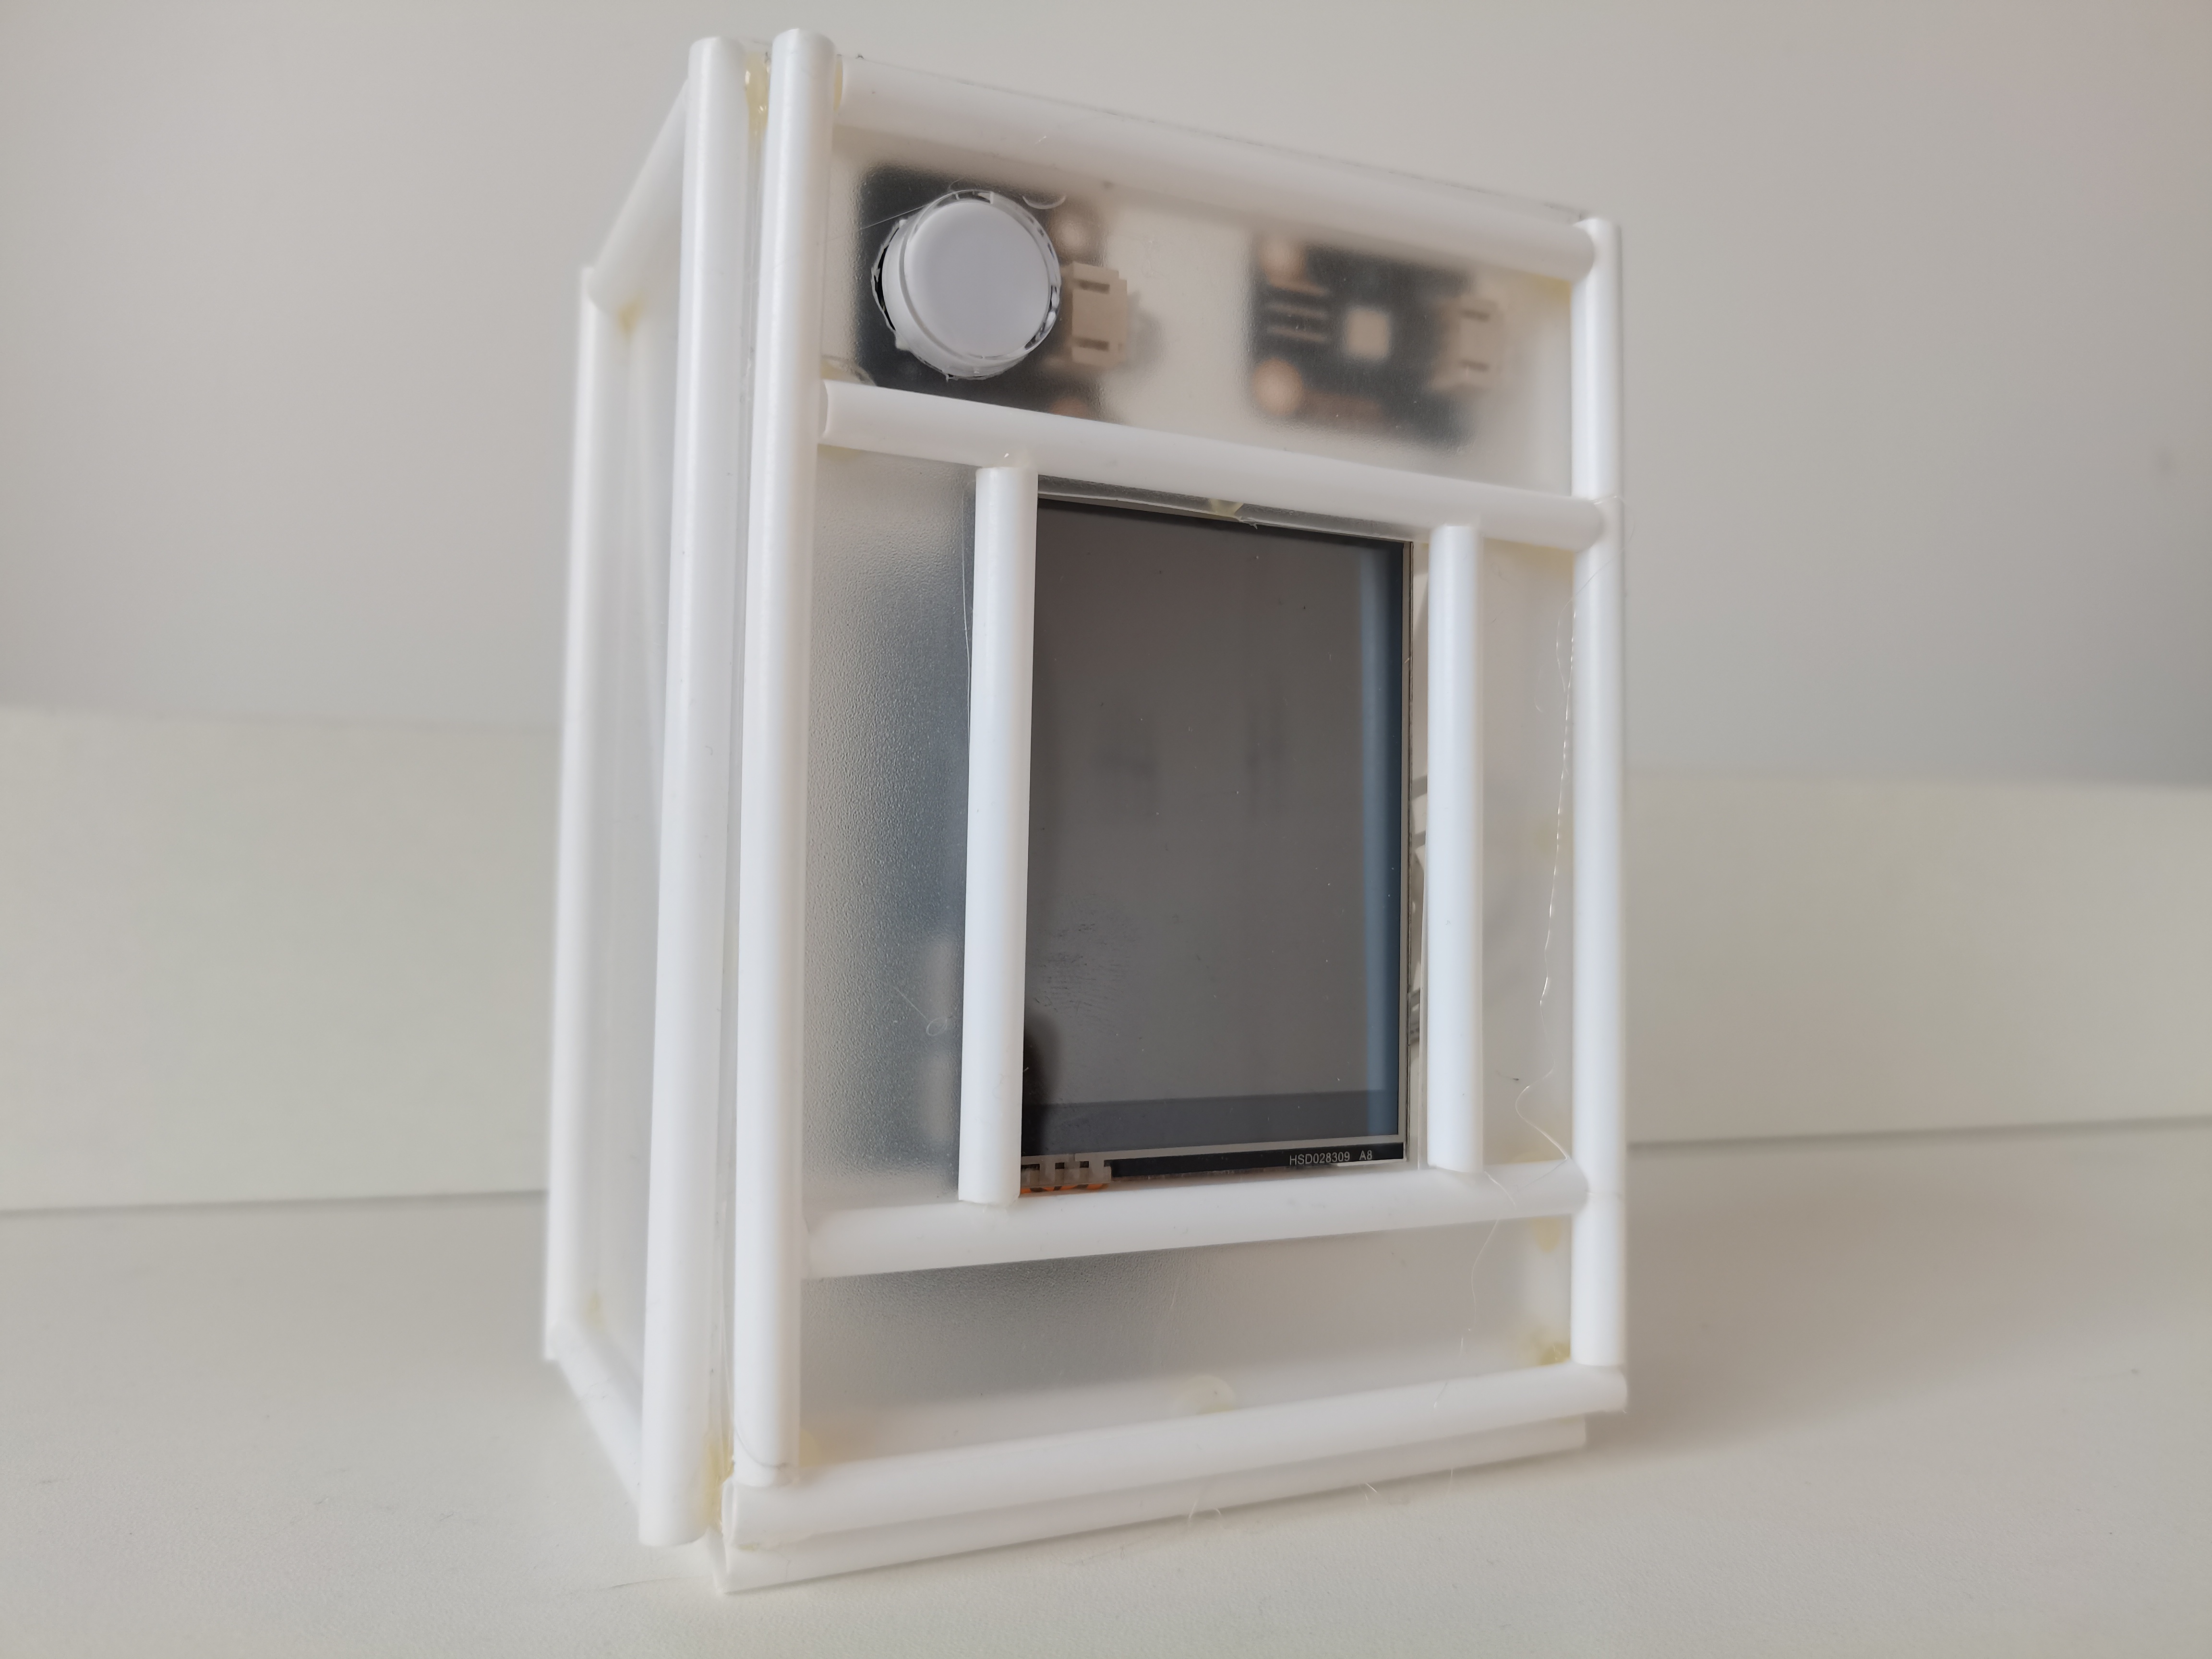
按钮接行空板引脚21(用于关闭提醒),LED灯接引脚22(用于亮灯提醒)。
2、Arduino接收、显示提醒信息装置
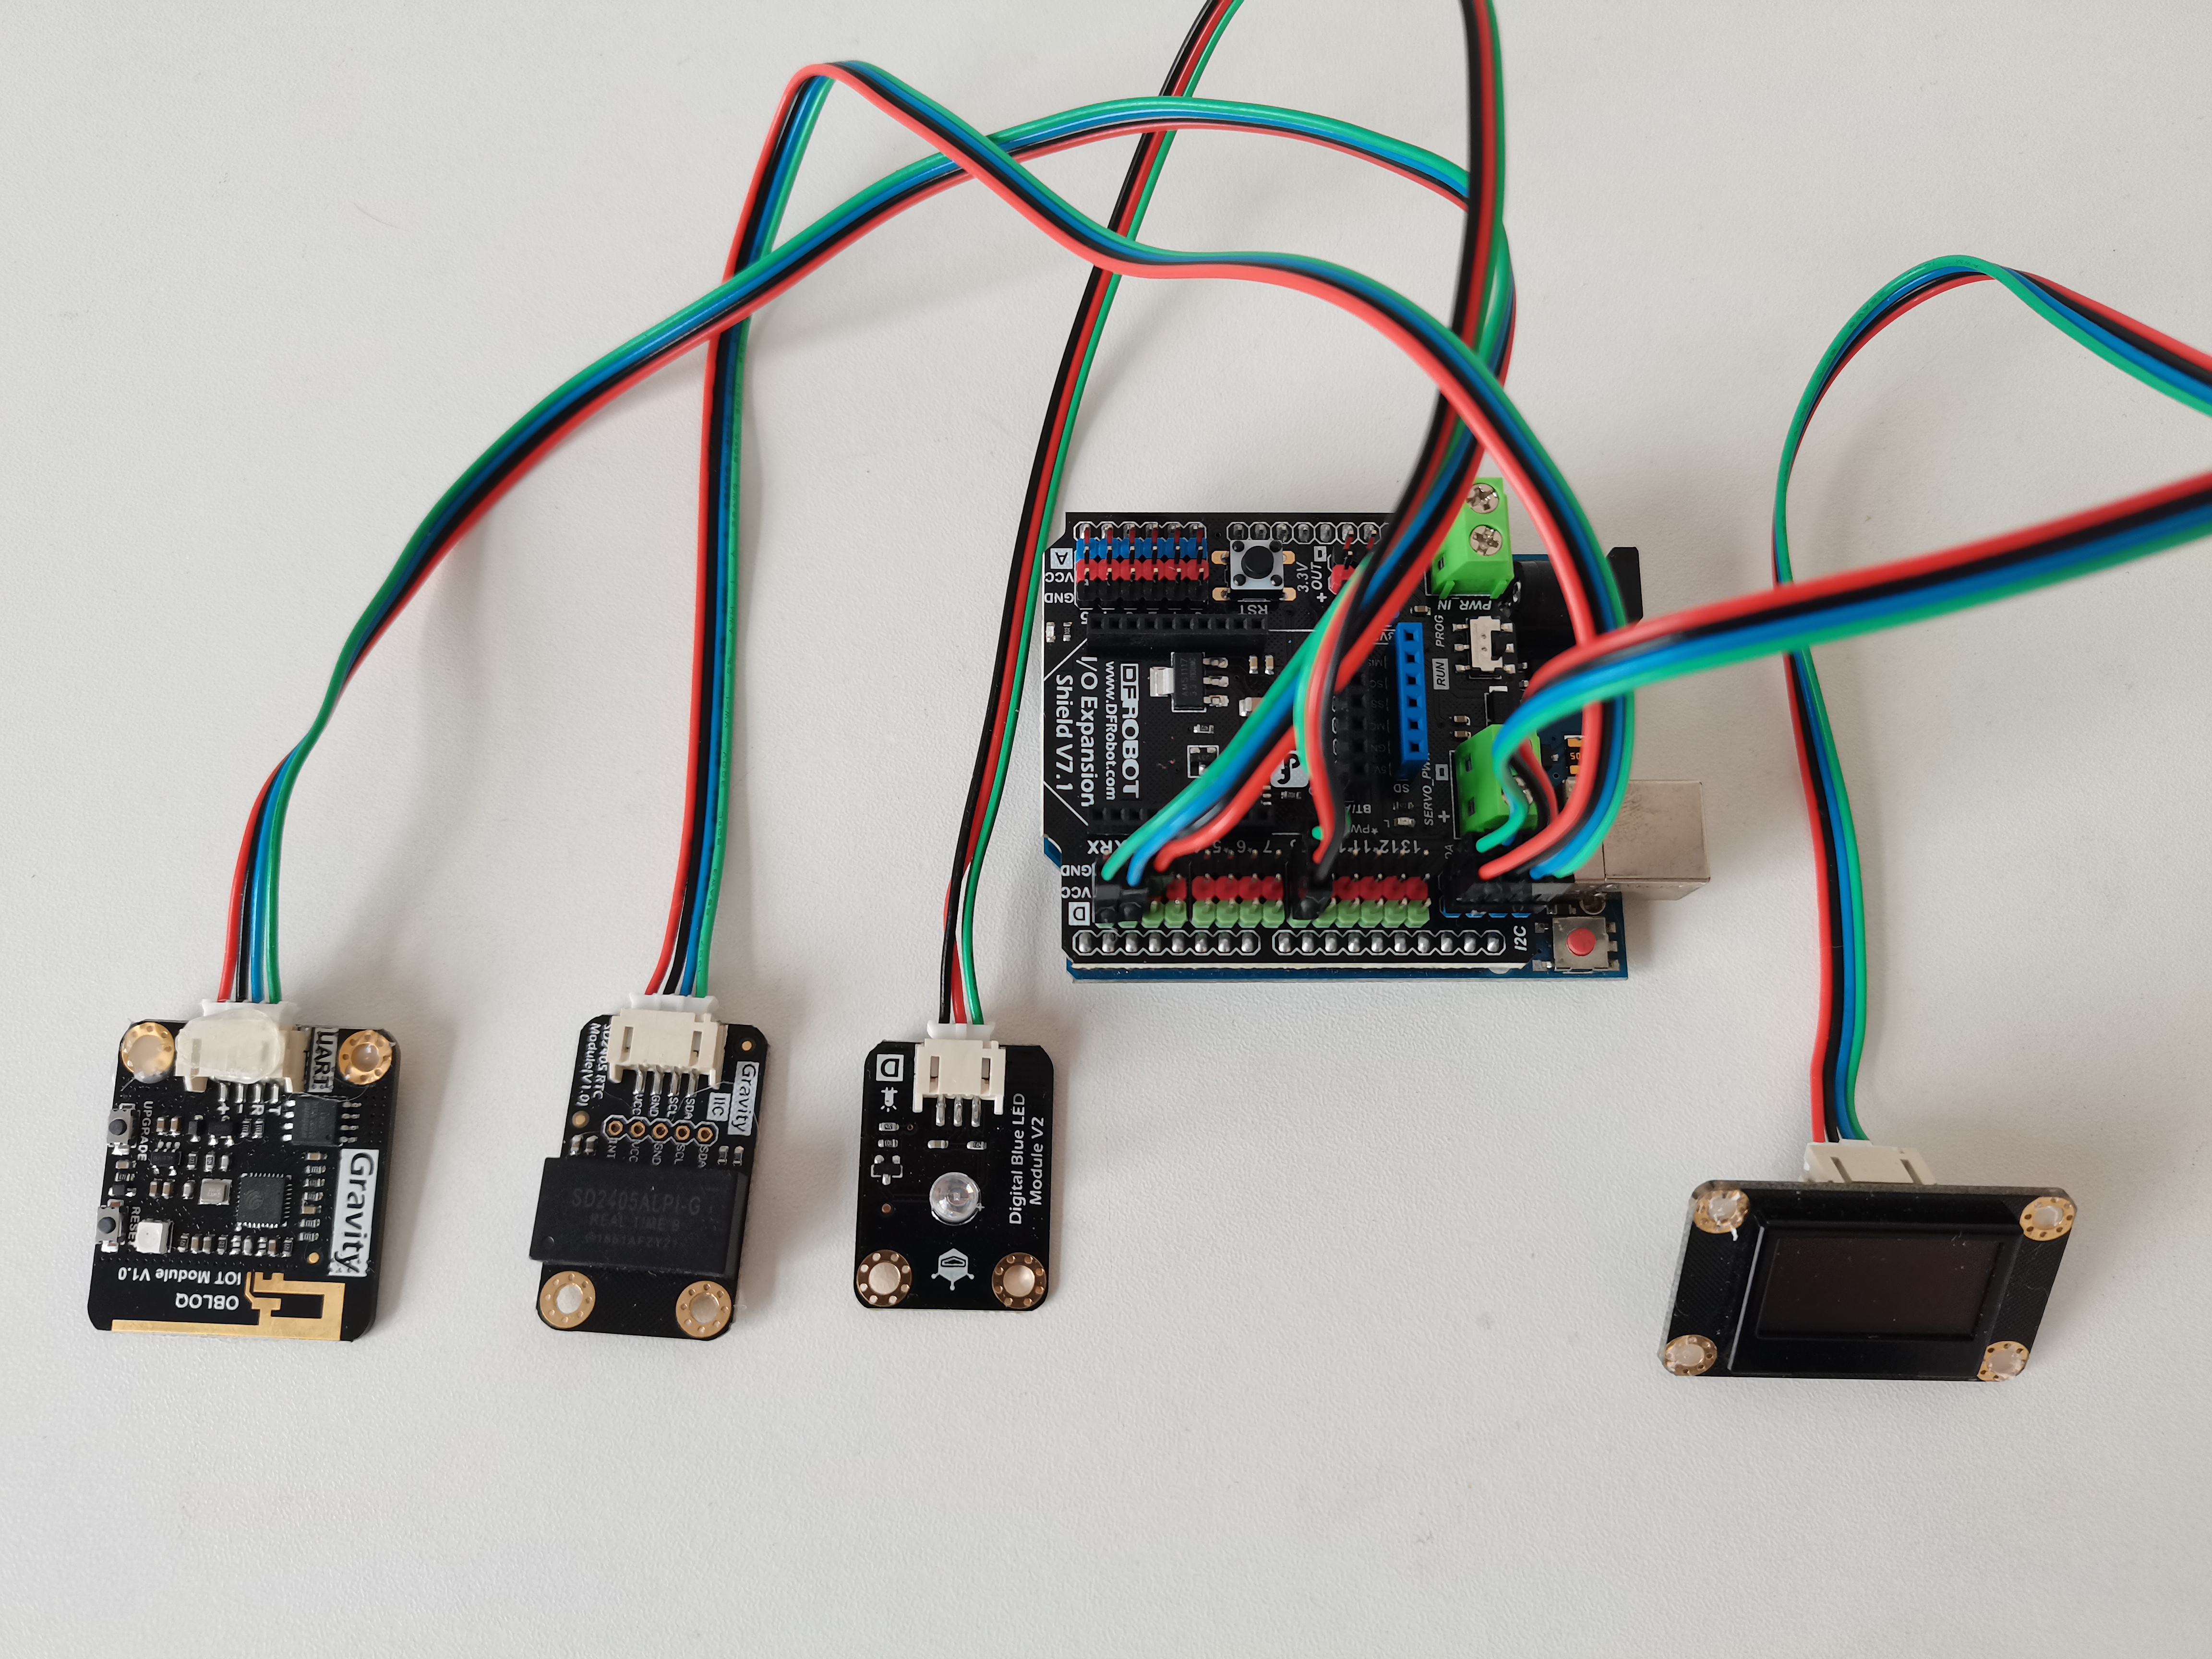
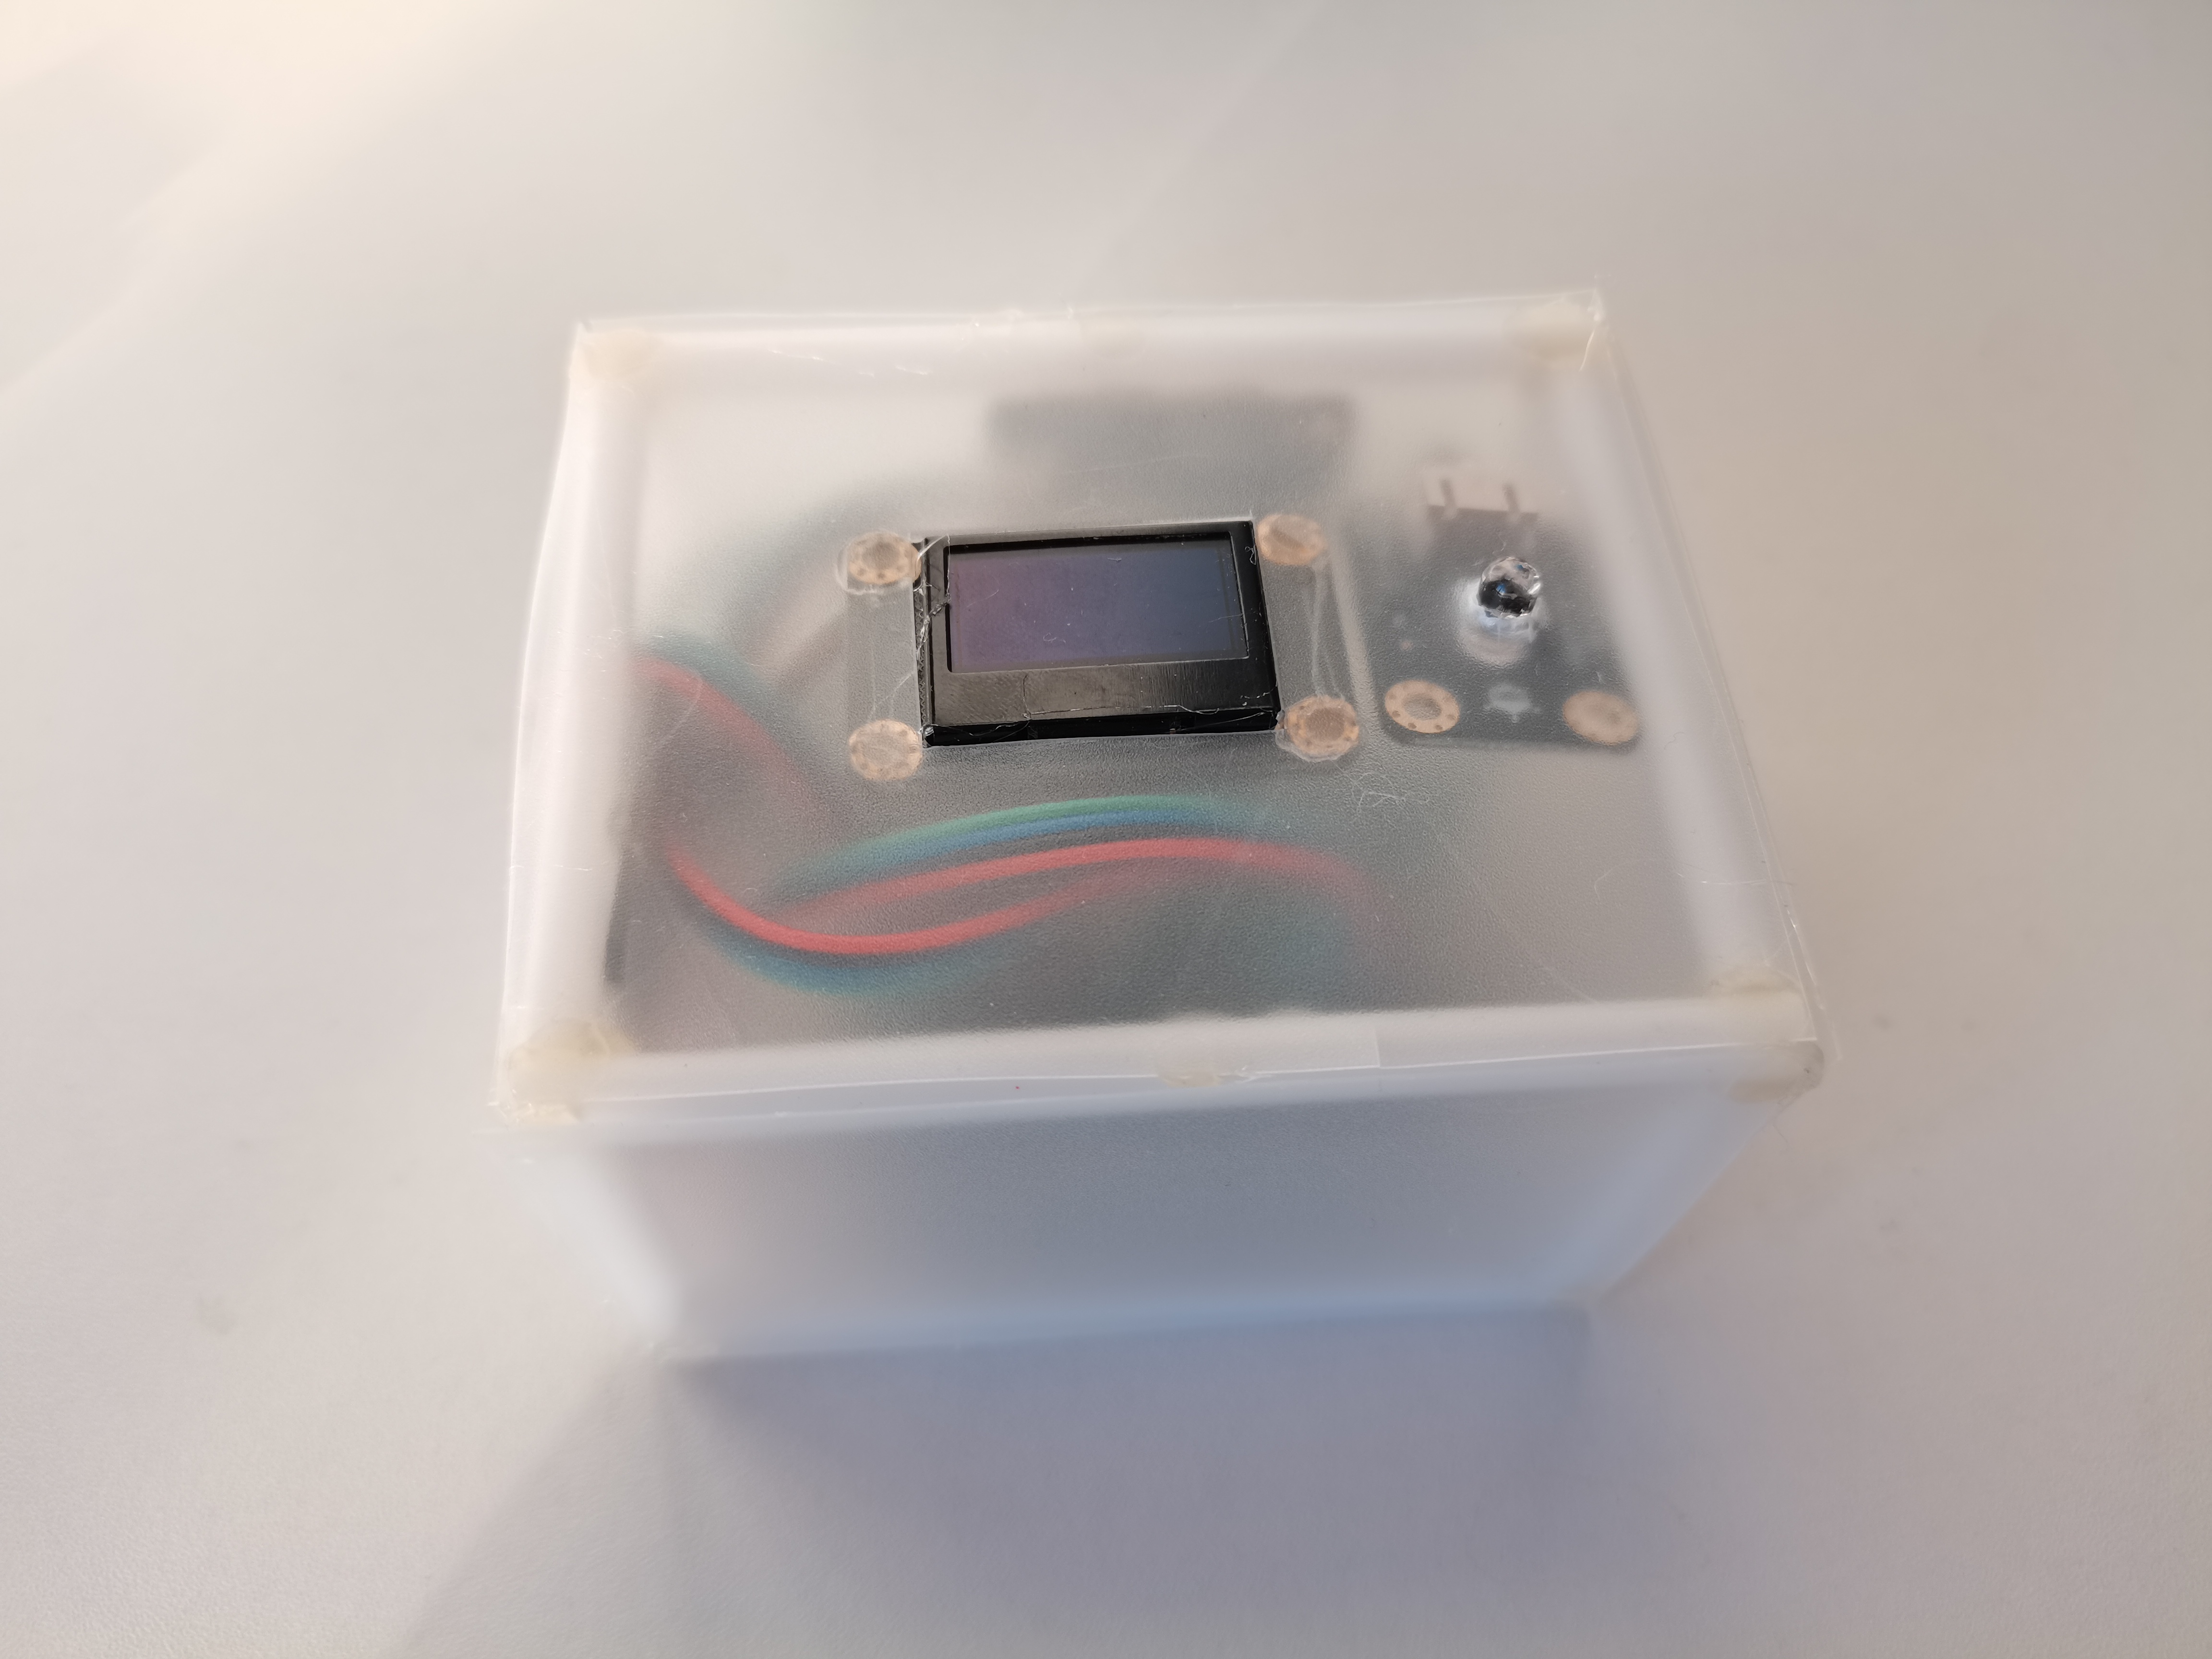
Arduino主板加扩展板,时钟和显示屏接扩展板IIC接口,物联网模块TX、RX分别接扩展板RX、TX引脚,灯接扩展板8引脚。
3、“掌控板 ”手表
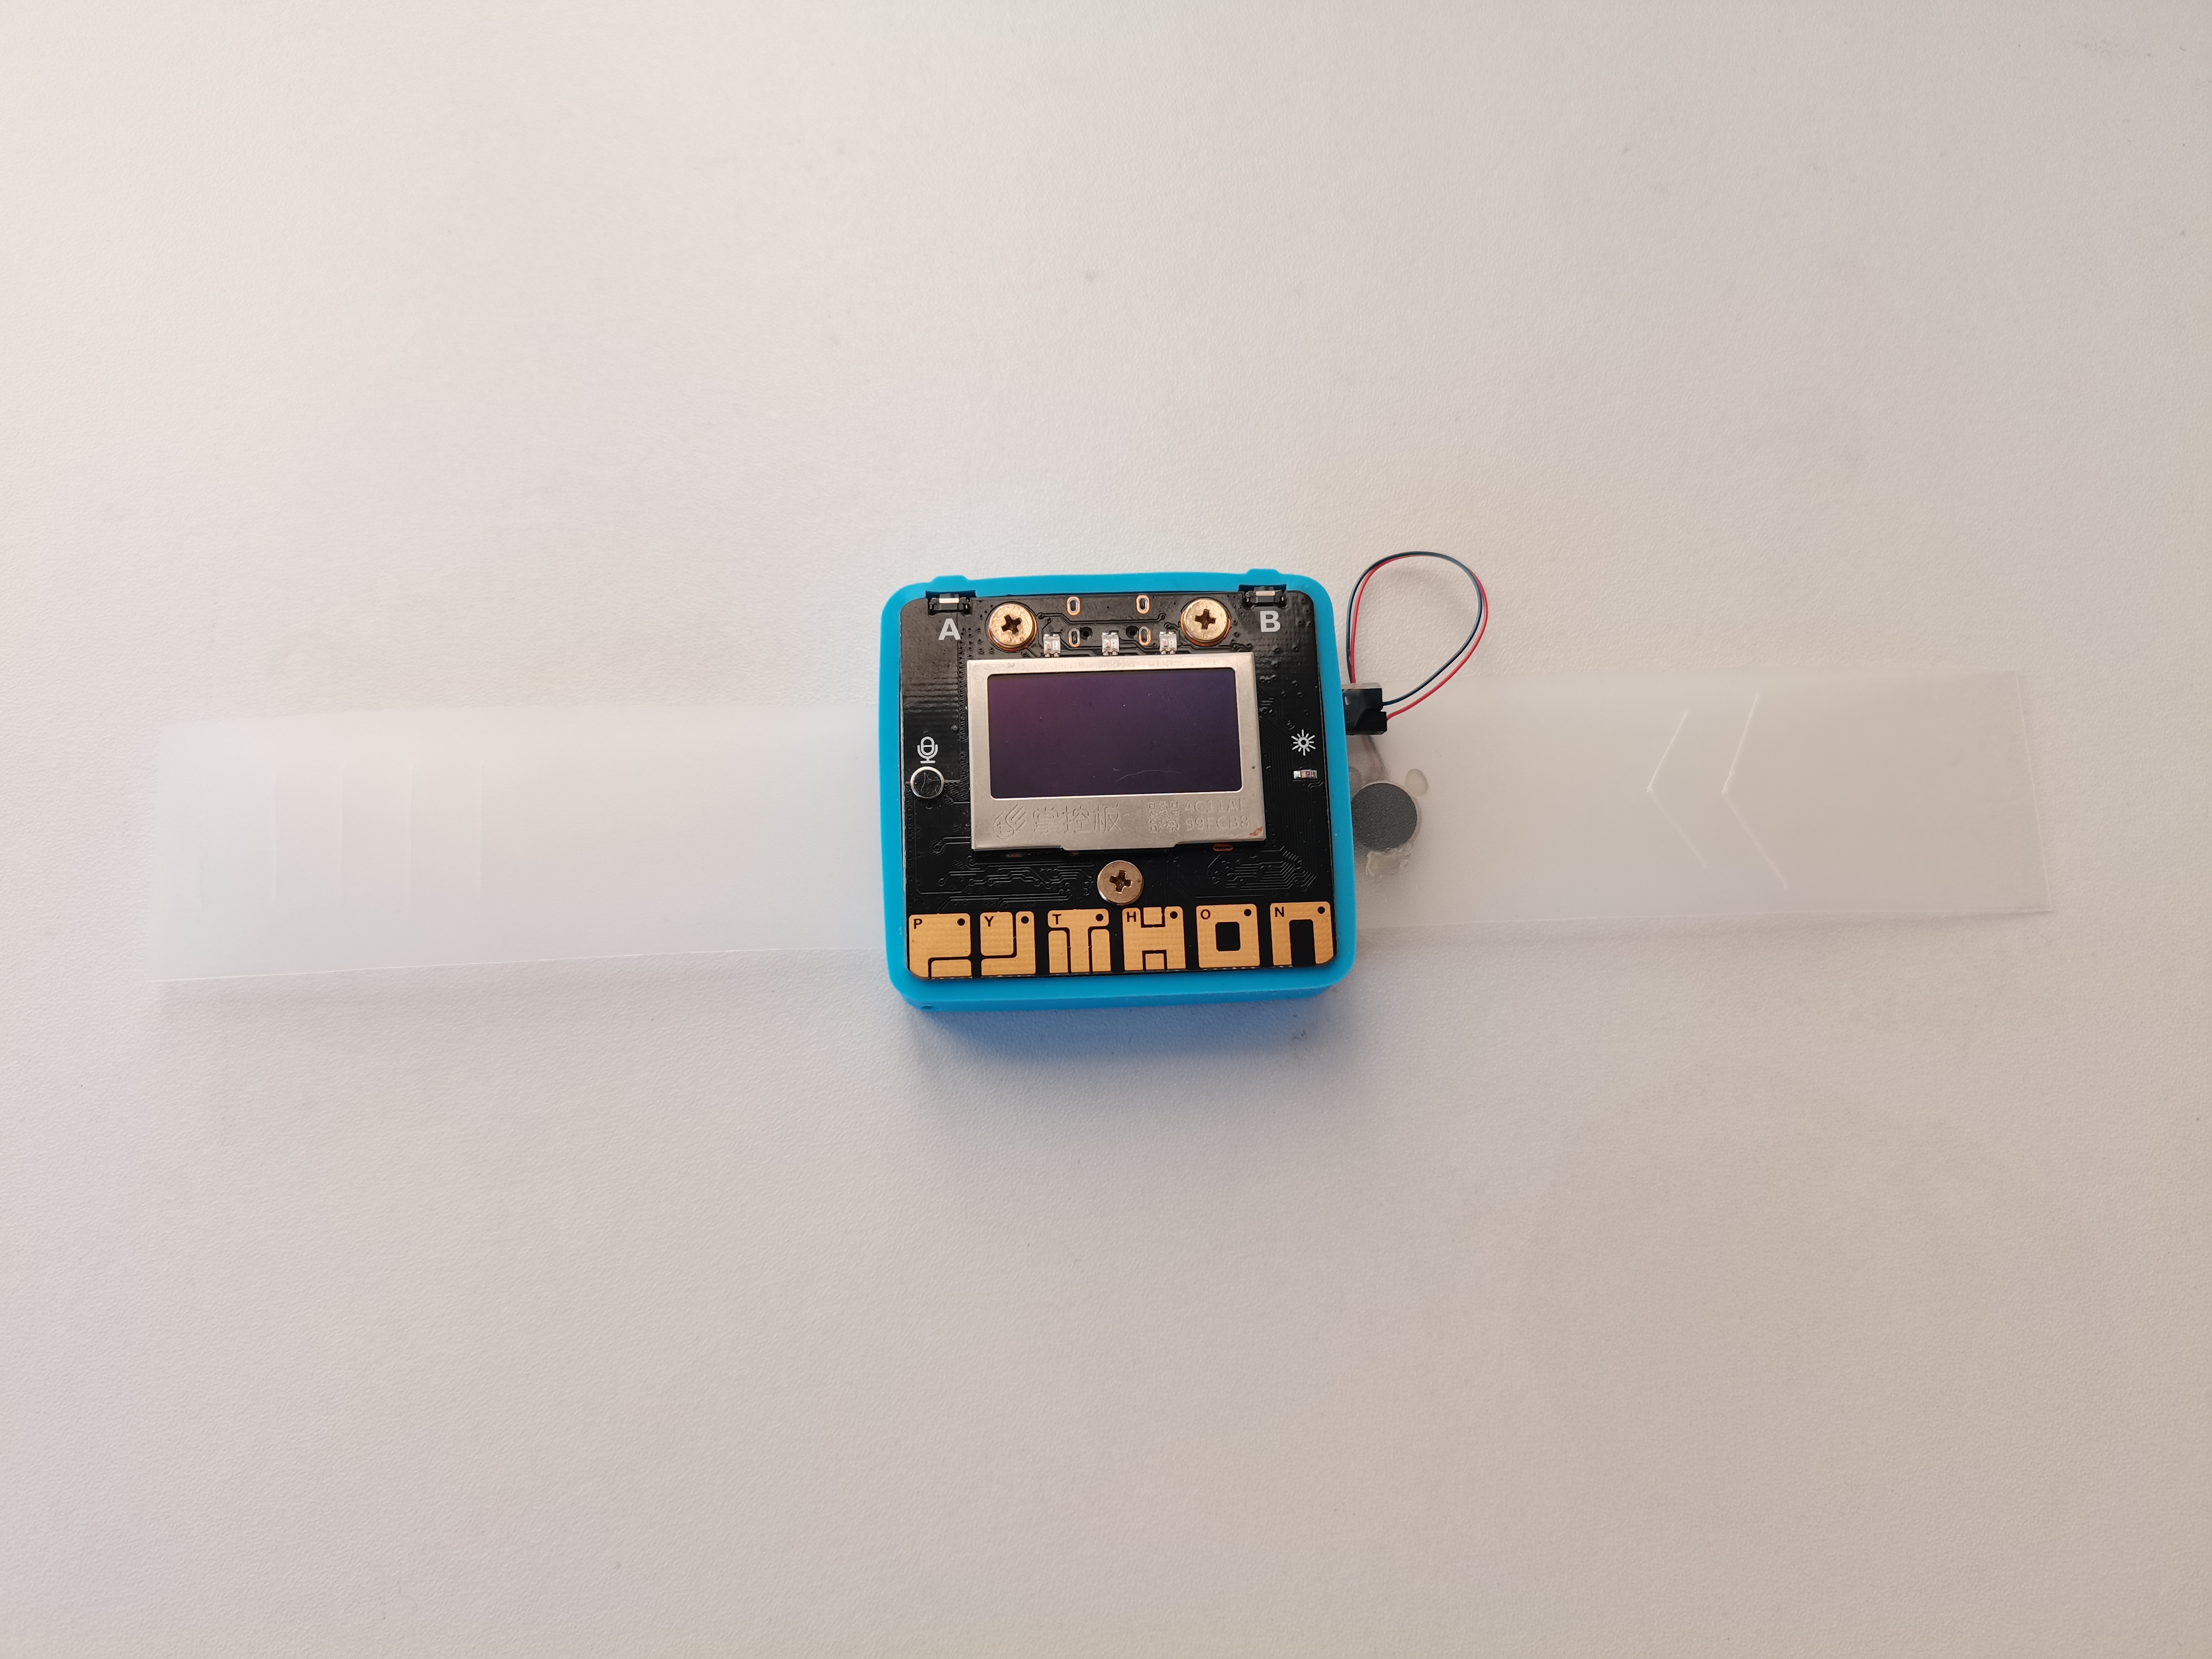
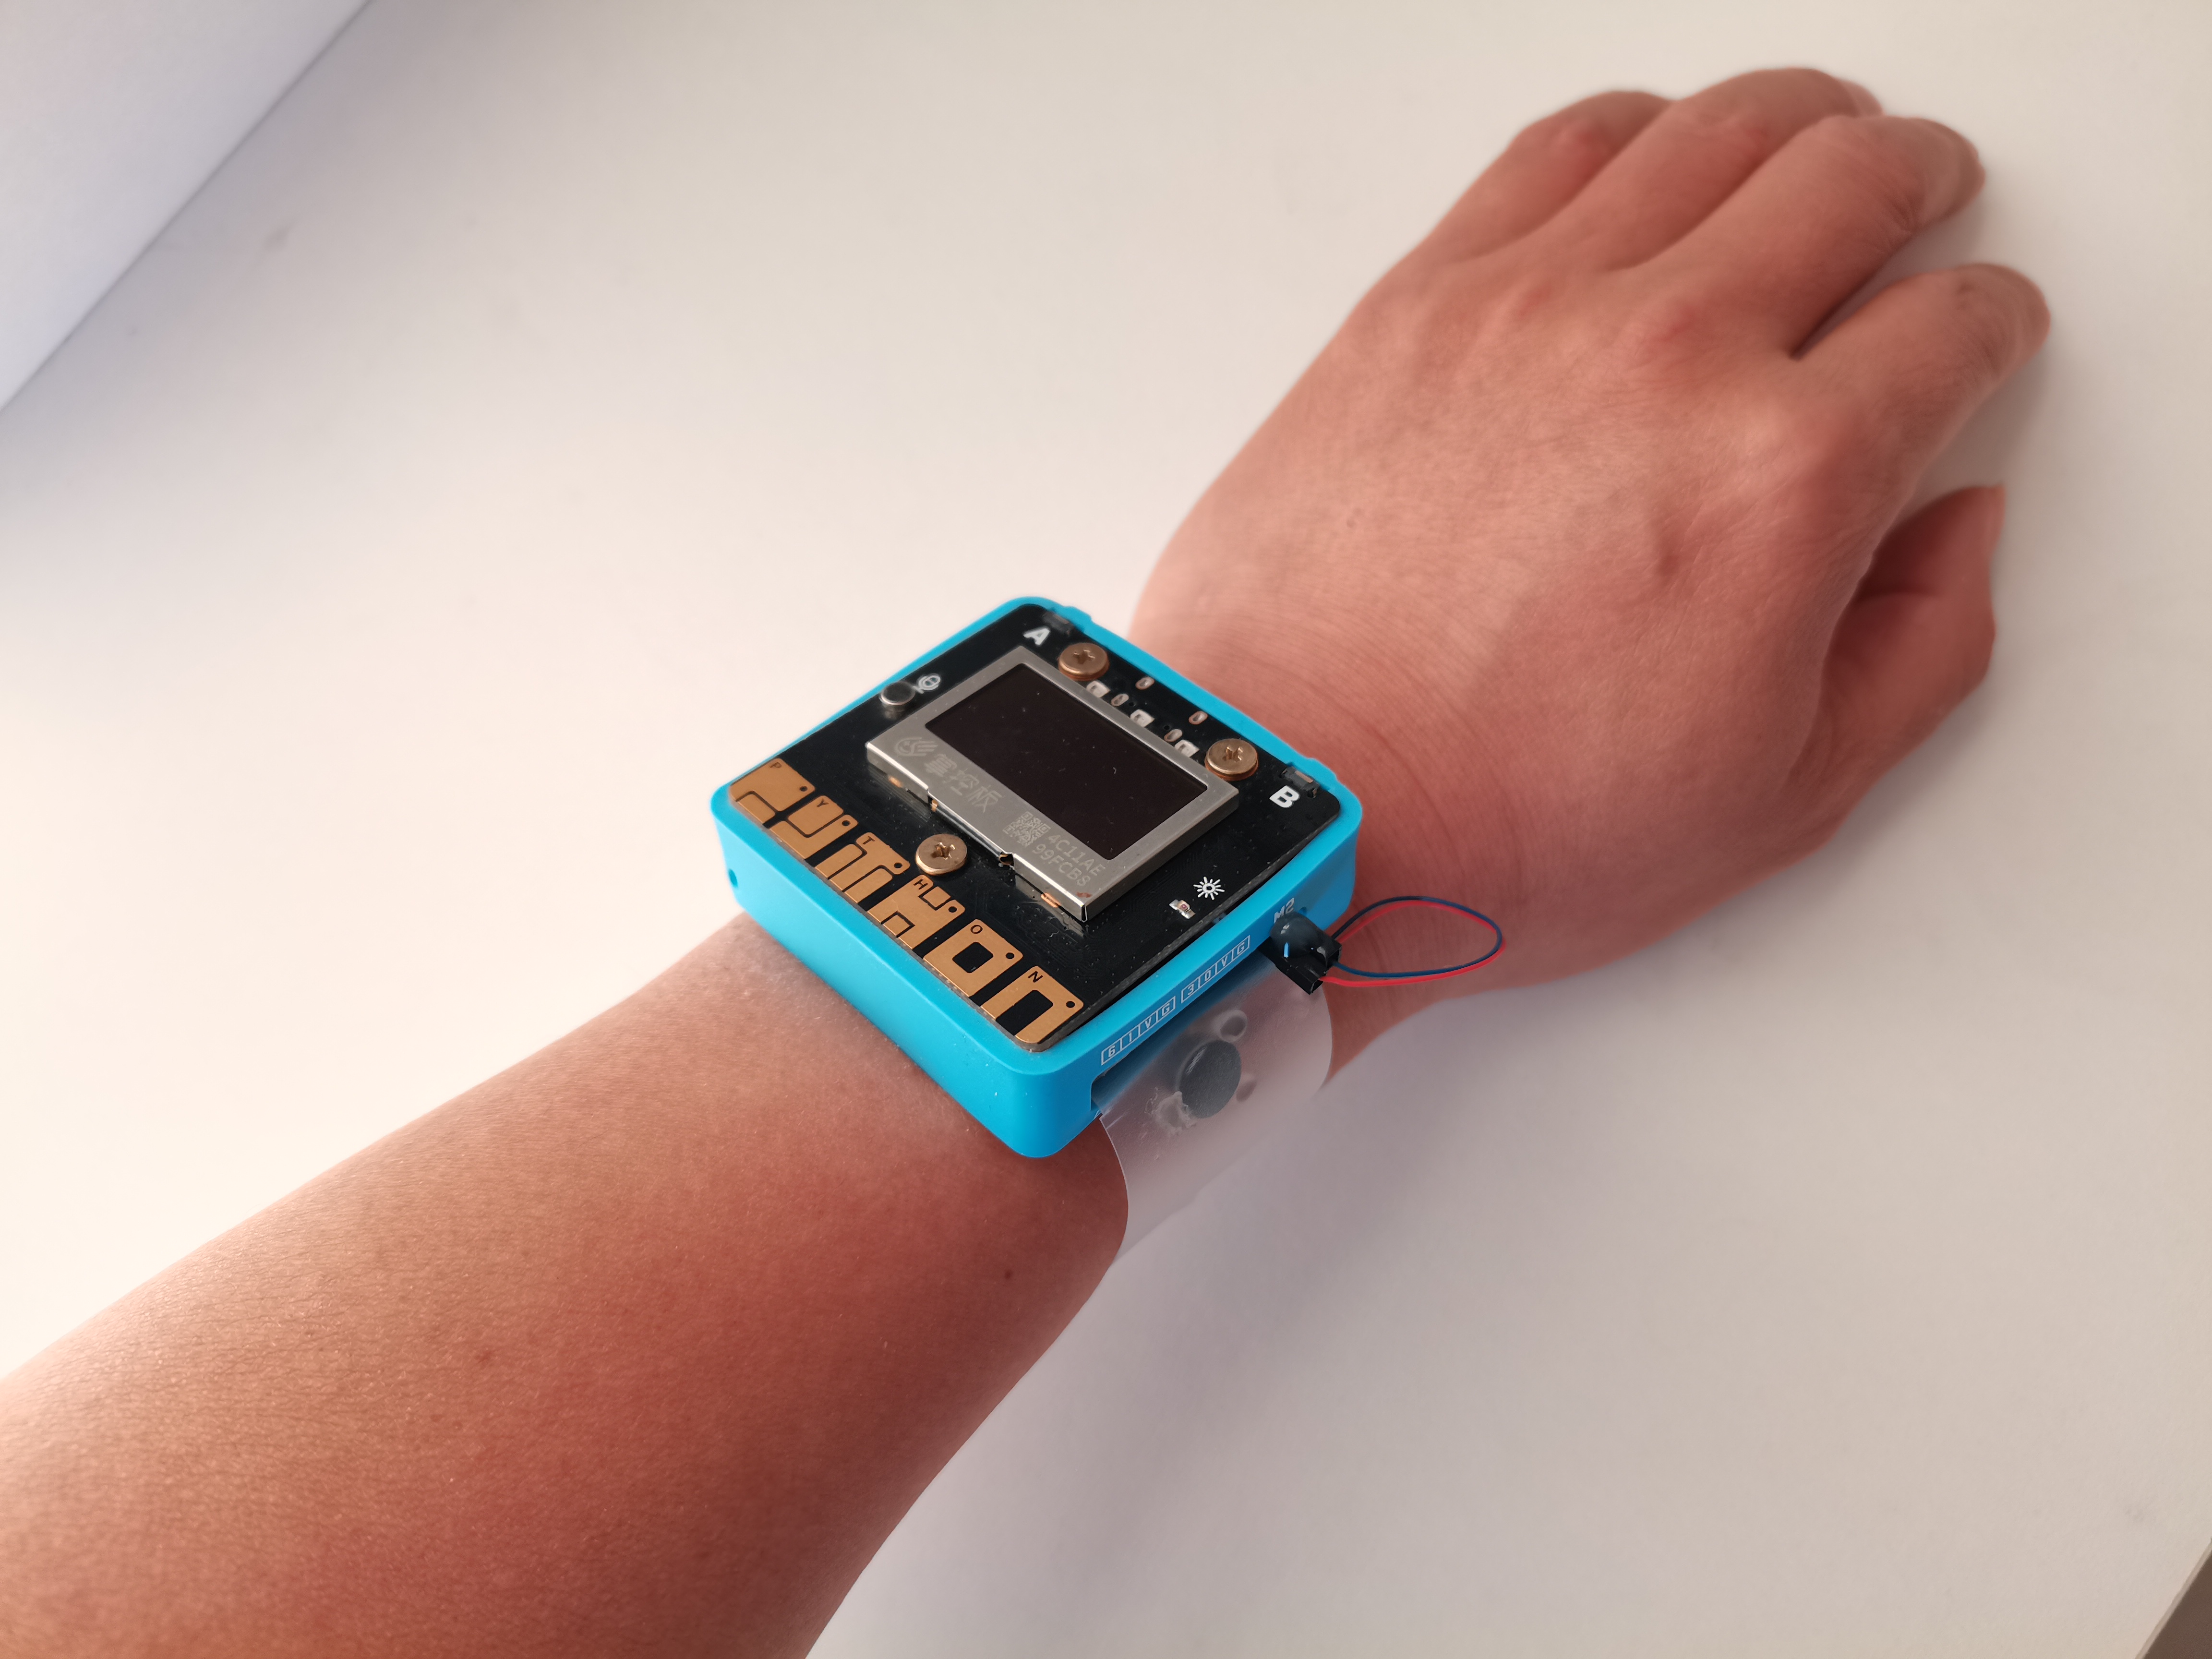
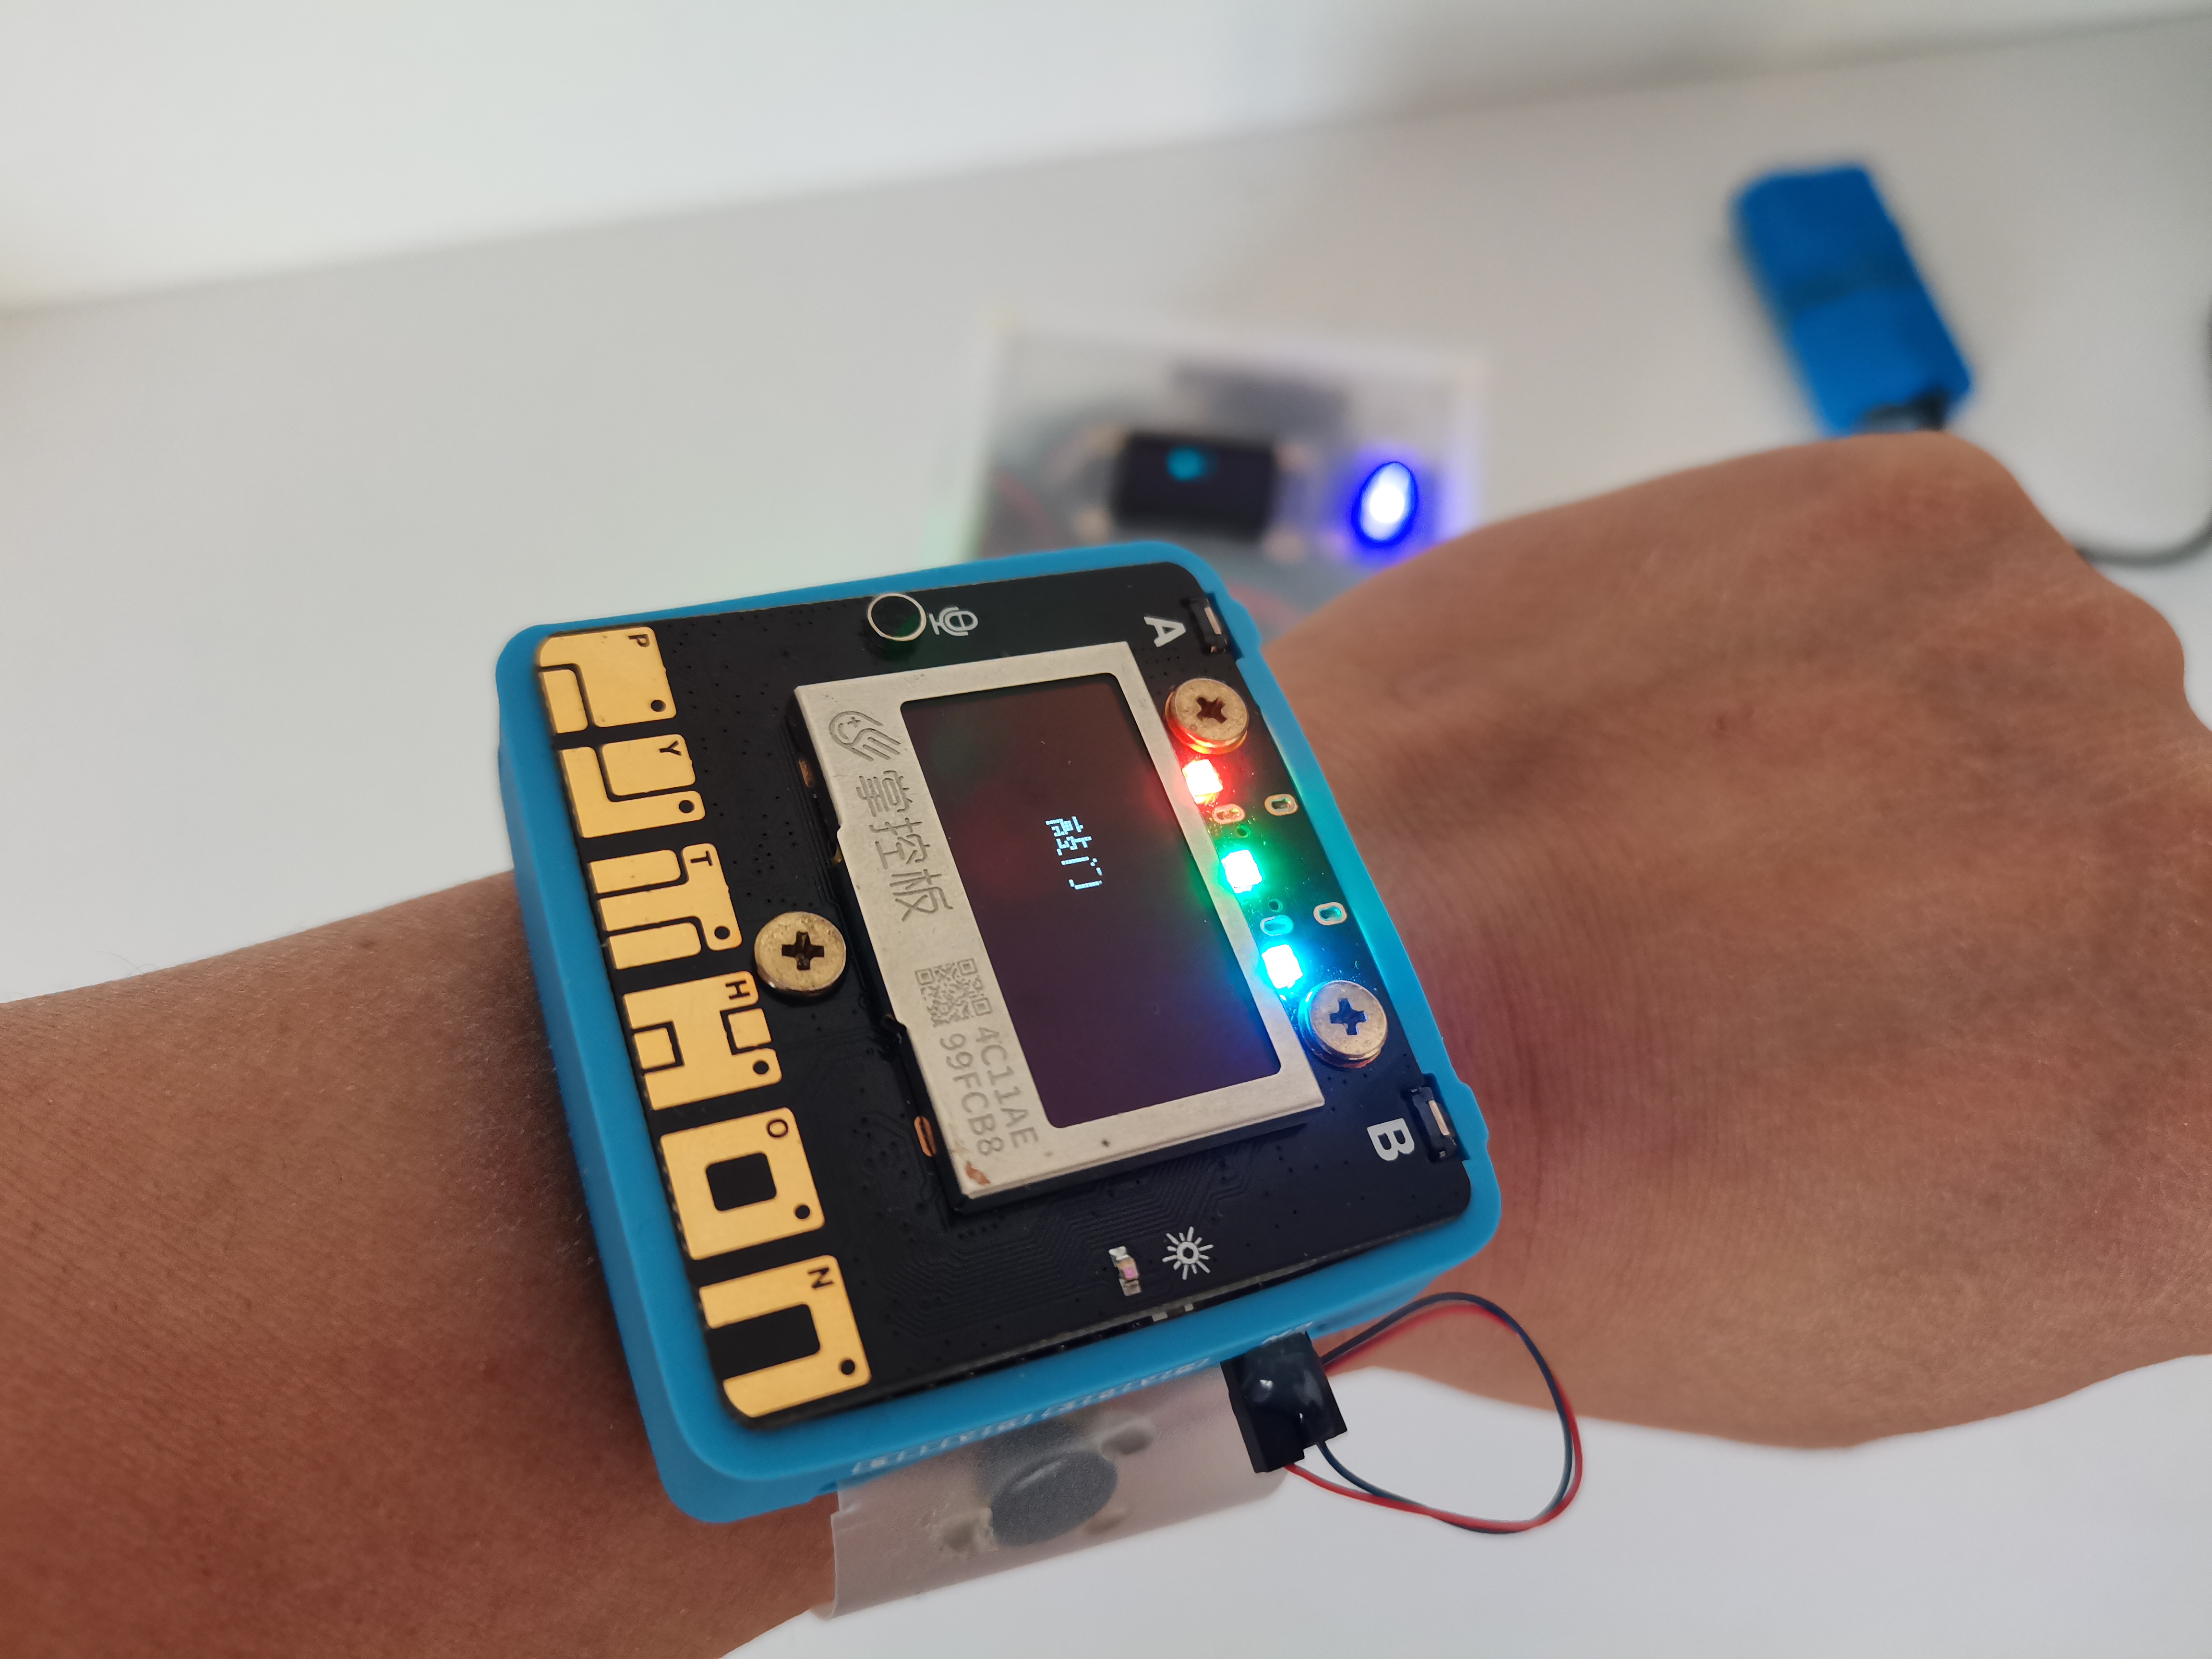
将震动马达接“掌控宝”的M2接口,并粘在表带上。
【模型训练】
1、采集声音图像
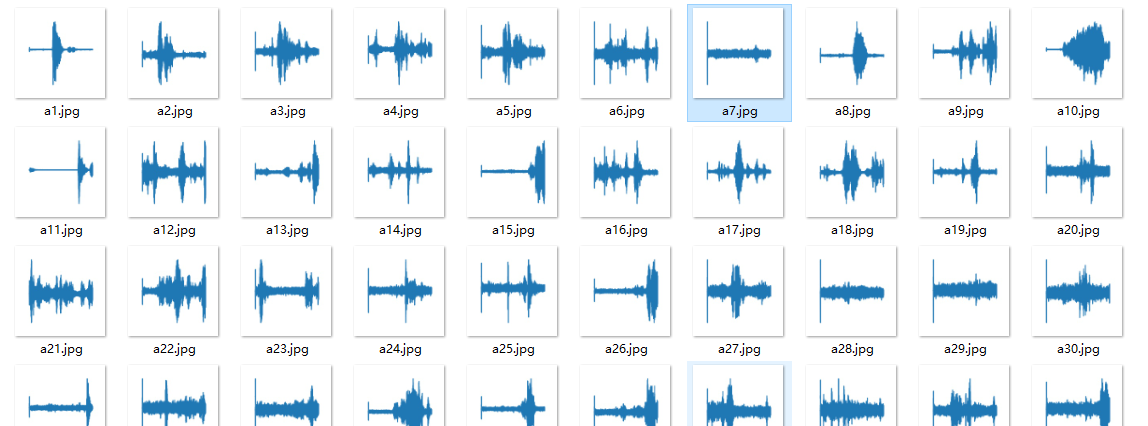
用以下Python程序,通过电脑的麦克风采集敲门声(我声音样本数据的比较简单,连续敲击两下)、水龙头放水声、背景声。
#加载模块:
import wave
import pyaudio
import numpy as np
import matplotlib.pyplot as plt
from tqdm import tqdm
def record_audio(wave_out_path,record_second):
CHUNK = 1024
FORMAT = pyaudio.paInt16
CHANNELS = 1
RATE = 44100
p = pyaudio.PyAudio()
stream = p.open(format=FORMAT,
channels=CHANNELS,
rate=RATE,
input=True,
frames_per_buffer=CHUNK)
wf = wave.open(wave_out_path, 'wb')
wf.setnchannels(CHANNELS)
wf.setsampwidth(p.get_sample_size(FORMAT))
wf.setframerate(RATE)
print("* recording")
for i in tqdm(range(0, int(RATE / CHUNK * record_second))):
data = stream.read(CHUNK)
wf.writeframes(data)
print("* done recording")
stream.stop_stream()
stream.close()
p.terminate()
wf.close()
for i in range(50):
record_audio("output.wav",record_second=2)
#加载音频:
filepath = "output.wav"
f = wave.open(filepath,'rb')
#读取音频数据,并把数据转化为字符串的形式:
params = f.getparams()
nchannels, sampwidth, framerate, nframes = params[:4]
strData = f.readframes(nframes)
#把字符串转化为整数:
w = np.fromstring(strData,dtype=np.int16)
#归一化数据:
w = w*255.0/(max(abs(w)))
#把数据转化为二维向量(也就是点的直角坐标):
w = np.reshape(w,[nframes,nchannels])
#画出音频的第一个声道的波形图:
time = np.arange(0,nframes)*(1.0 / framerate)
plt.figure(figsize=(2.24, 2.24))
# 600 x 600 像素(先宽度 后高度)
# 注意这里的宽度和高度的单位是英寸,1英寸=100像素,所以要除以100
plt.subplot(1,1,1)
plt.plot(time,w[:,0])
plt.xlabel("")
plt.title("")
plt.axis('off')
plt.savefig('save''+str(i)+'.jpg')
#plt.show()
敲门声
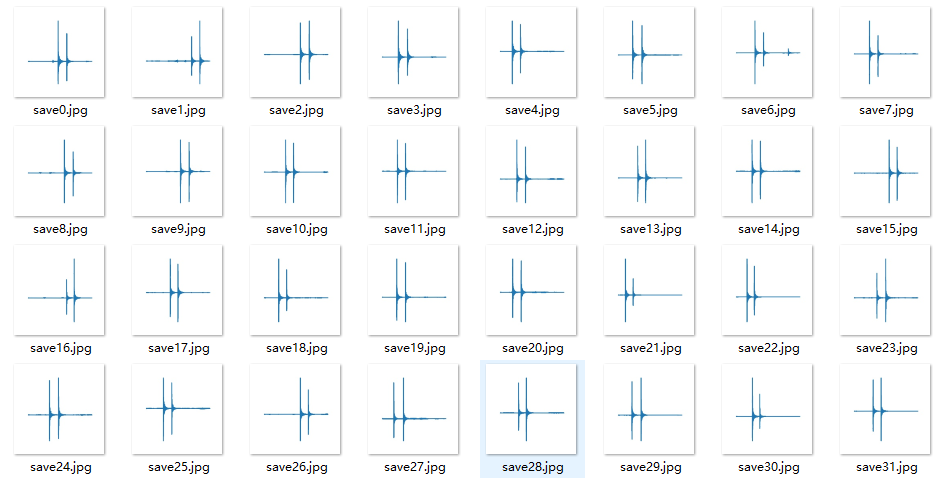
流水声
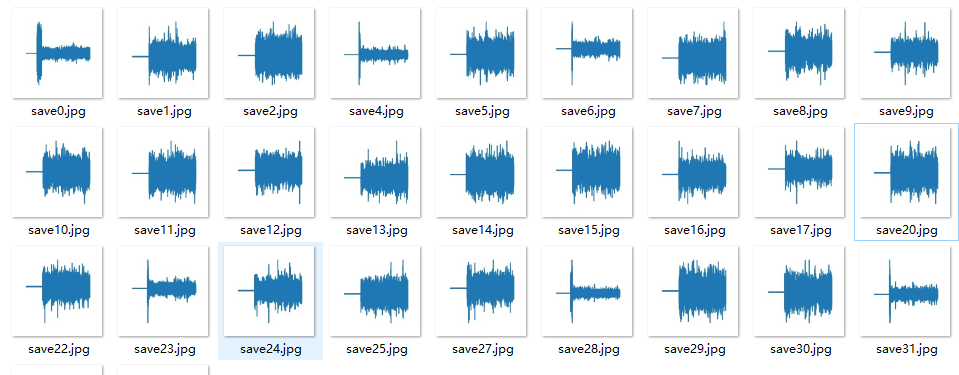
背景音
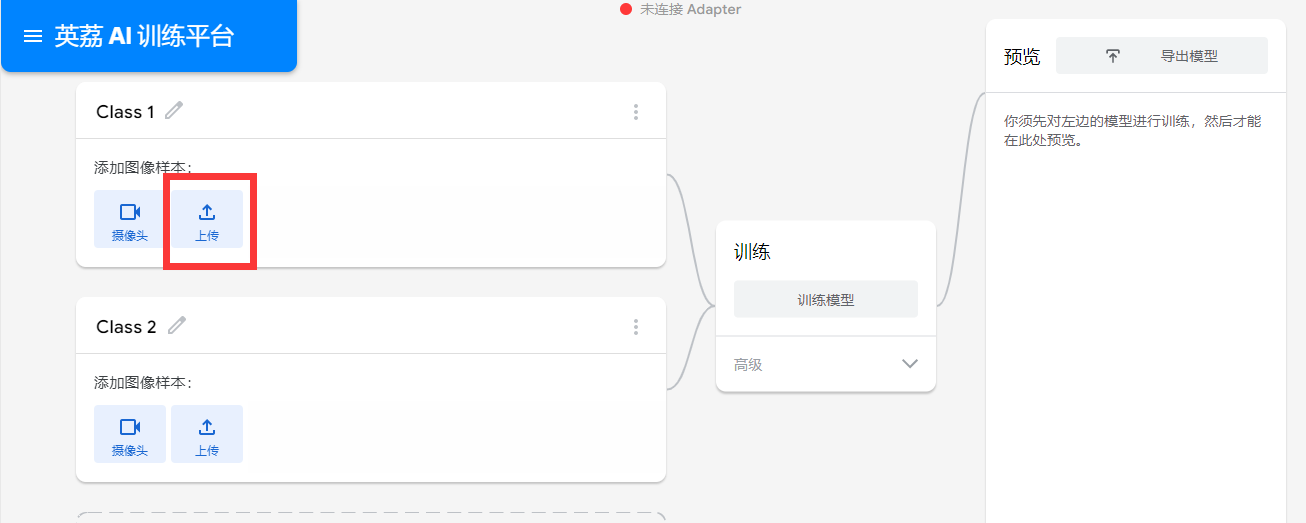
【英艻AI训练平台】
将图片上传到“英艻AI训练平台”进行模型训练。类型有“door”、“water”、“baby”、“background”
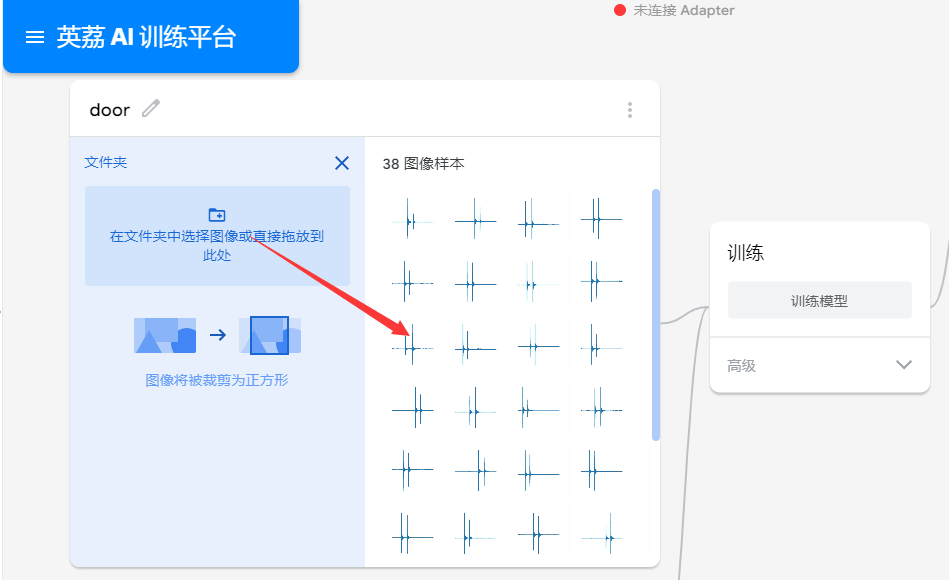
下载模型,放到行空板程序相应目录。
【行空板程序】
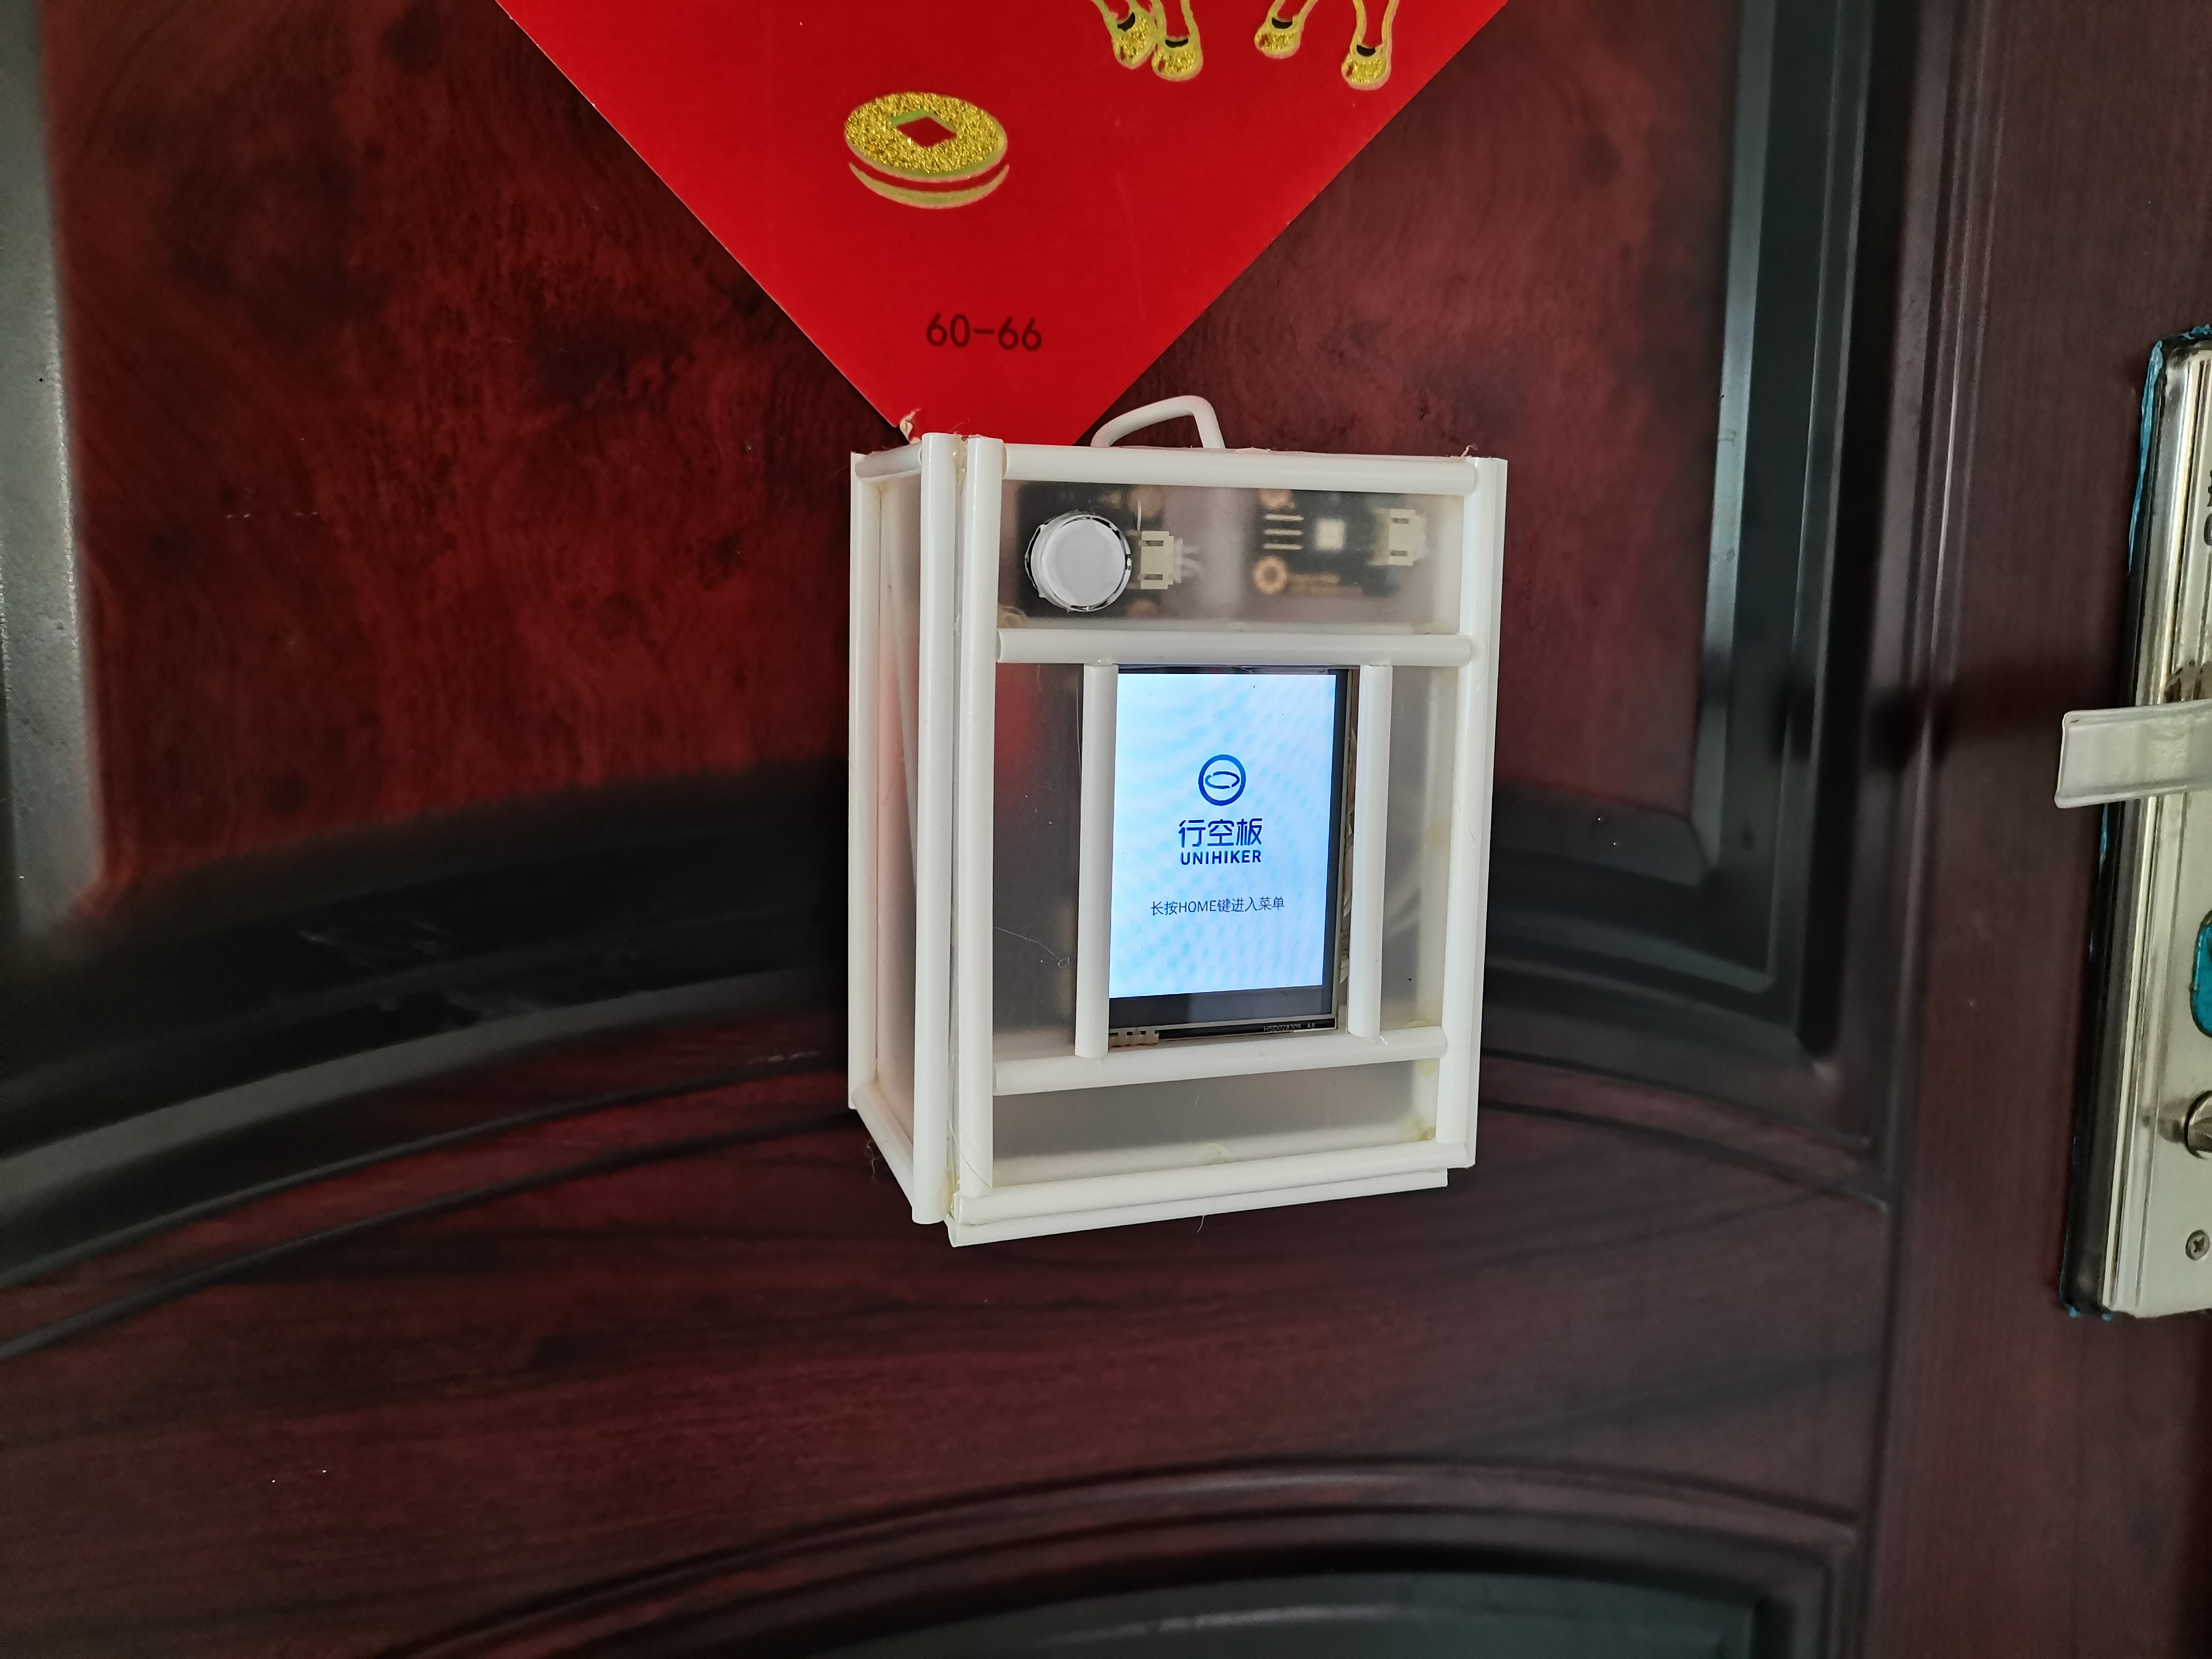
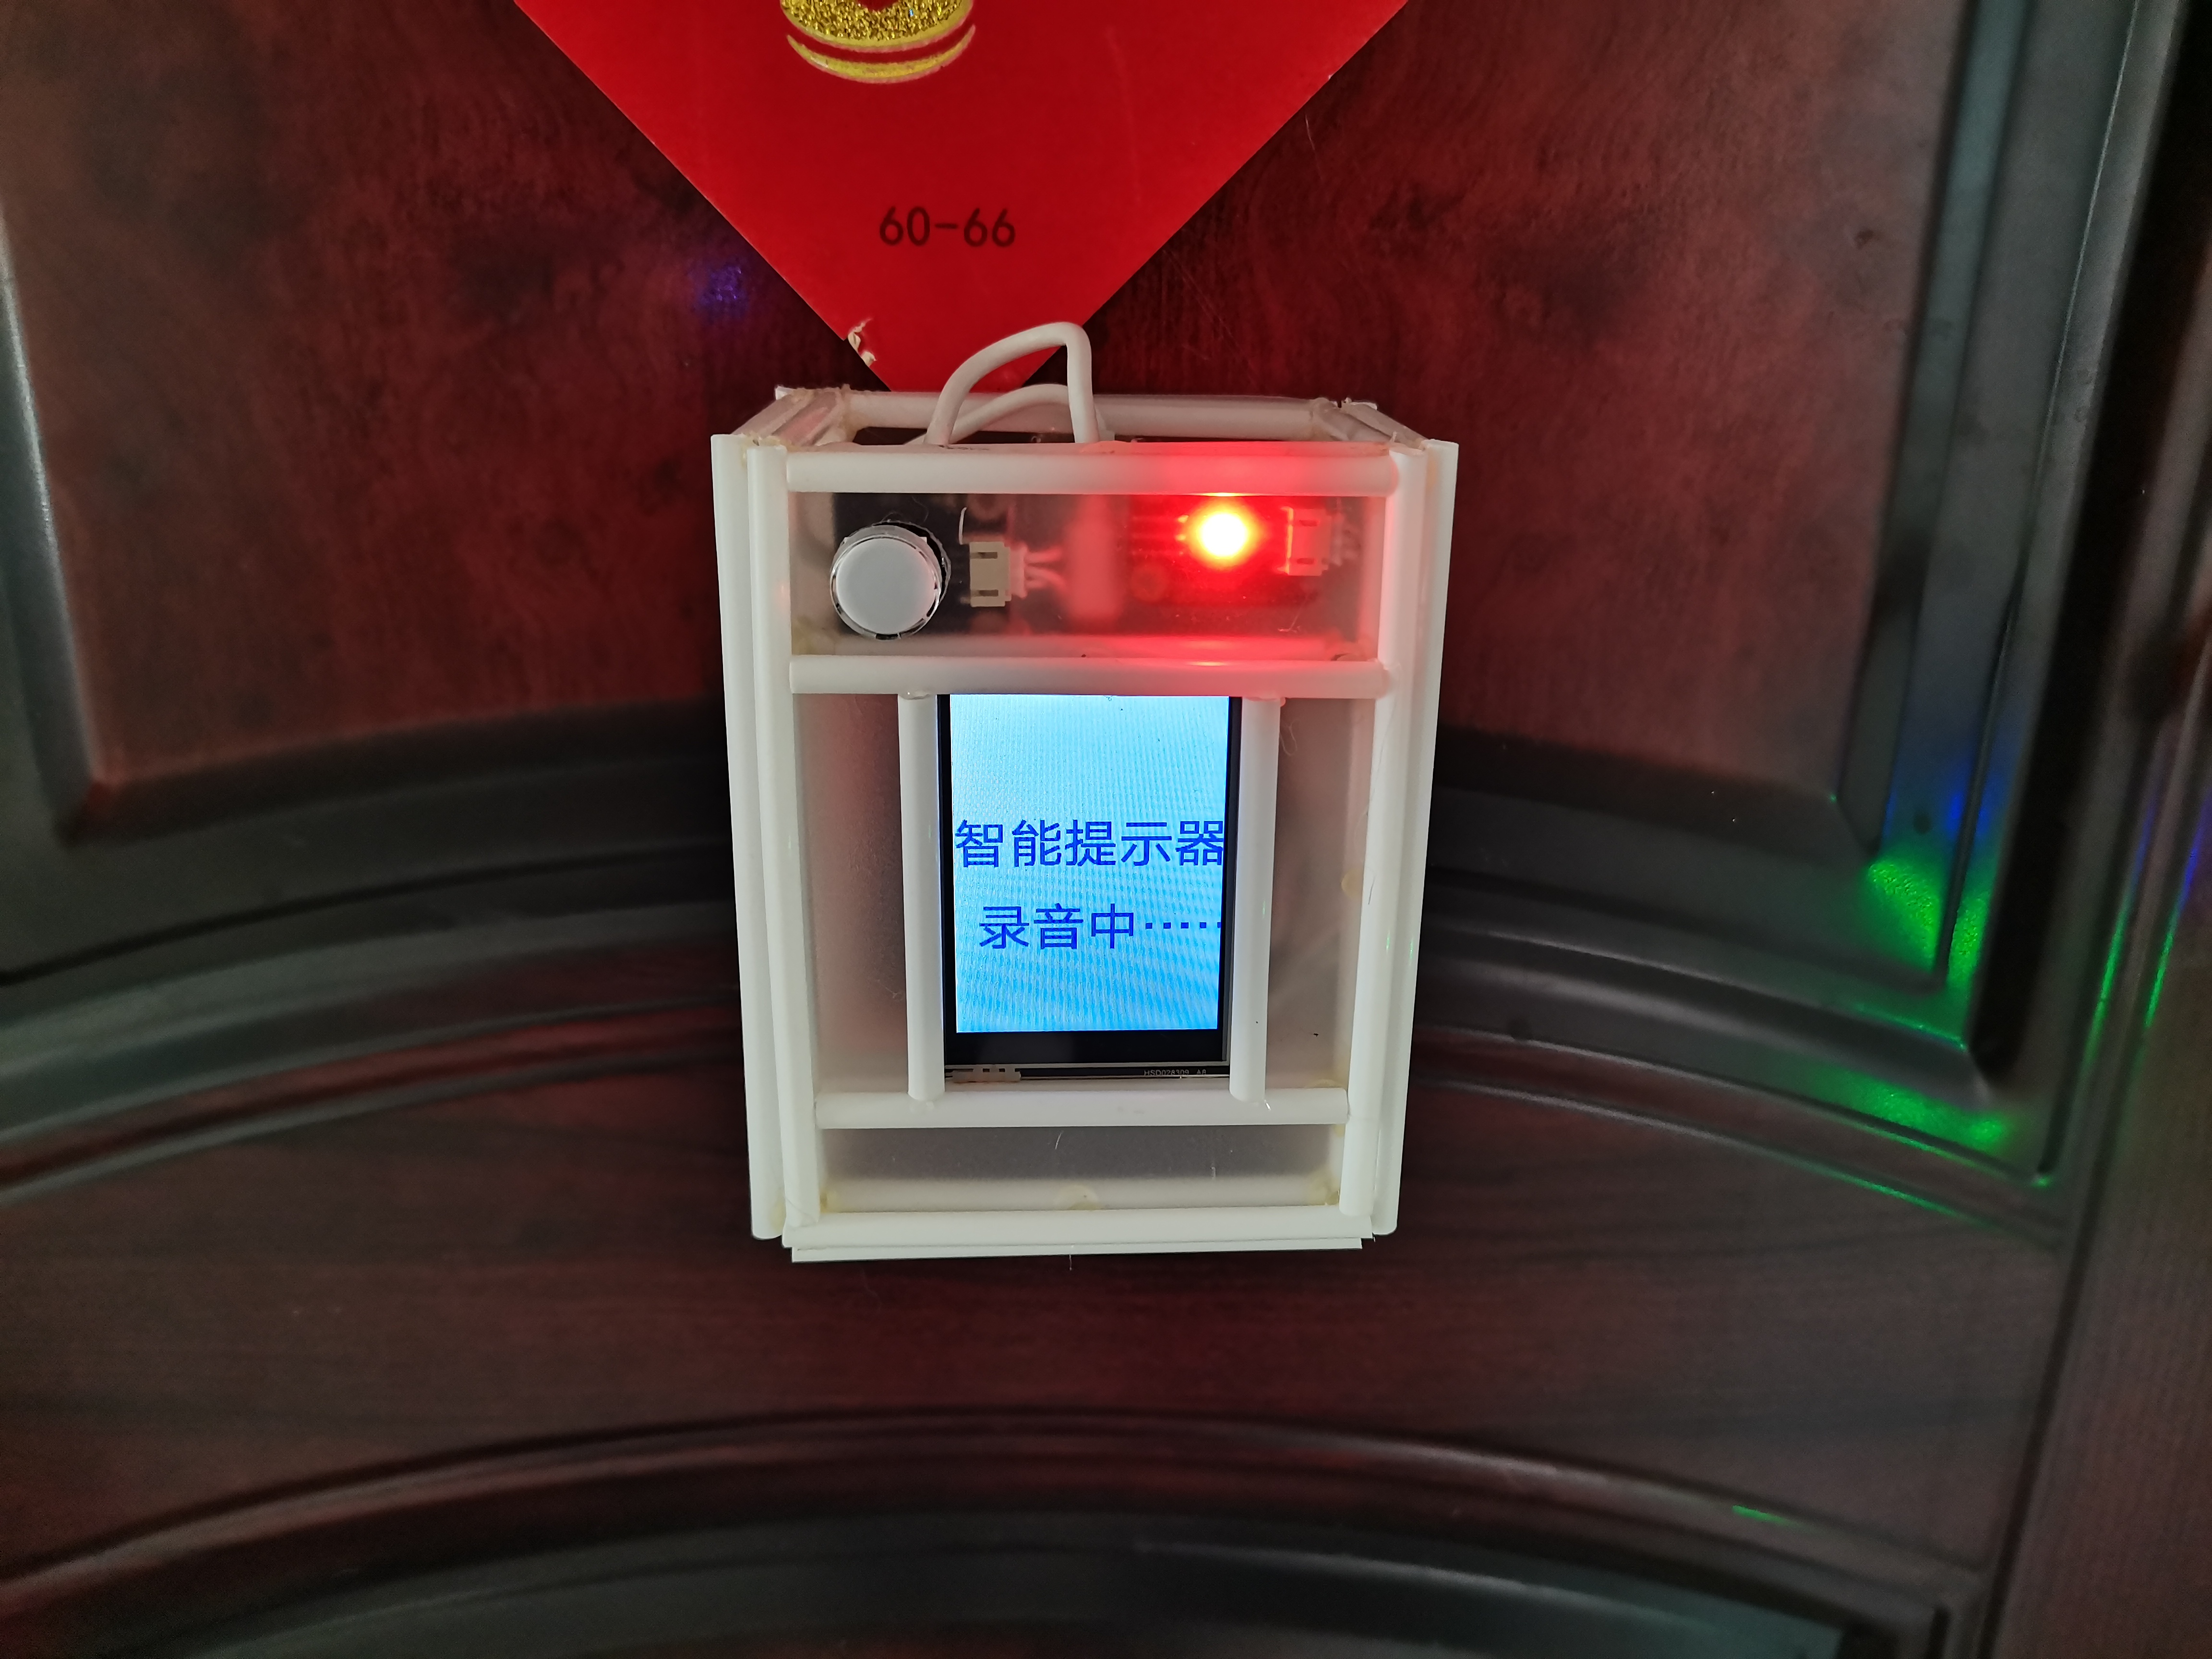
利用行空板板载麦克风采集声音,利用matplotlib变换成图片,使用keras加载训练好的模型“keras_model.h5”,进行预测出声音类型。点亮LED灯并通过物联网发送相关信息指令。
#加载模块:
from unihiker import GUI
u_gui=GUI()
显示=u_gui.draw_text(text="智能提示器",x=0,y=100,font_size=35, color="#0000FF")
内容=u_gui.draw_text(text="加载库",x=20,y=180,font_size=35, color="#0000FF")
from pinpong.extension.unihiker import *
from pinpong.board import Board,Pin,NeoPixel
import wave
#import pyaudio
from unihiker import Audio
import numpy as np
import matplotlib.pyplot as plt
from keras.models import load_model
from PIL import Image, ImageOps #Install pillow instead of PIL
import siot
u_audio = Audio()
Board().begin()
p_p22_out=Pin(Pin.P22, Pin.OUT)
p_p21_in=Pin(Pin.P21, Pin.IN)
np1 = NeoPixel(p_p22_out,1)
np1[0] = (0,0,0)
# Disable scientific notation for clarity
np.set_printoptions(suppress=True)
内容.config(text="加载模型")
# Load the model
model = load_model('keras_model.h5', compile=False)
# Load the labels
class_names = ['door','background']
# Create the array of the right shape to feed into the keras model
# The 'length' or number of images you can put into the array is
# determined by the first position in the shape tuple, in this case 1.
data = np.ndarray(shape=(1, 224, 224, 3), dtype=np.float32)
内容.config(text="连物联网")
siot.init(client_id="",server="iot.dfrobot.com.cn",port=1883,user="X8jykxFnR",password="u8jskbFngz")
siot.connect()
siot.loop()
while(True):
if (p_p21_in.read_digital()==True):
siot.publish(topic="jBarN574g", data="S")
np1[0] = (0,0,0)
else:
内容.config(text="录音中……")
u_audio.record("record.wav",2)
内容.config(text="识别中……")
#加载音频:
filepath = "record.wav"
f = wave.open(filepath,'rb')
#读取音频数据,并把数据转化为字符串的形式:
params = f.getparams()
nchannels, sampwidth, framerate, nframes = params[:4]
strData = f.readframes(nframes)
#把字符串转化为整数:
w = np.fromstring(strData,dtype=np.int16)
#归一化数据:
w = w*255.0/(max(abs(w)))
#把数据转化为二维向量(也就是点的直角坐标):
w = np.reshape(w,[nframes,nchannels])
#画出音频的第一个声道的波形图:
time = np.arange(0,nframes)*(1.0 / framerate)
plt.figure(figsize=(2.24, 2.24))
# 600 x 600 像素(先宽度 后高度)
# 注意这里的宽度和高度的单位是英寸,1英寸=100像素,所以要除以100
plt.subplot(1,1,1)
plt.plot(time,w[:,0])
plt.xlabel("")
plt.title("")
plt.axis('off')
plt.savefig('wave.jpg')
image = Image.open('wave.jpg').convert('RGB')
#turn the image into a numpy array
image_array = np.asarray(image)
# Normalize the image
normalized_image_array = (image_array.astype(np.float32) / 127.0) - 1
# Load the image into the array
data[0] = normalized_image_array
# run the inference
prediction = model.predict(data)
index = np.argmax(prediction)
class_name = class_names[index]
confidence_score = prediction[0][index]
内容.config(text=class_name)
if class_name=='door':
siot.publish(topic="jBarN574g", data="D")
np1[0] = (255,0,0)
elif class_name=='water':
siot.publish(topic="jBarN574g", data="W")
np1[0] = (0,255,0)
elif class_name=='baby':
siot.publish(topic="jBarN574g", data="B")
np1[0] = (0,0,255)
print('Class:', class_name)
print('Confidence score:', confidence_score)
#plt.show()
【掌控板手表程序】
通过物联网接收行空板传来的指令,屏幕显示相应信息,板载LED灯循环闪烁,并驱动马达震动。

【Arduino接收器程序】
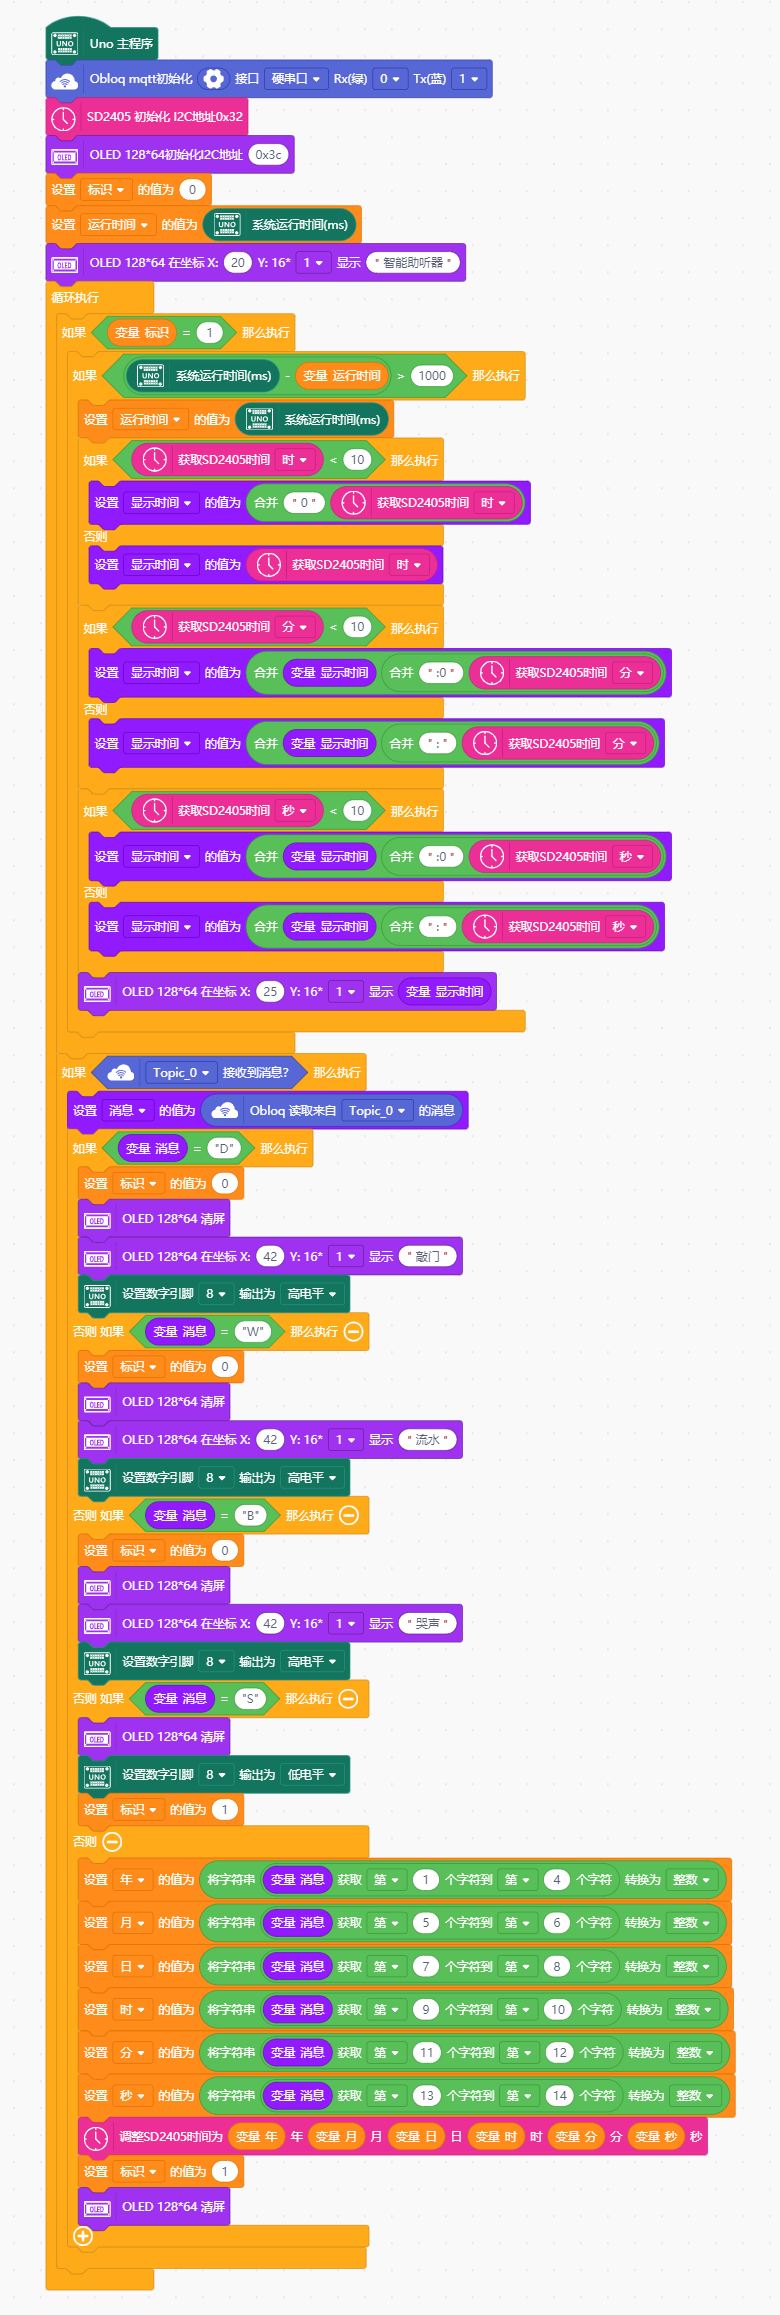
通过物联网接收时间传给“实时时钟模块”,接收行空板指令,屏幕显示相应信息,灯亮提醒。

【演示视频】

 返回首页
返回首页
 回到顶部
回到顶部


annet2023.05.05
超级厉害
花生编程2023.01.15
好创意
花生编程2023.01.15
厉害厉害
Joannali2023.01.05
厉害,好创意
三春牛-创客2022.12.26
很不错的项目
三春牛-创客2022.12.26
厉害厉害
摸鱼的网民2022.12.22
666
摸鱼的网民2022.12.22
为什么没人评论??
摸鱼的网民2022.12.18
感觉好长啊
摸鱼的网民2022.12.18
好厉害
摸鱼的网民2022.12.16
666