 返回首页
返回首页
 回到顶部
回到顶部
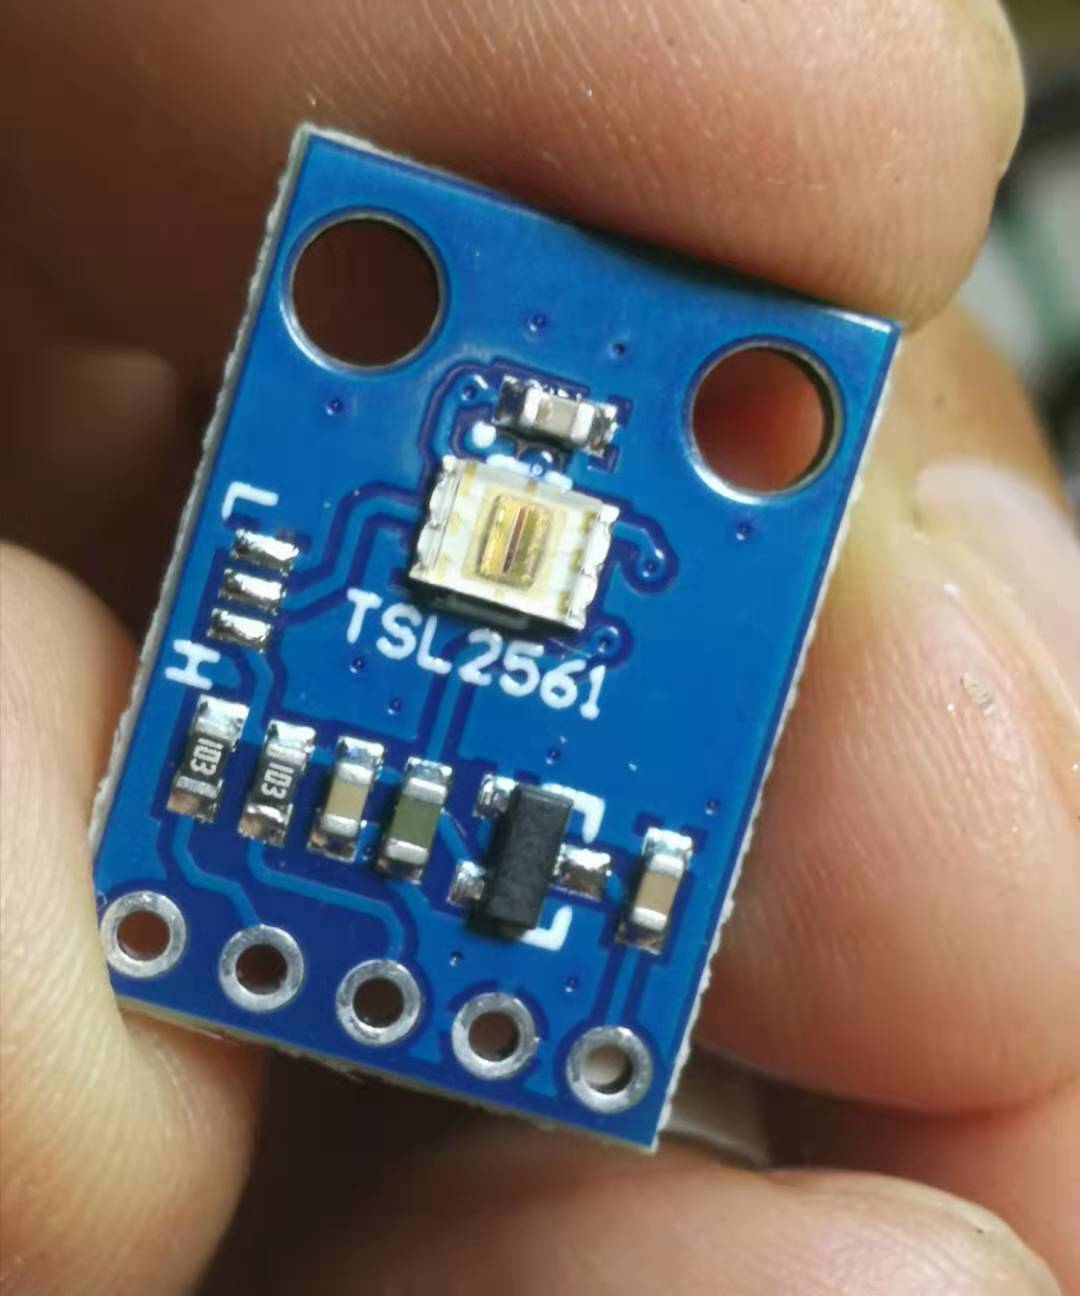
TSL2561 是 TAOS(现属于德州仪器)公司生产的一款环境光传感器。
1、基本概述
TSL2561 能感知周围环境的光照强度,其内置了两个光敏二极管,分别对可见光和红外光敏感,通过对这两个光敏二极管输出信号的处理,可以计算出环境光的强度,并且能够将光信号转化为数字信号,通过 I²C 接口输出,便于与微控制器(如 Arduino、ESP32 等)进行连接和通信。
2、主要特性
1. 宽动态范围:可检测的光照强度范围很宽,从 0.1 lux 到 40,000 lux,能适应从微弱光线到强光的不同环境,比如室内昏暗的灯光环境到室外明亮的阳光环境都能准确测量。
2. 高灵敏度:对光线变化非常敏感,能够检测到微小的光照强度变化,适合用于需要精确光照检测的应用场景。
3. 可编程增益和积分时间:用户可以根据实际需求调整传感器的增益和积分时间,以优化在不同光照条件下的测量精度。例如,在低光照环境下可以增大增益和积分时间来提高测量灵敏度。
4. I²C 接口:采用 I²C 通信协议与微控制器进行数据传输,这种接口方式简单且通用,方便与各种开发板集成。
5. 低功耗:工作电流低,适合电池供电的设备使用,能有效延长设备的续航时间。
3、应用场景
1. 智能照明系统:根据环境光强度自动调节室内灯光的亮度,实现节能和舒适的照明效果。例如,在白天光线充足时降低灯光亮度,在夜晚光线较暗时提高灯光亮度。
2. 显示屏亮度调节:用于手机、平板电脑、笔记本电脑等设备,根据环境光强度自动调整显示屏的亮度,提供更好的视觉体验,同时也能节省电量。
3. 农业和园艺:在温室种植中,监测光照强度,帮助控制植物生长环境,确保植物获得适宜的光照。
4. 安防监控:根据环境光强度自动调整监控摄像头的曝光参数,保证在不同光照条件下都能拍摄到清晰的图像。
【Arduino】189种传感器模块系列实验(资料代码+仿真编程+图形编程)
实验一百八十八:TSL2561数字I2C环境光传感器 GY-2561光照强度检测模块
项目之五:TSL2561 传感器使用Adafruit类库的通用测试
实验开源代码
/*
【Arduino】189种传感器模块系列实验(资料代码+仿真编程+图形编程)
实验一百八十八:TSL2561数字I2C环境光传感器 GY-2561光照强度检测模块
项目之五:TSL2561 传感器使用Adafruit类库的通用测试
*/
#include <Wire.h>
#include <Adafruit_Sensor.h>
#include <Adafruit_TSL2561_U.h>
/* This driver uses the Adafruit unified sensor library (Adafruit_Sensor),
which provides a common 'type' for sensor data and some helper functions.
To use this driver you will also need to download the Adafruit_Sensor
library and include it in your libraries folder.
You should also assign a unique ID to this sensor for use with
the Adafruit Sensor API so that you can identify this particular
sensor in any data logs, etc. To assign a unique ID, simply
provide an appropriate value in the constructor below (12345
is used by default in this example).
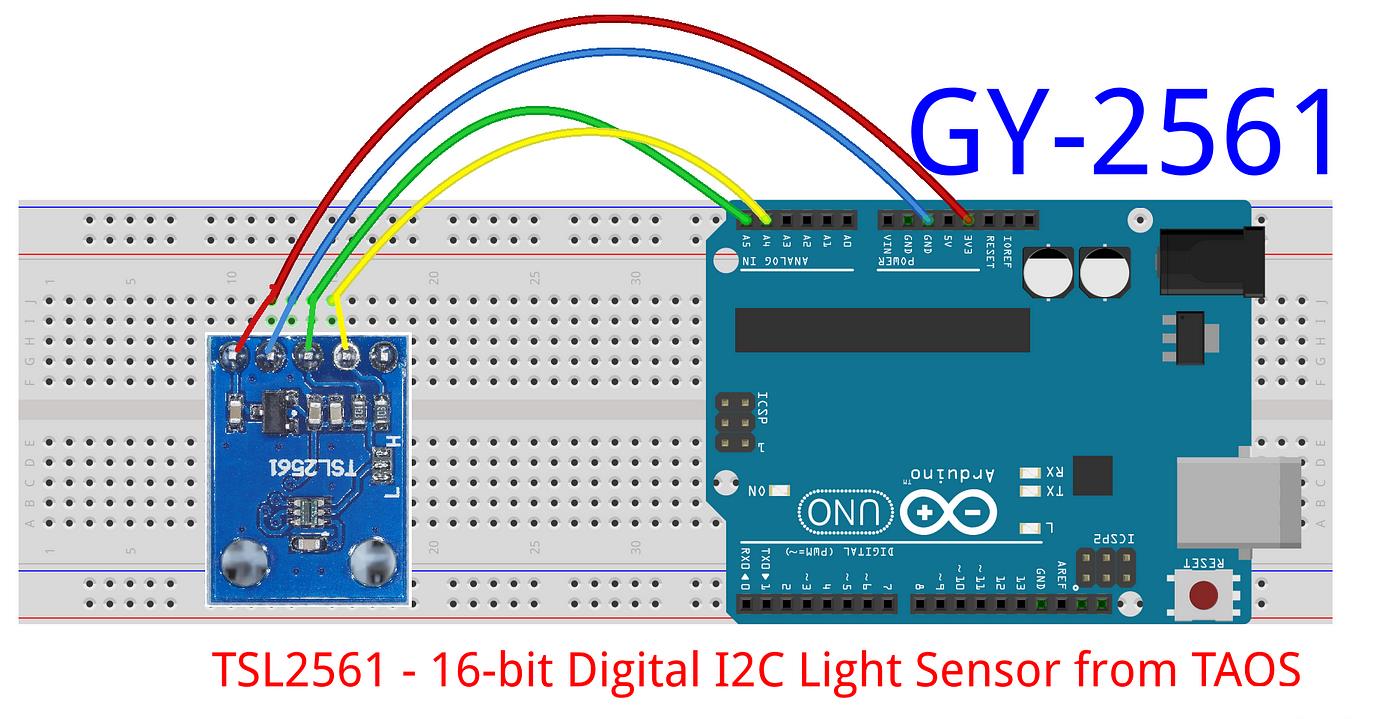
Connections
===========
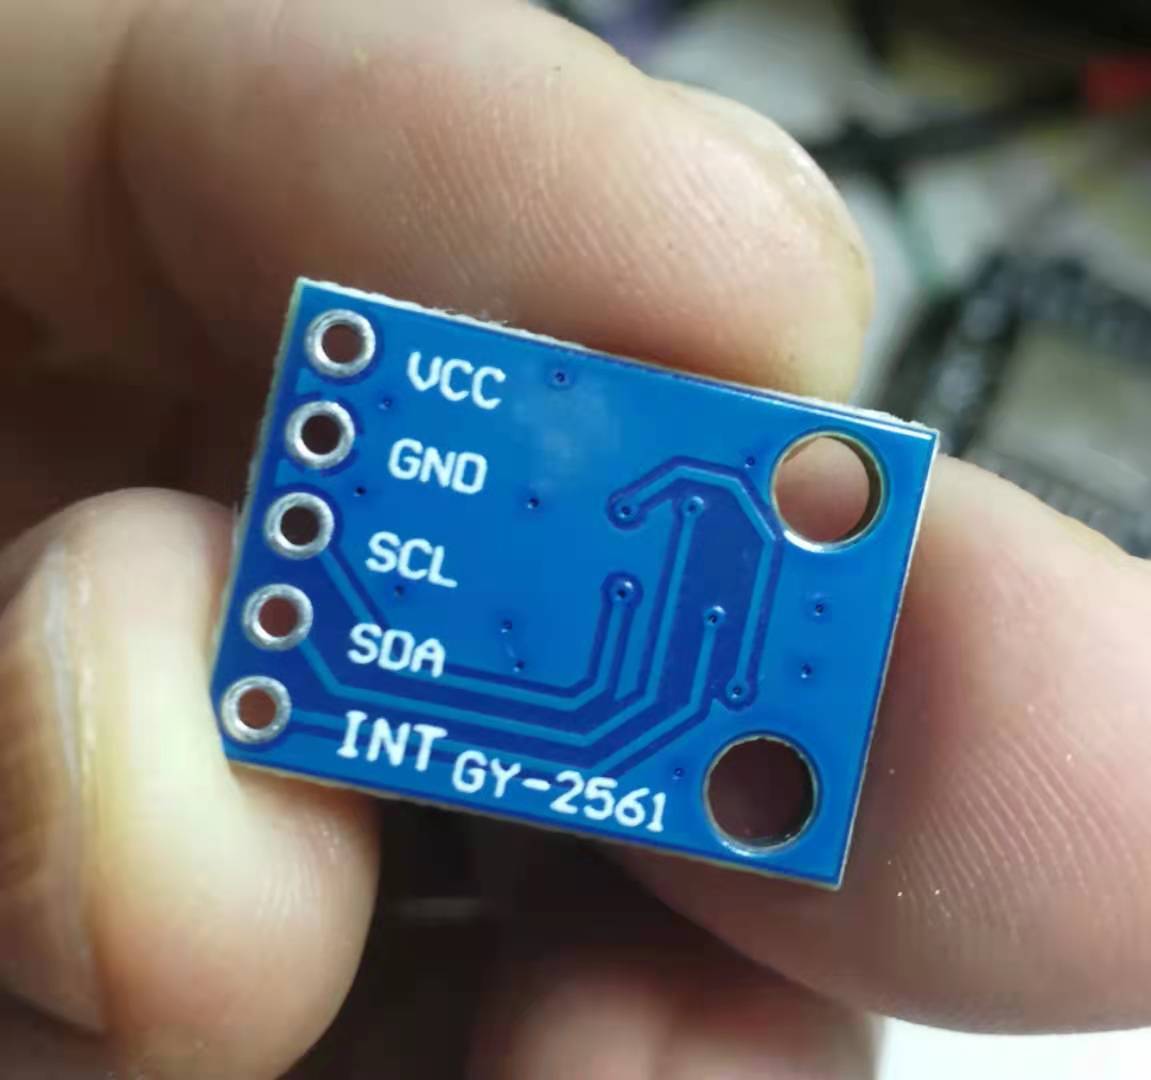
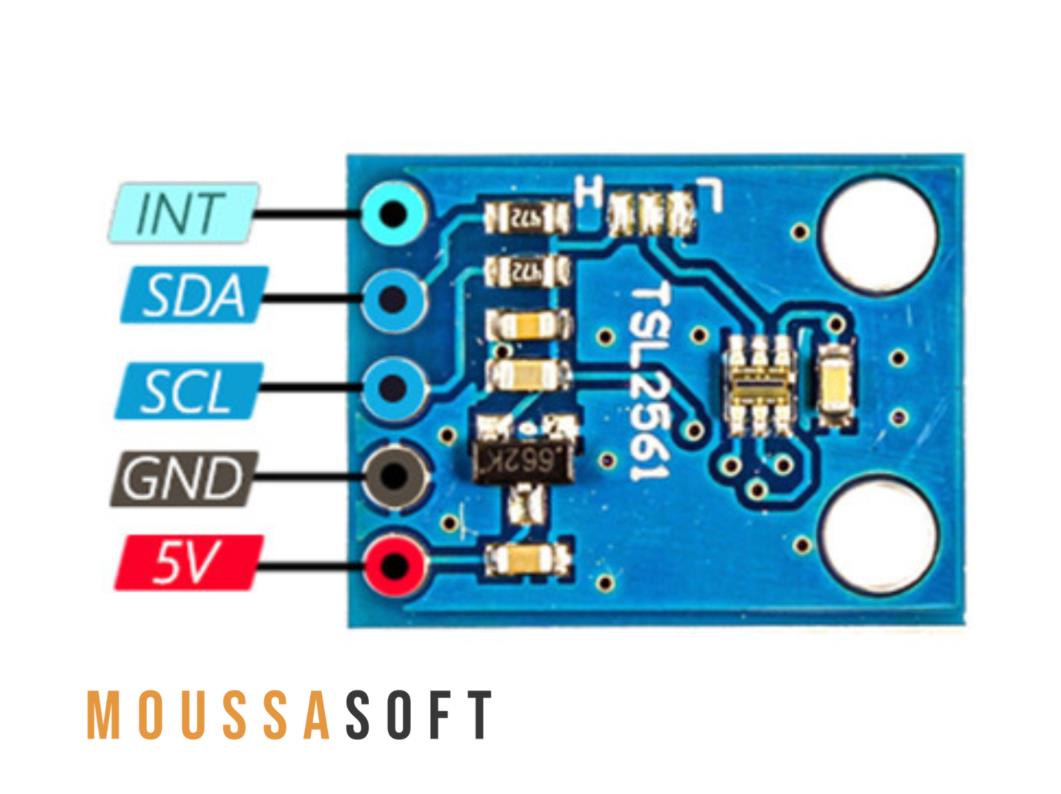
Connect SCL to I2C SCL Clock
Connect SDA to I2C SDA Data
Connect VCC/VDD to 3.3V or 5V (depends on sensor's logic level, check the datasheet)
Connect GROUND to common ground
I2C Address
===========
The address will be different depending on whether you leave
the ADDR pin floating (addr 0x39), or tie it to ground or vcc.
The default addess is 0x39, which assumes the ADDR pin is floating
(not connected to anything). If you set the ADDR pin high
or low, use TSL2561_ADDR_HIGH (0x49) or TSL2561_ADDR_LOW
(0x29) respectively.
History
=======
2013/JAN/31 - First version (KTOWN)
*/
Adafruit_TSL2561_Unified tsl = Adafruit_TSL2561_Unified(TSL2561_ADDR_FLOAT, 12345);
/**************************************************************************/
/*
Displays some basic information on this sensor from the unified
sensor API sensor_t type (see Adafruit_Sensor for more information)
*/
/**************************************************************************/
void displaySensorDetails(void)
{
sensor_t sensor;
tsl.getSensor(&sensor);
Serial.println("------------------------------------");
Serial.print ("Sensor: "); Serial.println(sensor.name);
Serial.print ("Driver Ver: "); Serial.println(sensor.version);
Serial.print ("Unique ID: "); Serial.println(sensor.sensor_id);
Serial.print ("Max Value: "); Serial.print(sensor.max_value); Serial.println(" lux");
Serial.print ("Min Value: "); Serial.print(sensor.min_value); Serial.println(" lux");
Serial.print ("Resolution: "); Serial.print(sensor.resolution); Serial.println(" lux");
Serial.println("------------------------------------");
Serial.println("");
delay(500);
}
/**************************************************************************/
/*
Configures the gain and integration time for the TSL2561
*/
/**************************************************************************/
void configureSensor(void)
{
/* You can also manually set the gain or enable auto-gain support */
// tsl.setGain(TSL2561_GAIN_1X); /* No gain ... use in bright light to avoid sensor saturation */
// tsl.setGain(TSL2561_GAIN_16X); /* 16x gain ... use in low light to boost sensitivity */
tsl.enableAutoRange(true); /* Auto-gain ... switches automatically between 1x and 16x */
/* Changing the integration time gives you better sensor resolution (402ms = 16-bit data) */
tsl.setIntegrationTime(TSL2561_INTEGRATIONTIME_13MS); /* fast but low resolution */
// tsl.setIntegrationTime(TSL2561_INTEGRATIONTIME_101MS); /* medium resolution and speed */
// tsl.setIntegrationTime(TSL2561_INTEGRATIONTIME_402MS); /* 16-bit data but slowest conversions */
/* Update these values depending on what you've set above! */
Serial.println("------------------------------------");
Serial.print ("Gain: "); Serial.println("Auto");
Serial.print ("Timing: "); Serial.println("13 ms");
Serial.println("------------------------------------");
}
/**************************************************************************/
/*
Arduino setup function (automatically called at startup)
*/
/**************************************************************************/
void setup(void)
{
Serial.begin(9600);
Serial.println("Light Sensor Test"); Serial.println("");
/* Initialise the sensor */
//use tsl.begin() to default to Wire,
//tsl.begin(&Wire2) directs api to use Wire2, etc.
if(!tsl.begin())
{
/* There was a problem detecting the TSL2561 ... check your connections */
Serial.print("Ooops, no TSL2561 detected ... Check your wiring or I2C ADDR!");
while(1);
}
/* Display some basic information on this sensor */
displaySensorDetails();
/* Setup the sensor gain and integration time */
configureSensor();
/* We're ready to go! */
Serial.println("");
}
/**************************************************************************/
/*
Arduino loop function, called once 'setup' is complete (your own code
should go here)
*/
/**************************************************************************/
void loop(void)
{
/* Get a new sensor event */
sensors_event_t event;
tsl.getEvent(&event);
/* Display the results (light is measured in lux) */
if (event.light)
{
Serial.print(event.light); Serial.println(" lux");
}
else
{
/* If event.light = 0 lux the sensor is probably saturated
and no reliable data could be generated! */
Serial.println("Sensor overload");
}
delay(250);
}代码解读
这段代码使用 Adafruit TSL2561 传感器库 通过 I2C 读取光照强度,并打印出亮度数据(Lux),核心逻辑如下:
1. 初始化传感器
✅ tsl.begin(); → 检查传感器是否连接正常
✅ displaySensorDetails(); → 获取传感器信息(版本号、分辨率、最小/最大值)
✅ configureSensor(); → 设置增益、自动调整光照范围,确保低光环境检测精度
2. 传感器配置
✅ tsl.enableAutoRange(true); → 开启自动增益调整(在亮光与暗光之间自动切换)
✅ tsl.setIntegrationTime(TSL2561_INTEGRATIONTIME_13MS); → 设定积分时间,适合强光环境
✅ 可调整 积分时间 为 101ms 或 402ms 以提高精度
3. 读取光照数据
✅ sensors_event_t event; tsl.getEvent(&event); → 获取新的传感器数据
✅ event.light → 获取 Lux 光照值(如果为 0,可能是传感器过载)
✅ Serial.print(event.light); Serial.println(" lux"); → 打印光照值(单位 Lux)
4. 循环采集数据
✅ delay(250); → 每 250 毫秒更新一次光照数据
这段代码让 TSL2561 传感器不断测量环境光照强度,并在串口输出 Lux 值。
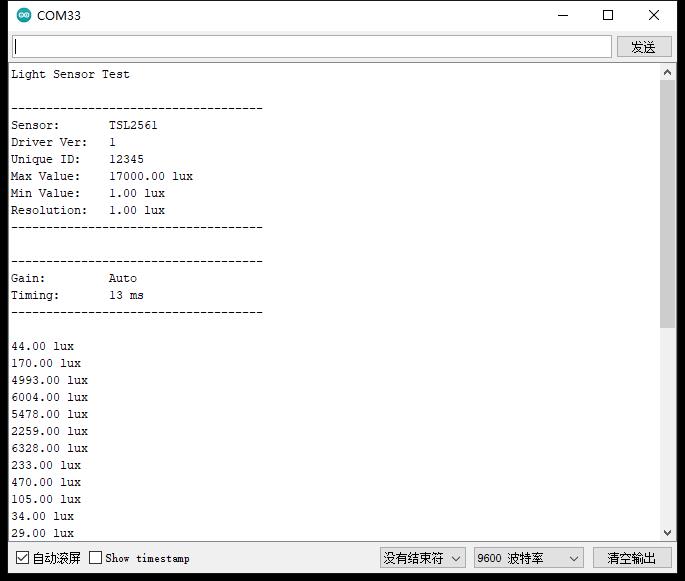
实验串口返回情况
实验串口绘图器返回情况


 他的勋章
他的勋章

评论