 返回首页
返回首页
 回到顶部
回到顶部
37款传感器与执行器的提法,在网络上广泛流传,其实Arduino能够兼容的传感器模块肯定是不止这37种的。鉴于本人手头积累了一些传感器和执行器模块,依照实践出真知(一定要动手做)的理念,以学习和交流为目的,这里准备逐一动手尝试系列实验,不管成功(程序走通)与否,都会记录下来—小小的进步或是搞不掂的问题,希望能够抛砖引玉。
【Arduino】168种传感器模块系列实验(资料代码+仿真编程+图形编程)
实验六十: 直条8位 WS2812B 5050 RGB LED内置全彩驱动彩灯模块
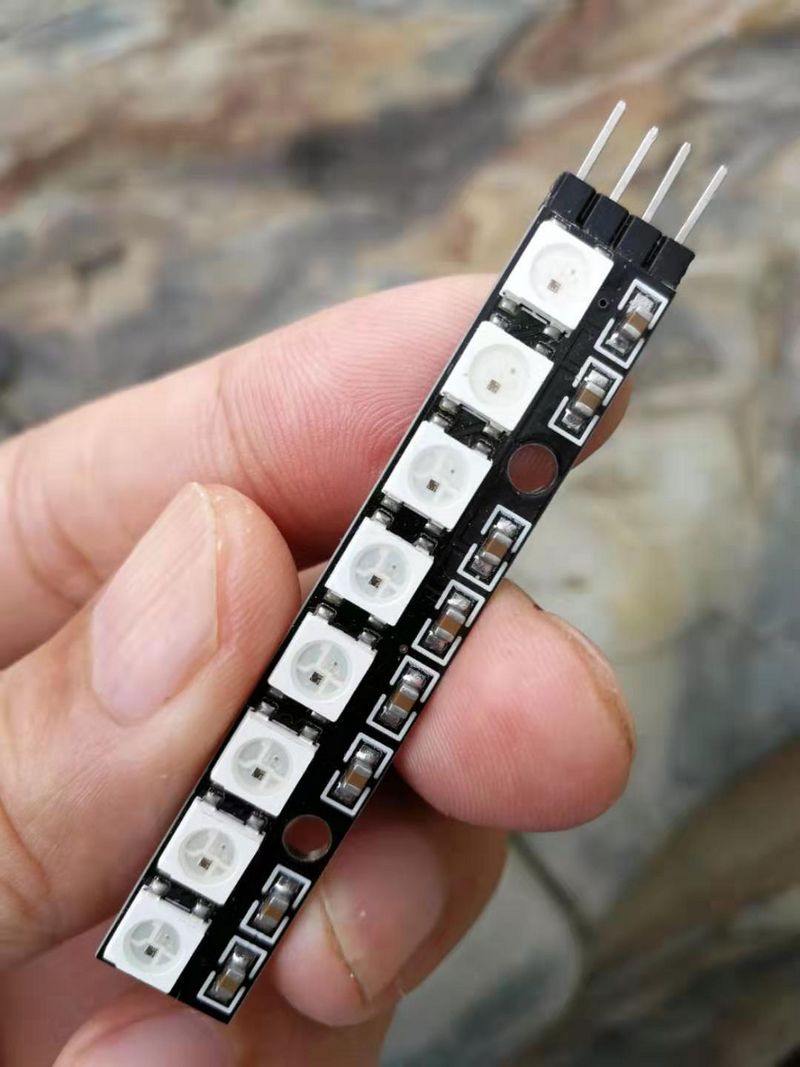
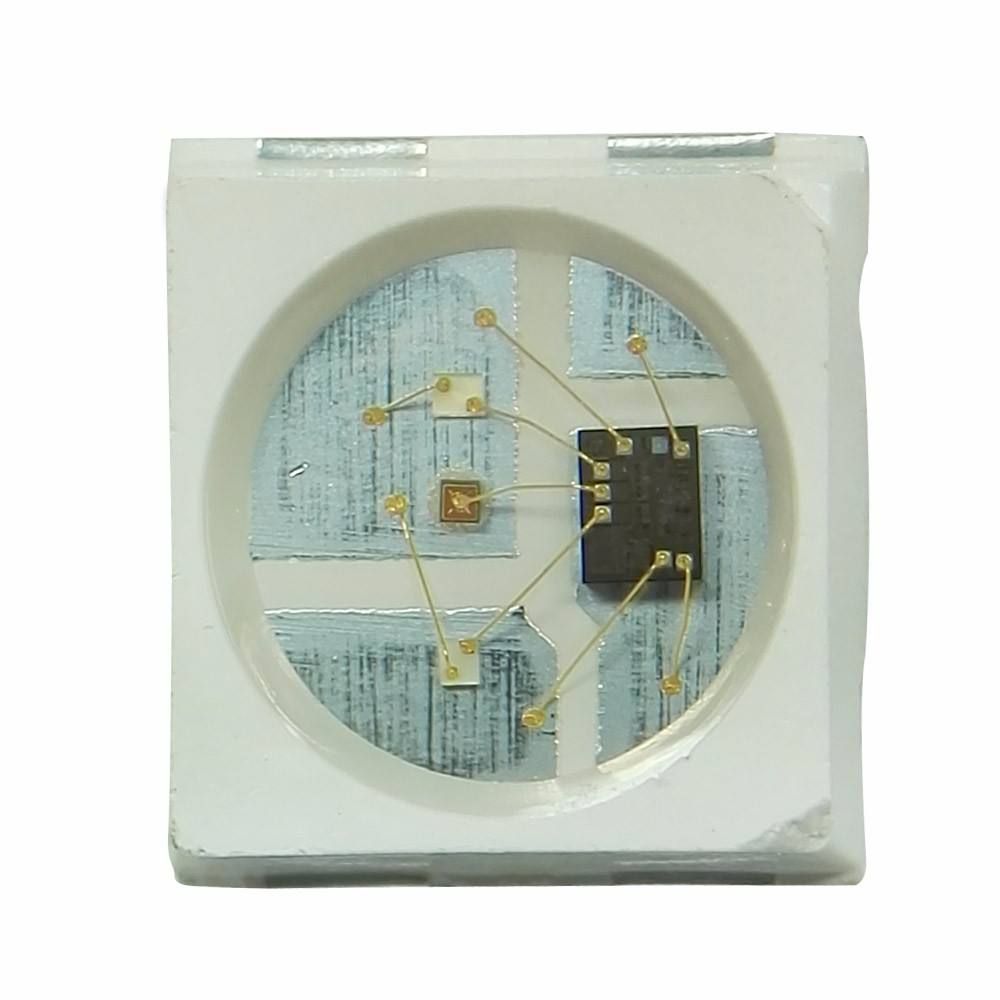
知识点:WS2812B芯片
是一个集控制电路与发光电路于一体的智能外控LED光源。其外型与一个5050LED灯珠相同,每个元件即为一个像素点。像素点内部包含了智能数字接口数据锁存信号整形放大驱动电路,还包含有高精度的内部振荡器和12V高压可编程定电流控制部分,有效保证了像素点光的颜色高度一致。数据协议采用单线归零码的通讯方式,像素点在上电复位以后,DIN端接受从控制器传输过来的数据,首先送过来的24bit数据被第一个像素点提取后,送到像素点内部的数据锁存器,剩余的数据经过内部整形处理电路整形放大后通过DO端口开始转发输出给下一个级联的像素点,每经过一个像素点的传输,信号减少24bit。像素点采用自动整形转发技术,使得该像素点的级联个数不受信号传送的限制,仅仅受限信号传输速度要求。
WS2812主要特点
1、智能反接保护,电源反接不会损坏IC。
2、IC控制电路与LED点光源公用一个电源。
3、控制电路与RGB芯片集成在一个5050封装的元器件中,构成一个完整的外控像素点。
4、内置信号整形电路,任何一个像素点收到信号后经过波形整形再输出,保证线路波形畸变不会累加。
5、内置上电复位和掉电复位电路。
6、每个像素点的三基色颜色可实现256级亮度显示,完成16777216种颜色的全真色彩显示,扫描频率不低于400Hz/s。
7、串行级联接口,能通过一根信号线完成数据的接收与解码。
8、任意两点传传输距离在不超过5米时无需增加任何电路。
9、当刷新速率30帧/秒时,级联数不小于1024点。
10、数据发送速度可达800Kbps。
11、光的颜色高度一致,性价比高。
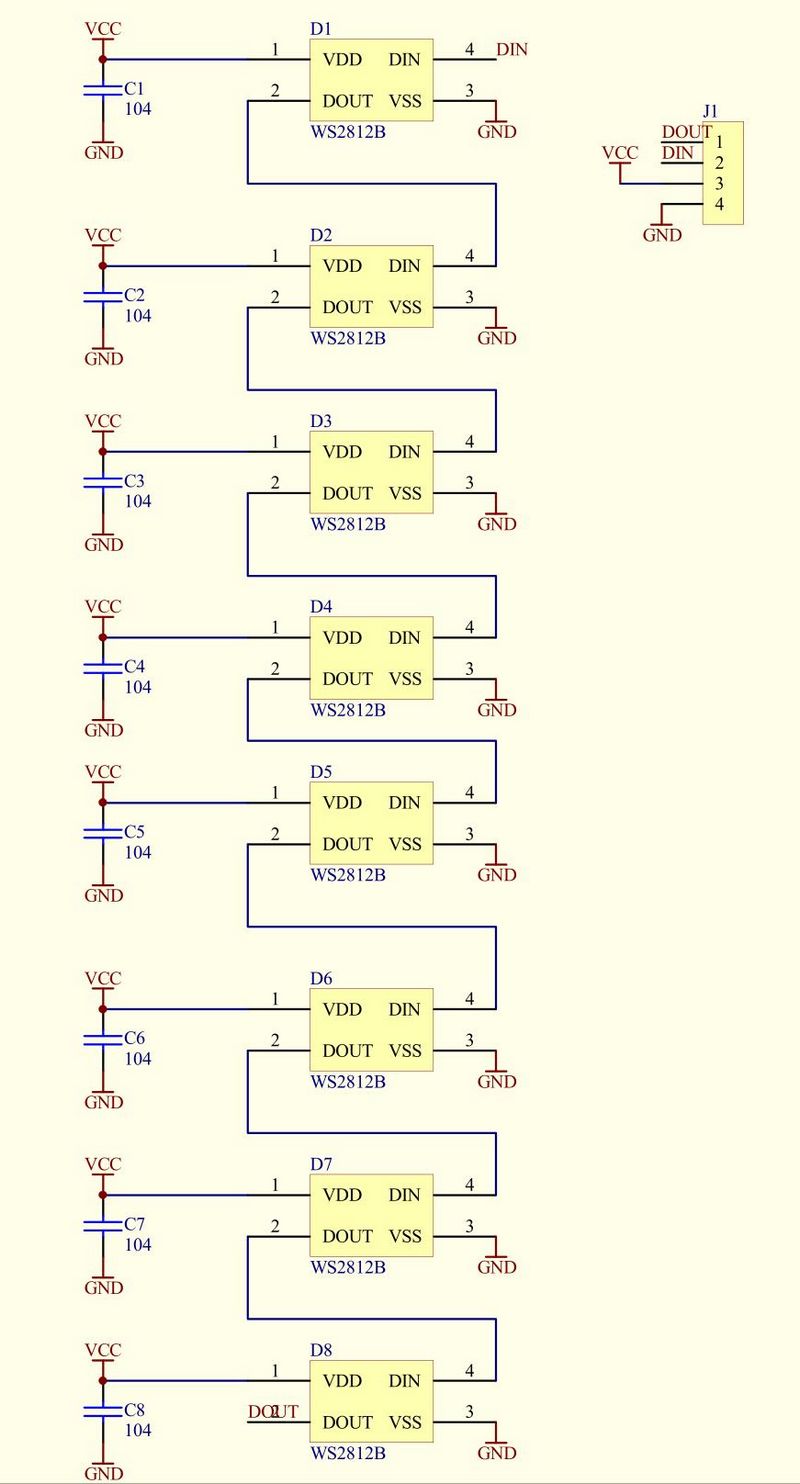
Arduino实验接线示意图
【Arduino】168种传感器模块系列实验(资料代码+图形编程+仿真编程)
实验六十:直条8位 WS2812B 5050 RGB LED内置全彩驱动彩灯模块
项目二十八:二维 XY 像素矩阵闪烁灯
实验开源代码
/*
  【Arduino】168种传感器模块系列实验(资料代码+图形编程+仿真编程)
  实验六十一:直条8位 WS2812B 5050 RGB LED内置全彩驱动彩灯模块
  项目二十八:二维 XY 像素矩阵闪烁灯
*/

#include <FastLED.h>

#define LED_PIN  5

#define COLOR_ORDER GRB
#define CHIPSET     WS2811

#define BRIGHTNESS 33

// Helper functions for an two-dimensional XY matrix of pixels.
// Simple 2-D demo code is included as well.
//
//     XY(x,y) takes x and y coordinates and returns an LED index number,
//             for use like this:  leds[ XY(x,y) ] == CRGB::Red;
//             No error checking is performed on the ranges of x and y.
//
//     XYsafe(x,y) takes x and y coordinates and returns an LED index number,
//             for use like this:  leds[ XYsafe(x,y) ] == CRGB::Red;
//             Error checking IS performed on the ranges of x and y, and an
//             index of "-1" is returned.  Special instructions below
//             explain how to use this without having to do your own error
//             checking every time you use this function.
//             This is a slightly more advanced technique, and
//             it REQUIRES SPECIAL ADDITIONAL setup, described below.


// Params for width and height
const uint8_t kMatrixWidth = 16;
const uint8_t kMatrixHeight = 16;

// Param for different pixel layouts
const bool    kMatrixSerpentineLayout = true;
const bool    kMatrixVertical = false;

// Set 'kMatrixSerpentineLayout' to false if your pixels are
// laid out all running the same way, like this:
//
//     0 >  1 >  2 >  3 >  4
//                         |
//     .----<----<----<----'
//     |
//     5 >  6 >  7 >  8 >  9
//                         |
//     .----<----<----<----'
//     |
//    10 > 11 > 12 > 13 > 14
//                         |
//     .----<----<----<----'
//     |
//    15 > 16 > 17 > 18 > 19
//
// Set 'kMatrixSerpentineLayout' to true if your pixels are
// laid out back-and-forth, like this:
//
//     0 >  1 >  2 >  3 >  4
//                         |
//                         |
//     9 <  8 <  7 <  6 <  5
//     |
//     |
//    10 > 11 > 12 > 13 > 14
//                        |
//                        |
//    19 < 18 < 17 < 16 < 15
//
// Bonus vocabulary word: anything that goes one way
// in one row, and then backwards in the next row, and so on
// is call "boustrophedon", meaning "as the ox plows."


// This function will return the right 'led index number' for
// a given set of X and Y coordinates on your matrix.
// IT DOES NOT CHECK THE COORDINATE BOUNDARIES.
// That's up to you.  Don't pass it bogus values.
//
// Use the "XY" function like this:
//
//    for( uint8_t x = 0; x < kMatrixWidth; x++) {
//      for( uint8_t y = 0; y < kMatrixHeight; y++) {
//
//        // Here's the x, y to 'led index' in action:
//        leds[ XY( x, y) ] = CHSV( random8(), 255, 255);
//
//      }
//    }
//
//
uint16_t XY( uint8_t x, uint8_t y)
{
  uint16_t i;

  if( kMatrixSerpentineLayout == false) {
    if (kMatrixVertical == false) {
      i = (y * kMatrixWidth) + x;
    } else {
      i = kMatrixHeight * (kMatrixWidth - (x+1))+y;
    }
  }

  if( kMatrixSerpentineLayout == true) {
    if (kMatrixVertical == false) {
      if( y & 0x01) {
        // Odd rows run backwards
        uint8_t reverseX = (kMatrixWidth - 1) - x;
        i = (y * kMatrixWidth) + reverseX;
      } else {
        // Even rows run forwards
        i = (y * kMatrixWidth) + x;
      }
    } else { // vertical positioning
      if ( x & 0x01) {
        i = kMatrixHeight * (kMatrixWidth - (x+1))+y;
      } else {
        i = kMatrixHeight * (kMatrixWidth - x) - (y+1);
      }
    }
  }

  return i;
}


// Once you've gotten the basics working (AND NOT UNTIL THEN!)
// here's a helpful technique that can be tricky to set up, but
// then helps you avoid the needs for sprinkling array-bound-checking
// throughout your code.
//
// It requires a careful attention to get it set up correctly, but
// can potentially make your code smaller and faster.
//
// Suppose you have an 8 x 5 matrix of 40 LEDs.  Normally, you'd
// delcare your leds array like this:
//    CRGB leds[40];
// But instead of that, declare an LED buffer with one extra pixel in
// it, "leds_plus_safety_pixel".  Then declare "leds" as a pointer to
// that array, but starting with the 2nd element (id=1) of that array:
//    CRGB leds_with_safety_pixel[41];
//    CRGB* const leds( leds_plus_safety_pixel + 1);
// Then you use the "leds" array as you normally would.
// Now "leds[0..N]" are aliases for "leds_plus_safety_pixel[1..(N+1)]",
// AND leds[-1] is now a legitimate and safe alias for leds_plus_safety_pixel[0].
// leds_plus_safety_pixel[0] aka leds[-1] is now your "safety pixel".
//
// Now instead of using the XY function above, use the one below, "XYsafe".
//
// If the X and Y values are 'in bounds', this function will return an index
// into the visible led array, same as "XY" does.
// HOWEVER -- and this is the trick -- if the X or Y values
// are out of bounds, this function will return an index of -1.
// And since leds[-1] is actually just an alias for leds_plus_safety_pixel[0],
// it's a totally safe and legal place to access.  And since the 'safety pixel'
// falls 'outside' the visible part of the LED array, anything you write
// there is hidden from view automatically.
// Thus, this line of code is totally safe, regardless of the actual size of
// your matrix:
//    leds[ XYsafe( random8(), random8() ) ] = CHSV( random8(), 255, 255);
//
// The only catch here is that while this makes it safe to read from and
// write to 'any pixel', there's really only ONE 'safety pixel'.  No matter
// what out-of-bounds coordinates you write to, you'll really be writing to
// that one safety pixel.  And if you try to READ from the safety pixel,
// you'll read whatever was written there last, reglardless of what coordinates
// were supplied.

#define NUM_LEDS (kMatrixWidth * kMatrixHeight)
CRGB leds_plus_safety_pixel[ NUM_LEDS + 1];
CRGB* const leds( leds_plus_safety_pixel + 1);

uint16_t XYsafe( uint8_t x, uint8_t y)
{
  if( x >= kMatrixWidth) return -1;
  if( y >= kMatrixHeight) return -1;
  return XY(x,y);
}


// Demo that USES "XY" follows code below

void loop()
{
    uint32_t ms = millis();
    int32_t yHueDelta32 = ((int32_t)cos16( ms * (27/1) ) * (350 / kMatrixWidth));
    int32_t xHueDelta32 = ((int32_t)cos16( ms * (39/1) ) * (310 / kMatrixHeight));
    DrawOneFrame( ms / 65536, yHueDelta32 / 32768, xHueDelta32 / 32768);
    if( ms < 5000 ) {
      FastLED.setBrightness( scale8( BRIGHTNESS, (ms * 256) / 5000));
    } else {
      FastLED.setBrightness(BRIGHTNESS);
    }
    FastLED.show();
}

void DrawOneFrame( uint8_t startHue8, int8_t yHueDelta8, int8_t xHueDelta8)
{
  uint8_t lineStartHue = startHue8;
  for( uint8_t y = 0; y < kMatrixHeight; y++) {
    lineStartHue += yHueDelta8;
    uint8_t pixelHue = lineStartHue;
    for( uint8_t x = 0; x < kMatrixWidth; x++) {
      pixelHue += xHueDelta8;
      leds[ XY(x, y)]  = CHSV( pixelHue, 255, 255);
    }
  }
}


void setup() {
  FastLED.addLeds<CHIPSET, LED_PIN, COLOR_ORDER>(leds, NUM_LEDS).setCorrection(TypicalSMD5050);
  FastLED.setBrightness( BRIGHTNESS );
}
【Arduino】168种传感器模块系列实验(资料代码+图形编程+仿真编程)
实验六十:直条8位 WS2812B 5050 RGB LED内置全彩驱动彩灯模块
项目二十九:使用NeoPixelBrightnessBus库将循环亮度从高到低
实验开源代码
/*
【Arduino】168种传感器模块系列实验(资料代码+图形编程+仿真编程)
实验六十一:直条8位 WS2812B 5050 RGB LED内置全彩驱动彩灯模块
项目二十九:使用NeoPixelBrightnessBus库将循环亮度从高到低
*/
// NeoPixelBrightness
// This example will cycle brightness from high to low of
// three pixels colored Red, Green, Blue.
// This demonstrates the use of the NeoPixelBrightnessBus
// with integrated brightness support
//
// There is serial output of the current state so you can
// confirm and follow along
//
#include <NeoPixelBrightnessBus.h> // instead of NeoPixelBus.h
const uint16_t PixelCount = 8; // this example assumes 3 pixels, making it smaller will cause a failure
const uint8_t PixelPin = 6; // make sure to set this to the correct pin, ignored for Esp8266
#define colorSaturation 255 // saturation of color constants
RgbColor red(colorSaturation, 0, 0);
RgbColor green(0, colorSaturation, 0);
RgbColor blue(0, 0, colorSaturation);
// Make sure to provide the correct color order feature
// for your NeoPixels
NeoPixelBrightnessBus<NeoRgbFeature, Neo800KbpsMethod> strip(PixelCount, PixelPin);
// you loose the original color the lower the dim value used
// here due to quantization
const uint8_t c_MinBrightness = 8;
const uint8_t c_MaxBrightness = 255;
int8_t direction; // current direction of dimming
void setup()
{
Serial.begin(115200);
while (!Serial); // wait for serial attach
Serial.println();
Serial.println("Initializing...");
Serial.flush();
// this resets all the neopixels to an off state
strip.Begin();
strip.Show();
direction = -1; // default to dim first
Serial.println();
Serial.println("Running...");
// set our three original colors
strip.SetPixelColor(0, red);
strip.SetPixelColor(1, green);
strip.SetPixelColor(2, blue);
strip.SetPixelColor(3, red);
strip.SetPixelColor(4, green);
strip.SetPixelColor(5, blue);
strip.SetPixelColor(6, red);
strip.SetPixelColor(7, green);
strip.Show();
}
void loop()
{
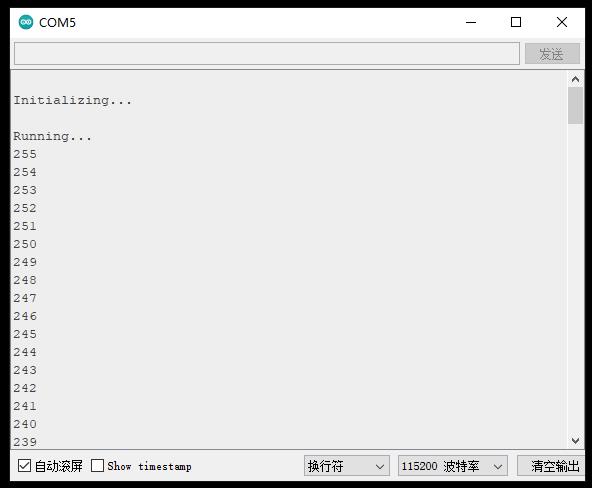
uint8_t brightness = strip.GetBrightness();
Serial.println(brightness);
delay(50);
// swap diection of dim when limits are reached
//
if (direction < 0 && brightness <= c_MinBrightness)
{
direction = 1;
}
else if (direction > 0 && brightness >= c_MaxBrightness)
{
direction = -1;
}
// apply dimming
brightness += direction;
strip.SetBrightness(brightness);
// show the results
strip.Show();
}实验串口返回情况
【Arduino】168种传感器模块系列实验(资料代码+图形编程+仿真编程)
实验六十:直条8位 WS2812B 5050 RGB LED内置全彩驱动彩灯模块
项目三十:显示具有伽马校正的定时系列颜色渐变
实验开源代码
/*
  【Arduino】168种传感器模块系列实验(资料代码+图形编程+仿真编程)
  实验六十一:直条8位 WS2812B 5050 RGB LED内置全彩驱动彩灯模块
  项目三十:显示具有伽马校正的定时系列颜色渐变
*/

// NeoPixelGamma
// This example will display a timed series of color gradiants with gamma correction
// and then without.
// If the last pixel is on, then the colors being shown are color corrected.
// It will show Red grandiant, Green grandiant, Blue grandiant, a White grandiant, and
// then repeat.
//
// This will demonstrate the use of the NeoGamma class
//
//

#include <NeoPixelBus.h>
#include <NeoPixelAnimator.h>

const uint16_t PixelCount = 8; // make sure to set this to the number of pixels in your strip
const uint8_t PixelPin = 6;  // make sure to set this to the correct pin, ignored for Esp8266

NeoPixelBus<NeoGrbFeature, Neo800KbpsMethod> strip(PixelCount, PixelPin);
// for esp8266 omit the pin
//NeoPixelBus<NeoGrbFeature, Neo800KbpsMethod> strip(PixelCount);

// uncomment only one of these to compare memory use or speed
//
// NeoGamma<NeoGammaEquationMethod> colorGamma;
NeoGamma<NeoGammaTableMethod> colorGamma;

void DrawPixels(bool corrected, HslColor startColor, HslColor stopColor)
{
    for (uint16_t index = 0; index < strip.PixelCount() - 1; index++)
    {
        float progress = index / static_cast<float>(strip.PixelCount() - 2);
        RgbColor color = HslColor::LinearBlend<NeoHueBlendShortestDistance>(startColor, stopColor, progress);
        if (corrected)
        {
            color = colorGamma.Correct(color);
        }
        strip.SetPixelColor(index, color);
    }

    // use the last pixel to indicate if we are showing corrected colors or not
    if (corrected)
    {
        strip.SetPixelColor(strip.PixelCount() - 1, RgbColor(64));
    }
    else
    {
        strip.SetPixelColor(strip.PixelCount() - 1, RgbColor(0));
    }

    strip.Show();
}

void setup()
{
    strip.Begin();
    strip.Show();
}

void loop()
{
    HslColor startColor;
    HslColor stopColor;

    // red color
    startColor = HslColor(0.0f, 1.0f, 0.0f);
    stopColor = HslColor(0.0f, 1.0f, 0.5f);
    DrawPixels(true, startColor, stopColor);
    delay(2000);
    DrawPixels(false, startColor, stopColor);
    delay(2000);

    // green color
    startColor = HslColor(0.33f, 1.0f, 0.0f);
    stopColor = HslColor(0.33f, 1.0f, 0.5f);
    DrawPixels(true, startColor, stopColor);
    delay(2000);
    DrawPixels(false, startColor, stopColor);
    delay(2000);

    // blue color
    startColor = HslColor(0.66f, 1.0f, 0.0f);
    stopColor = HslColor(0.66f, 1.0f, 0.5f);
    DrawPixels(true, startColor, stopColor);
    delay(2000);
    DrawPixels(false, startColor, stopColor);
    delay(2000);

    // white color
    startColor = HslColor(0.0f, 0.0f, 0.0f);
    stopColor = HslColor(0.0f, 0.0f, 0.5f);
    DrawPixels(true, startColor, stopColor);
    delay(2000);
    DrawPixels(false, startColor, stopColor);
    delay(2000);
}
【Arduino】168种传感器模块系列实验(资料代码+图形编程+仿真编程)
实验六十:直条8位 WS2812B 5050 RGB LED内置全彩驱动彩灯模块
项目三十一:像素测试:将四个像素显示为红色、绿色、蓝色、白色之间循环
实验开源代码
/*
【Arduino】168种传感器模块系列实验(资料代码+图形编程+仿真编程)
实验六十一:直条8位 WS2812B 5050 RGB LED内置全彩驱动彩灯模块
项目三十一:像素测试:将四个像素显示为红色、绿色、蓝色、白色之间循环
*/
// NeoPixelTest
// This example will cycle between showing four pixels as Red, Green, Blue, White
// and then showing those pixels as Black.
//
// Included but commented out are examples of configuring a NeoPixelBus for
// different color order including an extra white channel, different data speeds, and
// for Esp8266 different methods to send the data.
// NOTE: You will need to make sure to pick the one for your platform
//
//
// There is serial output of the current state so you can confirm and follow along
//
#include <NeoPixelBus.h>
const uint16_t PixelCount = 8; // this example assumes 4 pixels, making it smaller will cause a failure
const uint8_t PixelPin = 6; // make sure to set this to the correct pin, ignored for Esp8266
#define colorSaturation 128
// three element pixels, in different order and speeds
NeoPixelBus<NeoGrbFeature, Neo800KbpsMethod> strip(PixelCount, PixelPin);
//NeoPixelBus<NeoRgbFeature, Neo400KbpsMethod> strip(PixelCount, PixelPin);
// For Esp8266, the Pin is omitted and it uses GPIO3 due to DMA hardware use.
// There are other Esp8266 alternative methods that provide more pin options, but also have
// other side effects.
// for details see wiki linked here https://github.com/Makuna/NeoPixelBus/wiki/ESP8266-NeoMethods
// You can also use one of these for Esp8266,
// each having their own restrictions
//
// These two are the same as above as the DMA method is the default
// NOTE: These will ignore the PIN and use GPI03 pin
//NeoPixelBus<NeoGrbFeature, NeoEsp8266Dma800KbpsMethod> strip(PixelCount, PixelPin);
//NeoPixelBus<NeoRgbFeature, NeoEsp8266Dma400KbpsMethod> strip(PixelCount, PixelPin);
// Uart method is good for the Esp-01 or other pin restricted modules
// for details see wiki linked here https://github.com/Makuna/NeoPixelBus/wiki/ESP8266-NeoMethods
// NOTE: These will ignore the PIN and use GPI02 pin
//NeoPixelBus<NeoGrbFeature, NeoEsp8266Uart1800KbpsMethod> strip(PixelCount, PixelPin);
//NeoPixelBus<NeoRgbFeature, NeoEsp8266Uart1400KbpsMethod> strip(PixelCount, PixelPin);
// The bitbang method is really only good if you are not using WiFi features of the ESP
// It works with all but pin 16
//NeoPixelBus<NeoGrbFeature, NeoEsp8266BitBang800KbpsMethod> strip(PixelCount, PixelPin);
//NeoPixelBus<NeoRgbFeature, NeoEsp8266BitBang400KbpsMethod> strip(PixelCount, PixelPin);
// four element pixels, RGBW
//NeoPixelBus<NeoRgbwFeature, Neo800KbpsMethod> strip(PixelCount, PixelPin);
RgbColor red(colorSaturation, 0, 0);
RgbColor green(0, colorSaturation, 0);
RgbColor blue(0, 0, colorSaturation);
RgbColor white(colorSaturation);
RgbColor black(0);
HslColor hslRed(red);
HslColor hslGreen(green);
HslColor hslBlue(blue);
HslColor hslWhite(white);
HslColor hslBlack(black);
void setup()
{
Serial.begin(115200);
while (!Serial); // wait for serial attach
Serial.println();
Serial.println("Initializing...");
Serial.flush();
// this resets all the neopixels to an off state
strip.Begin();
strip.Show();
Serial.println();
Serial.println("Running...");
}
void loop()
{
delay(5000);
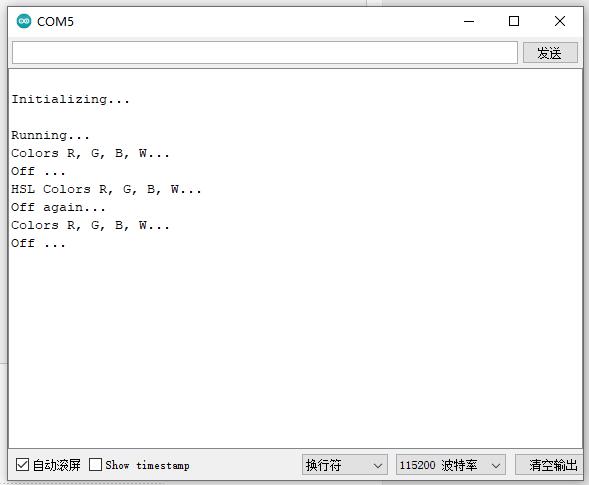
Serial.println("Colors R, G, B, W...");
// set the colors,
// if they don't match in order, you need to use NeoGrbFeature feature
strip.SetPixelColor(0, red);
strip.SetPixelColor(1, green);
strip.SetPixelColor(2, blue);
strip.SetPixelColor(3, white);
strip.SetPixelColor(4, red);
strip.SetPixelColor(5, green);
strip.SetPixelColor(6, blue);
strip.SetPixelColor(7, white);
// the following line demonstrates rgbw color support
// if the NeoPixels are rgbw types the following line will compile
// if the NeoPixels are anything else, the following line will give an error
//strip.SetPixelColor(3, RgbwColor(colorSaturation));
strip.Show();
delay(2000);
Serial.println("Off ...");
// turn off the pixels
strip.SetPixelColor(0, black);
strip.SetPixelColor(1, black);
strip.SetPixelColor(2, black);
strip.SetPixelColor(3, black);
strip.Show();
delay(2000);
Serial.println("HSL Colors R, G, B, W...");
// set the colors,
// if they don't match in order, you may need to use NeoGrbFeature feature
strip.SetPixelColor(0, hslRed);
strip.SetPixelColor(1, hslGreen);
strip.SetPixelColor(2, hslBlue);
strip.SetPixelColor(3, hslWhite);
strip.Show();
delay(2000);
Serial.println("Off again...");
// turn off the pixels
strip.SetPixelColor(0, hslBlack);
strip.SetPixelColor(1, hslBlack);
strip.SetPixelColor(2, hslBlack);
strip.SetPixelColor(3, hslBlack);
strip.Show();
}实验串口返回情况
【Arduino】168种传感器模块系列实验(资料代码+图形编程+仿真编程)
实验六十:直条8位 WS2812B 5050 RGB LED内置全彩驱动彩灯模块
项目三十二:为每个像素随机选择一种新颜色并设置动画
实验开源代码
/*
【Arduino】168种传感器模块系列实验(资料代码+图形编程+仿真编程)
实验六十一:直条8位 WS2812B 5050 RGB LED内置全彩驱动彩灯模块
项目三十二:为每个像素随机选择一种新颜色并设置动画
*/
// NeoPixelAnimation
// This example will randomly pick a new color for each pixel and animate
// the current color to the new color over a random small amount of time, using
// a randomly selected animation curve.
// It will repeat this process once all pixels have finished the animation
//
// This will demonstrate the use of the NeoPixelAnimator extended time feature.
// This feature allows for different time scales to be used, allowing slow extended
// animations to be created.
//
// This will demonstrate the use of the NeoEase animation ease methods; that provide
// simulated acceleration to the animations.
//
// It also includes platform specific code for Esp8266 that demonstrates easy
// animation state and function definition inline. This is not available on AVR
// Arduinos; but the AVR compatible code is also included for comparison.
//
// The example includes some serial output that you can follow along with as it
// does the animation.
//
#include <NeoPixelBus.h>
#include <NeoPixelAnimator.h>
const uint16_t PixelCount = 8; // make sure to set this to the number of pixels in your strip
const uint8_t PixelPin = 6; // make sure to set this to the correct pin, ignored for Esp8266
NeoPixelBus<NeoGrbFeature, Neo800KbpsMethod> strip(PixelCount, PixelPin);
// For Esp8266, the Pin is omitted and it uses GPIO3 due to DMA hardware use.
// There are other Esp8266 alternative methods that provide more pin options, but also have
// other side effects.
// for details see wiki linked here https://github.com/Makuna/NeoPixelBus/wiki/ESP8266-NeoMethods
// NeoPixel animation time management object
NeoPixelAnimator animations(PixelCount, NEO_CENTISECONDS);
// create with enough animations to have one per pixel, depending on the animation
// effect, you may need more or less.
//
// since the normal animation time range is only about 65 seconds, by passing timescale value
// to the NeoPixelAnimator constructor we can increase the time range, but we also increase
// the time between the animation updates.
// NEO_CENTISECONDS will update the animations every 100th of a second rather than the default
// of a 1000th of a second, but the time range will now extend from about 65 seconds to about
// 10.9 minutes. But you must remember that the values passed to StartAnimations are now
// in centiseconds.
//
// Possible values from 1 to 32768, and there some helpful constants defined as...
// NEO_MILLISECONDS 1 // ~65 seconds max duration, ms updates
// NEO_CENTISECONDS 10 // ~10.9 minutes max duration, centisecond updates
// NEO_DECISECONDS 100 // ~1.8 hours max duration, decisecond updates
// NEO_SECONDS 1000 // ~18.2 hours max duration, second updates
// NEO_DECASECONDS 10000 // ~7.5 days, 10 second updates
//
#if defined(NEOPIXEBUS_NO_STL)
// for AVR, you need to manage the state due to lack of STL/compiler support
// for Esp8266 you can define the function using a lambda and state is created for you
// see below for an example
struct MyAnimationState
{
RgbColor StartingColor; // the color the animation starts at
RgbColor EndingColor; // the color the animation will end at
AnimEaseFunction Easeing; // the acceleration curve it will use
};
MyAnimationState animationState[PixelCount];
// one entry per pixel to match the animation timing manager
void AnimUpdate(const AnimationParam& param)
{
// first apply an easing (curve) to the animation
// this simulates acceleration to the effect
float progress = animationState[param.index].Easeing(param.progress);
// this gets called for each animation on every time step
// progress will start at 0.0 and end at 1.0
// we use the blend function on the RgbColor to mix
// color based on the progress given to us in the animation
RgbColor updatedColor = RgbColor::LinearBlend(
animationState[param.index].StartingColor,
animationState[param.index].EndingColor,
progress);
// apply the color to the strip
strip.SetPixelColor(param.index, updatedColor);
}
#endif
void SetRandomSeed()
{
uint32_t seed;
// random works best with a seed that can use 31 bits
// analogRead on a unconnected pin tends toward less than four bits
seed = analogRead(0);
delay(1);
for (int shifts = 3; shifts < 31; shifts += 3)
{
seed ^= analogRead(0) << shifts;
delay(1);
}
// Serial.println(seed);
randomSeed(seed);
}
void setup()
{
Serial.begin(115200);
while (!Serial); // wait for serial attach
strip.Begin();
strip.Show();
SetRandomSeed();
// just pick some colors
for (uint16_t pixel = 0; pixel < PixelCount; pixel++)
{
RgbColor color = RgbColor(random(255), random(255), random(255));
strip.SetPixelColor(pixel, color);
}
Serial.println();
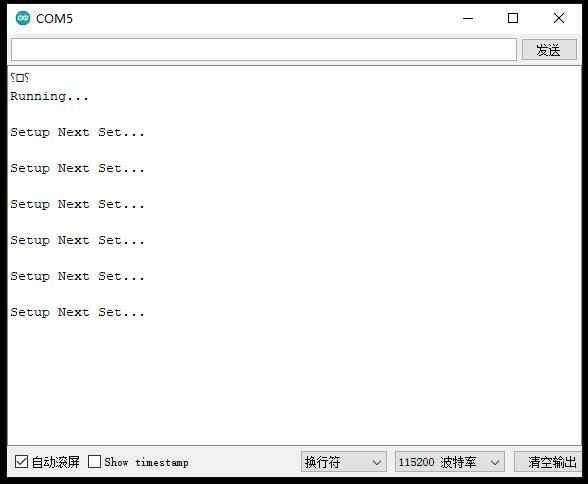
Serial.println("Running...");
}
void SetupAnimationSet()
{
// setup some animations
for (uint16_t pixel = 0; pixel < PixelCount; pixel++)
{
const uint8_t peak = 128;
// pick a random duration of the animation for this pixel
// since values are centiseconds, the range is 1 - 4 seconds
uint16_t time = random(100, 400);
// each animation starts with the color that was present
RgbColor originalColor = strip.GetPixelColor(pixel);
// and ends with a random color
RgbColor targetColor = RgbColor(random(peak), random(peak), random(peak));
// with the random ease function
AnimEaseFunction easing;
switch (random(3))
{
case 0:
easing = NeoEase::CubicIn;
break;
case 1:
easing = NeoEase::CubicOut;
break;
case 2:
easing = NeoEase::QuadraticInOut;
break;
}
#if defined(NEOPIXEBUS_NO_STL)
// each animation starts with the color that was present
animationState[pixel].StartingColor = originalColor;
// and ends with a random color
animationState[pixel].EndingColor = targetColor;
// using the specific curve
animationState[pixel].Easeing = easing;
// now use the animation state we just calculated and start the animation
// which will continue to run and call the update function until it completes
animations.StartAnimation(pixel, time, AnimUpdate);
#else
// we must supply a function that will define the animation, in this example
// we are using "lambda expression" to define the function inline, which gives
// us an easy way to "capture" the originalColor and targetColor for the call back.
//
// this function will get called back when ever the animation needs to change
// the state of the pixel, it will provide a animation progress value
// from 0.0 (start of animation) to 1.0 (end of animation)
//
// we use this progress value to define how we want to animate in this case
// we call RgbColor::LinearBlend which will return a color blended between
// the values given, by the amount passed, hich is also a float value from 0.0-1.0.
// then we set the color.
//
// There is no need for the MyAnimationState struct as the compiler takes care
// of those details for us
AnimUpdateCallback animUpdate = [=](const AnimationParam& param)
{
// progress will start at 0.0 and end at 1.0
// we convert to the curve we want
float progress = easing(param.progress);
// use the curve value to apply to the animation
RgbColor updatedColor = RgbColor::LinearBlend(originalColor, targetColor, progress);
strip.SetPixelColor(pixel, updatedColor);
};
// now use the animation properties we just calculated and start the animation
// which will continue to run and call the update function until it completes
animations.StartAnimation(pixel, time, animUpdate);
#endif
}
}
void loop()
{
if (animations.IsAnimating())
{
// the normal loop just needs these two to run the active animations
animations.UpdateAnimations();
strip.Show();
}
else
{
Serial.println();
Serial.println("Setup Next Set...");
// example function that sets up some animations
SetupAnimationSet();
}
}实验串口返回情况
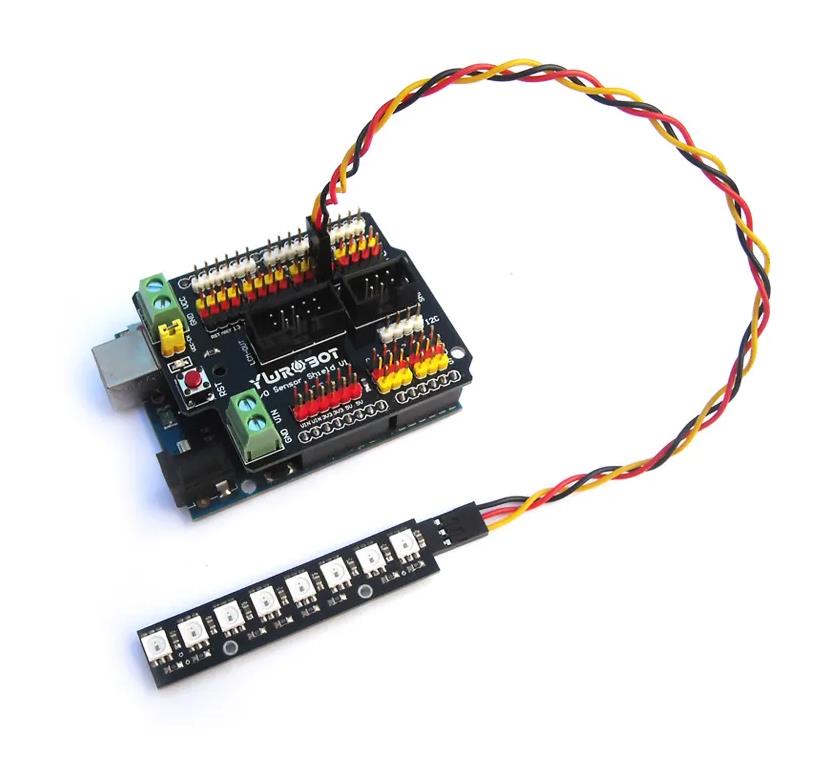
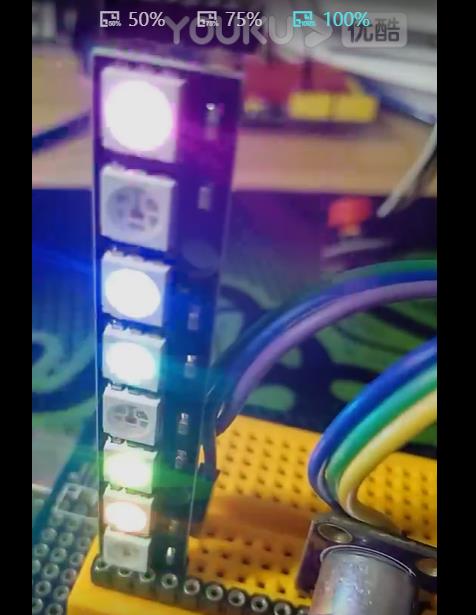
Arduino实验场景图


 他的勋章
他的勋章

9mm2023.08.08
666